Our project Td4

This site contains affiliate links for which LandyZone may be compensated if you make a purchase.
Another job ticked off my to do list.

This morning taking advantage of the nice sunny weather, I replaced the centre diff mounting bush. We were getting quite a loud bang/thud from the rear on the up change on the auto box. The front of the diff you could really move up and down by hand, once the mounting was off you could see why, the metal sleeve that runs through the centre part of the bush was literally hanging out. The new mounting was a bugger to refit due to the lack of space, but with a bit of swearing it all came together. One the test drive all was good with a nice smooth gear change.

583a22176729361584d78f65800e4d0d_zps56a4a417.jpg


90df5313f74cc544608fe3757c72da0b_zps763c304f.jpg
 
Last edited:
Nice one, wish I'd still got the same interest you have, unfortunately my Wife can always think of something more important. Nice descriptive photos and how to's, all the best it's nice to see a keen owner.
 
Since getting the Freelander seven weeks ago the drivers (O/S) door actuator has only worked to lock the door and not unlock, this was not a real issue as we could open it via the key, but two weeks ago the lock barrel gave up so access was only able through the passenger side door. I looked at a few second hand actuators on fleabay but seeing as a lot were advertised as parts from vehicles nearly as old as mine I thought I'd buy a new one from Land Rover, also ordered the three mounting screws as mine were seized and twisted the Trox bit trying to undo them. In the the end I had to drill them out. New actuator fitted with new screws and also replaced the door speaker as that was goosed. Now I have a car I can get into on the correct side and a radio I can listen to.

It may have its issues and problems, but I love it.

Next job is to replace the VCU support bearings.
 
While I had the drivers door panel off to replace the central locking actuator I thought it would be a good idea to repaint the speaker grill as it showing signs of light surface rust, so I gave both of the door speaker grills a coat of matt black.

I think they look better than the original grey?

5942443c4fbc271751b4056c0983fd60_zpsa250f363.jpg


b4f8147fb8de760f0499e33610869e74_zpse7003c01.jpg


ca8f5c71aaf46a6d753fb699b17cab26_zpsf51ac0d3.jpg


300a828506dfb06d4a1ff286a8cbca5a_zps6bf078f1.jpg
 
Drivers side brake caliper seized up for the second time at Christmas.

Fitted new calipers, caliper guid kit, disc's and pads from Famous Four.

5a210771bbf948efba7776a24a7e2c7b_zps02d9378b.jpg


f2e824cd664c52423bbc56289f80277e_zps19c79f52.jpg


475c8db311bf0ada3693fa97aa8ec9ab_zpsfd37287f.jpg


Also got a new GKN VCU and support bearings to fit, but first I want to fix a long on going problem with the pesky tailgate.
 
I thought I'd carry on with my blog as I'm slowly getting through the list of jobs to do on our project Td4.

The steering wheel on our FL was badly worn especially on the right hand side and the leather had worn away so I'd been on the look out for a replacement. Well a few months ago I was lucky enough to come across an excellent condition steering wheel from an exact same model (ES) and year as ours complete with the radio and cruise controls (the cruise controls buttons had been removed from our original steering wheel so this was a bonus). followed the instructions in Haynes manual on how to safely remove the airbag and then the steering wheel itself, to be honest its self explanatory it was just removing the airbag that worried me, I've seen these buggers go off, anyway all fitted and works fine and its nice to have the cruise control working.

203b1e82474fdf7cdb2668801c4925d2_zpsb020c1a6.jpg


6918db772a0574de863e90ab8b815276_zps9a7e59c7.jpg


Also after 6 months of rear window and tailgate problems with it having a mind of its own, opening while driving then not wanting to open and only opening with the engine running we finally got to the root of the problem. Thank you to members on here for advice and help it was very much appreciated. It's now nice to have a tailgate and rear window that works as it should.

Right that's two more jobs ticked off my list.
 
Also after 6 months of rear window and tailgate problems with it having a mind of its own, opening while driving then not wanting to open and only opening with the engine running we finally got to the root of the problem. Thank you to members on here for advice and help it was very much appreciated. It's now nice to have a tailgate and rear window that works as it should.

Did you share what the cause was?
 
A little update.

Finally got my new GKN VCU and support bearings fitted. Can't say I noticed much difference in driving or reversing into the drive, but then again I have been running it with out the prop on for 2-3 months so I got used to its smoothness, one thing I'd notice on my way home last night from the garage was the overall noise has increased with the prop refitted, can't remember if it was like that before or not.

Also had the rear metal brake pipes from front to rear replaced and the rotten fuel tank cradle replaced for a decent used item.

After that it was M.O.T'd, great feeling to get another 12 months ticket on it, but the wallet took a bashing!

New VCU and support bearings
fecdedf230a4fda6ad409d5ce1875478_zpsd8bb1fde.jpg


2c8bd94a9067028cc10bbbc1051d685e_zpsd83a9d5e.jpg


Propshaft assembly ready to be fitted

7b2f05c1c87cd5d4ff4f36d73d0019a0_zps7c36b368.jpg


Extremely rotten fuel tank cradle.

b74c11350ece1a604d389ad2905546f5_zpsfa7e4f84.jpg


Replacement cradle fitted.

0b626993c1c7925bc1347fe1a4520b6d_zps9c7f097b.jpg


ed957d091e1071e7cb9a6698cd3f818e_zps383eed7c.jpg
 
Yes we couldn't split the VCU from the props, so ended up taking the propshafts to an engineering company who do transmissions and props etc which they removed the VCU with a little help from some heat, once removed they checked the UJ's on the props which were all ok, cost me £40 but thought it was worth it as it was well and truly stuck on the splines.
 
Next on the Freelander is to sort out the bumpers and arches after the previous owner made a mess of them with a heat gun!

33faacf8b6c26fd02ad1a39e395381fa_zpsfda498d5.jpg


Thoughts are is to either replace the lot, or a cheaper option maybe is to paint them satin black, either way I've got to get it sorted this summer as it looks terrible.
 
Last edited:
I've got a lttle GTechniq C4 left which you're welcome to try if you like? PM me your address and I'll post it up to you.

You need some Isopropyl Alcohol to thoroughly clean the trim before you use the C4. Make-up removal pads are what you use to wipe the C4 on and off again.

I've not tried it on trim that far gone, but it's worked miracles on some of my other cars.
 
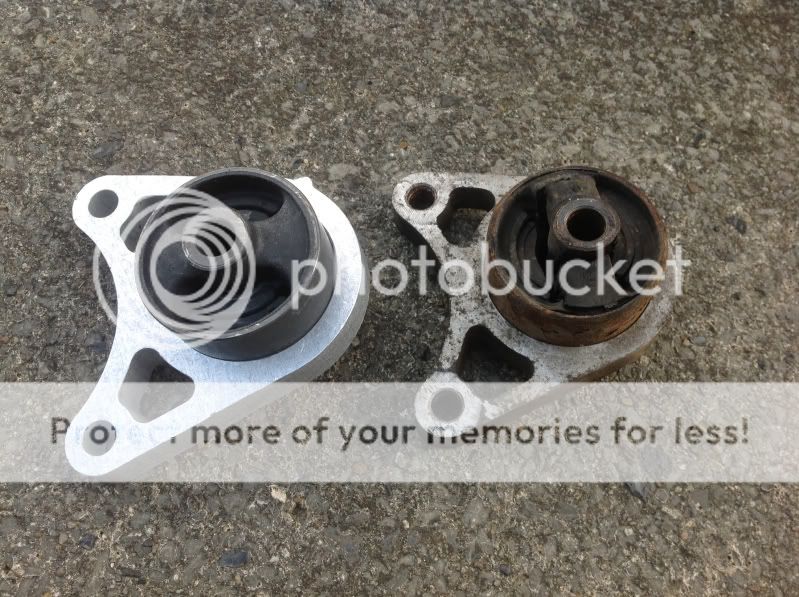
For a couple of weeks I'd noticed a knocking noise that was gradually getting worse from the O/S front suspension, quick diagnosis and it was found to be worn ball joint on the anti-rollbar stabiliser bar. Also had a clunk from up front when pulling out of junctions, as if the engine was moving on it mounts, again a quick look underneath and it was found to be a badly worn bush on the lower gearbox/engine mount or what ever it's called.

So with this in mind and also wanting some new rear brake shoes I went online and ordered the parts from Rimmer Brothers.

d92c4a37a5a461833efa1590353a22e7_zpse649d596.jpg


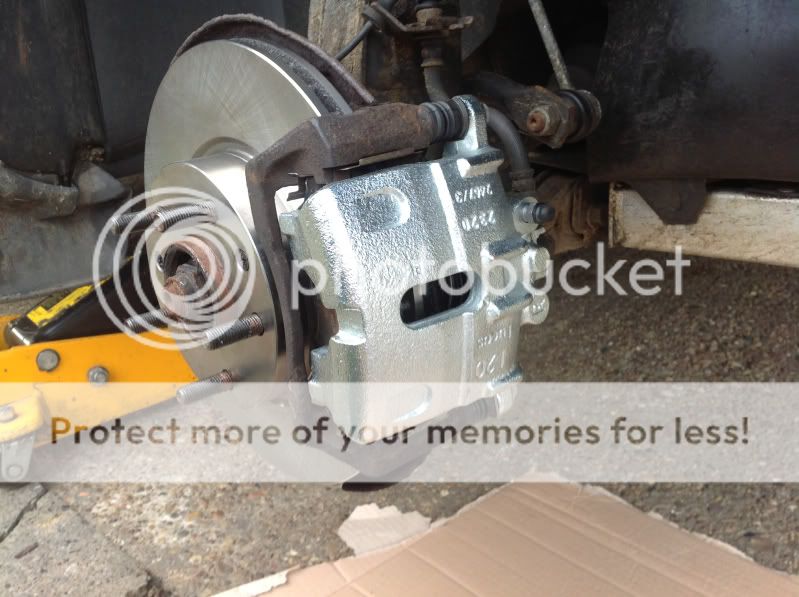
First job was to change the rear brake shoes.

Not to much meat left the old ones.

cf780f8c87ce97419efcc69ccbc7b312_zps1079d64f.jpg


Brakes all sorted I whipped of the offending Anti-rollbar stabiliser bar, only to find the new one I had ordered was around 10mm or so longer than the one fitted to the car.

c48794ddc9d3b0f900dd6f15d756f547_zps17eb9cfd.jpg


I phoned Rimmer Brothers thinking they had sent me the wrong part for the age and chassis number of our Freelander. It turns out that our late Feb 2001 Freelander is a bit of a crossover and the part I had ordered going by my chassis number was actually for a later Freelander and I needed a part for a early Freelander, to say I was confused was an understatement as all the other parts I ordered off the chassis number fit a OK. Anyway correct OEM part ordered and fitted in a couple of mins.

ef557dcf9ef400bbfed17dc8b04d623f_zpscf018ce2.jpg


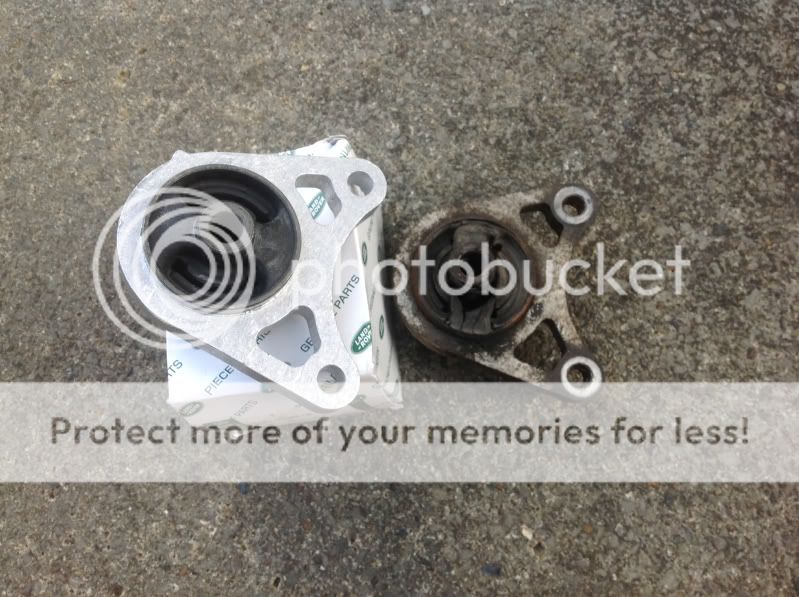
Next was the lower gearbox/engine stabiliser mount, it took longer to take the sump guard off then what it did to fit this part.

8b5f73c4402171dc8ff25fa5d71c24db_zpsf09421b1.jpg


af2c3e09d3d503e88a2e7fdf0b374f44_zps2c15e57d.jpg


A quick test drive and all was fine, lovely smooth gear changes and no knocking suspension, even the brake pedal feels better:)

I'd tried different products on the exterior trim, but nothing worked. Also a big thank you to PlattyR56 for sending me a bit of Gtechnig C4 to try, but unfortunately that didn't work and the plastic was to far gone.

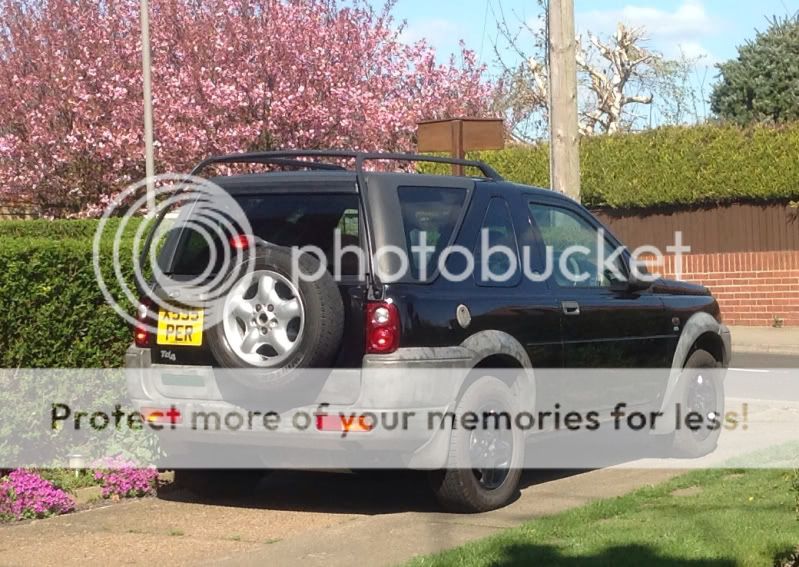
Taking advantage of the nice weather we are having I decided to take the plunge and paint the arch mouldings and front and rear numbers. I visited our local paint shop who recommended keying the plastic with a grey scotch pad then spraying with a plastic primer then two coats of satin black paint. The boring job that seemed to take for ever was masking everything off.

809bb4ec136b2b6c7edd945d485f4f12_zps5730b847.jpg


185d69774d884d86d81de6ba531186f9_zps904c9e36.jpg


Rear painted first.

0e6adbdbe2c7fc8a33ef2e801fa725d5_zpsf79a1984.jpg


e3eba3911bfdd9897a3e49981e565489_zps6b3241c6.jpg


Then the front.

ce4053c9b5e2ec83d3ba8ae208e3f441_zps6333ac36.jpg


a3d2cef0939be5347623031934b707d7_zpsddc710f9.jpg


1ed6a7f2b08d45dc1359b94183f92000_zps49415fcb.jpg


e2ffea3bba1307278e9315bfe22e28bc_zps6c532f3e.jpg


e3f8a7416e70a8f14a9ad8950f761dbf_zps9dc561dc.jpg


b94de38f3fea72b6b3deac914b16a1d8_zpse8edab2d.jpg


Overall it looks much better than the badly heat gunned plastic that the previous owner did.

33faacf8b6c26fd02ad1a39e395381fa_zpsfda498d5.jpg


But the spray paint cans were not that good as they struggled to apply a smooth uniformed fan of paint onto the surface, it was more like hit and miss, I had four cans and all were the same, I wish I'd used the spray cans now that I had bought from Halfords as they were fantastic when I sprayed the bonnet of my Avenger Tiger in matt black, anyway like I said its much better than it was.
 
Last edited:
Are you keeping the wheels black, or will you match them to the spare? I must admit, I am biased against the black wheels on the black car,.......maybe too black for MY taste?
Nice job of bringing the car back!
 
Bumpers look great, been looking for pictures, before attempting mine. :)

I would use some high fine grit wet and dry paper to blend in the patches then put a few light coats of laquer over the top.
 
Back
Top