2004 Freelander Upgrade, this is how its done

This site contains affiliate links for which LandyZone may be compensated if you make a purchase.

Stuarts the man

New Member
Posts
118
Hi, just upgraded my freelander to the 2004 on model, relatively easy this is how its done. I do not know how to upload pics to this thread so if you need any help, contact me by email.All parts purchased from ebay. Parts req
1.Front bumper 70-85 100 tops do not pay more as there are plenty about, do not buy with damaged colour coded side panels, as these are not replaceable, bumper is a 1 piece unit, with no parts available.
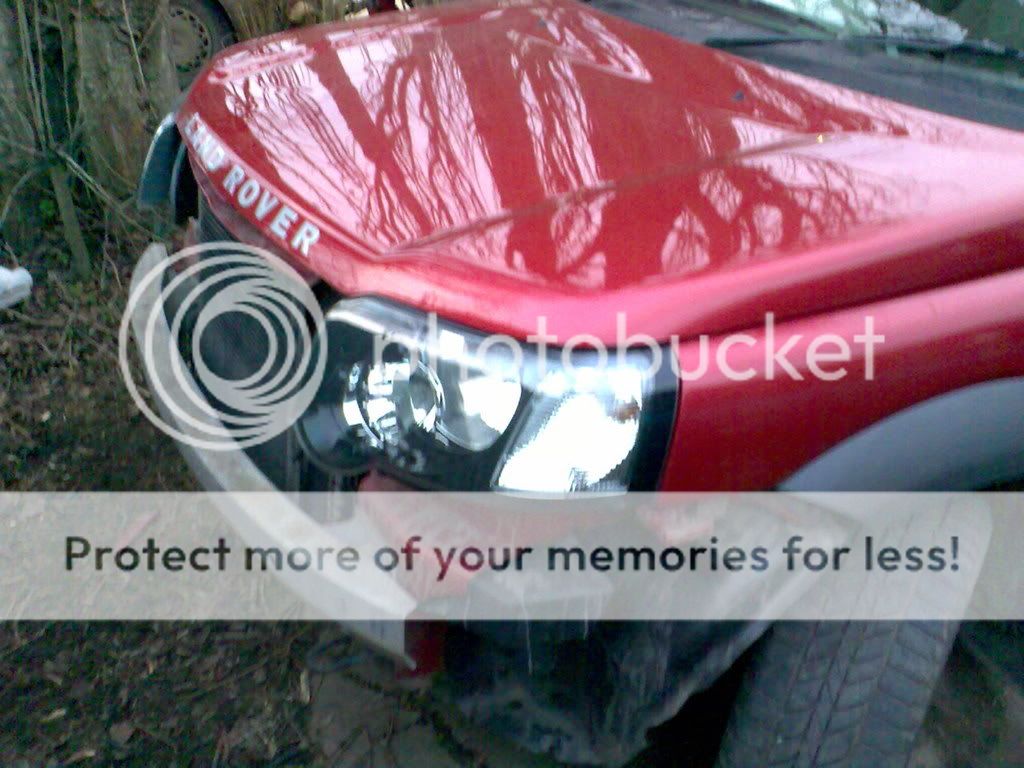
2.2004 onwards headlights, missed a pair at 99 paid 140 this seems to be the going rate, but have been told new ones are only 100 new
3. Rear bumper 40-50 plenty available, plus bumper lights, indicator and brake square shape plenty available on ebay at 19 plus postage 25 from main dealer
4. New REAR FOG and REVERSING lights, only available from breakers 60.00 when you fit rear bumper you have a 1 1/2" gap between bumper and lights New lights have an extra bit of reflector on bottom
5. Lastly plastic trim for bottom of tailgate, you do not need this but i think it finishes off conversion.NOT available from anywhere except main dealer small part to right of spare wheel 20.00 large part 104.00 OUCH and 12. for new badge.
All in costs less than 500, dependant on how far you want to go. i colour coded mine myself, 2 cans of spray paint from your local paint shop and 1 can of lacquer
 
Starting with the back first, bumpers look similar, but some differences. remove old bumper, screws absolute bugger, do not be tempted to destroy wheel arch liner 40.00 new. bumper will not fit flush due to you needing to remove top bumper mounting bracket, just below fog light, drill out spot welds, you then have a lip sticking out all the way down the inside edge of the bumper 6" long 1/2 wide. this needs to be hammered flat, and then coated with seam sealer to protect from the elements. After this bumper then fits, you then need to drill a new mounting hole for the top edge of bumper to compensate for the bit you removed.Do not refit bumper bracket as it will not fit. New lights need to have your original bulbholders modified to fit easy to do.You will now see the gap between fogs and bumper, fit new rev and foglights, problem only 1 hole lines up bottom one drill 2 new holes, and take a small hammer and tap round edges of body where light fits, hey presto new back end. You then have to get bunper paint to blend arches round door and wing to match dark colour of bumper
 
Back tailgate trim has extra row of holes, due to height, but everything else lines up, either drill tailgate to take extra clips or use bonding agent as used for sticking on roof spoilers, never going to come off. Back end now totally complete
 
Front end,remove bumper cover, then lights.also brackets beside lights. New lights will not fit at bottom, Now cut out a piece of metal 2" deep and 6" long from the headlamp mounting panel, headlamp will now line up with top mounting holes, and fit against the wing. Make up L shape bracket to mount bottom of light to panel, easy to do.Do same to other side, easy now that you have done 1 side. Bumper cover now fits straight on, with the exception of the 3 plastic bolts which secure it to the front bumper bracket. The bumper is the same as old style, the only difference is the length of the mounts, which can be changed, i left mine as is, will do at a later date.before mounting bumper rotate r/h towing eye 90 deg to clear cutout in bumper. use 4 self tappers on bottom of bumper grey bit to secure to skid plate.It may catch on bottom towing eye, but just trim slightly with dremil. Again paint wheel arches to match in
 
Lastly wiring front lights, it is near impossible to match up to or connect to the new lights. This is how i did it. remove connecting plug from new light, just twists off has a fair amount of wire to play with. Remove plug and wiring from old light, you get bugger all for your old style lights on ebay anyway. This will then connect up to your original wiring loom, keeping it neat and glue old connector into new light, i used silicon. I can supply wiring diagram if needed. I think i have covered most of the bits i can think off, i may have missed a couple, but if any help needed please contact me and i will do anything to help if i can. I have a spare front bumper and a fog/rev light if needed
 
Hi Stuart

great info and advice there from you , can not wait till see pictures of the result . i my self will start my search on eBay on the items that i will need to complete the task

Adam
 
Forgot to mention smoked side indicators, normally on ebay for 12-15 go to your local scrappy and get them of rover 45 , 25 etc mine only cost me 4.00
 
Thanks Stuart

got the pictures from your king self and yes she looks good and what a good job done there by you excellent cant-wait till i get mine started

Adam
 
At last ive finished my Facelift £600 in total approx and looking good i mite say just waiting for the rear fog/ reverse lights to come but these are a easy fit (I Hope):confused:

Unsure how to post picture do i have to resize via a Hosting site and answer would be Nice Thanks Mupley
 
If you've got a photo editing prog like photoshop or windows picture editor you can do it in there or you can put em on photobucket or similar and copy the link from there.
 
Thanks

First go hope its ok I will post some more pictures Tommorrow evening


http://i240.photobucket.com/albums/ff211/DUBSPORT77/Image066.jpg

Just testing Headlights complete will post more pictures tomorrow When its Light Mupley

This is better
Image066.jpg
 
Back
Top