Series 3 109 - 1973 - Full Restore

This site contains affiliate links for which LandyZone may be compensated if you make a purchase.

WoodyO

Well-Known Member
Posts
339
Location
UK
Evening all,

Backstory: My Granddad has had this 109" diesel since the mid-eighties, before that his Dad maintained it from new when he worked as a mechanic at Co-Op. The Series 3 was their recovery vehicle, fitted with a lift and tow crane in the rear tub.
Ever since I remember, I would wander around my Granddads old workshop in awe of this great Land Rover, constantly asking if I could have it. My wish was granted on my 16th birthday when it was handed over officially, although it took another 11 years for me to make a start on doing anything to it.


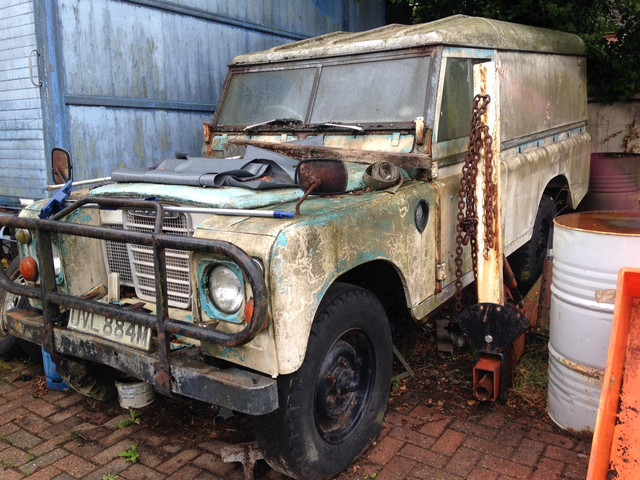
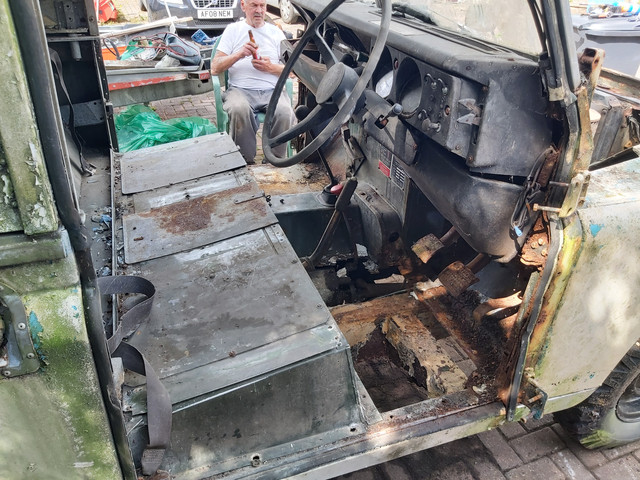
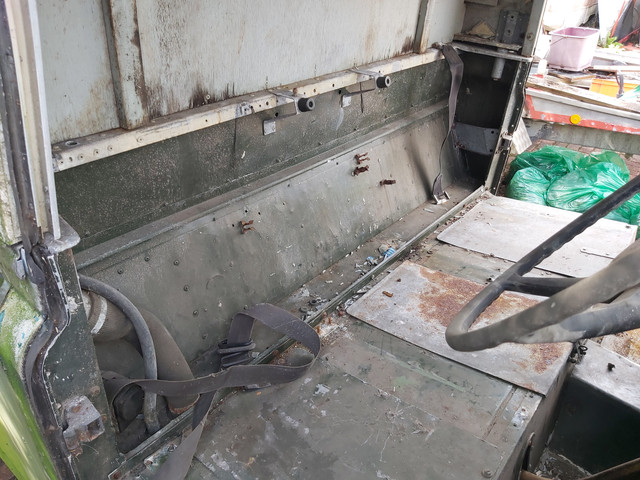
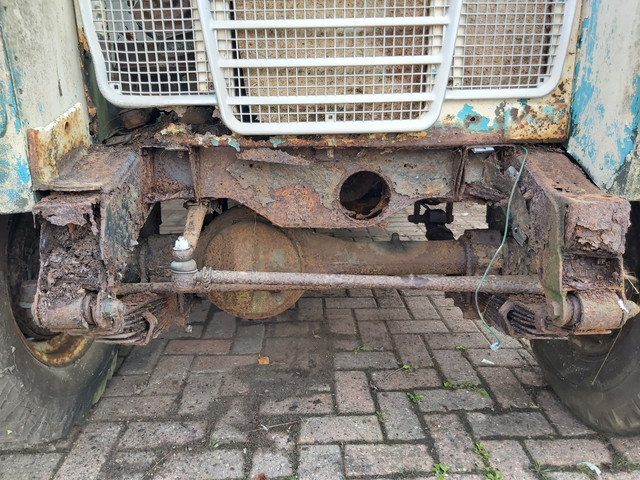
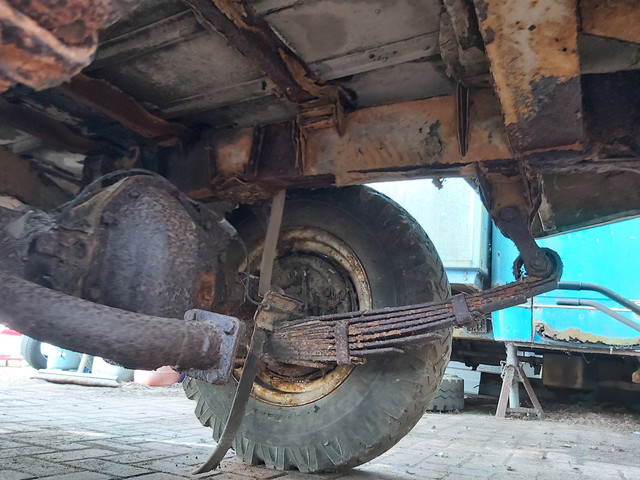
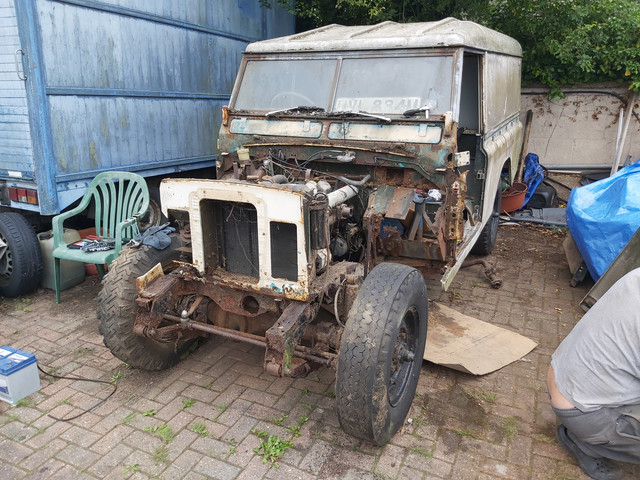
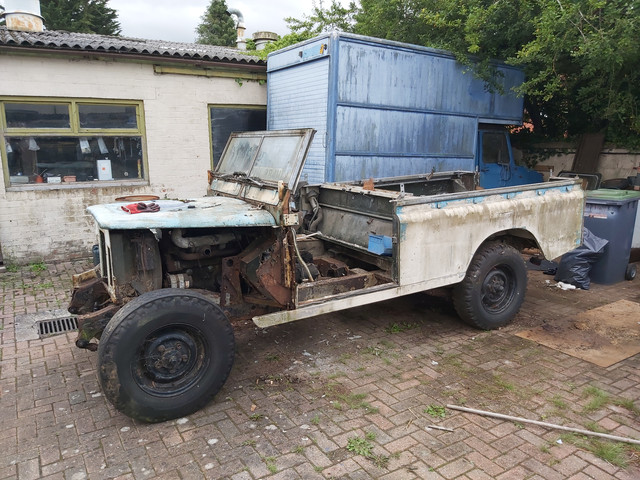
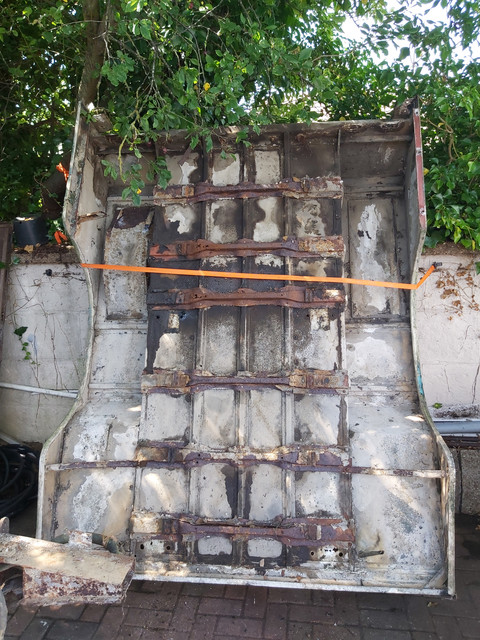
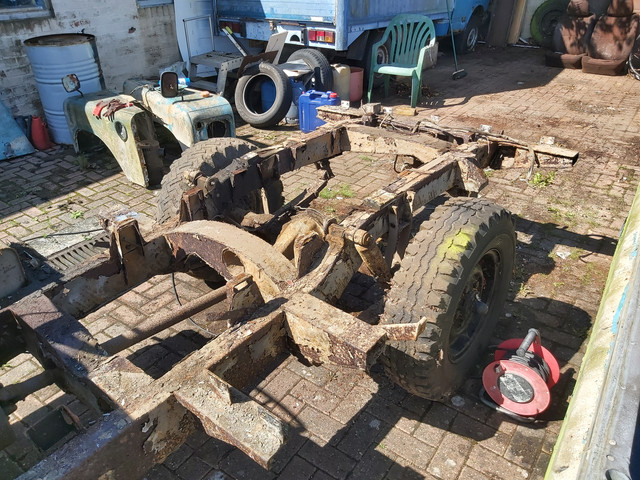
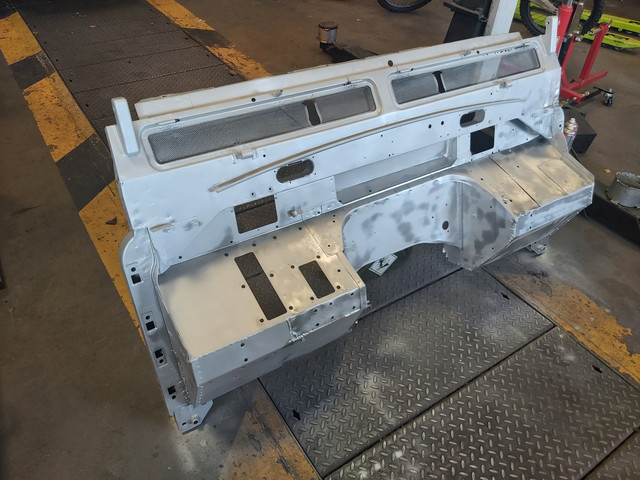
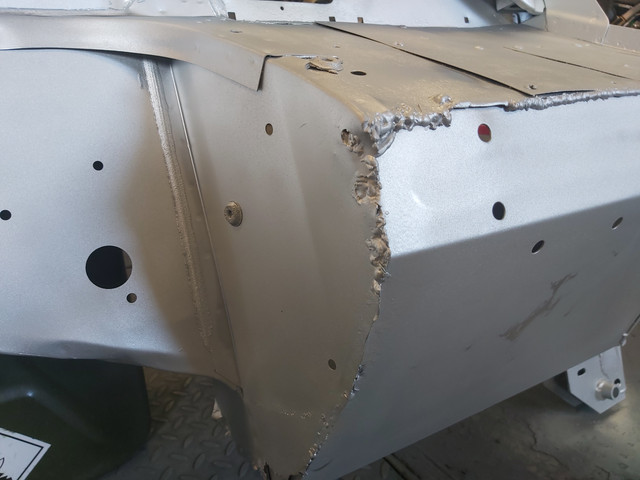
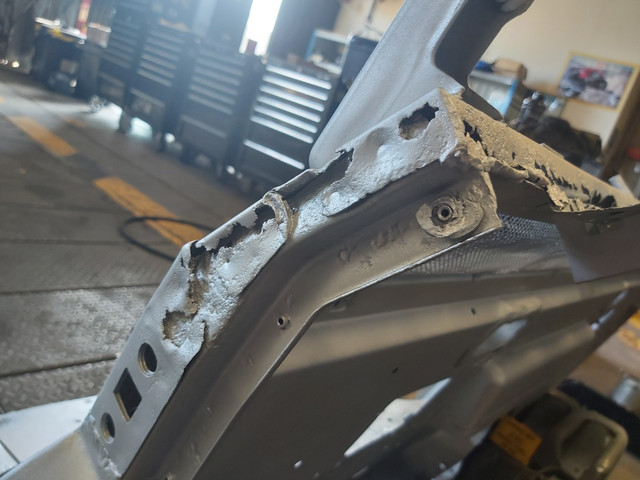
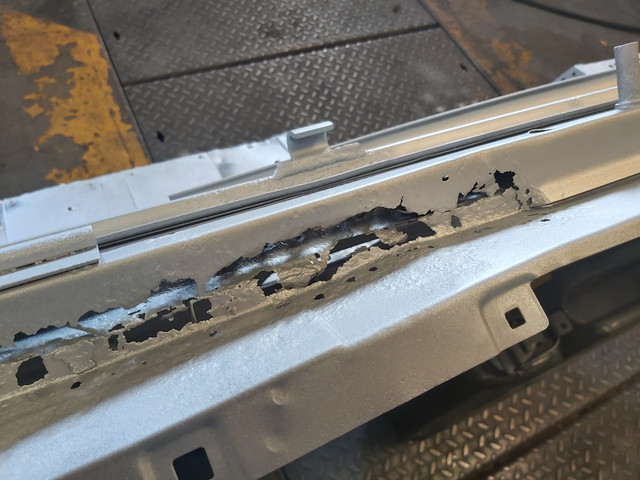
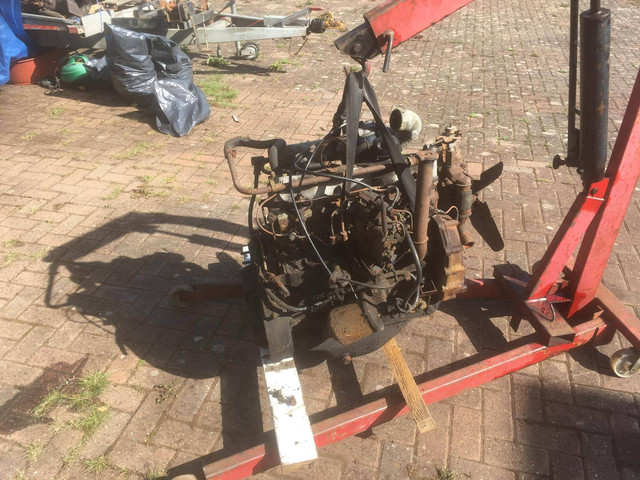
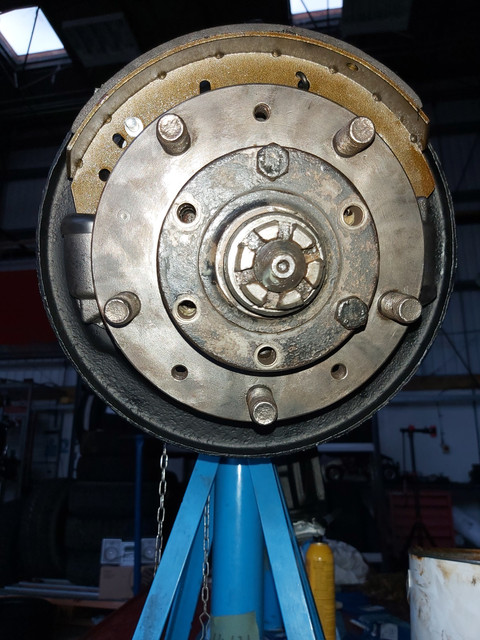
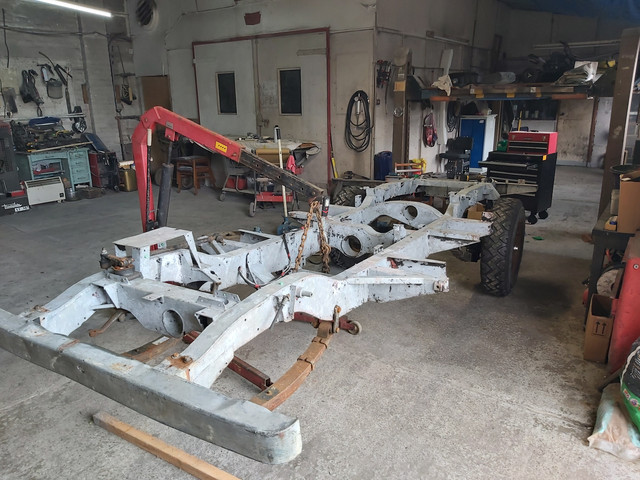
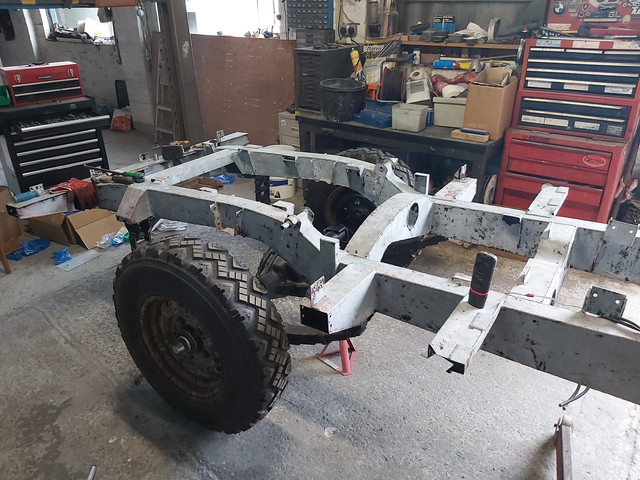
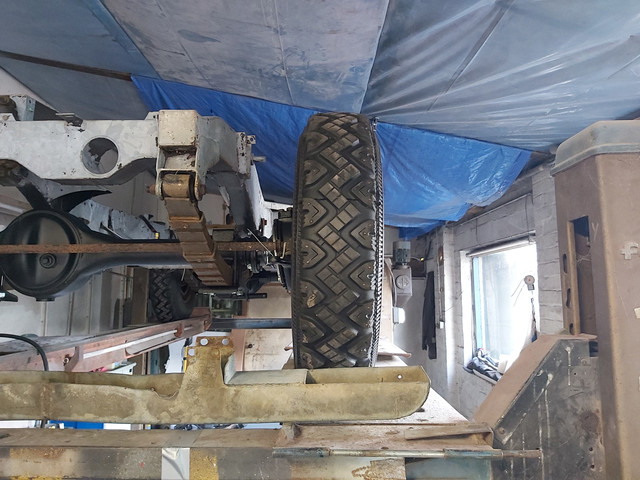
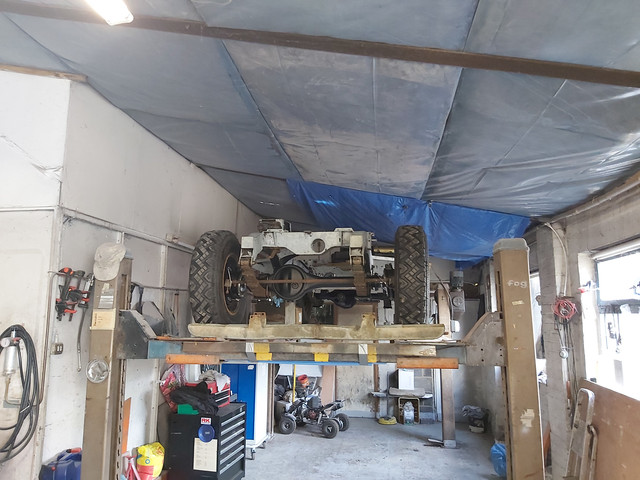
Starting Point: As you can see from the photos, it was in a pretty dire state. Chassis completely rotten, bulkhead beyond salvage and only really held together by some of the body panels. Knowing it would need at least a new chassis and bulkhead is why I took so long to get started; lack of time, money and motivation. It took a friend at work to start on his 88" 1973 diesel to really get me started, sharing some motivation and ideas together.

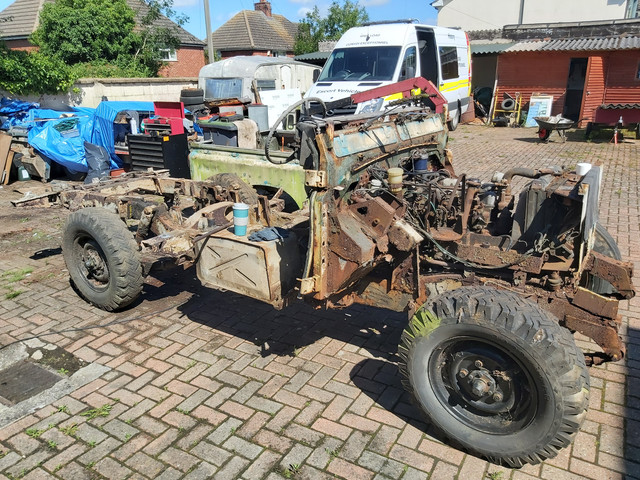
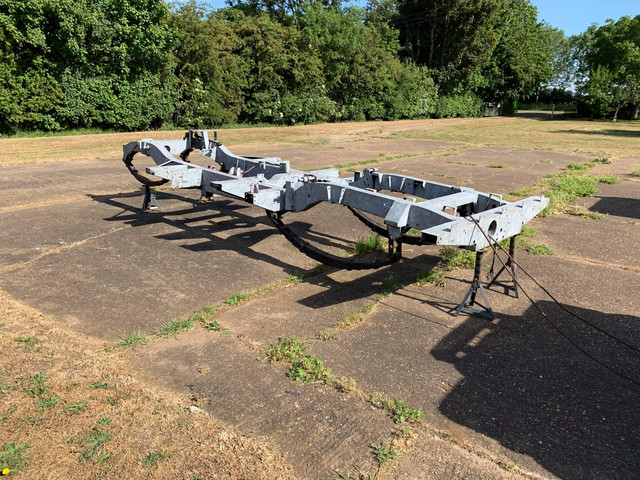
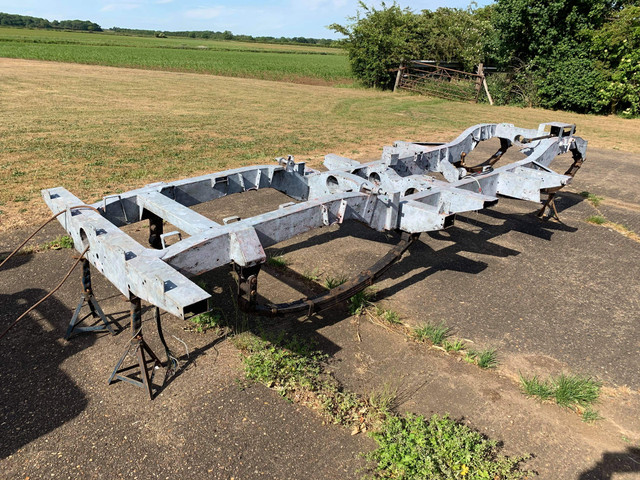
The Plan: I knew it would have to be built up on a replacement chassis, so it might as well be galvanised. My initial thoughts were to do a full rebuild, but with limitations. So I didn't want to strip major components unless they needed it, but everything that could be easily replaced would be. Time will tell how well that plan holds up, I'm well aware this will always be an on-going project, but I also want to make sure it's well finished and not just bodged together.

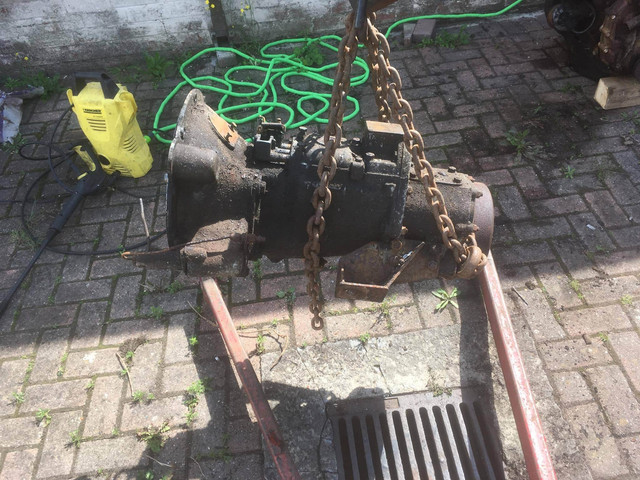
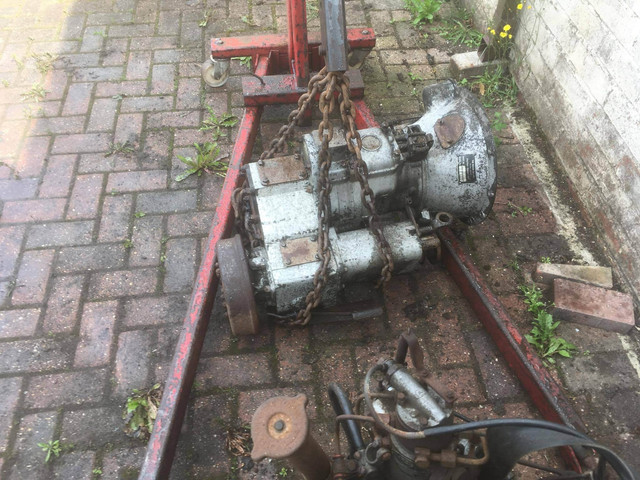
I'm fortunate enough to have a full workshop at work (mechanic by trade), along with access to a full metal-smith shop. However I'm not able to do the full build there; my plan is to strip the whole vehicle where it is at my Granddads yard, then bring components to work to rebuild, swapping them out along the way, hopefully onto a galvanised chassis.
 
Last edited:
Disassembly: I had a weekend free so popped up to Lincoln to get started on the strip down. There was a lot of stuff that needed emptying from the rear tub before we could start doing much, mostly old paint from when the old man was using the spray booth (fortunately it's still in working order, so a proper paint job will be easy enough!).

My plan here was to just get as much removed from the chassis as possible, taking mental notes of what was re-usable and what would need work. As it turns out, that's pretty much everything.

Doors came off fairly easily, it was clear the bulkhead is in a very bad state, opening one of the doors resulted in the bulkhead peeling away, rather than the hinge opening!


The seats were a bit of a pain, when the Land Rover was being used as a recovery vehicle for the Co-Op, some modern (at the time!) car seats had been welded onto the original rails, unfortunately this meant the rails were scrap by the time they were removed.


Front dumb irons looking worse for wear, signs of previous welding.

 
The rear leaf springs, along with the fronts, are severely corroded and unusable.


A strange reinforcement of the rear cross-member. During its recovery days, it was used to tow broken down milk floats which is apparently the reason for the strengthening. The service history shows a replacement chassis in the early 80's, perhaps the reinforcement was put in at that time? No numbers on the chassis to confirm, but along with the flattened off engine number, that doesn't surprise me.

 
Next off were the wings. As expected, all of the fixings were corroded and needed cutting or grinding off, worst of all were the fixings between the inner wings and the radiator panel. Knowing the radiator panel was scrap (and having already purchased a good second hand one) I chopped the edges of the panel off, to easily remove the wings.


After that it was off with the roof and sides, easy enough apart from a few bolts holding the roof to the top of the windscreen. Nice and easy to lift, two of us managed with ease and sat it down in a corner of the workshop ready to go on eBay. My intention is to run it without roof/sides and door tops for the summer months, then fit a truck cab for the winter, so the full van roof was surplus.


This was also the day we managed to get the engine running. As far as I know, the last time the vehicle moved (under it's own steam) was sometime in 1995. My Granddad was always sure it would start, telling me stories of how it never let him down during the times it was a workshop vehicle.

To give it a fighting chance, the heater plugs were removed and some engine oil squirted down the bores. Whilst that was soaking in, I dropped the oil and topped up with fresh, along with draining the diesel tank and putting some new stuff in.

The wiring loom is in a terrible state (surprise surprise), so after turning the engine over by hand a few revolutions, I bridged the starter solenoid terminals with the heater plugs out to get some more oil circulating.

Plugs back in, fuel on and the old engine fired straight into life! The video below is of it's second start, still a bit lumpy but certainly good enough for me to not pull the head. At most, I'll whip the sump off for a clean, adjust valve clearances and just a good service.

 
Last edited:
The next few hours let me get to grips with removing the rear tub. Again, most of the fixings needed chopping off, well, those that didn't shear as soon as a socket was put on them. Perhaps stupidly, I chopped through the rear tub stays (the same as the ones on the front wings), so they are on the shopping list.

Inspection of the rear tub showed the steel supports to be beyond repair, fortunately YRM do good replacements, although I'd rather pay a bit less! The tub has had some abuse in its life, the lift and tow crane used to be mounted and unmounted a few times a year, so that's taken it's toll. When recommissioned, the tub will at a minimum have new supports and a new thicker aluminium floor, along with some tie-down points. I'm yet to work out how, ideally mounted to the chassis, but probably just some double thickness spreader plates under the tub floor.


With everything being removed around it, it's easy to see now just how bad the bulkhead is. Foot wells are almost nonexistent and the pillars are in a right state.


The chassis with the tub removed; doesn't look anywhere near as bad as it is.

 
Galvanised Chassis: A friend of mine spotted a 109" galv chassis for sale not too far from me. It turned out to be a station wagon chassis, but a few modifications would allow me to fit the rear rub without issue. Certainly much easier than going the other way, from pick-up to station wagon. The chassis is fitted with new(ish) leaf springs front and back, and an unknown steering relay already mounted. I think the chassis has been built up on previously, but it's certainly good enough for what I need. I also got a decent bulkhead thrown in, it needs work but is easily fixable.


Looking good! Keep,the pics coming. Your grandad would be proud of that rebuild.

Thank Knappster, the old man is still kicking about, he's still active enough and being a mechanic by trade too he's always giving me a hand, whether I like it or not...

Bulkhead: I took the replacement bulkhead to the sand-blasters to see where I'm at, £60 inc VAT. Overall, I'm happy with the condition, better than I expected for a £200 bulkhead. Obviously needs a few patches and a couple of old repairs making good. I've got a pair of replacement vent panels for the top, the rest will be patched in. Footwells are good enough for me, with just a couple of edges to tidy up.

I'm still in two minds whether to galvanise once it's repaired. I guess getting it to this stage and knowing the bulkhead is good, it's a bit of a no brainer, but it also adds another element of cost!

For now it's laid up in cold galv spray. I'll be away with work for a couple of months towards the end of the year, so my plan is to give the bulkhead to a welder over that period.


Engine out: Catching up to present day, a couple of weeks ago I had some photos come through from my Granddad; he got bored and decided to whip the engine and box out, in preparation for paint, etc. before dropping into the new chassis. The bulkhead was still on the chassis at this point, so he split the box from engine and took them out separately.

The engine will be having the sump taken off for a good clean and oil pump inspection. All coolant hoses need replacing, as they're leaking like a sieve, I'm also contemplating core plugs whilst it's out, but not sure if I should go poking where there aren't currently problems, any thoughts on this? As the engine runs, I'm not going to be pulling the head or adjusting pump timing, etc. Just a good service, new fluids and a coat of duck egg blue. The rocker will come off for a clean up, valve clearances adjusted and hopefully that's it.

I've got a new clutch kit from Craddocks waiting to go on when I get some time, 'box selects all gears so until I find problems I won't go looking. The gearbox main seal is leaking, so I've got that ready to go on before it gets mounted back onto the chassis.


Rear Salisbury Axle: Finally some progress you can see! This takes us up to a couple of days ago now, so updates will slow down to real time. My plan from a little while ago was to build up individual components and build up to the chassis as I go. Reason being, if something comes up that means I have to abandon the project; time, money, work, etc. I will have something that resembles fully completed components, and put me in a better position for sale. Rather than everything half started and with nothing to really show. Getting the axles down first would also allow me to move the new chassis around easier, as there's hopefully scope to move the bulid into my workshop, rather than taking weekends to travel up to Lincoln.

Anyway, rear axle; the strip down started a couple of weeks ago, I left stub axles and backing plates on just for ease. An awfully long time spent with a wire brush on the grinder, quite a bit of zinc rich primer and some very tough black topcoat got me this far. Everything except bearings were replaced, which were all Timken and in good condition. A couple of pin holes appeared on the diff pan when taking the rust off, which turned into bigger holes, so a new pan was ordered and fitted. I'm awaiting the diff pinion oil seal, gasket and oil thrower before I can fill with oil.

Brakes are Britpart axle set; new cylinders, shoes, springs, etc. Original drums have plenty of life in them so they will be staying. I'm not sure if I'll paint the drums and flanges, but after a quick blast with the wire wheel they've come up well, so may well stay as they are.


I'm awaiting another Paddocks order to arrive so I can finish the front axle, which is currently just the tube in paint. Once they're both completed it will be up to Lincoln to fit to the chassis.
 
Not much to update on today; the rear axle is now sitting on some WOLF rims that will eventually get cleaned up and painted limestone.

Done the leaking Salisbury diff pinion oil seal but I've still got a click from the rear diff, even after the pinion nut has been done up. I've got a feeling this has been tampered with before as I did the nut up to my mark, but there was still end float. It went a bit tighter, maybe half a turn before any serious resistance, but then the pinion didnt want to turn.

Other than that I've been busy grinding, sand blasting, rust treating and painting various front axle components ready to get built up next week.

 
Front axle rebuild:
Started on the front axle today, however I've had to cut a few corners to get it together for the weekend. Reason being, I'm away for a couple of months shortly, so need to get the chasiss rolling before then.

Started off getting some of the remaining bits painted; a rust inhibitor and matt black top coat. The paint has proven to be very tough so far, so hopefully it will last.


I've been waiting for a distance piece for the half shaft to turn up from Paddocks. I'd ordered these and the bearings, etc on a previous order but it had been missed off. They were very good and sent one out within a couple of days of me telling them. The distance piece was driven on with a scaffold tube, no heat, and slid straight on.


Backing plates for the front drums are now painted up and cylinders fitted. Unfortunately I only just noticed that the snail cams were seized and the bolt heads rounded off, so all of those have been removed. I only had 1 spare left from my pack of 4, so could only fit the one shoe. More adjusters on order so they will get fitted in time. I can still get the hubs built up and drums on to get it rolling so I'm not too concerned.

The small screws that adjust the angle of the shoe were terribly rotten so they have been removed and replaced with bolts and lock nut.


Finally, stub axles and backing plates bolted up to the swivel housing. Again some corners cut here, I havent set the correct drag for the swivel housings or filled with grease, but this will all be done when I return. Main aim is to just get wheels on and get it rolling.

The oil seals will be put in place and nipped up to stop them getting damaged. I managed to get one hub packed with grease and on before running out of light. The other side will be tomorrow morning before taking the axles up to Lincoln.

Can anyone spot the obvious brake mistake? I didnt until trying to fit the shoes...


Last edited:
Rolling Chassis:

A rushed Friday afternoon saw me get the rest of the front axle together, but needing quite a few bits still doing at a later date. Both front and rear axles loaded up into the van and off to Lincoln to get them fitted to the new chassis.

The new chassis had already been fitted with a set of leaf springs and fortunately the bolts had all been copper greased so came out nicely. The engine crane came in handy here to hold the ends of the chassis up whilst we dropped one end of the springs and rolled the axle into place. New stainless brake pipe brackets were fitted on the rear springs at the same time.

For now the u-bolts are just buzzed up enough with the gun to take out the clearance between spring and axle, as I might be taking the rear axle back off at some point to investigate the diff click.


The front axle went in even easier, the old track rod is just held in place to make it easier to roll about for now. It will eventually get cleaned back with new ball joints, etc. The steering box that came in the chassis seems in good condition; nice smooth action and doesn't need much resistance to move. It will get properly inspected when linking up the steering components.

The rolling chassis is now sitting up on the ramp out of the way until I get back in early December, so there won't be an updates until then. The bulkhead has been dropped off with an mechanic/welder who has a soft spot for Series, so will be completed and ready for paint when I return.

Next up is going to be getting the engine ready to drop in; sump off for a clean internally and a paint. Strip the block for cleaning and paint, valve clearances, etc.

At some point though the front axle needs to get finished off, the bits below are what need doing. More for my future reference than anything else...
  • Torque swivel ball to axle bolts
  • Set resistance of swivel housing with shims and torque/lock washer top and bottom bolts/nuts
  • Fill swivel housings with grease
  • Refit swivel oil seal
  • Set steering lock distance
  • Fit 3 x new snail cam adjusters to front backing plates
  • Fit shoes and springs
  • Torque/lock washer backing plate/stub axle to swivel housing bolts
  • Set wheel bearing end float and lock washer
  • Torque drive flange bolts
  • Split pin half-shaft nut
  • Fit hub caps and new oil seals

Positive camber on front axle:
Once the front axle was fitted and it was up on the ramp at eye level, the amount of front camber became quite noticeable. At first I was slightly concerned, but as I read into it, it appears they are meant to have a degree of positive camber on the front axle. I can't remember if I read 1.3 or 1.5 deg. per wheel in the AutoData (1983) book, but it put my mind at ease slightly. Once the chassis is with me back at work I will get the alignment done on the 4 wheel laser machine, just to check nothing is completely out.


Heater matrix and blower:

The heater matrix and blower were missing from my S3, but managed to pick both up on Gumtree for £30. The heater box was a little worse for wear and needed a couple of patches welding in after the sand blaster blew holes in the metal.

Welded up and painted, I've just found time to refit the heater matrix. The matrix itself was horrendously dirty inside, must have taken 15 minutes of running the hose in both directions to get anything that resembled clean water coming out.

Once the heater box was painted I spent a bit of time sealing the gaps with a black sealant, to minimise escaping air.

Some 12mm neoprene was then cut up to seal the gaps between the matrix and heater box.

I couldnt cut the neoprene to properly seal around the pipes so just used some more black sealant to keep it air tight. Finished with some new zinc plated screws to keep it together.


I'm working out of the old mans place in Branston, but once time allows I'll be taking it down to work in Dorset.
 
Blimey. My father in law used to run the chip shop in Branston many years ago. :)

That's a bit of a trek to keep going back and forth.
 
Cracking work so far and your Grand dad sounds like a right trooper if he took the engine and box out cos he was bored:)

Keep it up good luck:)

J
 
Still away with work but have managed to get a new bulkhead delivered.

Bit the bullet and got a new galv from TerrainTech, the old one doesnt need too much so will sell it on as is for a project.

 
Back
Top