LandySurf
Active Member
- Posts
- 164
- Location
- London / Cornwall
Hey all
Looking to paint the rear crossmember at the weekend to spruce things up a little bit!
I don't want to spray it - i'd rather paint it by hand - just personal preference
Yes i know it's easier to spray - more time effective - etc - but just personal preference to paint by hand ....
I've read in a few places that a few people have used various grades of wire wool in the first instance to prep it
Coarse grade followed by a fine grade.....
Then from here - primer and then finally painting etc.
I was just wondering if you might all recommend some products in terms of wire wool / primer / paint etc.
I don't want a satin finish and would rather go with matte!
New to all of this so apologies but just reaching out for a bit of advice and to benefit from experience.
Hope you all don't mind!
Happy Wednesday and thanks!

")

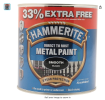
 I’ll grab the matte one that’s got the primer in it as well that I posted a picture of above so that’s sorted! I think that’s on Amazon too!