Finally got another Freelander...

This site contains affiliate links for which LandyZone may be compensated if you make a purchase.
Well, two doses of Mr Muscle didn't so much. One dose of dishwasher powder and boiling water helped after an hour, so did a second dose overnight. This morning rinsed it all with boiling water and very very good, but soaked in petrol for an hour then rinsed after a poking session with bottle brushes. Now almost fully cleaned out and about as good as I'm going to get so it's drying out the petrol now. I've popped it out in the sun on the shed roof so give it a couple of hours and it should be dry enough to refit. Hopefully not too many petrol vapours left after...

I also cleaned out the MAP sensor which was blocked and reading somebody elses tale of woe, it might account for a lot of problems. It was gunged up solid. It is supposed to have a hollow tip as it's a pressure sensor. Hopefully cleaning will have helped but I'll price up a new one just in case. The other chap had all sorts of problems and changed just about everything until he changed the MAP and all fixed! It's a tiny sensor bolted on the manifold corner opposite the EGR end.
Horrid job , but worth doing well :)
 
Started straight away and chuffed smoke out the EGR/Exhaust joint.. Took it apart and added exhaust sealant paste. Started straight away again with MUCH less smoke and vibes than before, but still not 100%. Drove a few miles, seems nicer. Got Ronbox on setting 1 for now. Got home and while trying to locate the bearing that is making all the racket, I notice I hadn't plugged the MAP sensor back in.... So, burning RAVE cd to work out the aircon tensioner pulley as mine won't undo the top bolt and don't want to knacker it. Then I'll try another drive..
 
Got it off and found the aircon tensioner pulley is only slightly whirring, but I'll replace it anyway, but the aircon clutch pulley bearing is totally shot. Graunching and play present. Pulled it off and trying to track down a separate bearing, but without any online luck. Will try LR tomorrow to see if the clutch assembly is available on it's own, and also a bearing supplier. The bearing has been peened in so I'll have to do lots of little grinds before pushing it out. The other option is to buy a complete used air con pump from ebay and swap the clutch over.

Anyone done any of this? I've read posts about people replacing the compressor clutch but no details on how and what was used?


The Ronbox on setting 5 works nicely I must say. Not as dramatic as my Golf when that went from 130 - 180bhp, but I think I still need 3 injectors looking it (one was a new one in 2011 rest are original). Now the aircon belt has been cut off, the bearing noises have gone!
 
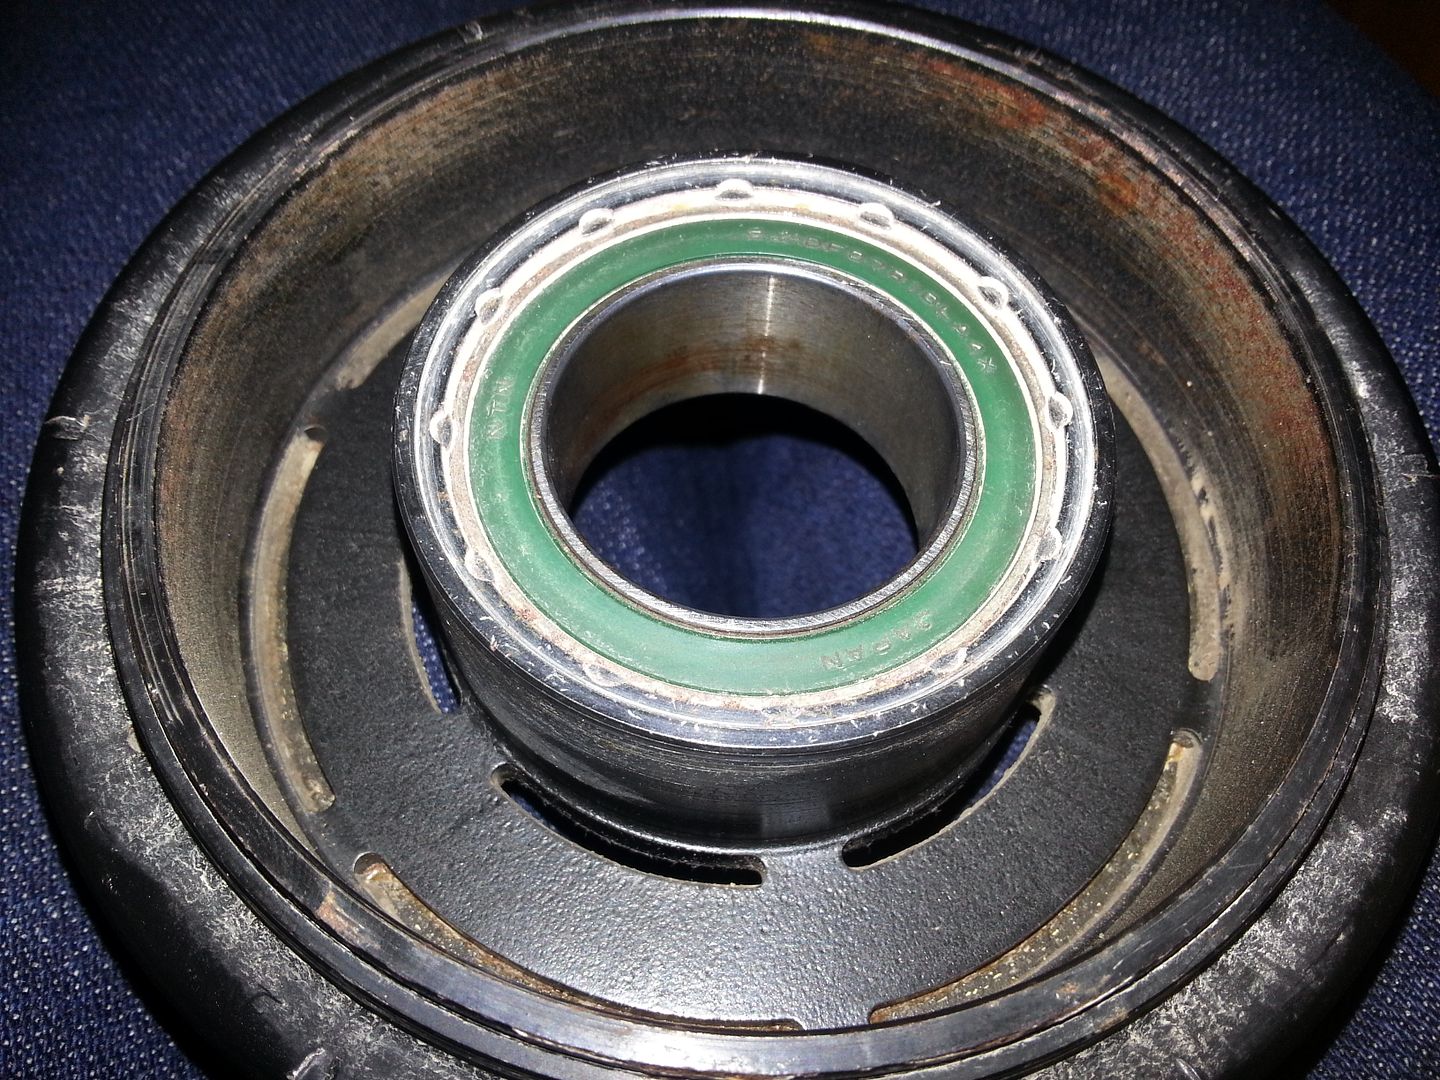
You can replace just the bearing in the air con compressor clutch pulley. Should come out one side without grinding. Bearing is 35BD5222DUM18A. Same bearing used in the v6 and td4 air con compressor pulley. The v6 has a wider aux belt so the pulley wheel is wider with an extra groove, but bearing is the same.

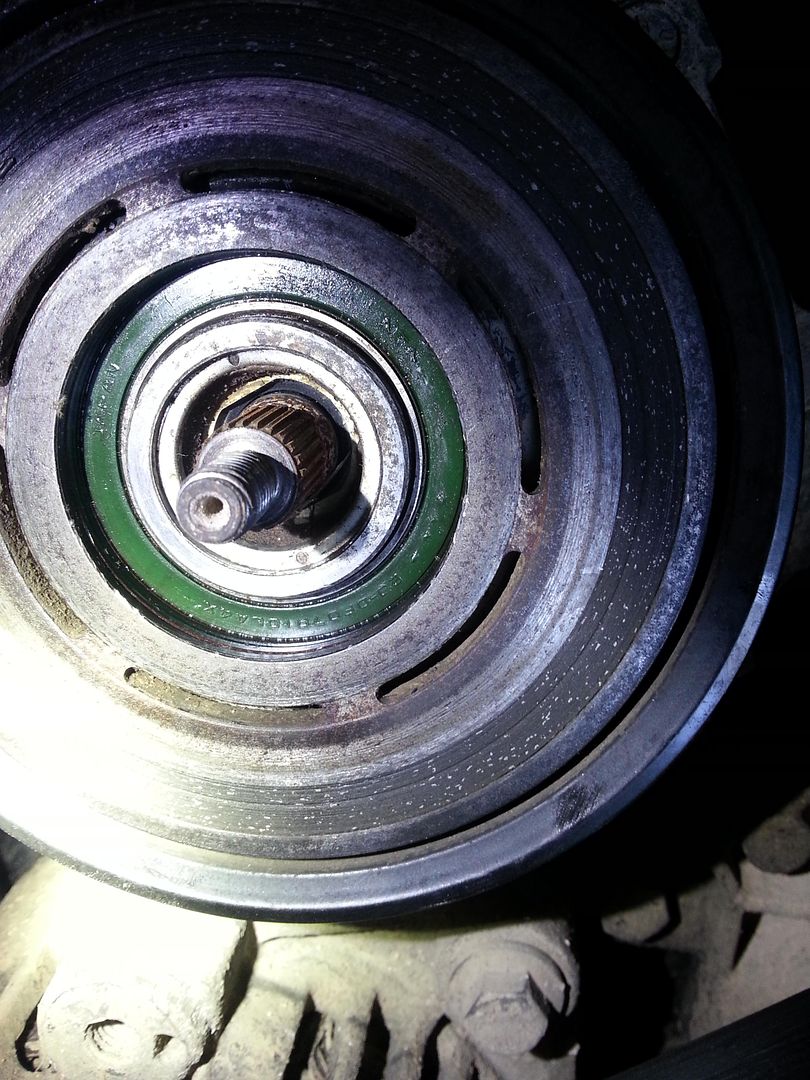
First, remove the auxiliary belt. Next hold the air con compressor pulley still, and undo the bolt in the middle. This bolt goes through the outer pulley, into the inner shaft. I did mine by wedging a screw driver onto a rivit like thing on the side, to stop it turning. Once the small bolt is removed, you can see the small hole it came out of. You’ll also be able to see the bigger hole it went through in the pulley, to get to the small hole behind it. Get a larger bolt the correct size, and screw this only into the pulley. About 4 turns only from memory. The removed bolt holds the whole thing together. The new bolt only goes into the pulley, that spins independently when the clutch is not engaged. Pull on this new bolt and the fly wheel will come off. I then pushed out the old bearing from the pulley, then fitted the new bearing. This part may not be called the pulley, but that’s what I’ve called it. I needed a hydraulic puller to do this. Then put it all back, and the failed bearing was ok. There’s a cir clip some where which also needs removed. Watch out for this. Once the bearing has been replaced, put it back in reverse order.

edit: video link dead
 
Last edited:
Thanks mate, but I think mine is slightly different. I took the small nut off easily and slid the outer plate off easily, then used a 3 arm puller to remove the clutch and bearing as one from the shaft. The bearing (number 2J-DF07R10LA4X) is definitely peened into place in mine.

20131006_170451.jpg


20131006_234518.jpg


I've tried searching quite a few UK bearing suppliers for your bearing reference and mine and neither is recognised. I can't even find any to the correct measurements either.. :(

When I search on Google images, I must admit your ref bearing comes up and looks identical, but do you have a source to buy them from..?
 
Right after mucho digging, I have found a few similar part numbers for the bearings:

35BG52222DL which is a KYK bearing
DAC355222RR90 which is Koyo

They're not cheap though!!! It's actually cheaper to buy a used working air con compressor complete!! Cheapest I have found so far is £40..... My local place lists 4 of the KYKs in stock so tomorrow I shall get a price from them.
 
Got a bearing for £20 today from my local. Much better price than from the so called specialists online!!! Much less than half the price..

Anyway, the reference number on it is PC35520022CS so that's another reference for future use. Now to fit it.... :boom:
 
It's in, but can't peen it over. It's about 0.5-1mm too wide for that, which is worrying... Shall find out if it fits when I reassemble the compressor.
 
Today I refitted my propshaft complete with GKN bearings and Bell VCU, which all went according to plan. Tested on a very lumpy gravel track and got the rear wheels working. :cool:

I realigned all the wipers which were a spline or 2 out so they sit better now as well, and fitted a black leather steering wheel with audio controls, which worked straight away. I also assembled and fitted by brand new roof rack, which makes it look a lot better IMO.

Tried to fit the air con pulley. When I fitted the bearing it was about 1.5mm too wide and I couldn't peen it in. This meant that when fitted back together it wouldn't go on far enough to get the circlip back on. So that bearing doesn't work. :( I shall now just get a second hand compressor and rip the clutch off that one instead.

Another problem today. I removed the door trim to check the speaker out. The tweeter works in the driver's door, but the woofer doesn't. I was hoping the connector was off, but it was fine. Cleaned it up, jiggled it about but no, still not working. Is there a crossover somewhere? Where is the signal split for the two speakers???
 
Spent all afternoon trying to get the damned injectors out. What a **** of a job!!! Trouble is, it's becoming more and more of a problem with modern common rail diesel engines. Most CRD injectors have a service life of 100k miles, but by then they will be so coked up they won't budge! Thankfully, mine had been removed and put back back in May, before I had it, so 2 came out quite easily with a bit of leverage. The other 2 would not budge. After hours of penetrating oil and knocking with as chisel and hammer (to give a twisting action) and leverage, they finally popped out. Bent my crowbar though!!! Sent off to Lynx Diesel Specialists for reconditioning...

I used a couple of bits of wood on the fuel rail as a fulcrum and levered the bits the fuel unions go in. This gives a roughly correct direction of travel.

The washers came out no probs, and were fairly new so proof that the injectors really did come out a few months ago and the washer mating surface on the head is clean. Lots of gunge on the bores of the hole though. Any advice on best cleaning practice? Not sure I want that gunge going down in side...


Oh, and fitted the new BMW breather part too. I have fitted the EGR delete bit but the exhaust part was leaking despite plugging with plenty of exhaust paste and careful fitting of the clamp. Any ideas of the best way to seal it? I have this one:

LAND ROVER FREELANDER TD4 EGR VALVE/REPLACEMENT | eBay
 
Well I heard back from Lynx Diesels today and the 4th injector which was fitted new a couple of years ago (before I bought it) .... was the wrong one! And injector 4 had a lot of blowby from the seat which caused it to be set solid. No wonder it ran rough!! They gave me a bit of discount and are sending back 4 stock 130 injectors but one had to be charged exchange rates, but still the total for 4 with the vat was £400. Today I ordered a tool to clean/cut the seat for the injector properly to prevent blowby.

Hopefully get them back in on Friday. So while I have been waiting I have been trying to solve the issue of my compressor clutch bearing. I got the right bearing as listed all over the net yet found it too wide in practice. Well, blow me, last night i discovered there are two brands of compressor fitted to the TD4 and mine is the 'other' sort- a Sanden PXV16 8622. The PXV16 is fitted to lots of GM cars and a few Landies. And the bearing is 20mm wide instead of 22mm... So today I got the correct bearing and it is indeed the same size as what came out! Ref for PXV16 bearing is PC25520020CS. 25mm internal 52mm external 20mm depth. Tomorrow I'll swap them over and try again...

Clutch of PXV16:

169908.jpg


169910.jpg


Also got my red silicone hoses. Woohoo!
 
Spent all afternoon fiddling with the car to put my new fuel injectors back in. It's not straightforward... First you have to clean the black carbonised gunge out of the hole the injector came out of which is about an inch wide and 5 inches deep, right at the back of the engine bay. Best way was to put cotton wool down the bottom to stop crap getting in the engine, then spraying lots of carb cleaner (toluene) and scraping with screwdrivers and toothbrushes. Then remove the cotton wool using my toothed forceps (advantages of my job!!) and use a greased screwdriver to pull out any more lumps. Then use a seating tool to grind the injector seats perfectly flat at the bottom, again greased to pick up the crap and ally filings. Then repeat using WD40 type stuff and mop out with a tissue. Couldn't believe the amount of carbonised gunge in 2 of the injectors. They were the stuck ones and obviously the combustion gasses were blowing past the washer at the bottom because the seats weren't cleaned properly. So much carbon I thought Han Solo was down there. Repeat 4 times..

Then reassemble everything but with the fuel pipes on the injectors loose and turn the ignition on and off a couple of times to let any dirt come out the top in the leaking fuel.

Clean up the diesel, then reassemble everything properly..... and fire it up! Started right on the button with no hiccups! Bloody amazing!! Very slight wiff of smoke on start then nothing at all. Engine very smooth idle and revs cleanly. Left it running for 20 minutes then switched off for a cuppa. Now I'm about to take it for a test run.....:brick:
 
Time consuming, yes, but dead easy. That's why I bought this particular one as cosmetically it was sound and it had a recent clutch flywheel etc. Everything else was fairly simple IMHO. The only job so far I can't do myself on my driveway is changing the belts and all the tensioners. Tried and can't budge the top tensioner at all. Basically I got a £5000 motor (going on local prices) for £3000 (including £1500 p/x on my GT TDI Golf which was about to cost a lot of money) and by the time I have finished sorting my problems I'll have spent less than a grand easily. But I'll have a sorted Freelander with all the faults cured for a few years.
 
Yay! Drives lovely, and even with the Ronbox on a low setting (6) it is far more responsive and much smoooother! And no smoke at all. Job done! And worth doing... Tomorrow I'll check for leaks and take it on a long run to Portsmouth.
 
Great stuff.

I part ex'd my Yeti for the Freelander. Cost me £100 in total!!! The dealer paid off the finance on the Yeti.

I am well pleased with mine. Like you I have done most things you can do for preventative maintenance.

Unlike you, this is my first FL1.

I'm running my Ronbox on 10, but the switch inside the cabin is on Eco 2 (middle position.) as I filled up yesterday after having run it without it on for 2 tankfuls, just over 800 miles, it is time to switch it back on. I had never really tried driving it before fitting the Ronbox. Now it is sorted.

Auto Gearbox oil next. Local garage has looked into it and quoted me £120 all in, which is a little less than the £266 Harwoods quoted me.
 
My first tank was with dodgy injectors, even more dodgy MAF and clogged up EGR. I got 540 miles before panic filling! 116 miles into my second tank so we shall see what I get now! I'm also running mine on Diesel Rhino which has really helped on my VWs so I shall carry on using it.

What did you think of the Yeti? I'd like one in a few years when they are cheap as chips.
 
I loved the Yeti. It was excellent. Brilliant off road, let down by ground clearance.
On road it was awesome. Mine was a remapped CR140 DSG up to around 175/180, with a big brake upgrade as well. Also fitted a vRS flappy paddle MFSW. It was quick and economical.

I sold it as the lease was running out and I didn't want to have to make any more monthly payments just for the privilege of owning it.

I drive too much around London, which really hits my economy. I'm averaging 33mpg at the moment, though my best was about 40 on a long run before I sorted it all out.

Now need a decent long fun to see what it will do. I don't tend to drive faster than about 60/65 as the aerodynamics are those of a brick and it makes a big difference if you keep the speed down. The Yeti was the same. Only it would do 50mpg on a long run........at 60/65, 43 mpg at 70 mph.
 
Back
Top