The S3 Beach Bus, and so it begins......

This site contains affiliate links for which LandyZone may be compensated if you make a purchase.
Not as much done over the last few weeks as I wanted. I started off attacking the door tops but after welding on a strengthening plate to one I looked inside the rectangular section and could see they were rusting from the inside out. I’ll get some new ones as they are beyond saving. That's next pay check though.

I’ve also been trying to sort the oil leak that was getting onto the propeller shaft and spraying everywhere in the engine/transmission area. There was a strong smell of EP90 so I assumed it was the front diff pinion seal. It also appeared to be dripping from there. Another problem from the same area was a loud rattle that sounded like a thrust bearing but was dependent on road speed, not engine speed. It would strangely disappear at 23 mph.

Whilst under the truck investigating the leak I decided to wiggle the prop shaft UJs. These were fine but it became apparent the section of the shaft where the two halves slide was not so good. I could move the shaft up and down by about 5 mm. The shaft had to come off anyway if I was to replace the diff oil seal. Having removed it the noise disappeared, hurrah. One problem solved. Looks like the hole in the gaiter I mentioned earlier might have contributed to this.

Anyway, the oil leak. I got a new seal from DLR and spent a couple of hours replacing it. I had to borrow a 26mm socket off a neighbour, I warned him about the corner of the tank mount when he crawled under to have a look, then went and skewed myself on it. Still 3 months ownership and that was the first blood.

Having reassembled it all and fitted a new prop shaft from Paddocks I was miffed to find oil everywhere again. It may be that I didn’t quite seat the new seal quite right, I used the flange to drive it into the diff as I did up the large castlated nut. It could however be the oil filter is leaking onto the shaft. Whilst under there I found the rear diff seal is leaking and has sprayed EP90 onto the exhaust can, which might account for the smell. The oil level in the engine has also dropped, so now the suspicion is on a leaky oil filter. It is dripping oil, but I thought it had been sprayed by the prop shaft. Unfortunately having been breathing in various lubricants most of the afternoon I can’t tell what’s sprayed out on the two mile test drive. Had enough for today, now having a sulk. I’ll go and have another poke during the week and attack the rear diff seal.

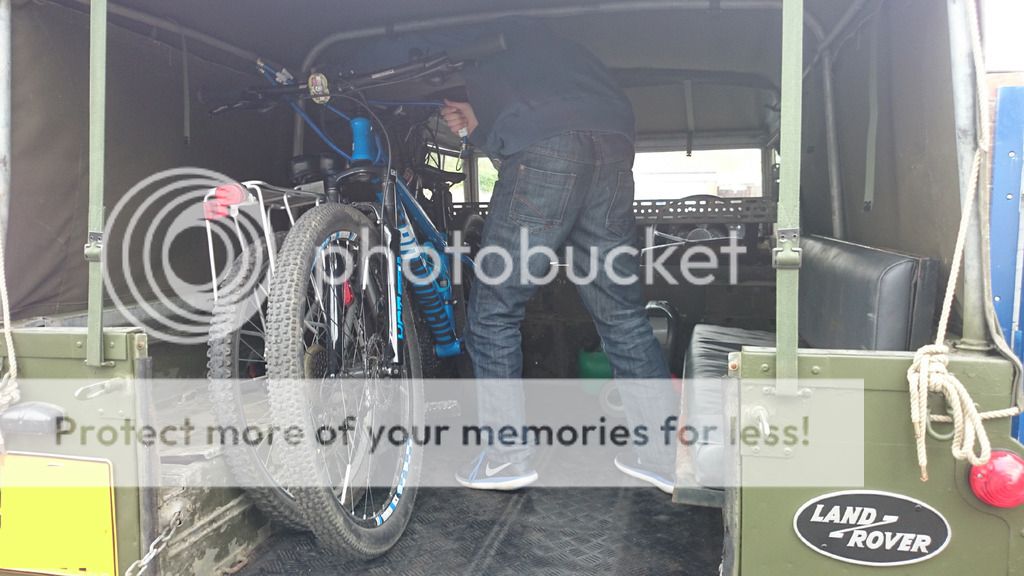
Anyway it has been earning it’s keep. One task I bought it for was carrying the mountain bikes as the lads are getting bigger and so are their mountain bikes. Getting them in the Mondeo had become an issue. It's so much easier with the Landy.


It has also been used for the first barbecue down the beach which went quite well. The speed bumps into the West Witterings car park are a bit vicious for those in the back. Not sure if parabolics would help with this.

That's all for now, I've also had to do some maintenance on the house as I was neglecting that. I'm not in as much trouble as one of the neighbours with his camper van project though.
 
Looks a lovely landy. I wouldn't worry about having perfect paintwork. Yours looks good and fresh, its just not been prepped as well as it could have. If you paint it really nice you'll just scratch it down a Greenlane. Also, if it ain't leaking its ran out ;)
 
Hello,

Not much posted recently as I have been using it over the summer, well until we had the two weeks away on the family holiday. It’s been laid up since then. However, before I go into that the progress has been,

Fitted Britpart “Deluxe” front seat backs. These make a great improvement in comfort, even the children noticed.

Further tidying of the back tub interior. I have now nearly removed all the non slip grit filled paint. It wore out the chisels I was using to strip it at an alarming rate.

The courtesy light ! Having no courtesy light was a bit of a problem when lugging the children about at night so I decided to fit a courtesy light. I also wanted some lighting in the back for use in it’s role of Beach Bus.

Looking for 24v lighting on ebay I came across some LED strip lights and I duly ordered a 5 metre roll. 2 metres down each side on the roof frames and 1 metre across the hoop at the back of the cab would be good I though. So we start by doing the metre strip across the cab roof hoop. Now, I’ve never used these before, I suppose if I’d thought about it the fact my bike lights have only three LEDS would have been a clue. We did the work in the mid day sun so weren’t fully aware of what would happen when we turned them on after night fall. When we did, bl**dy h*ll, we needed sun glasses. So, we’re not having two metres down each side in the back now. I would post a picture but photobucket want cash off me to do that now so I’m researching other methods.

We used it as a family for going out at night to watch the Perseid meteor shower. We had the roof rolled back whilst parked up on top of the hill above Goodwood, the Trundle. It worked really well. We dazzled the lairy youngsters having a noisy barbecue with our LEDs.


So, the problems with buying cars that have been laid up for a while.

25 years ago I bought a friends Mini that had been laid up for a while after a minor accident. Got it, a runner, for the princely sum of £35. Bled the brakes, repaired the damage + usual rust & got it on the road. Over the next year most of the brake seals failed at different times until I’d replaced most of them. I’m having a bit of déjà vu here with the Landy. The MOTs, or lack of, suggest it was laid up for 10 years until a few months before I got it. The following saga goes to confirming this.

Several weeks before we went away a hissing sound started around the servo. I checked the vacuum pipe but all was in order. The brakes felt the same as before so I wasn’t too concerned.

I contemplated a new servo but wasn’t entirely convinced that was the problem and I'm a bit skint with the holiday. I was aware that too much loss of vacuum could cause the engine to run lean & potentially cause damage so I decided to have a more in depth look after the holiday.

Shortly after this it started pulling to one side under hardish braking so I parked it up and concentrated on getting ready for the hols. No leaking brake fluid was evident on the tyres of the side affected at this time.

So, off we go, see the sights, chat to relatives, drink their beer & return.

After getting back I escape to the Landy. The Landy started first time, I then pulled away to remind myself which side was not working properly. I put my foot on the brake pedal and it went straight to the floor, nothing. Pumping doesn’t work. Fortunately I’m only doing 3-4 mph. Gingerly reverse back into the parking slot, look in master cylinder and find no fluid. Decide to go and have a cup of tea/sulk.

I fill the master cylinder up with fluid in the hope this will help identify the leaking side/restore brake pressure. No, it doesn’t. Foot straight to floor again but mysteriously the fluid is not going down.

This baffles me a bit. I get my 14 year old lad to help me. He’s not entirely convinced old cars are fun yet. We get the master cylinder off then remove the bonnet to get to the servo nuts. He’s undoing these whilst I get to the split pin & clevis pin for the pedal to servo joint. The split pin comes out alright but I notice someone has mangled the end of the clevis pin. It soon becomes apparent why, the clevis pin is seized solid.

Junior gets in the cab and pushes on the brake pedal and the servo shoots off leaving the pushrod still attached to the pedal. I’m a bit horrified when I find the pushrod is seized too. Every time I have been braking it must have been going up and down as well as in & out which is what probably ripped the diaphragm and lead to the air leak.

No way is the clevis pin coming out so we remove the pedal box and retreat to the shed. This all took two hours which is juniors attention span, so he goes off to shoot zombies whilst I set to the pin. I put the pedal box in the vice, soak with WD40 and whack the pushrod with a lump hammer via a lump of wood. The first few movements back and forth need most of my strength, then it eases up enough to be moved with the trolley jack handle placed over it. I repeat this until it is free to rotate with gravity.

I remove the pedal box from the vice, file the mangled end of the pin as best I can so it doesn’t interfere with the bush bearings. I rest it on a long spark plug socket, positioned over/around the large end of the clevis pin then whack the other end of the pin via a socket extension bar with the lump hammer. After a few blows it gives and I gradually drifted it out.

I then spent half an hour cleaning up the bushes and pin with emery paper. It goes back together nicely now. Hopefully I can get it all back together over the next week. I hadn’t realised how useful the Landy has been until suddenly it’s not available any more. I haven’t driven it for over a month now :-(.
 
I'm having the same problem with photobucket. I'm now using the 'upload a file' button below.
It seems really easy and I can't think why I haven't always used it.
Shame about the people at photobucket being gits. I have lost all the photos from my rebuild thread so it doesn't make much sense to new viewers. Never mind.
Good luck with the brakes.
 
I've decided to replace all the cylinders now to avoid problems later. They are not that expensive and I trash a set of pads if/when they fail and leak fluid everywhere, which gets expensive. Also, I was shearing off bleed nipples despite a good soaking with WD40. I've got to the "it happens when it happens" stage of things.
 
I found similar - after the refurb was more or less completed and I started to use it a bit more, I had ongoing brake cylinder and clutch cylinder leak issues. I only drive it at weekends and they don't like standing around, especially in the damp winter time. Since I've garaged it, I have not had a problem, even so I make a point of taking it for a run once a fortnight as a minimum to keep things in working order.
 
Hurrah, back on the road after two months. Not actually that much work for two months off but day job work is hectic at the moment and when I do have time I'm a bit knackered. So far replaced the servo, master cylinder, all four front slave cylinders, pads and most of the front brake pipes. Took me a while to get the system primed when bleeding it but we got there.

Next jobs - rear slave cylinders and do the new door tops. I also need to bring the wipers back to life as they don't like being not used for a while.

Used it for the school run for the first time this morning. The young'uns insisted on me dropping them off around the corner as they might get in trouble from their mates for "showing off".
 
Probably, though strangely they like being picked up in it after school trips. Something about being seen with the Landy in front of only a coach load of class mates is cool but not when it's the whole school.
 
The children go through stages. At first when at primary age it's great. When they are grumpy teenagers it's totally uncool and will not contemplate sitting in it (especially girls). Then when they are young people they want to be on the insurance to drive it cos it's cool. I'm at the last stage :eek::D.
 
Yes, my eldest is 14 and one of the attractions/excuses for getting the 109 is that it should be cheap insurance teaching them to drive.

Anyway here is a pic of it down the beach doing one of it's intended jobs & helping to teach the youngsters how to feed themselves !
DSC_2158.JPG
 
The Electrics !!! Random failures occur from time to time then clear themselves for no apparent reason. I think the over winter task will be a bit of a rewire.
Anyway, this weekends task is to investigate what appears to be a bit of slop in the lower mounting of the steering relay. I'd best get off this PC and on with it I suppose, after one more brew though......
 
Right, effing hell. I crawled under the front and got one of the lads to wiggle the steering. This showed about 2 mm of play at the bottom of the steering relay which would explain a lot about the vagueness of the steering. I always thought it was how Land Rovers with big knobbly tyres were. Evidently not.

So, after a bit of thought I decided I would remove the relay lower collar and investigate getting a tapered steel circular shim made up at work in exchange for some beer or running a bead of weld around the inside of the collar then machining it to fit on my small model making lathe which should just be able to cope with that. I decided that as I wanted it sorted as soon as possible I would do the welding option. This appeared simple enough. Undo four bolts and the pinch bolt for the steering arm. All bolts came out with ease but the collar remained stuck to the chassis. I think, ah it must be the waxoyl the whole underside is coated with. The trusty flat screwdriver is deployed to prise the collar off but it seems strangely stuck. I then run my finger around the edge of the collar to find some cretin has WELDED the collar in place, apparently in an effort to remove the slop.

By this time it was evident that I was not going to get the thing off and done in time before easily offended relatives turned up for the rest of the weekend so I made a temporary "L" section curved shim up from some spare steel plate. The collar could be prised away from the chassis enough to get the shim in place. All four bolts did up alright and reduced the slop considerably. Driving is now a more relaxed/enjoyable + safer experience.

Hopefully I can get a whole day on it next weekend and do the welding option. If I have time I might fit a couple of dowel pins to the chassis to locate in a couple of holes in the collar to stop the collar moving once the weld is cut off.

We also got around to fitting a courtesy light in the rear, though we could do with a bit more in the back as we were over cautious following the dazzle effect of the lights in the front.

Back to parenting duties now.

Here's a picture of the front courtesy lighting before we calmed it down a bit. You can choose any combination of red, green or blue. We thought the green matched the camo. White is now hardwired in.


19247676_10213761674624116_2046525559193056831_n.jpg
19437509_10213761675024126_759436778058889292_n.jpg
 
Last edited:
Well 5 months since the last post. I've spent a fair bit of that time using the beast. It performed well in one of it's intended tasks when I had to rescue my 12 year old and one of his mates after they had got a bit enthusiastic on their mountain bikes in the wet and cold. They went a bit too far out & got lost then had punctures. I found them in a pub warming up after getting the distress call. Nice to know his homing instincts are showing promise.

Not much progress partly due to having to have an operation that is not conducive to hauling the steering on an old truck around for a month or so after. I'll hopefully be able to use it again at the end of next week.

Anyway I have got the new door tops done. I was just going for new frames and runners then decided to get a new set of aluminium strips. I'm not sure if I saved much on buying complete glazed door tops but I have managed to keep the original glass and got to give the frames a good paint before assembling. I was also able to give them some Waxoyl treatment though I need to adapt the short Waxoyl nozzle tube with some windscreen washer tube so I can get it into all of the bottom rectangular section of the door top. I have re attached the window locks with self tappers so I can take the locks out when I have a decent tube setup made. I wanted to get the tops done and not wait about faffing with the Waxoyl.
I used the short tube to fill the frames where ever I have drilled the retaining strip screw holes. I reckon I've got about 75% coverage inside if I'm lucky. Still, better than the originals.

I couldn't find any of the glass putty so I used general purpose sealant for this task. It was a slightly messy process but use of some masking tape and sharp knife got a good result. Now I have doors that don't wobble at the top when you shut them.
Here are some pictures for you all.

First up, the state of the doors the first day I got the Land Rover
DSC_1415edie.JPG

DSC_1406edit.JPG


The new door tops from Paddocks.
IMG_1630edit.JPG


The sealant ready for the glass to go in . The small silver square in the sealant is one of the lumps of 4 mm aluminium I used to shim the glass to the correct gap to match the Aluminium spacer strips. One in each corner.
IMG_2011edit.JPG

IMG_2020edit.JPG

IMG_2026edit.JPG


Just needs the seal riveting on.
IMG_2029edit.JPG


New door top in place. Unfortunately the NATO green I have does not quite match the rest of the truck, though it's not far off it is almost, though not quite, annoying. Anyway it looks nicer for having fresh, not painted over , rubber seals.
IMG_2040edit.JPG
 
Back
Top