pardec
Active Member
- Posts
- 993
- Location
- South Manchester- North Devon
defo not epsom
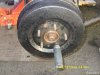
I used a wire wheel brush on an angle grinder (on low speed) to remove all the loose paint and powdery ally, then sprayed with etch primer then Tetrosyl Stone Chip http://www.eurocarparts.com/ecp/p/c...ir/stone-chip-protection/?549774241&0&cc5_712I took my spare wheel off the carrier this morning, and it looks a bit grubby underneath there.
I'm not very good at this sort of thing, but I'd like to paint it to smarten it up.
1. What black paint do you think I should use?
2. How do I prepare the area for painting? Do I need to sand it to bare metal, or can I prime it and just paint it, or do I just paint on top of what's there?
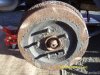
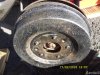
If I'm painting stuff, I'd also like to do the rear brake drum in black too. It's currently very rusty on the surface. Do I need a special type of paint to do this, or is there one that will do the brake drum AND the wheel carrier?
How do I prepare the brake drum surface? Wire brush and emery cloth?

Unless you get all the rust off the rear drums, they will rust up again inside a year.
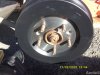
It's best to get some new replacements and paint those. Then just switch the old for new.
front & rear will be changed, I used smooth hammerite in the rear drums spray form not brush.Exactly what I did when I purchased my FL1 soon to be an FL2 so the work starts all over again
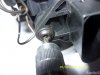
Yes, I noticed and meant to get some when I went to Halfords, but forgot as I was a bit cross because of the Torx bolt and lack of success in removing it.
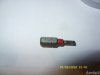
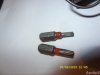
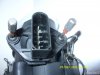
, but I have now got the K&N filter fitted.LOL, just saw this and was about to say the same. I was replacing my MAF last night so it was fresh in my memory.I was going to suggest that maybe a MAF screw had been fitted by mistake.
But at least you'll now be able to remove the MAF in future
! I had it set to 2 (High torque/Medium power), and blasted up the dual carriageway, pulled over and set it to 9 (High Torque/High power) and came back, flying past just about everything. I think 2 might be where I keep it.Welcome To LandyZone, the Land Rover Forums!
Here at LandyZone we have plenty of very knowledgable members so if you have any questions about your Land Rover or just want to connect with other Landy owners, you're in the right place.
Registering is free and easy just click here, we hope to see you on the forums soon!