1965 Series 2a Station Wagon in Holland

This site contains affiliate links for which LandyZone may be compensated if you make a purchase.
{One chicken curry scoffed}

HTS continued...

...the distortion in the panel is pretty bad after the hole filling exercise

1965 series 2a station wagon hts panel distorted1.JPG


1965 series 2a station wagon hts panel distorted2.JPG


1965 series 2a station wagon hts panel distorted3.JPG


The problem with using the HTS on thin Birmabright as a hole filling medium is that it melts at a much lower temperature than the Birmabright and that as it shrinks it pulls the panel out of shape.

Here's a little drawing I made showing what's happened

1965 series 2a station wagon hts why filling holes with hts doesnt work.JPG


I don't hold out much hope getting the panel back to a flat shape.

I'll give it a go - I have a cunning plan - but I think this HTS stuff is probably best used for other purposes.

From a cost perspective it ain't cheap either. The three sticks used so far cost me 5 quid 10p delivered. Still it is more structurally sound than using filler...
 
If you removed the backing plate before the panel had cooled and relaxed then it will warp. You could try heating the other side a bit to pull it that way. Some times we need to hot spot things if the guy making it doesn't brace it during the welding process.
 
If you removed the backing plate before the panel had cooled and relaxed then it will warp. You could try heating the other side a bit to pull it that way. Some times we need to hot spot things if the guy making it doesn't brace it during the welding process.

I didn't remove the backing plate until it was all cool - but removing it earlier would have probably resulted in the same

I probably haven't explained it very well.

In the hole filling situation there's a gap. You melt lower melting point gunk into it. The gunk cools. The gunk pulls the sides of the hole inwards. You get warping from that.

You also get warping from the effing big lumps of gunk you need to add to get the coverage over the gap. This HTS stuff balls up like Mercury on glass - rather difficult to spread it thinly. When hard, however, it ends up being harder than the parent Birmabright metal so it is a bit of a bugger to make thin again.

I'll take a few pictures of the balled up HTS stuff tomorrow so you can see the problem.

(Trying to hit it flat isn't going to work because there's no where for the excess metal to go - I'm guessing hitting it flat will make cracks)
I can't remember where but I watched a guy fill similar by spreading the blobs with a welding rod/piece of stiff wire while it cooled using a movement like a cross between a windscreen wiper and a hand whisk, needed less heat, used less filler and gave a much thinner consistent repair.
 
I can't remember where but I watched a guy fill similar by spreading the blobs with a welding rod/piece of stiff wire while it cooled using a movement like a cross between a windscreen wiper and a hand whisk, needed less heat, used less filler and gave a much thinner consistent repair.
I tried something similar whilst doing it the first time. I obviously need more practice!

There are also wooden paddles available for lead loading (old school hot rod body work) to pat and smooth. I might be able to botch it a bit smoother but my over all impression of this HTS stuff is that it will probably be best if I use it for other things.
 
Flipping back to the front axle today - need to get this finished as I've been tripping over it in the green house spray booth for ages now.

Cleaning out the muck has not been easy. I think letting it sit for a few months has actually helped though. "Das Dasty is zer gut" household degreaser seemed to have helped collect sand and muck and dust which has dried out the gunk. Good oh!

1965-series-2a-station-wagon-using-household-degreaser-to-clean-axle-casing1-jpg.104442


Still I needed to get more of the gunk out.

I used a speedbore extension on the end of a drill wire brush attachment

1965 series 2a station wagon front axle cleaning1.JPG


Outside was angle grinder and wire brush as usual

1965 series 2a station wagon front axle cleaning2.JPG


The bits that are easy to reach are now clean

1965 series 2a station wagon front axle cleaning3.JPG


Most parts of the axle legs are clean too.

1965 series 2a station wagon front axle cleaning4.JPG


It isn't, however, clean enough to apply the Glyptal engine paint.

I'm just going to have to let go on this one I guess. The Glyptal is just going to peel off. I'm going to grease up the inside of the axle housing and then try a few oil changes to see how it goes.

If that doesn't work then I'll be getting a replacement front axle.

####

So onwards and upwards - masking time!

(I love masking - don't know why - most people find it tedious)

1965 series 2a station wagon front axle masking1.JPG


1965 series 2a station wagon front axle masking2.JPG


The casing is now soaking in Brunox.
 
Those wheels aren't completely buggered, not even a little bit!

...
I went back and had a better look at the wheels.

Four of them are at the sand blasters - blinking expensive business 100 euros for four...

...pick 'em up tomorrow...

...anyway I've 'ad a go with an angle grinder and a bit of paint stripper on another one that wasn't looking so great and whaddya know

(you were right again)

1965 series 2a station wagon road wheel strip1.JPG


That's gonna come good.


#########

I've found quite a few markings on this wheel that might help those googling for "Series Land Rover steel wheel marking ID"

I don't know what this means "ROUK1010"

1965 series 2a station wagon road wheel markings1.JPG


This bit 55FX16X33
Probably means 55 => 5.5 inches wheel width

16 - 16 inch wheel

33 is probably the offset in mm => nice mix of units! 33mm is pretty much the same as 1, 5/16 inches

1965 series 2a station wagon road wheel markings2.JPG


FV738903 is a military part number

According to google "FV" is fighting vehicle - so putting these boots on the Land Rover will be a bit like putting on a pair of Doc Martins (oi Oi OI)

1965 series 2a station wagon road wheel markings3.JPG


569690 is the normal part number

Corresponds to information in the parts book which says it is a 16 inch 109" road wheel (optional on 88") with the 1, 5/16" offset

1965 series 2a station wagon road wheel markings4.JPG


One other bit of information that I can find is this little "FC"

I don't know what it means - could be a quality control thing. (Probably not "forward control")

1965 series 2a station wagon road wheel markings5.JPG


Oh by the way these are not the original wheels for my 1965 series 2a station wagon - just in case the presence of the military numbers isn't clear.

I'll post up some markings of the original ones tomorrow once they get back from the sand blasting.
 
I went back and had a better look at the wheels.

Four of them are at the sand blasters - blinking expensive business 100 euros for four...

...pick 'em up tomorrow...

...anyway I've 'ad a go with an angle grinder and a bit of paint stripper on another one that wasn't looking so great and whaddya know

(you were right again)

View attachment 108585

That's gonna come good.


#########

I've found quite a few markings on this wheel that might help those googling for "Series Land Rover steel wheel marking ID"

I don't know what this means "ROUK1010"

View attachment 108586

This bit 55FX16X33
Probably means 55 => 5.5 inches wheel width

16 - 16 inch wheel

33 is probably the offset in mm => nice mix of units! 33mm is pretty much the same as 1, 5/16 inches

View attachment 108587

FV738903 is a military part number

According to google "FV" is fighting vehicle - so putting these boots on the Land Rover will be a bit like putting on a pair of Doc Martins (oi Oi OI)

View attachment 108588

569690 is the normal part number

Corresponds to information in the parts book which says it is a 16 inch 109" road wheel (optional on 88") with the 1, 5/16" offset

View attachment 108589

One other bit of information that I can find is this little "FC"

I don't know what it means - could be a quality control thing. (Probably not "forward control")

View attachment 108590

Oh by the way these are not the original wheels for my 1965 series 2a station wagon - just in case the presence of the military numbers isn't clear.

I'll post up some markings of the original ones tomorrow once they get back from the sand blasting.

I found another marking, this time on the inner side of the wheel (the others are on the front / outer side)

1965 series 2a station wagon road wheel markings6.JPG


This time a "4180" (no idea what that's for) and a "RUK 5 5F" 5.5 inches is the width of the wheel...

...may be this information is more meaningful to others...

...may be this information is useful to others...
 
Well some stuff is in the Brunox anti-rust stuff today

[Drum roll]

1X Front axle

1965 series 2a station wagon front axle in brunox.JPG


1 X Road wheel

1965 series 2a station wagon road wheel in brunox.JPG


Not a massive amount of stuff done today - but you've gorra keep on chipping away at it all

I must say the 25 euros per wheel sand blasting fees aren't looking as bad as they did when I took the wheels to the sand blaster. I guess it took a solid two hours of scrubbing and paint stripping to get that one wheel in a sort of paint ready state. Back to the {time poor} : {cash rich} ratio
 
I pay £50/hour for blasting, and that's in flipping Surrey where we have so much money that we don't know what to do with it. I had five wheels and some other bits done for £40.

Edit. Just realised that I do actually cross into West Sussex for the blaster. West Sussex is world-renowned as the ghetto of the South.

Autoblast at Dial Post if anyone's interested. Very grumpy chap, but good and cheap.
 
And I meant to comment on your alu brazing rod attempt. I didn't say anything at the time, but I bought some a few years ago and tried to repair a garden chair as a first shot. I thought your description as 'like mercury' was particularly accurate. I gave up, thinking maybe it was my technique, but it would seem not.
 
A lot of people don't realise how expensive shot blasting can be, but it does clean the metal like nothing else.

I find the cost of employing people in Holland to do something for you is at least twice the price of the rates in South East England.

I pay £50/hour for blasting, and that's in flipping Surrey where we have so much money that we don't know what to do with it. I had five wheels and some other bits done for £40.

Edit. Just realised that I do actually cross into West Sussex for the blaster. West Sussex is world-renowned as the ghetto of the South.

Autoblast at Dial Post if anyone's interested. Very grumpy chap, but good and cheap.

Yeah 40 quid an hour is about what I'd like to pay. I guess the four wheels I've just had done took about an hour to do. So 100 euros an hour is a bit cher for me...
 
And I meant to comment on your alu brazing rod attempt. I didn't say anything at the time, but I bought some a few years ago and tried to repair a garden chair as a first shot. I thought your description as 'like mercury' was particularly accurate. I gave up, thinking maybe it was my technique, but it would seem not.
Because of dissimilar metals I guess you're always gonna get a bit of a balling effect - you get that when soldering too sometimes (if you put too much on). The putting too much on is as always a bit of a problem and for the case of filling holes there is little you can do about it as you have to get it to spread...

...I reckon it might come good as a sort of jointing cement on rips and tears - I'll try that some other time (as I have a few of them!)
 
Dag nam it - ran out of Ferpox primer again.

(Pain in the arse or what?)

Anyway...

...So I remembered a couple of cans of Corroless number 1 I've got hidden away (in the box at the back under the shelf behind the piles of ****)

I quickly remembered why these spray cans were hidden away - the bloody things don't actually spray - they sputter. Whilst Corroless has a really good reputation as a good rust preventing paint their spray cans are total ham shank - a right pain in the arse to work with. There's no excuse for it - modern spray can technology has really come on in the last few years - there should NOT be any need to

1) Press down hard so it looks like your finger bone is going to burst through your finger nail

2) Don't stop spraying for any reason - shake the can vigorously whilst spraying

3) Soak the hole in the top of the can and the spray button in brake cleaner and then fit the spray can cap to stop the brake cleaner from evaporating

1965 series 2a station wagon road wheel in corroless.JPG


#####

The markings on the original wheels (that have come back from the sand blasters) are not as prolific as the later type.

I've only found two so far

Part number is 272309

1965 series 2a station wagon original road wheel markings1.JPG


And a "764" - I haven't a clue what that's for...

1965 series 2a station wagon original road wheel markings2.JPG
 
Is that not. '/64'. As in 1964 year build-date? .....perhaps.
I've just had a quick read through the James Taylor book and he states that all of the series 2 wheels have a date stamped on the outer surface. So that's that then - definitely "/64" - 1964 - fits in nicely with the originality of the vehicle. (Yet another "originality tick")

The Taylor book also mentions that these wheels (part number 272309) have a slightly smaller offset of an inch and three quarters (1 3/4") - this is confirmed by the parts catalogue

From about 1968 the 109" chassis got the larger offset (1 5/16") as shown above. Jame Taylor book states, however, a different fighting vehicle part number FV607510 which were used until about 1970 when they were upgraded (probably to the type I've shown above) with slightly thicker steel (8SWG from 9SWG).

So I think I need to get the scales out and weigh some wheels.

Which are lighter? Which are heavier?


(Where's me anorak)
 
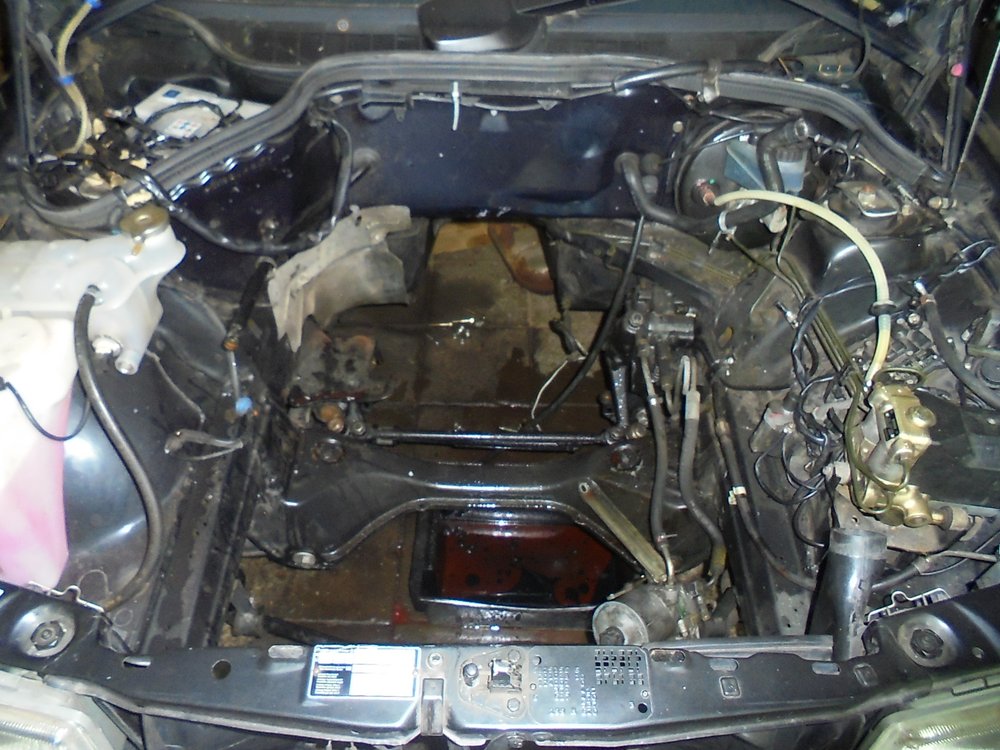
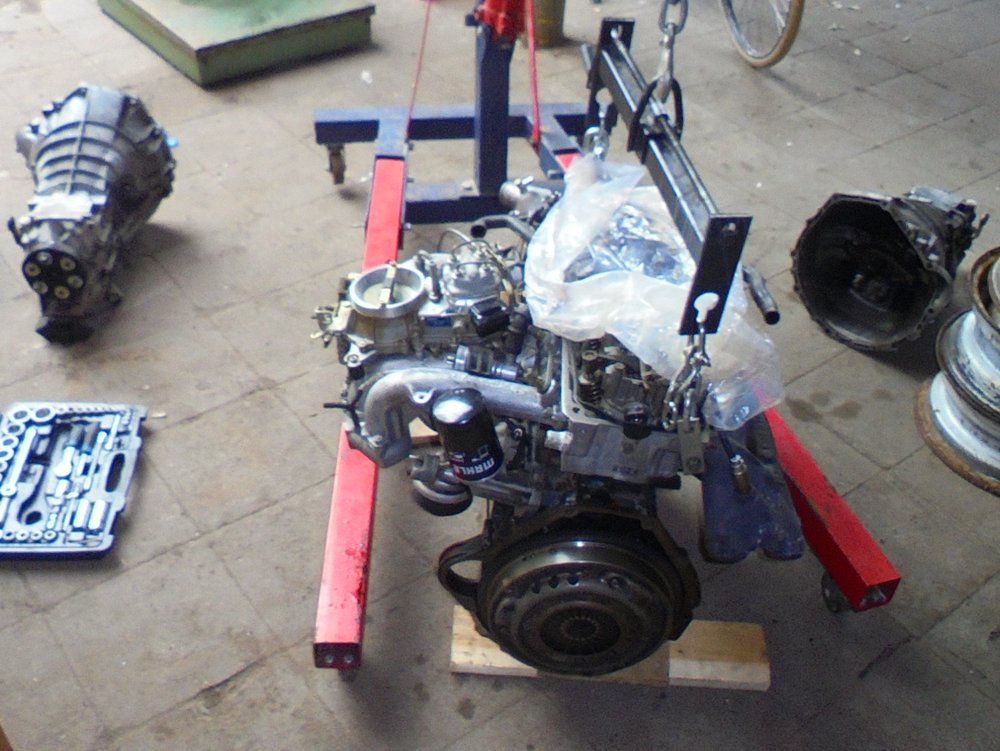
(busy with other stuff again => Mercedes =>

138796d1475956179-achtung-das-schweinhund-baby-benz-thread-w201_018-engine-out-again1.jpg


138797d1475956179-achtung-das-schweinhund-baby-benz-thread-w201_018-engine-out-again2.jpg
)

But have managed to start the weighing of wheels

So far

(post 1968 thicker steel 109" rims) part number 569690 are coming in at 12kg a piece
(pre 1968 thinner gauge steel 109" rims) part number 272309 are coming in at 11.3 kg a piece

{Disclaimer:- measured on Landlady's bathroom scales - could be a few points of a kg out but should be fairly close to reality)
 
Still struggling with painting the wheels.

Timing is everything - eastern cold has crept this way and the temperature is for most of the time under 10 degrees C - been like this for a few days now.

Paint won't dry quickly so I'm spraying outside and then bringing it inside to dry. Not ideal - as you may imagine mistakes keep happening during transportation - lumps of metal seem to take for ages to get back up to room temperature - and inside doesn't have enough air flow to speed drying times...

...still I have to get some paint on the wheels otherwise I'll have to remove surface rust from sand blasted items => Now that really is a ****er if it happens...
 
Back
Top