Disco 1 Glutton for Punishment - got myself another 300 tdi......

This site contains affiliate links for which LandyZone may be compensated if you make a purchase.

StuRox

Well-Known Member
Posts
1,806
Location
Nr Bath
Maybe a glutton for punishment, but have bought another 300 tdi!!

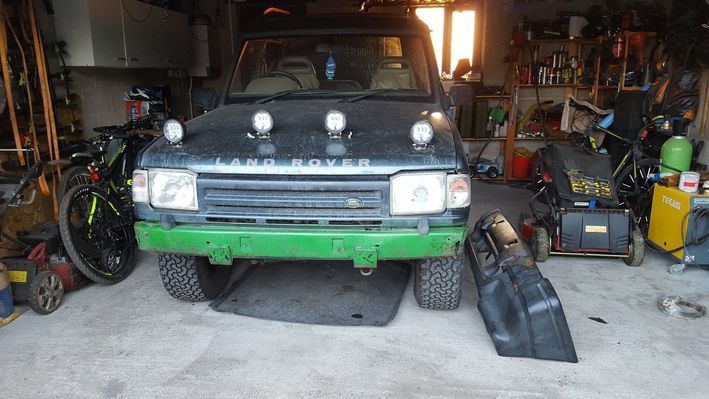
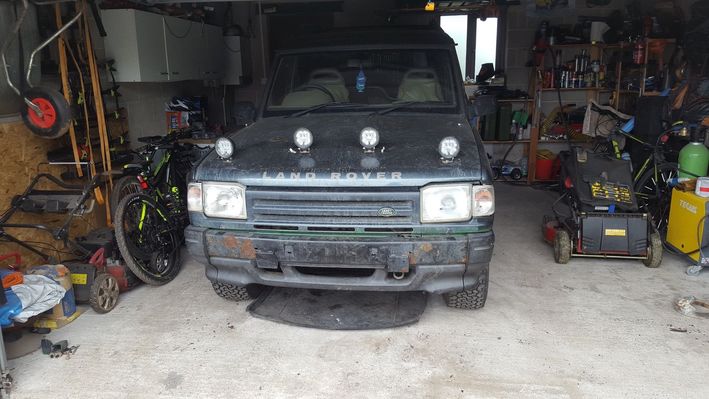
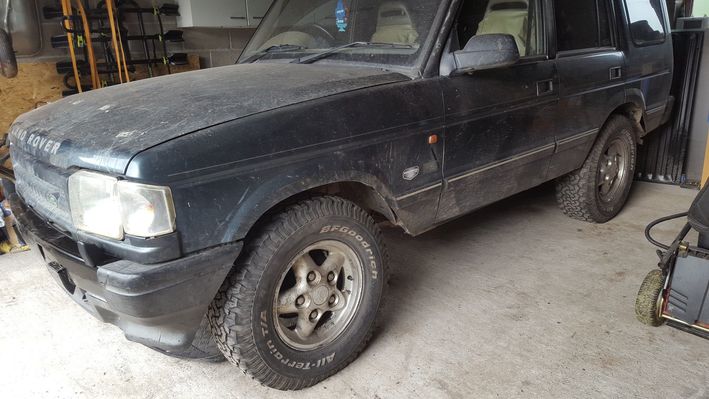
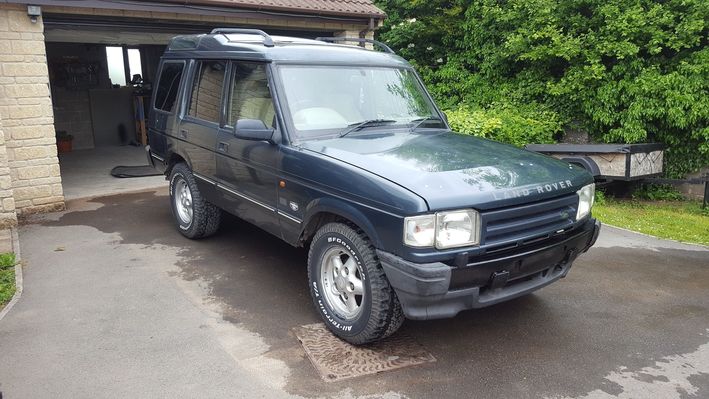
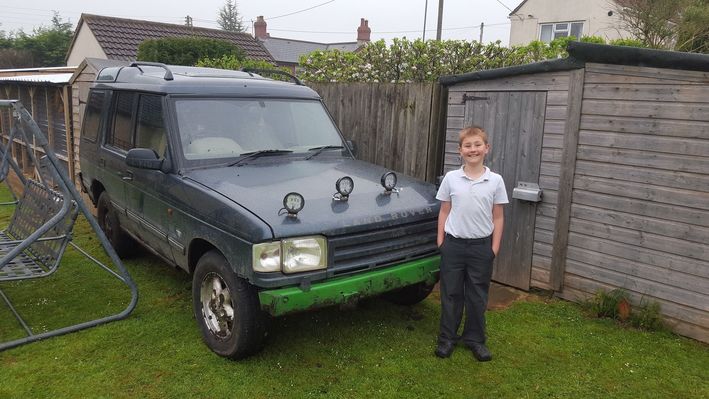
I thought I would get a manual version, so I can start to teach my son how to drive – well he is coming up to 10 years old! Found a 1995 ES 300 Tdi manual at a farm.

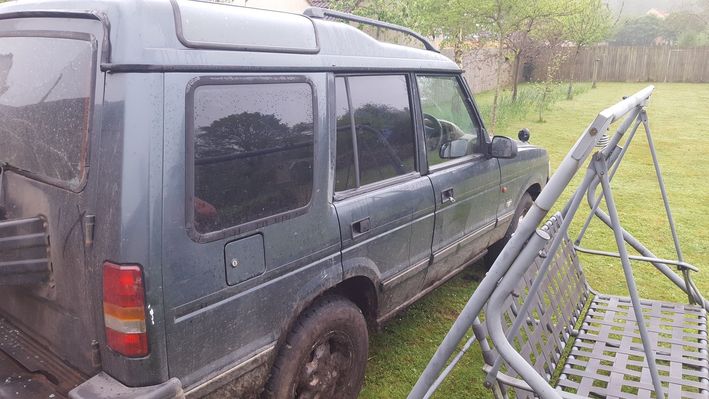
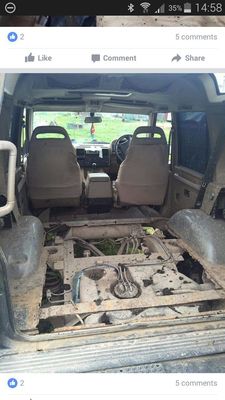
Structure and chassis is great, engine and gearbox spot on - pulls like a train. Cosmetically.....needs help, but that ain't a problem, as got 7 years before my lad can legally drive to sort it, and its a good project for us to both work on, so he gets a good knowledge and foundation on the car and mechanics too

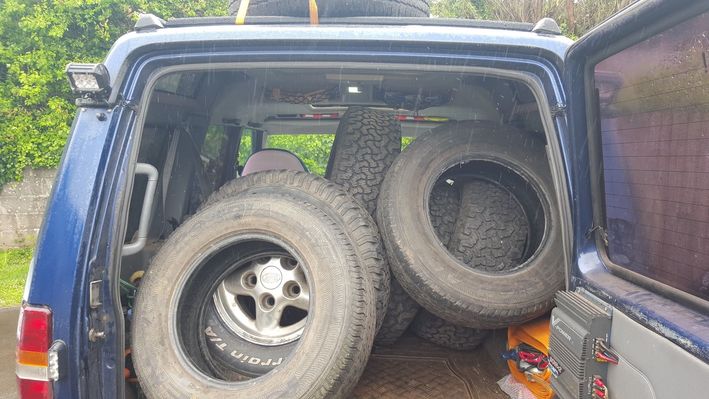
All for well under budget too - a steal at £360.00 - I knew all those episodes of watching 'Wheeler Dealer' would come in handy. Could have spent that easily on an xbox or the likes. As it stands with the parts (boot floor, side boot panels, rear door, rear ladder, 2x alloy wheels with tyres, front grill, drivers door handle) and steel etc I have just bought, owes me £550.00, which I think is still a bargain!

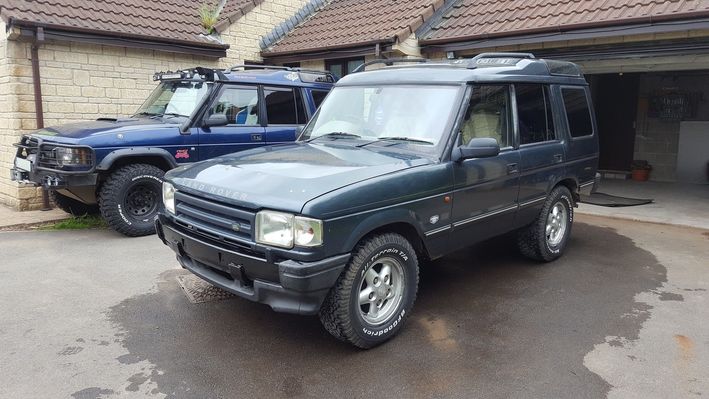
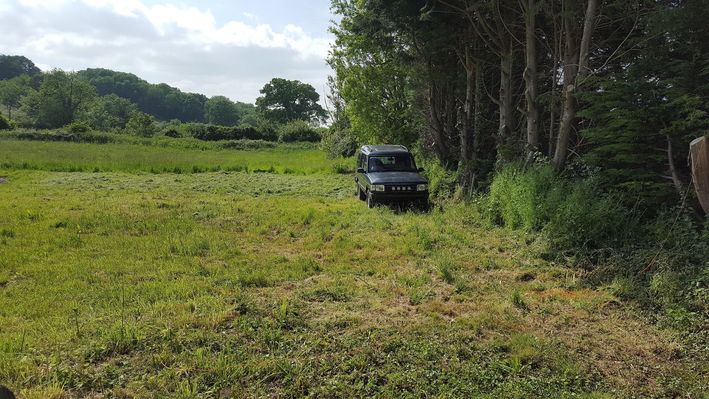
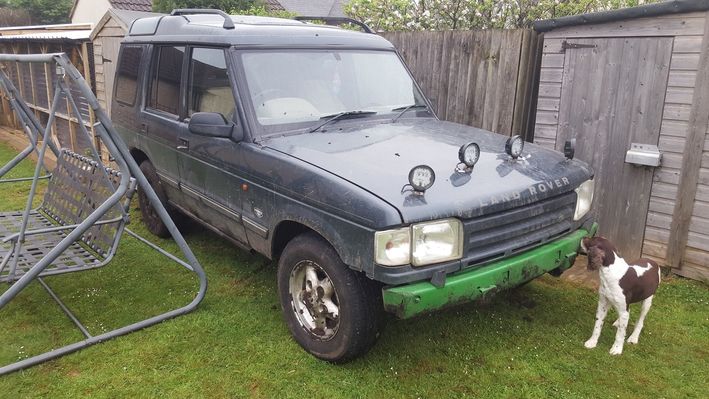
Of course the dog had to check it out first, since its parked in the garden...

normal_20160510_073838.jpg

normal_20160510_073857.jpg

normal_20160510_073915.jpg

and my lad, chuffed to bits
normal_20160510_075519.jpg

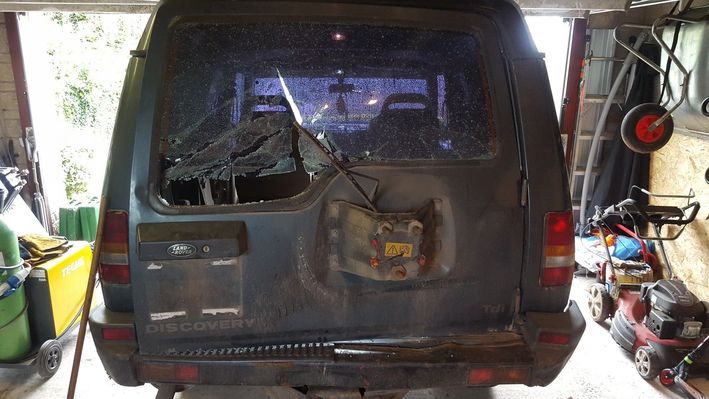
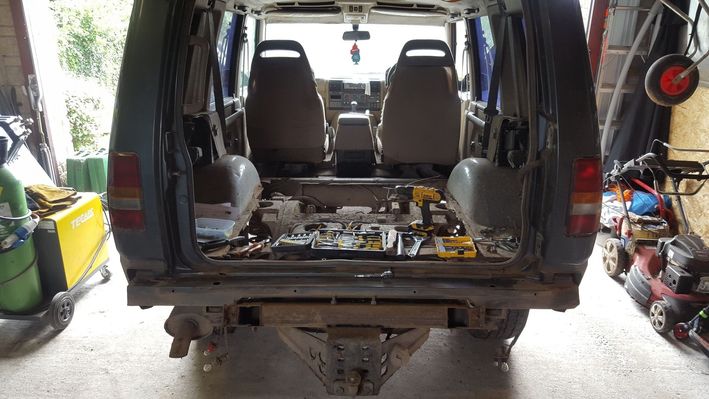
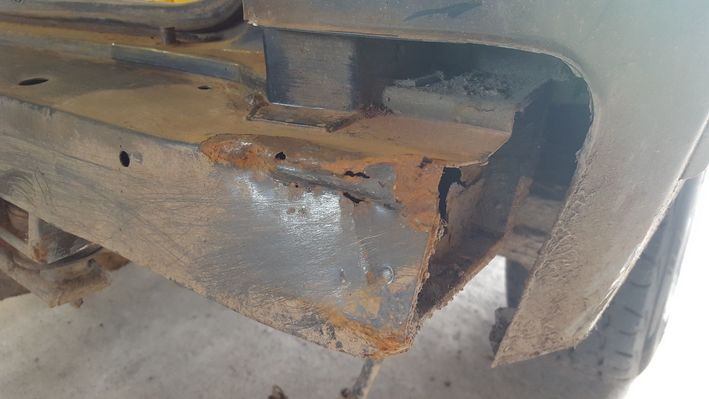
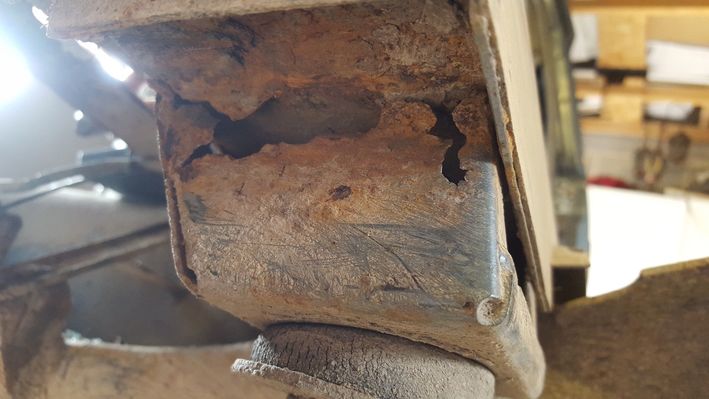
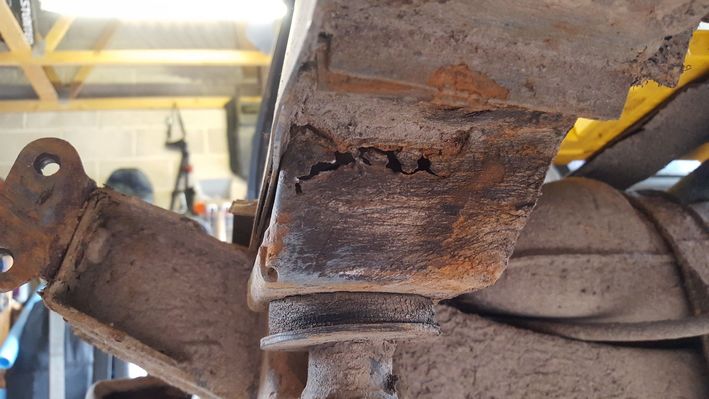
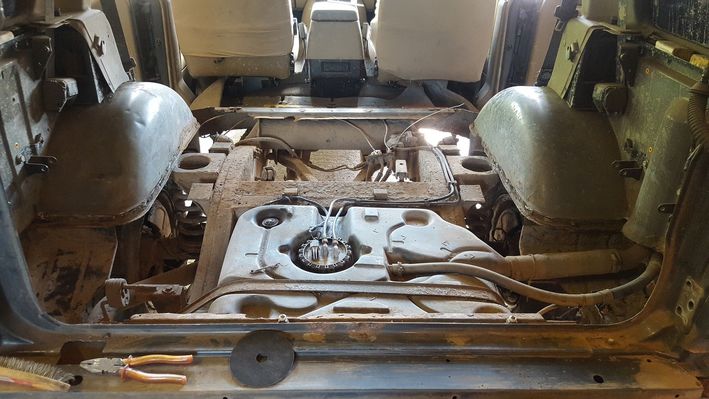
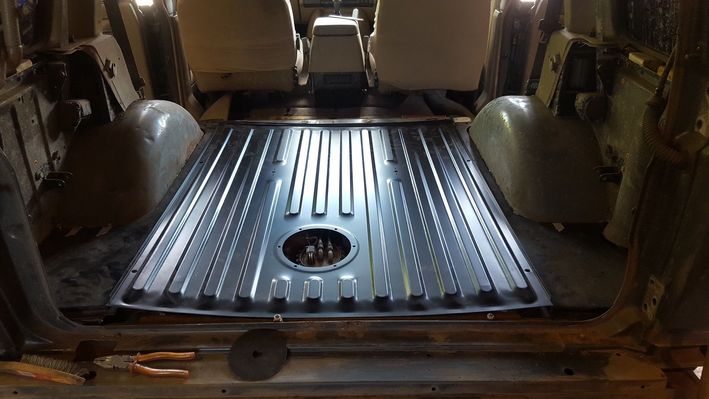
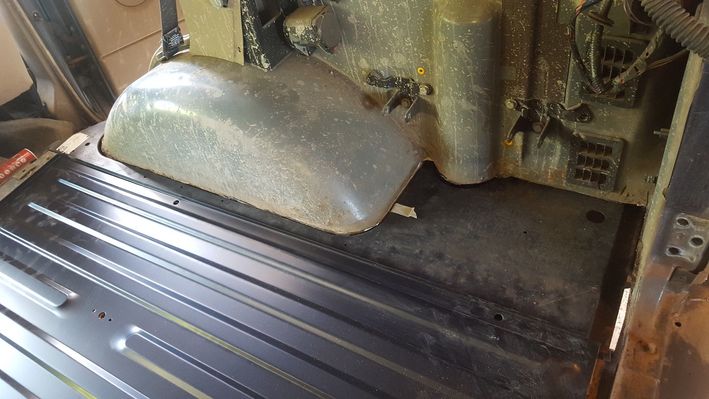
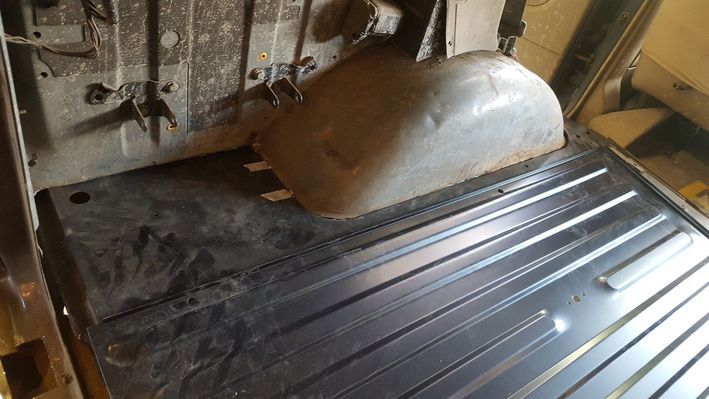
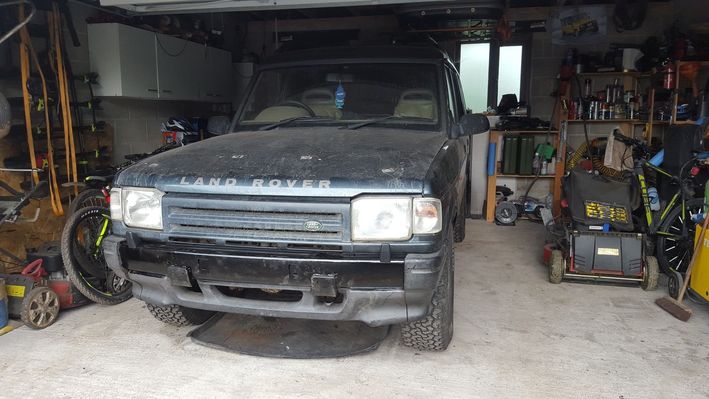
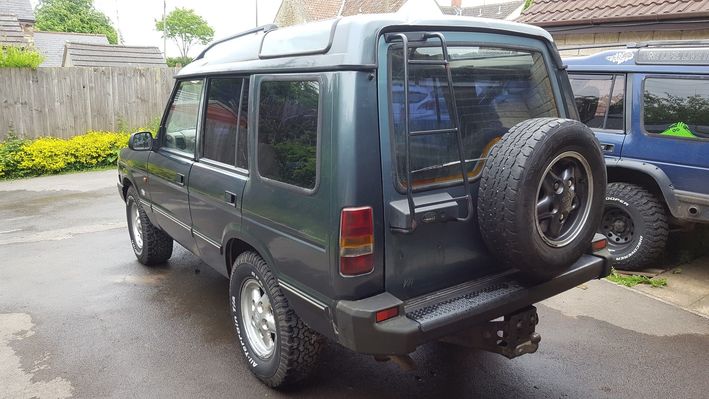
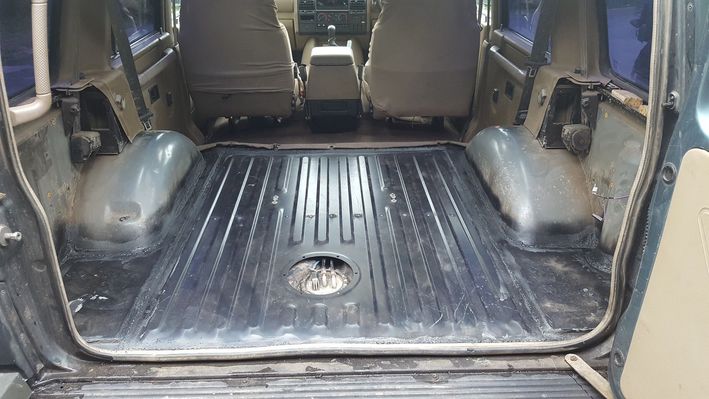
Only real rust is in the back, so boot floor out, just need to get the boot sides out for the new parts to be welded in and a new back door to be fitted as the window is broken on the current one, which will then make it, hopefully, watertight, or as watertight as you can get a disco…..
normal_IMG-20160509-WA0011.jpg

So a build up thread will be started.....
 
Last edited:
All your panels look reasonable, but, in case im mistaken....

I have one that i think is the same colour. Im going to take what i want off it (engine, gearbox, dash, door internals, axels) and then, i suspect, just give (as in free) the rest of it away (as a job lot, collection only).

Im not a million miles away, so it may (or may not) be of interest.
 
I will be after all of the rear interior at some point, rear seats, middle seat belts, boot side interiors etc, but that is a while away, but let me know what you have ;)

front seats are shot, but will be looking at bucket seats to replace them.
 
I will be after all of the rear interior at some point, rear seats, middle seat belts, boot side interiors etc, but that is a while away, but let me know what you have ;)

front seats are shot, but will be looking at bucket seats to replace them.

Interior will be left in, less rear carpet - but, again, it will be as a job lot. If you want to pick up the lot, and weigh in what you dont want on the way home, that's no concern of mine, but you will need a trailer to pick up the whole lot in one go.

I could just call up a scrap yard, and im sure they would pick it up for free, but i would rather someone had some use out of it.
 
I don't have access to a trailer to pick it up, sorry, so as it narks me to hell to say - will have to decline....as sounds ideal for parts for this one....
 
Well, the strip down started at the weekend, to see exactly what I have bought.

First job, strip down the rear, and take off the smashed back door and bumper....

normal_20160514_083822.jpg


normal_20160514_100624.jpg


Once off, wasn't too bad underneath, a few parts that need to be patched and welded, but nothing major, and the rear body mounts need a bit of help, but nothing I wasn't expecting....

normal_20160514_100631.jpg


normal_20160514_100649.jpg


normal_20160514_100637.jpg


normal_20160514_100645.jpg
T
then onto the boot, to cut out the whole of the floor ready for the new panels to be fitted...
normal_20160514_122823.jpg


normal_20160514_122828.jpg


normal_20160514_122832.jpg


And test fit with the panels....
normal_20160514_122721.jpg

normal_20160514_122726.jpg


normal_20160514_122730.jpg

Whilst the boot was cut out noticed that the bushes had gone in the rear shocks, so bush kit on order, but apart from that, quite happy with what I 'never' found :)

Have a few more bits to cut out ready before I start the job of welding it all up!

More pics of the restoration will follow......
 
Got a bit more done yesterday, as all the back and body mounts are now welded up and undersealed....

normal_20160516_172830.jpg


Got the rear bumper and trim back on, and after a lot of swearing got the rear door bolted on (a very hard job when working solo!) , but now have to mess on getting it all aligned on the hinges so it will close....so gave up for the day at that point!

Just waiting for the suspension bushes to land as easier to change them whilst there is no boot floor before I start to weld up that.
 
Well, have been busy working away, and slowly getting there. New bushes fitted to the rear shocks and new wheel bearing fitted at the front. Might need to change the swivel bearing on the passenger side, which is not a job I am looking forward to, as not done that before.

Also, as I switched my tyres to new mud tyres, my BFG's have gone onto these alloys ready to be fitted, so a camel cut was required ready ;)

normal_20160521_121459.jpg
 
Well, the strip down started at the weekend, to see exactly what I have bought.

First job, strip down the rear, and take off the smashed back door and bumper....

normal_20160514_083822.jpg


normal_20160514_100624.jpg


Once off, wasn't too bad underneath, a few parts that need to be patched and welded, but nothing major, and the rear body mounts need a bit of help, but nothing I wasn't expecting....

normal_20160514_100631.jpg


normal_20160514_100649.jpg


normal_20160514_100637.jpg


normal_20160514_100645.jpg
T
then onto the boot, to cut out the whole of the floor ready for the new panels to be fitted...
normal_20160514_122823.jpg


normal_20160514_122828.jpg


normal_20160514_122832.jpg


And test fit with the panels....
normal_20160514_122721.jpg

normal_20160514_122726.jpg


normal_20160514_122730.jpg

Whilst the boot was cut out noticed that the bushes had gone in the rear shocks, so bush kit on order, but apart from that, quite happy with what I 'never' found :)

Have a few more bits to cut out ready before I start the job of welding it all up!

More pics of the restoration will follow......
Hi
Could you tell me please where you got the boot floor side panels from I have not seen them advertised and the look like a good time saver.

Cheers

David
 
Just got them from my local land rover parts man, but would imagine they are available from any online shop...paddocks etc and even on fleabay....just search for boot floor and loads come up. They are expensive for what you get but saves a load of time making up intricate panels
 
Well, have been doing little bits now and then when I have some free time, and have started to weld up the rear boot floor, but managed to get a front bumper and a diff guard yesterday for next to nothing, so front bumper was straight on, just need to sand it down to remove the surface rust and give it a new coat of paint....

normal_20160524_204728.jpg


looking much better in my opinion......

normal_20160525_081653.jpg
 
So are you doing it up for offroading or not. Not to come across the wrong way. But I prefer the other one. Don't like the look of standard item. Your car, your choice though.

Are you going to keep the spot lights on the bonnet?
 
The bumper that was on was the original Land Rover bumper without the valance and also the plastic corners, but it was so rusted through with holes it was beyond saving, so managed to get this one that happened to be complete with the corners and lower valance.

Initially it will be just driving around my fields, nothing extreme, so will only be making the cuts on the side corners (camel cut) to stop any rubbing against the bigger tyres fitted. Should my lad want to change it in the future, ie remove the valance then he can decide then, chances are a winch bumper will probably go on ;) but that will be out of his pocket, not mine......I ideally wanted to make it pretty much as standard as I could whilst fitting the upgraded tyres etc so then my lad has a blank canvas to how he wants it to look, and not me moulding it into something I have created - if that makes sense!

And the lights on the bonnet are definitely coming off! Will be making a light bar to fit onto the bumper for them to sit on, or I have a couple of 8" spots in the garage that might go on the bumper with 2 of the LED's either side and then put 2 of the LED's on the rear for reversing/work lights, like I have done on mine :cool:
 
A bit more work done, bumper sanded down and re-painted with new Headlight Washers fitted (as they didn't survive the transplant from one bumper to the other) and the LED spots removed from the bonnet...

normal_20160527_081310.jpg


And a pic showing the BFG's A/T's fitted looking snug ;)

normal_20160527_081319.jpg


Also fitted some new bump stops after noticing that the rears had no rubber on them.

Have got a day off on Tuesday so am hoping to get the boot finished and welded up, as that is now my last job before it can come out of the garage for a good clean and then start to have fun in the field getting it mucky :cool:

Has been quite a slog over the last 3 weeks stripping it down and making sure everything is working fine, but she is now looking very good....might even switch it for mine!
 
Well, just over 3 weeks, and she is done, all welded up and fully serviced ready to go.....

normal_20160531_143310.jpg


normal_20160531_143320.jpg


normal_20160531_143333.jpg


normal_20160531_143343.jpg


All in all, she owes me just over £670 which includes the purchase price and all the parts I have needed, which for a solid disco isn't too bad :cool:
 
Disco is now started to get some 'extra's' as I had the LED spots from the bonnet, so decided to make up a light bar for the front bumper.

I used some 3mm angle I had left over to make the frame, and got a slight offset with the sides so that it came out away from the grill, and welded on some bolts to help keep it in position on the bumper whilst I welded it on.

normal_20160603_124225.jpg

normal_20160603_124229.jpg


normal_20160603_124245.jpg

normal_20160603_130440.jpg


normal_20160603_130426.jpg


normal_20160603_151148.jpg


and in its new home...

normal_20160603_161009.jpg


My lad had his first drive at the weekend, and really pleased with him. Stalled a few times, which is to be expected, but on the whole, think he is better than some of the drivers we see on our roads today!
 
Looking good, I would have ripped those lights off the bonnet before I even drove it home. Some people have no taste. My youngest lad (11) is really interested in a disco I just bought. Not sure if he will stay interested, he's never really bothered with the 110. Sadly nowhere for him to drive it though.
 
Well, I decided to take the old girl in for a MOT today, to see how I have done in my re-build, and really chuffed with the result (even though it was a fail)...

Test date: 11 October 2016
Test Result: Fail
Odometer reading: 143,235 miles

Reason(s) for failure:
offside rear Anti-roll bar linkage has excessive play in a ball joint (2.4.G.2)

Advisory notice item(s):
centre exhaust clamp loose

An easy fix, as asked the garage to whack on a new ball joint to get its ticket, and will sort out the '1' advisory with the welder when I get her back, as I was expecting a full list of things wrong :D

Less wrong with it than my 'proper' one :rolleyes:
 
Back
Top