rustyrhinos
Well-Known Member
- Posts
- 2,625
- Location
- Stamford, Lincs
Thought some people might want to see our Sankey "expedition" trailer build for those considering doing it. We are not the type to make things fancy and we want to keep it on a low budget as possible so we are fabricating everything we can ourselves - soo perhaps it might help/inspire a few others! If it shows any interest, I will keep the thread updated as progress is made.
It's for the Range Rover, not the Series - a few reasons why they want to go for a trailer - of course to store all the equipment, jerry cans, camping stuff, spares, etc etc...but also they want a roof tent...but don't really want it on the Range Rover as for a start it means taking it on and off the rack when it's not in use...and actually getting a roof rack which doesn't flap about in the breeze is proving a little difficult. Also means that everything is in a contained unit - so when it comes to trip time (they also do quite a lot of camping in the UK), quick checkover, hitch up and off you go!
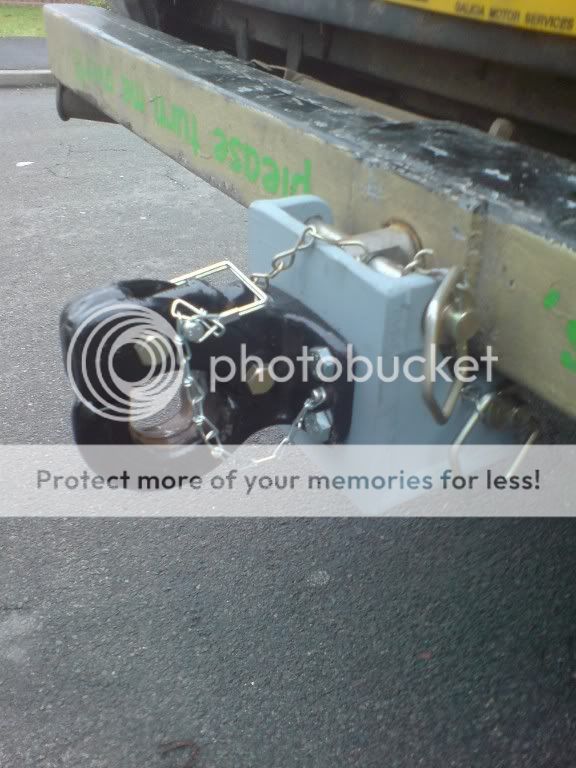
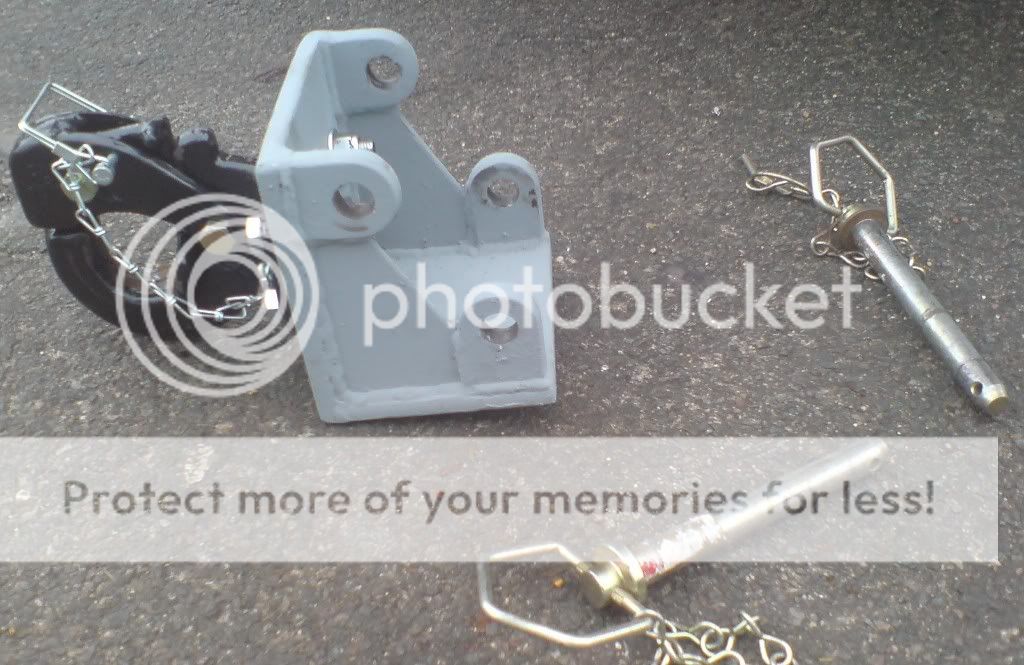
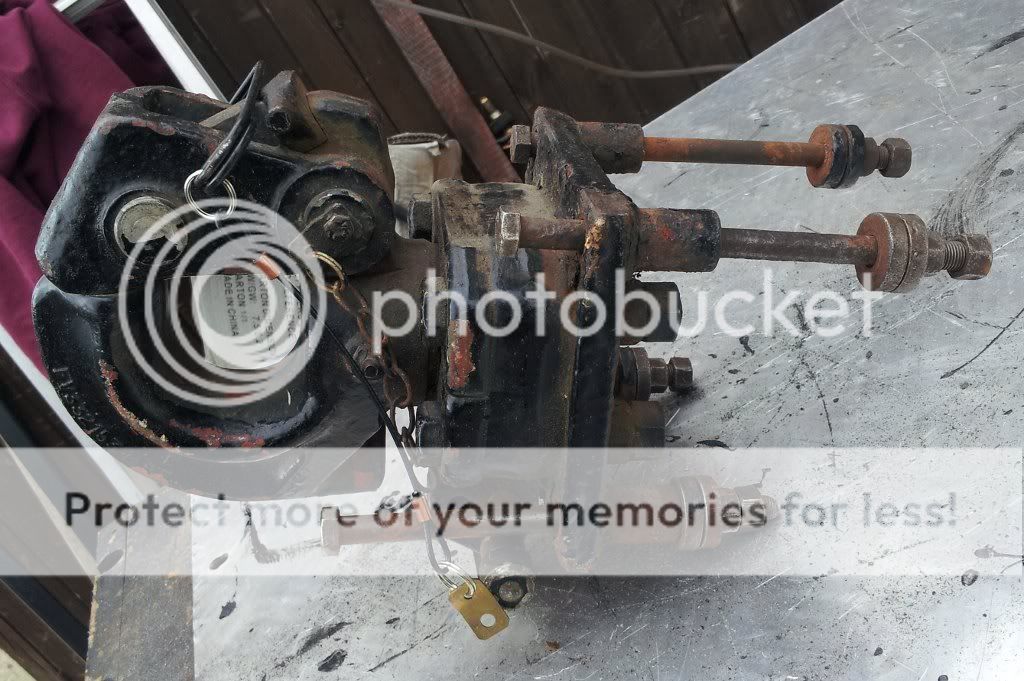
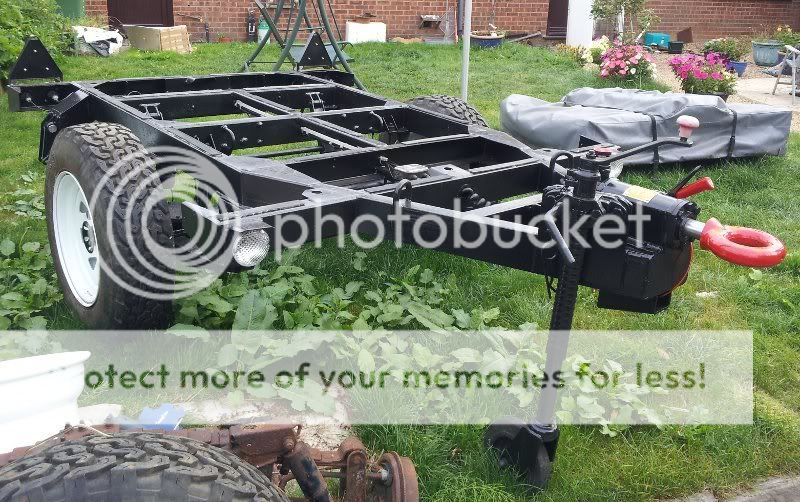
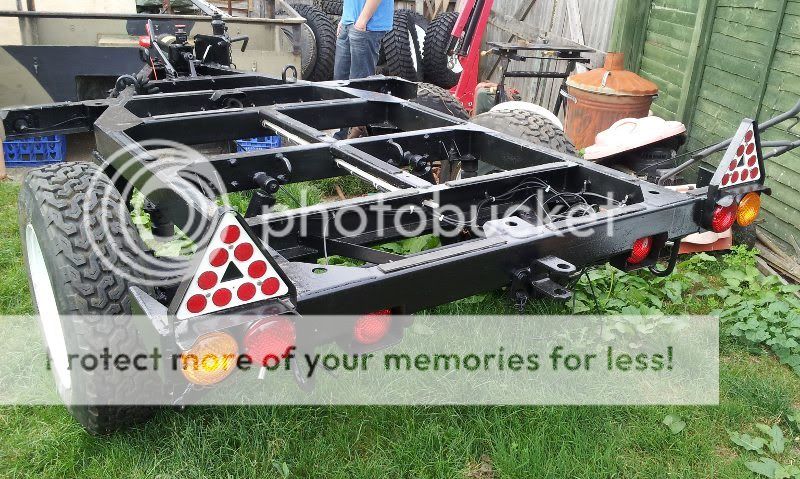
We actually swapped the trailer for a very tired Series 1 chassis and a few Series 1 bits - we were never going to build the Series 1 in reality so made sense to get rid of it. So the first job was to strip everrything apart and replace most of the mechanical bits - hitch, brakes, electrics, lights (NAS lamps) etc. Chassis was in very good fettle and that was mainly clean up, inspect and paint:
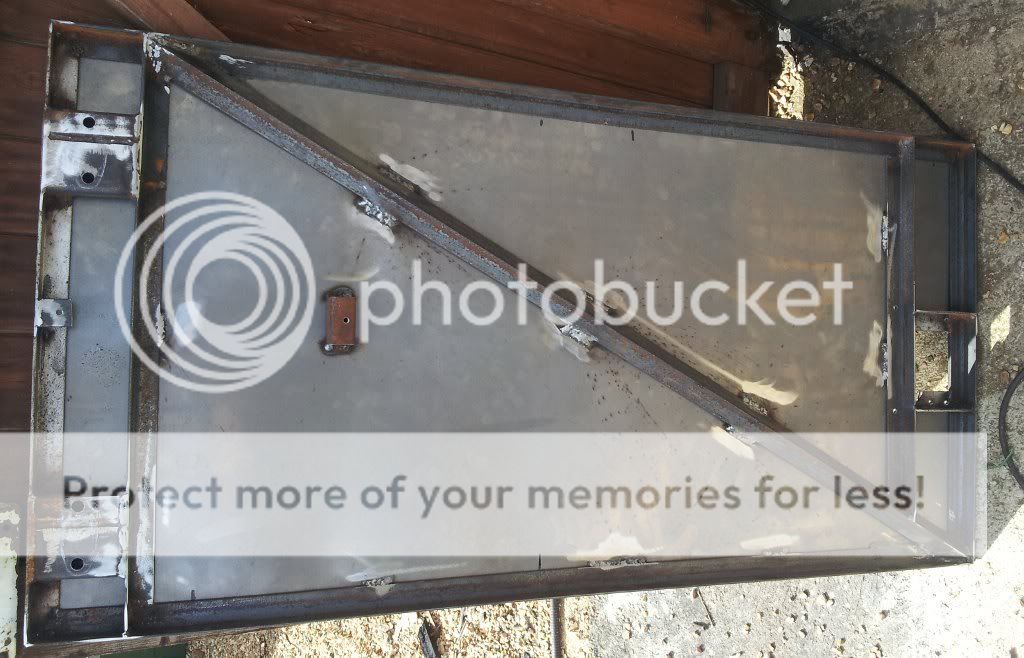
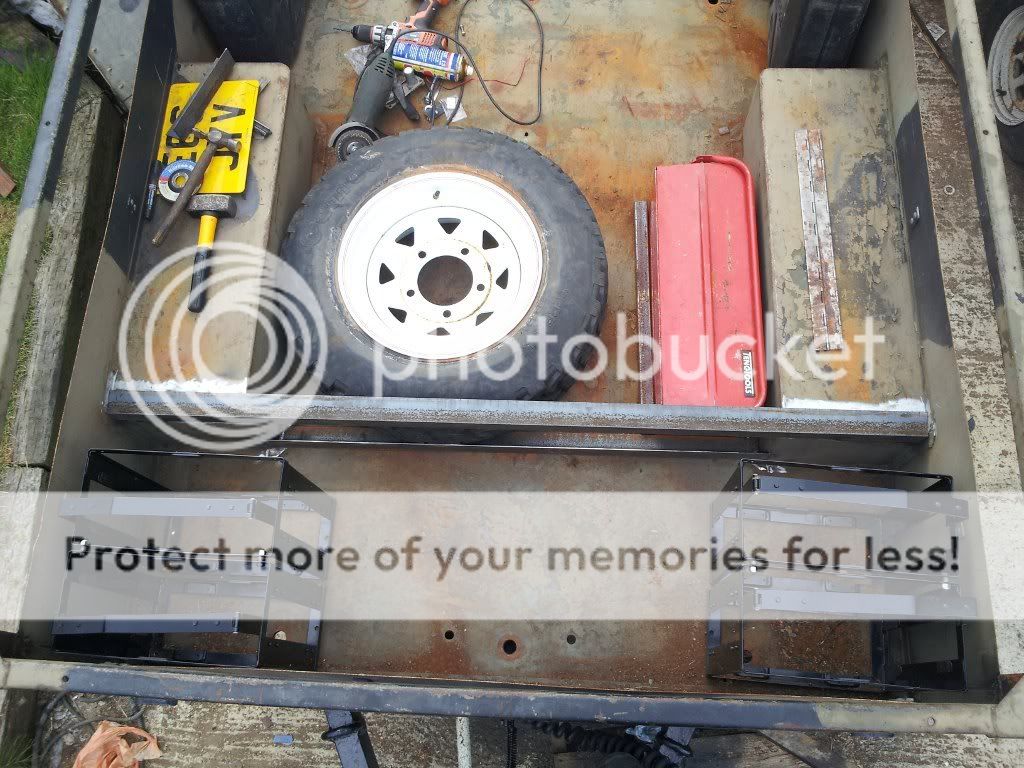
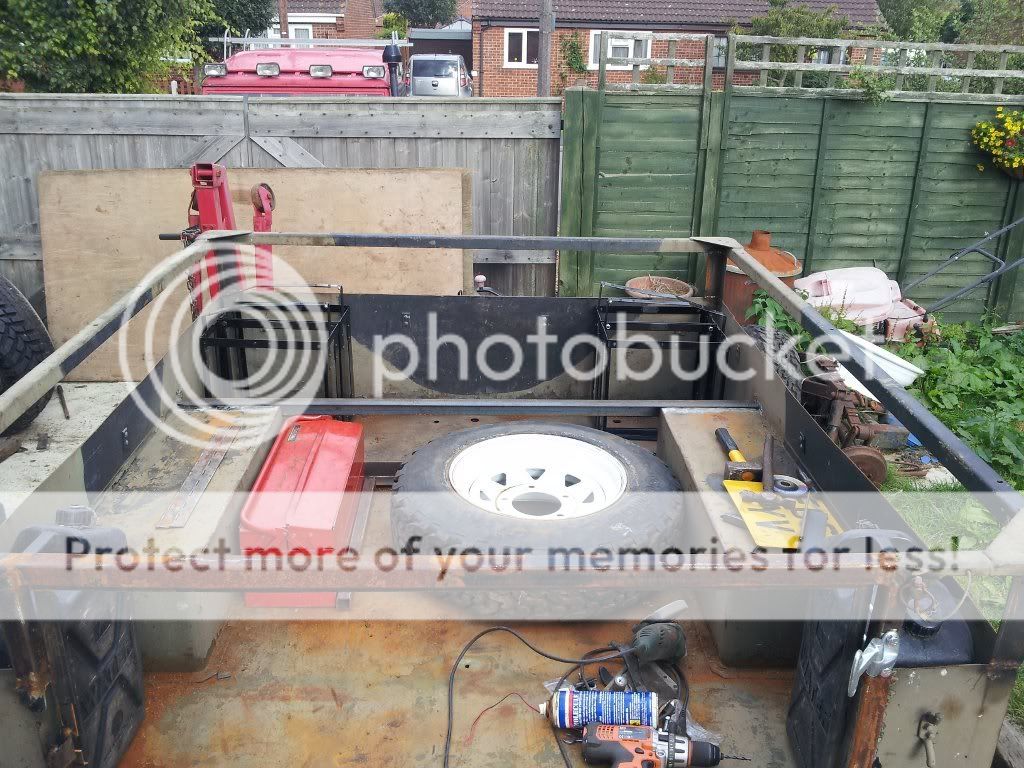
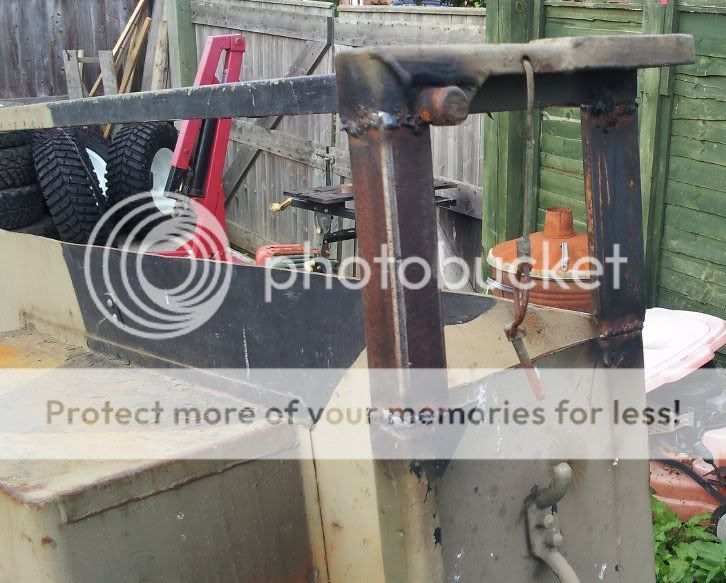
The plan is to put the jerry cans in the trailer. The annoying thing is that the body is not quite tall enough for the cans to sit upright, which is just not good enough, so cut the top off the trailer and created a lift for it. The gap you see will be filled in with metal sheet and stregthened where/if required.

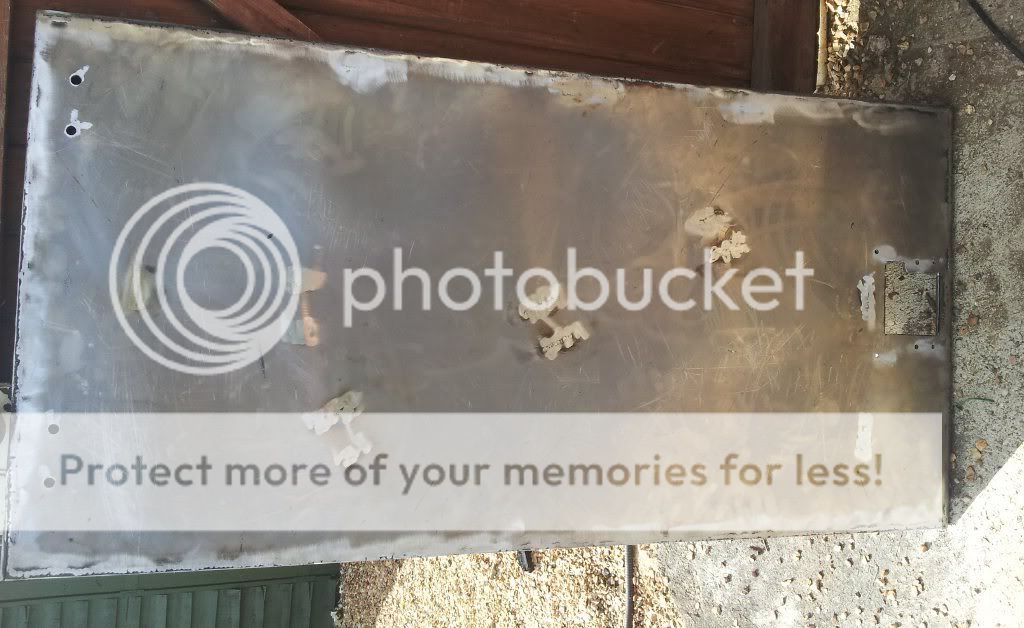
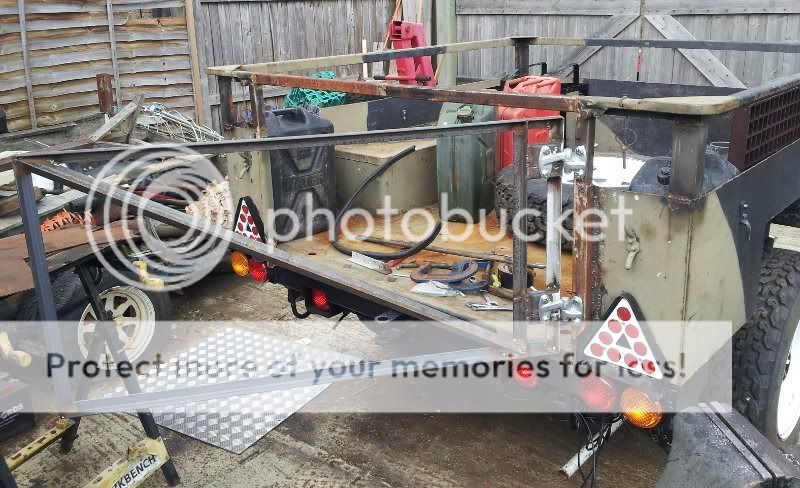
On the Sankey, the rear tailgate opens out downwards, which will be annoying leaning over that to try to get stuff out (the
trailer will have a cover, and a roof tent on t, so you wont be able to get at stuff from above). So that has to be changed. So set about making our own tailgate:
Using standard LR Hinges which I think keeps in look with the trailer:
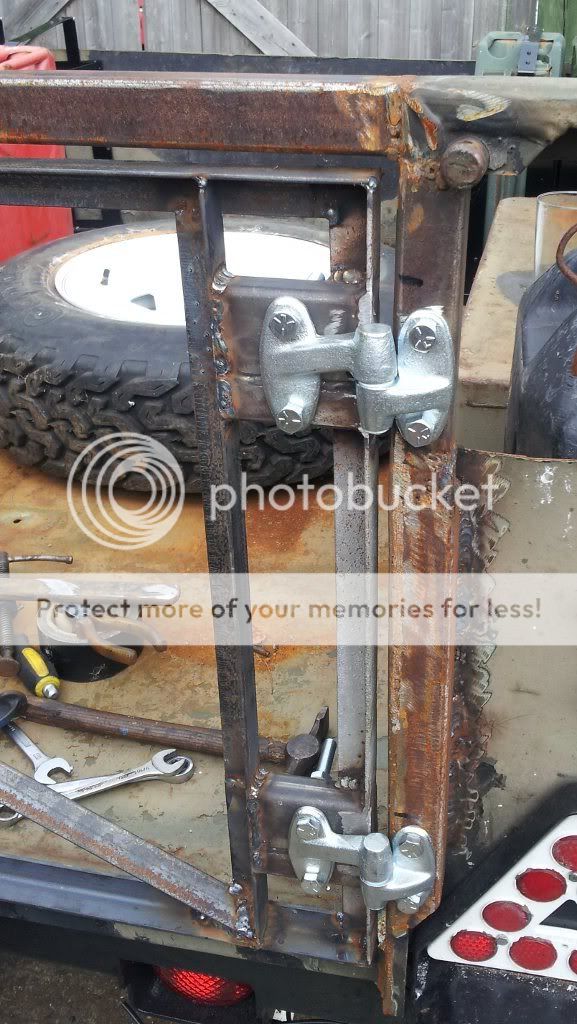
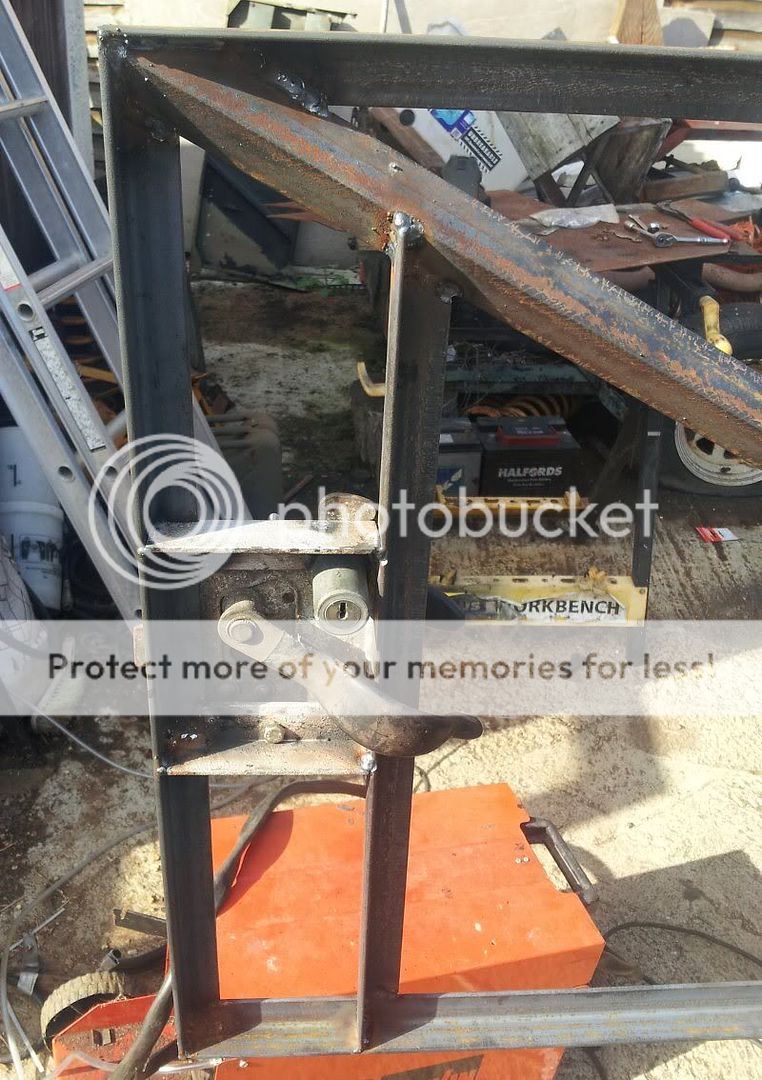
Obviously need a door hitch/lock so created a frame for a standard LR Series door lock:
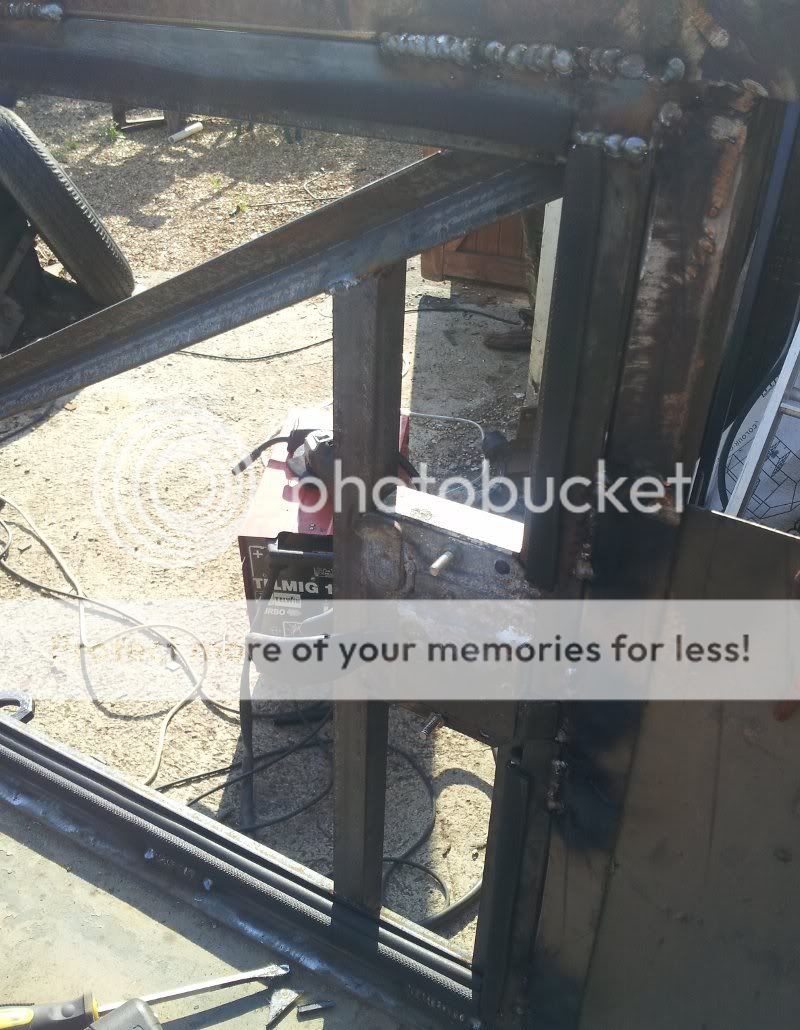
And from the inside...you will see we welded a thin frame for the tailgate to butt up to, as well as acting as an edge for the seal and for the tailgate lock.
Thats pretty much it for now! Next job is to tidy up the frames etc, paint everything up and put a skin on the tailgate.
It's for the Range Rover, not the Series - a few reasons why they want to go for a trailer - of course to store all the equipment, jerry cans, camping stuff, spares, etc etc...but also they want a roof tent...but don't really want it on the Range Rover as for a start it means taking it on and off the rack when it's not in use...and actually getting a roof rack which doesn't flap about in the breeze is proving a little difficult. Also means that everything is in a contained unit - so when it comes to trip time (they also do quite a lot of camping in the UK), quick checkover, hitch up and off you go!
We actually swapped the trailer for a very tired Series 1 chassis and a few Series 1 bits - we were never going to build the Series 1 in reality so made sense to get rid of it. So the first job was to strip everrything apart and replace most of the mechanical bits - hitch, brakes, electrics, lights (NAS lamps) etc. Chassis was in very good fettle and that was mainly clean up, inspect and paint:
The plan is to put the jerry cans in the trailer. The annoying thing is that the body is not quite tall enough for the cans to sit upright, which is just not good enough, so cut the top off the trailer and created a lift for it. The gap you see will be filled in with metal sheet and stregthened where/if required.
On the Sankey, the rear tailgate opens out downwards, which will be annoying leaning over that to try to get stuff out (the
trailer will have a cover, and a roof tent on t, so you wont be able to get at stuff from above). So that has to be changed. So set about making our own tailgate:
Using standard LR Hinges which I think keeps in look with the trailer:
Obviously need a door hitch/lock so created a frame for a standard LR Series door lock:
And from the inside...you will see we welded a thin frame for the tailgate to butt up to, as well as acting as an edge for the seal and for the tailgate lock.
Thats pretty much it for now! Next job is to tidy up the frames etc, paint everything up and put a skin on the tailgate.
")