-
SSimonBrown replied to the thread Signor Galvani has a lot to answer for!.Galvanitic corrosion requires contact between dissimilar metals and an electrolyte. Water completes the circuit between the metals. So it will have been damp, at least at some point. Keeping the metals apart (rubber/paint) or keeping out the...
-
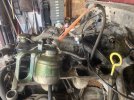
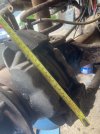
SSimonBrown replied to the thread 110 Project.The last few days has been spent removing the rear suspension upper and lower trailing arms. Each, in their own way, has been a PITA. Was supposed to be overhauling the front and rear calipers but the courier company has decided our village is...
-
-
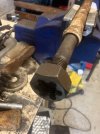
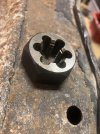
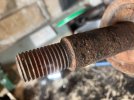
SSimonBrown replied to the thread 110 Project.A few more tasks done at the weekend...removing rear springs, draining the oil and stripping the brake calipers for a good clean and inspect. Plus an M20 x 2.5 die nut that popped up on Fleabay arrived: And used to clean up the threads on the...
-
-
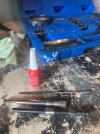
SSame type I have, but not Nielsen. Nielsen make garbage. If you buy lifting or compressing tools, don't cheap out.
-
SRubbish type on the left Excellent type on the right.
-
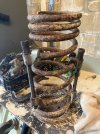
SSimonBrown replied to the thread 110 Project.Taking the advice of @Hicap phill the glow plugs were pulled out each pot and a good dose of oil squirted in. Then the glow plugs were back in and the engine spun over a few times to slosh the oil around. Each glow plug removed in turn and the...
-
-
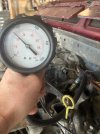
SDid you have to do the test dry or add a bit of oil? With a bit of oil the ring may seal
-
SSimonBrown replied to the thread 110 Project.I had forgotten that trick. The engine has sat for a while and may have a sticking ring...so will lube and repeat. That said, there is some evidence the bores are worn with oil coming up the breather pipe. Not sure if its a "feature" or...
-
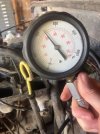
SSimonBrown replied to the thread 110 Project.Tonight was compression testing time. That's a quick snap of No4 after it had sat for a while. The numbers were: No1 = 420psi No2 = 400psi No3 = 340psi No4 = 400psi So straight away and before consulting the workshop manual No3 a concern as...
-
-
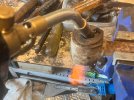
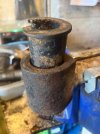
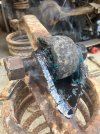
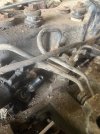
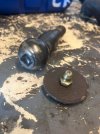
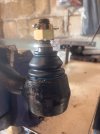
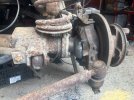
SSimonBrown replied to the thread 110 Project.More minor jobs. The steering box has been removed and given a good clean. It had a sticky residue of ATF but no apparent leaks so a good clean up and it will go back on. The drop arm ball joint rubber had split so a new ball joint was fitted...
-
-
SSimonBrown replied to the thread Front Axle - What Type?.Proof enough. Mine will go through the shotblaster...proper cleanup and refit.
-
SNicely showing why I wouldn't be without one :oops:
-
SMines battered pan. Should have could have would have fitted diff guard. :D but sealed by welder.
-
SClearly you can run without them and people do, but they are a very cheap and easy to fit piece of protection that I would not go without. Considering how thin the diff pan is, it would not take much of a knock to dent or damage it. Especially if...
-
SSimonBrown replied to the thread Front Axle - What Type?.I did wonder if the diff guard was going to be refitted. That kind of feedback means its going back on. But not before a good deal of corrosion prevention has been applied.
-
SThat is fairly common. You need to fill the diff guard with waxoil or similar to preserve the diff pan. I would not run without the guard personally as the diff pans are very thin.
-
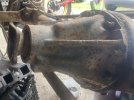
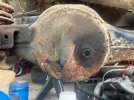
SSimonBrown replied to the thread Front Axle - What Type?.The diff pan had a guard that trapped mud/moisture. I did wonder what was going to be left of the casing, but its looking OK. Clean up job will commence in time. Most brackets are sound I think but the stripping wheel will reveal all.
-
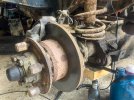
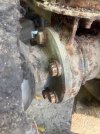
SThey are the later large calipers…better than the small early type. Now that confuses me.(later than your 87) Unless some one has upgraded the callipers.. Normally these appeared from 300tdi on ward
-
SSimonBrown replied to the thread Front Axle - What Type?.Not only did Land Rover have the policy of improvement...that mindset persists with (most of) the owners. Thanks everyone.
-
SThe fact that has no number along with narrow arm brackets, larger axle end caps, swivel housing style suggest it is the original axle. I fact it looks just like my 1990 one [which is original] with more rust. Not that bad though looks like it...
-
SSimonBrown replied to the thread Front Axle - What Type?.Not 100% certain it has been replaced...but getting a positive ID will be needed at some point. Rear is a Sailsbury. Caliper photo inbound shortly. Judging by the fact some of the zinc and yellow passivate is still visible, and the discs are...
-
SLooks like early 110 axle. Photo of the calliper please. There are 2 sizes Early small Late large(you can upgrade to these on that axle
-
SWhy do you think the axle may not be original. It is just because the rear has been changed? Axles are very easy to rebuild so unless there is a very good reason they are not something people tend to change. Especially as the front already has...
-
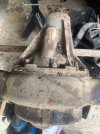
SLike many 40 year old Land Rovers Izzy has seen a few mods. Originally a 1987 vintage 110 the engine, gearbox and back axle have all been swapped at some point. An ID of the front axle has so far eluded me. Been over the tube with a wire brush...
-
-
SSimonBrown replied to the thread Deformed Piston bowl.The injector wont be over fueling - the quanitity of fuel is the job of the fuel pump - but if the injector is not atomising the fuel correctly it might not be burning evenly, creating a potential hot spot. Testing an injector spray pattern...
-
SSimonBrown replied to the thread Deformed Piston bowl.Local heat buildup. If its one cylinder only then over fueling injector or blocked oil gallery in the piston crown are possible causes, with the latter only relevant if the 200TDI has oil cooled pistons. Local blockage in coolant gallery might...
-
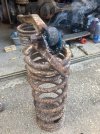
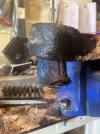
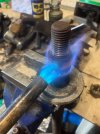
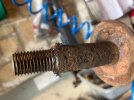
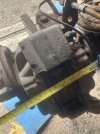
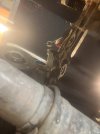
SSimonBrown replied to the thread 110 Project.Previous days have been spent getting the axles ready to drop. Most bolts were tight but shifted with a little heat. One was subject to the slitting wheel for failure to cooperate. Whilst poking around I took a look at the swivel housings and...
-
-
SSimonBrown reacted to mystery's post in the thread 1985 County fog and reversing lights not working with
 Like.
they are in PNG format and rendered with MS paint so the colours do not bleed into each other unlike other formats so if you down load them and open with MS paint and zoom they should stay as is
Like.
they are in PNG format and rendered with MS paint so the colours do not bleed into each other unlike other formats so if you down load them and open with MS paint and zoom they should stay as is