Reinstalling ACE to Disco 2

This site contains affiliate links for which LandyZone may be compensated if you make a purchase.

Jamiegreen

Well-Known Member
Posts
628
Location
Wales
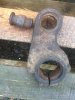
When I picked up my new disco, silly me didn't check if the ACE was working properly, and the guy didn't tell me the pipes had been cut, pump replaced with blank pulley wheel and running on roll bars.
Now im more a fan of fixing things than ditching them, I love that ACE system, and it happens I still have my old crashed disco with most of the parts I need. Im not sure exactly what parts get replaced but im sure I can work it out, and then im going to take the pipes to my hydraulics shop and have them all made with "rubber" pipes.
I've read the system then needs to be bled with a nanocom or similar, and not sure if its the right section to ask, but if anyone could help me out with doing that, would be great. Im near Blackwood, NP12. And paid of course :D
Hoping to get the pipes made and fitted by next week.
Will do a write up since I couldn't find much on putting ACE back into a disco.
 
I have a nanocom in De55 if you struggle.

I also have the ace i removed from mine with some rubber pipes to the rear if you can't find anyone to make some up. Pretty cool idea to use rubber pipes instead of the metal ones that rot like the rest of the truck
 
I have a nanocom in De55 if you struggle.

I also have the ace i removed from mine with some rubber pipes to the rear if you can't find anyone to make some up. Pretty cool idea to use rubber pipes instead of the metal ones that rot like the rest of the truck

Thanks for the offer :D
Will see if anyone's around a bit closer, as its about 3 hours from me, I only found this hydraulics guy a couple weeks ago by mistake, but he said it shouldn't be a problem.
Only bit im going to have to play with is the valve block, whether to just cut the stock steel pipe short and put joints onto them or try and get those pipes out of the block and tap a thread into the block for new joints :confused:
 
And remember there is an attenuator in the pump supply pipe which must be kept, all others can be replaced
 
And remember there is an attenuator in the pump supply pipe which must be kept, all others can be replaced

Great job you did on it, I did see that little part between the pump and block, wouldn’t of thought to keep it.
So if I’m correct, you had a larger hole drilled through the plate that comes off with the pipes and then has the thread tapped into the actual valve block itself?
Heard those pipes can be a little tricky to get out as well, something about needing to tap a thread into them to get them out..
 
Quick question, took the front ram out and saw this metal part where the bolt slides through was looking a bit..rusty, should there be some sort of rubber seal/ grease in this joint, it’s the one the top of the ram goes into.
Thanks
 

Attachments

  • 6EF872DD-DCE1-4E71-80FB-15142DBFCD5B.jpeg
    6EF872DD-DCE1-4E71-80FB-15142DBFCD5B.jpeg
    365.2 KB · Views: 165
Great job you did on it, I did see that little part between the pump and block, wouldn’t of thought to keep it.
So if I’m correct, you had a larger hole drilled through the plate that comes off with the pipes and then has the thread tapped into the actual valve block itself?
Heard those pipes can be a little tricky to get out as well, something about needing to tap a thread into them to get them out..


The plates were tipped. Broken ends were a pain to remove

My original block was taken to a local company to be done.

Wider bit was counter drilled to about 1 inch

Inner bit was drilled then tapped 1/4" BSP
 
Quick question, took the front ram out and saw this metal part where the bolt slides through was looking a bit..rusty, should there be some sort of rubber seal/ grease in this joint, it’s the one the top of the ram goes into.
Thanks

Accidently hit like

meant reply

Not sure but that is pretty tatty, best thing is to compare with rear ram

There is a bush at the other end which is replaceable
 
Accidently hit like

meant reply

Not sure but that is pretty tatty, best thing is to compare with rear ram

There is a bush at the other end which is replaceable

Thanks for the info, Not sure if the rear will be coming off today with the state of the bolts on the roll bar part :confused:
And I think you mean those rubber ones on the right side of the pic, I’ll replace the drop links as I cut them off to remove them
 

Attachments

  • DA331DCE-6695-45DA-9D05-FD32E0ABD4CE.png
    DA331DCE-6695-45DA-9D05-FD32E0ABD4CE.png
    44.3 KB · Views: 164
Quick question, took the front ram out and saw this metal part where the bolt slides through was looking a bit..rusty, should there be some sort of rubber seal/ grease in this joint, it’s the one the top of the ram goes into.
Thanks

As @MJI has said, that looks a bit tatty.
I don't know whether you have a copy of RAVE, well worth downloading if you don't:-
http://www.green-oval.com/data/lr/rave01.iso

In the attached diagram, you should be able to see the part in question is No 11, ACE Short arm. There is a bush pressed into it. Judging by your picture, I'd say that the outer part of the old bush is still stuck inside the arm, so that's going to have to be pressed or even cut out before a replacement can be fitted, once again with a press.
The part numbers can be found on this page:-
http://www.allbrit.de/UNI.cfm?PAGE=818014&SPRACHE=EN

Untitled.gif
 
As @MJI has said, that looks a bit tatty.
I don't know whether you have a copy of RAVE, well worth downloading if you don't:-
http://www.green-oval.com/data/lr/rave01.iso

In the attached diagram, you should be able to see the part in question is No 11, ACE Short arm. There is a bush pressed into it. Judging by your picture, I'd say that the outer part of the old bush is still stuck inside the arm, so that's going to have to be pressed or even cut out before a replacement can be fitted, once again with a press.
The part numbers can be found on this page:-
http://www.allbrit.de/UNI.cfm?PAGE=818014&SPRACHE=EN

View attachment 136202

Thanks, helped a lot, I also found this parts list for them, might come in handy for someone.
Although i will admit it’s turning out to be a bit more work than I thought, hopefully the roll bars on my new disco will be easier to get off if it was converted recently, not that I know.
And I just saw the link you posted, my bad :rolleyes:
 

Attachments

  • D8FD30B2-B259-43DF-AF09-89594AF05F33.png
    D8FD30B2-B259-43DF-AF09-89594AF05F33.png
    179.3 KB · Views: 163
Last edited:
Got everything off the old disco today, both front and rear rams/pump/block and pipes. Ordered new bushings and gaiters. Took the pipes to my hydraulics guy and all pipes to be made up for less than 50 quid, keeping the flexi part of the supply hose. Although he said given the pipes going into the block where in good condition and theres no leaks he's just going to join the new rubber pipes onto the cut off steel ones coming from the block instead of making threads etc in there.
 
it's no real drama if you dont bleed with tester cos the system will bleed itself if you make it work hard, find a wide place to drive it as fast as you can while cornering both ways and braking hard to make the body rock and roll all the way... important is to prime the pump well before you drive it, the tester is compulsory to enable the system if it was disabled with it.
 
it's no real drama if you dont bleed with tester cos the system will bleed itself if you make it work hard, find a wide place to drive it as fast as you can while cornering both ways and braking hard to make the body rock and roll all the way... important is to prime the pump well before you drive it, the tester is compulsory to enable the system if it was disabled with it.

I never had that much luck bleeding my old one when I changed the rear pipes, I cornered it damn hard but still felt a little roll in the back, although it was only a little. I’m assuming it’s been turned off via tester, haven’t looked to see if ace ecu pins are jumped.
Would priming the pump simply be pumping fluid through the low pressure feed to the pump or is there a little more to it?
Just a thought, if I had to travel to someone with a tester, could I drive with the rams fitted and leave the pump off till I got there?
Cheers
rams will self bleed they are just double acting rams, you prime the pump by rotating the drive pulley by hand before fitting the belt
 
dont fit the banjo to the pump's outlet untill uou dont get nice flow there, here's the relevant part from the book:
.....
4. Connect suction hose to ACE pump and secure
with clip.
5. Ensure there is sufficient fluid in ACE/PAS
reservoir to prime ACE pump.
6. Position ACE pump below level of ACE/PAS
reservoir, with suction hose uppermost, and
allow fluid from ACE/PAS reservoir to
completely fill ACE pump.
7. Position ACE pump to mounting, fit bolts and
tighten to 25 Nm (18 lbf.ft).
8. Rotate ACE pump clockwise (viewed from
pulley end) until a steady flow of fluid runs from
outlet port.
9. Connect pressure pipe to ACE pump with banjo
bolt and new sealing washers. Tighten banjo
bolt to 28 Nm (21 lbf.ft).
.....

you can drive it with rams fitted just be aware that it will be "floppy"

Thanks, and sorry I will get round to reading the rave manual :rolleyes:
Will start transferring parts tomorrow, having my remap done right now, plus a £70 maf sensor :confused:
My only problem I can see right now is getting those rams out of the ..metal bracket thing to change the gators, I see there is a lr tool for it but I ain’t paying 40 quid for a fancy socket, hopefully can do it with the vise and ratchet/spanner.
 
Back
Top