TD4_4x4
Active Member
- Posts
- 283
- Location
- North Yorkshire, UK
This will be a big project thread I wanted to share with you to show what can be done to a MK1 Freelander and for inspiration to others to give them 'ideas' with other vehicles too. As it's such a big project, I'll post it in parts so not to overwhelm people reading and looking at photos.
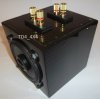
For now, I will show you one finished job, a Custom Centre Speaker which is part of a big audio project I am nearing the end of - but I will need your help if possible please finishing it (will need car audio battery in boot with split charge set up).
For the critics, I understand this is pointless, and certainly isn't 'audiophile grade' or '4X4' either - but to me it's fun as I like making my car unique, primarily as it's old and and unloved (like its owner!).
I enjoy doing mods, as even if the outcome wasn't what you thought, you achieved something unique and at least had a go. That's why I do it, to try and be creative.
Parts Used:
Marine Ply (12mm) - double layer in 3 of 4 faces = (24mm). One face is single layer to get 'lid' on.
Paint (sand down wood, then a primer coat).
File.
Saw.
Hole saw (to cut speaker hole).
Wood glue.
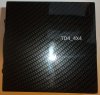
Carbon dip finish.
Black metal screws for: Speaker/box lid/speaker binding posts.
Audio:
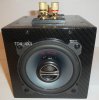
2 x 4'' Alpine SPG-10C2 2-way speakers (180w Peak/45w RMS) will go to Amps (undecided) in boot.
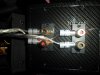
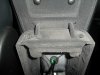
KnuKonceptz Karma Kable Twisted OFC (soldered) onto speaker binding posts.
Nakamichi Banana Plugs
Comments:
I wanted to fit 2 x 6'' speakers but the limitations of height and depth of the Freelander interior forced the size to be limited to 4 inch speakers, and this was a big squeeze in such a tiny box to wire the speakers up, make sure they don't touch internally and then screw the lid on with the speaker cables soldered.
It sounds 'OK', but is naturally devoid of any bass - although that won't be a problem due to other 'upgrades'. I would rate the finished sound quality then, only as adequate. On a positive note, the aim was to create some mid/high presence in the center of the car when surrounded by speakers on the external perimeter of the vehicle (doors) - and that was achieved (used a mini home amp to test it).
However, the limitations forced by the structural size are undeniable as are positioning compromises needed to be made unless you want to stop the car being functional which I didn't. I wanted it to be 'there' but not too obvious otherwise the entire car becomes a disco, rather than most of it.
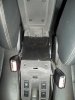
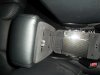
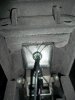
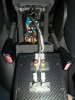
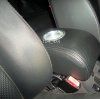
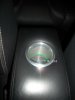
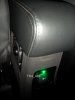
Will post pics later of centre speaker inside car, you might be surprised where I put it!
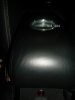
[Centre speaker box]:
Attachments


Last edited:


")