saxmanuk
Active Member
- Posts
- 469
- Location
- On the top of a hill Nr Harrogate
Hello all
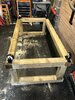
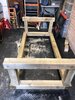
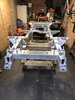
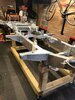
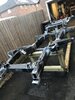
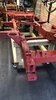
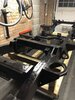
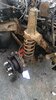
Been a fair while since I posted - maybe 5 yrs! - anyway Leaky the Landy failed its MOT and so since I have not really tinkered for the last 5 yrs or so I am gonna get a new chassis soon and as a winter project replace said chassis. Will post pics of progress and no doubt be asking questions along the way! some relevant and no doubt some stupid ones.
6 years ago I completely stripped and rebuilt the 110 CSW so am hoping the work I did then is still ok - but I can see that the springs and the work I did replacing bushes etc. look rusty and tired already!
So I will be asking opinions on the best springs and shocks and bushes etc. no doubt - I will be searching 1st and will not fall into the same trap as asking about which wheels and tyres etc.") I have newbie questions covered haha. So hello again and let the games begin - Sean
I have newbie questions covered haha. So hello again and let the games begin - Sean
Been a fair while since I posted - maybe 5 yrs! - anyway Leaky the Landy failed its MOT and so since I have not really tinkered for the last 5 yrs or so I am gonna get a new chassis soon and as a winter project replace said chassis. Will post pics of progress and no doubt be asking questions along the way! some relevant and no doubt some stupid ones.
6 years ago I completely stripped and rebuilt the 110 CSW so am hoping the work I did then is still ok - but I can see that the springs and the work I did replacing bushes etc. look rusty and tired already!
So I will be asking opinions on the best springs and shocks and bushes etc. no doubt - I will be searching 1st and will not fall into the same trap as asking about which wheels and tyres etc.
I have newbie questions covered haha. So hello again and let the games begin - Sean