- Posts
- 16,475
Following on from: http://www.landyzone.co.uk/lz/f10/oil-pump-do-they-need-bed-270499.html & http://www.landyzone.co.uk/lz/f10/ready-waiting-271271.html I started at just after 9.30 on Saturday Morning
..
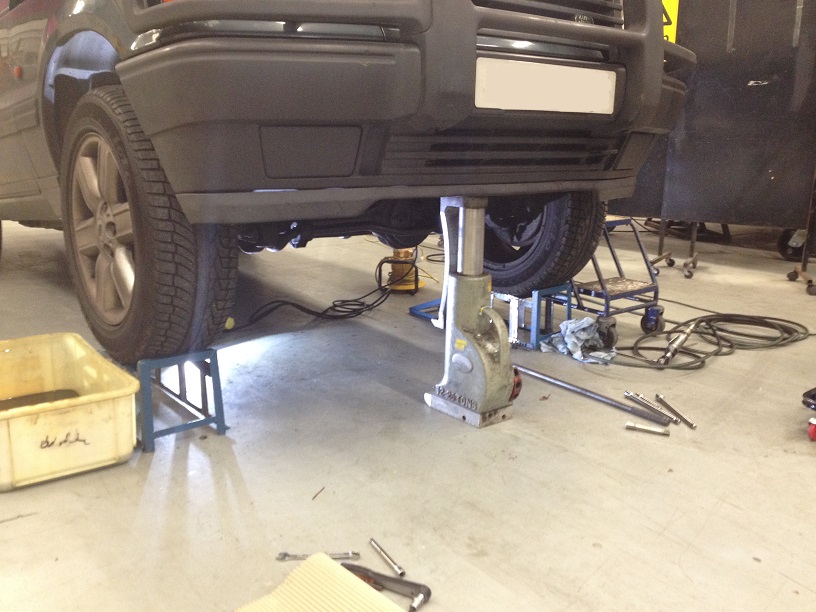
Position vehicle on ramps and lower to access (to be able the access the plugs easy enough!)
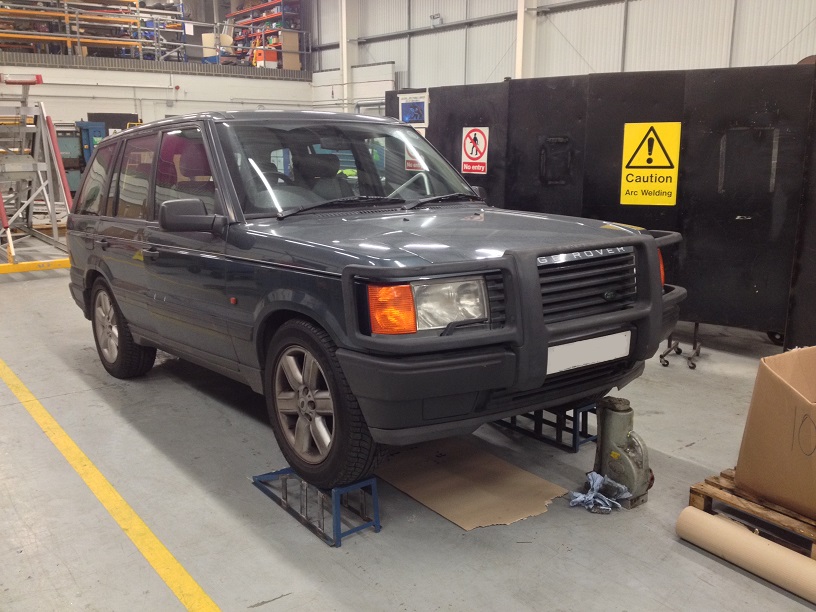
Raise the Bonnet and detach the Struts, position in Service mode and lock the catches on each side
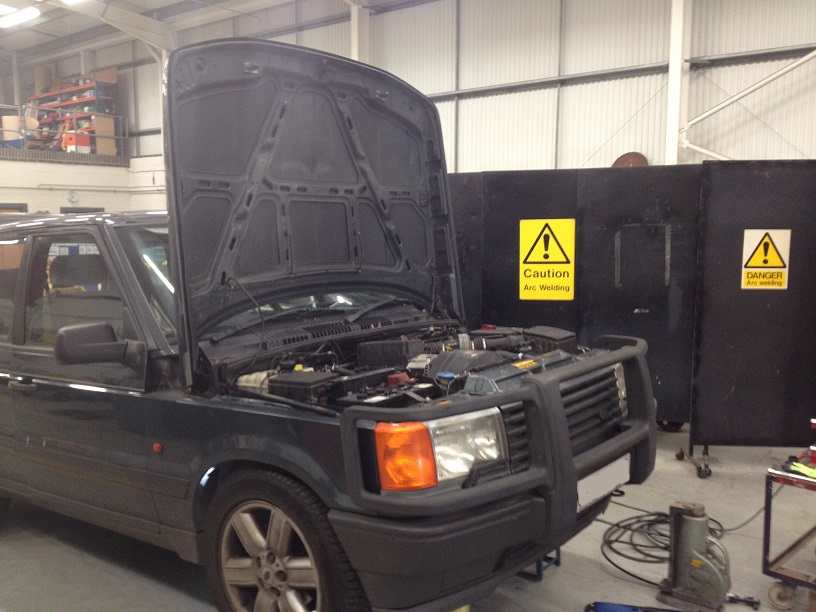

Disconnect the battery in accordance with the Owners Manual (Some require you to turn ignition on, then off and disconnect battery within 17 seconds)
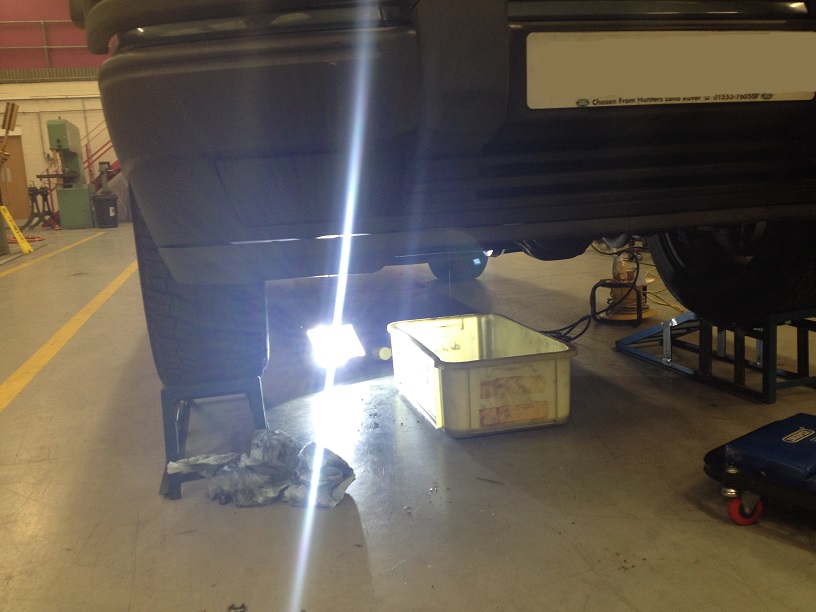
Lucky enough to be working in the workshop so I have access to a high powered LED Flood lamp (No heat Loads of light!).
Drain the Oil from the sump.
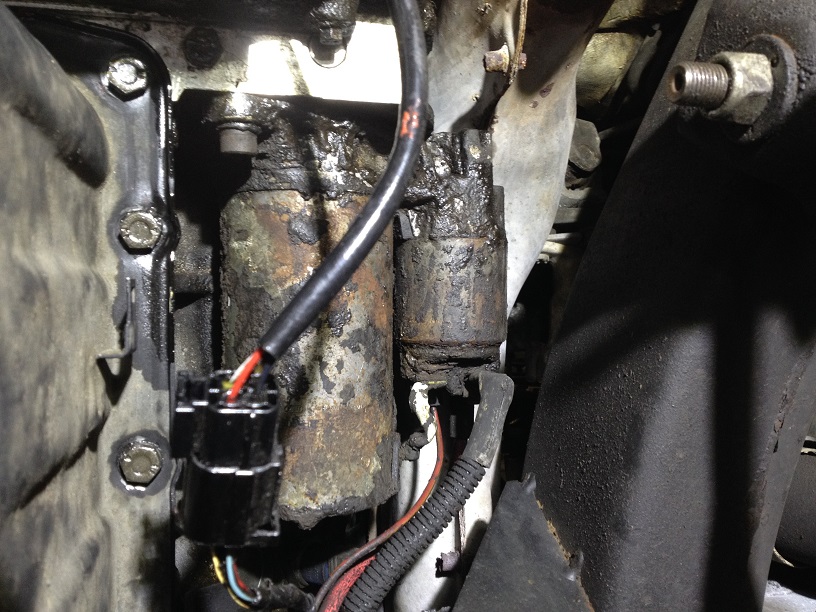
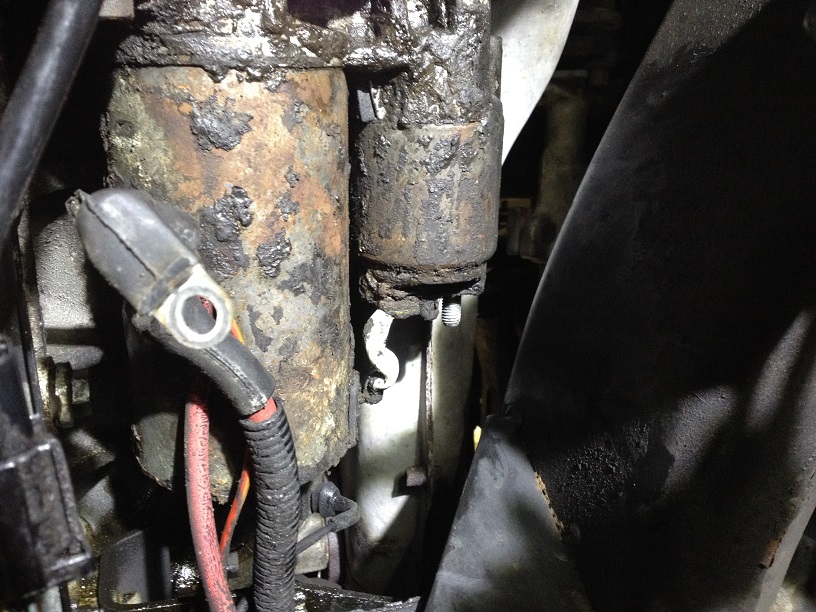
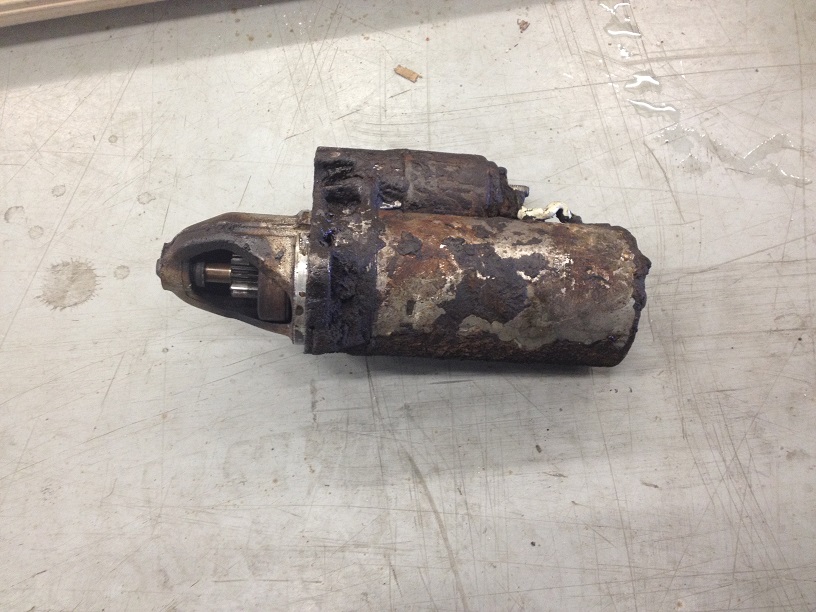
Next is to fight with the top Starter Motor bolt .need to remove the starter as one of the Main Bearing cross bolts (socket cap) sits recessed in the block and is hidden behind the starter.
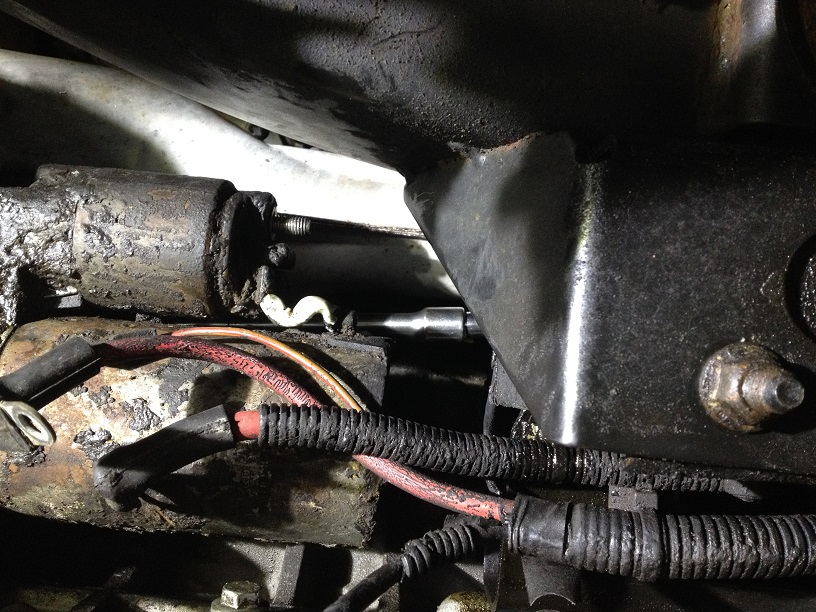
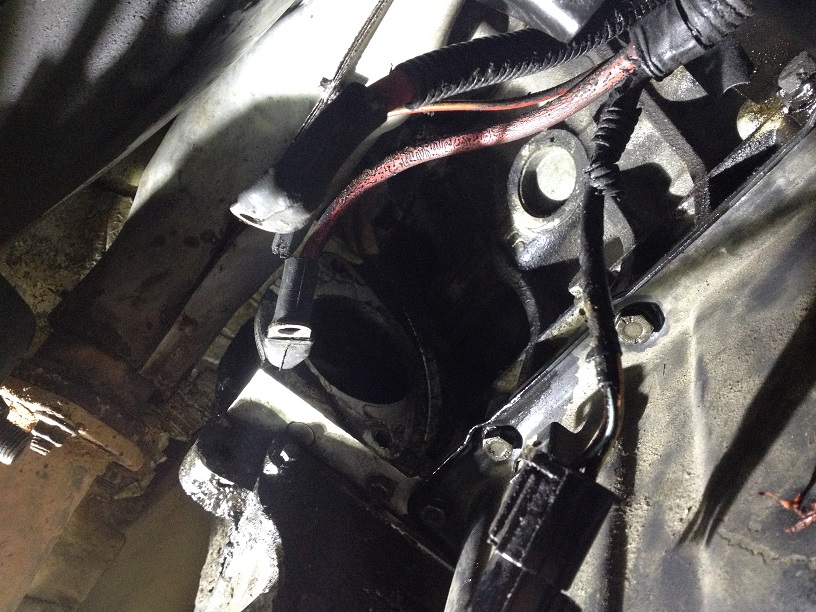
First remove the Power Cables to the Starter and the little connector, this makes getting your hand over the top of the starter to feed the ratchet in easier!
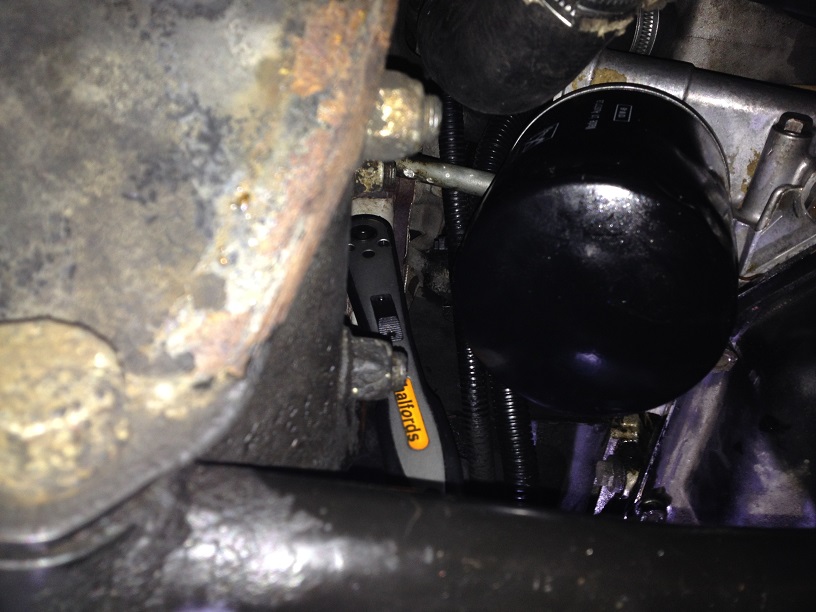
Using extensions and an 8mm Allen Socket, Feed the extensions in from next to the Oil Filter, over the top of the engine mount and using your other hand over the top of the starter, feel for the top bolt and guide the extensions and socket into the bolt ..

Using a few expletives and a good deal of pressure to keep the socket in the socket cap, apply liberal amounts of force and crack the bolt off .Do everything you can to avoid rounding off the socket cap exhaust manifold off job to rectify that!!
Luckily mine cracked off without rounding the socket cap
After reading horror stories of people struggling for hours and sometimes days to get that off, I was lucky and it took me 30 minutes of fiddling and using different combinations of extensions to get the right length!
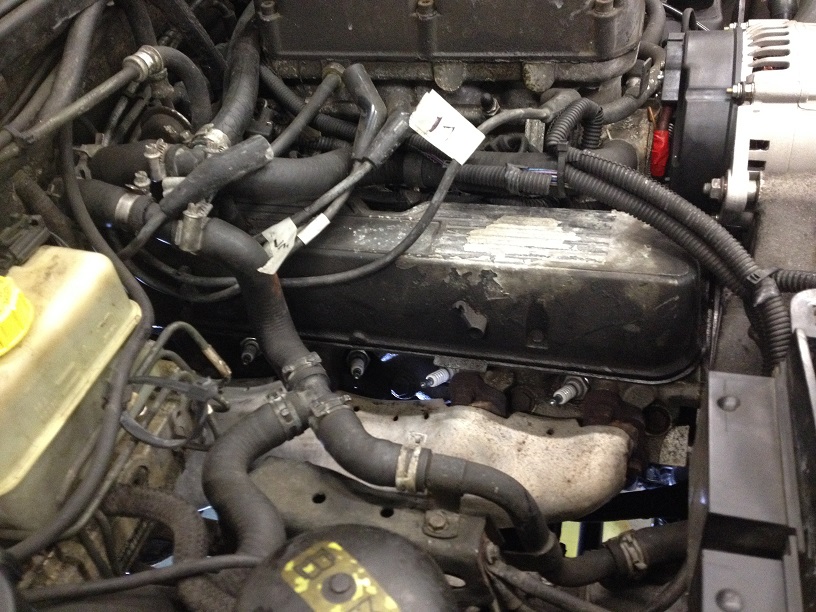
Next is to remove the spark plugs. This is done so when you get to the bearings, you can turn the crank by hand to get the shells out and position the big ends to undo them!
Label the leads, and remove the plugs mine looked a little old and the gap was over sized, so I replaced all 8 plugs with new on refitment!
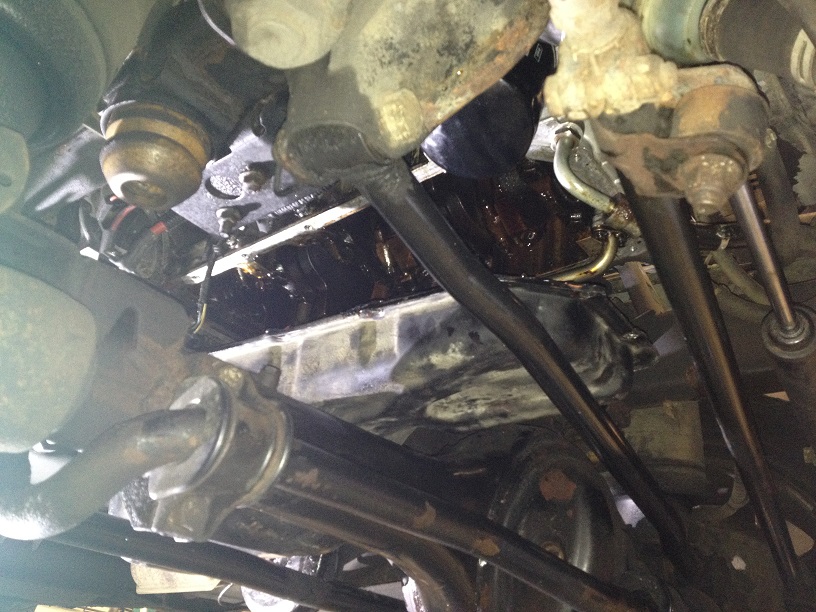
Next, undo the billion sump bolts luckily I had access to an air powered ratchet which took a lot of the elbow grease out of this boring and annoying task!
Life was made easier with using one of those Car Inspection Trolley thingies to slide under the car and back out again, rather and lying on my back on the floor!
Once I had undone all but to opposing corner bolts, I jacked the front of the car up (as it was in access height to get easier access inside the engine!) so the sump will clear the steering and track arms.
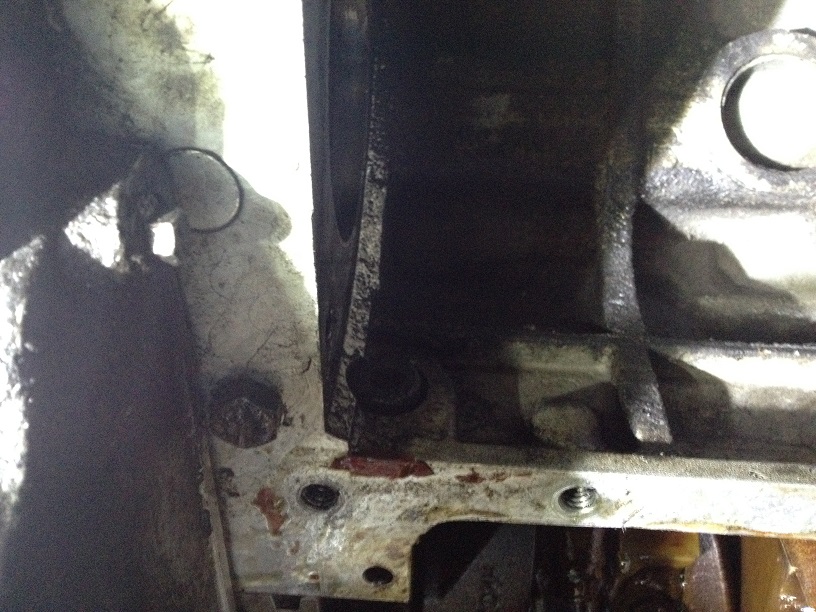
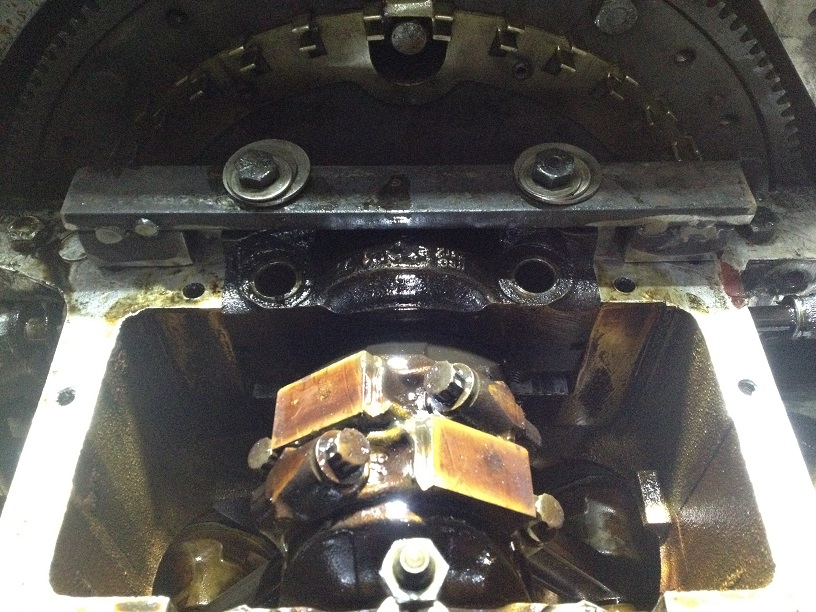
The hidden Socket Cap cross bolt!
Next, undo the 10 (well I did the first 9 then swore at the last one, explain soon!) Cross Bolts .some are tucked behind oil pipes, but they do move to allow a spanner on some you cant get a ratchet onto due to clearance issues ..mine were sodding tight, so I cut the end off a spanner and slid a 10 length of 20x20 steel box over the end for additional leverage ..
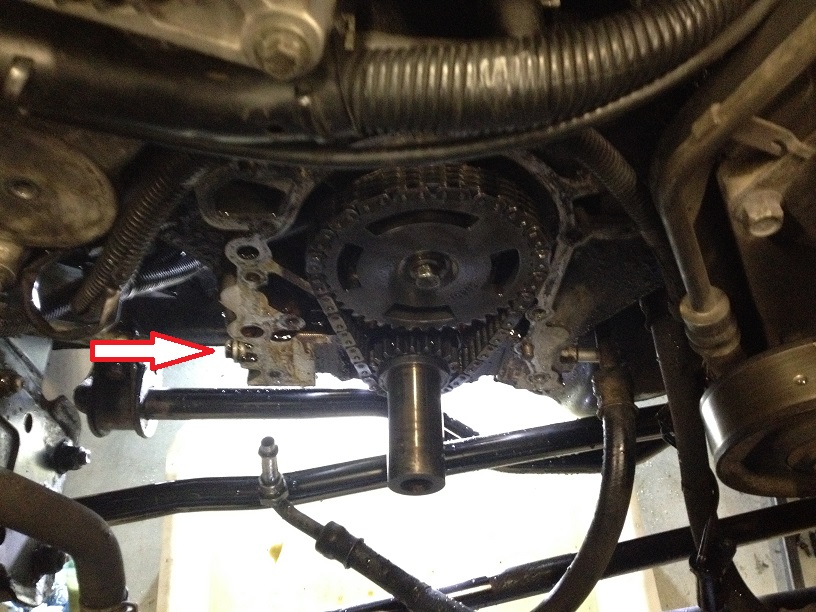
Then I go the to the 10th bolt ..ARRGGGHHHH hidden behind the Filter .no probs, take the filter off .AAARRRRGGGHHHH .still blocked by the bowl the filter screws on to!
After my many trials and troubles with the front cover (covered in other threads of mine) the bloody thing had to come off again ..For the process read http://www.landyzone.co.uk/lz/f10/gems-front-timing-chain-cover-part-1-a-260980.html and http://www.landyzone.co.uk/lz/f10/gems-front-timing-chain-cover-part-2-a-261443.html
Right after spending time getting the thing ready for the work, time to crack on with the Main Bearing replacement.
In order to facilitate rotating of the crank and also to make getting the top shells out easier, I elected to crack off and loosen by about a quarter turn all the main bearing bolts .DO NOT loosen to far as you dont want the crank to drop potentially ruining the rear crankshaft seal!
Refit the Crank pulley (so you can fit the Crank Pulley Holding Tool as per my previous thread) and redo the Crank Pulley Bolt back up again.
Then place a ratchet and socket onto the Crank Pulley Bolt, this allows you to turn the crank by hand easily enough.
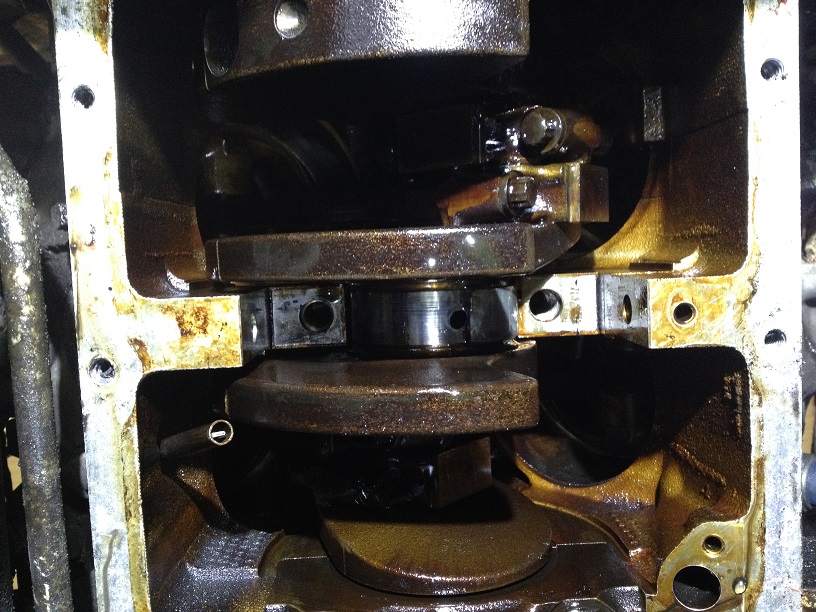
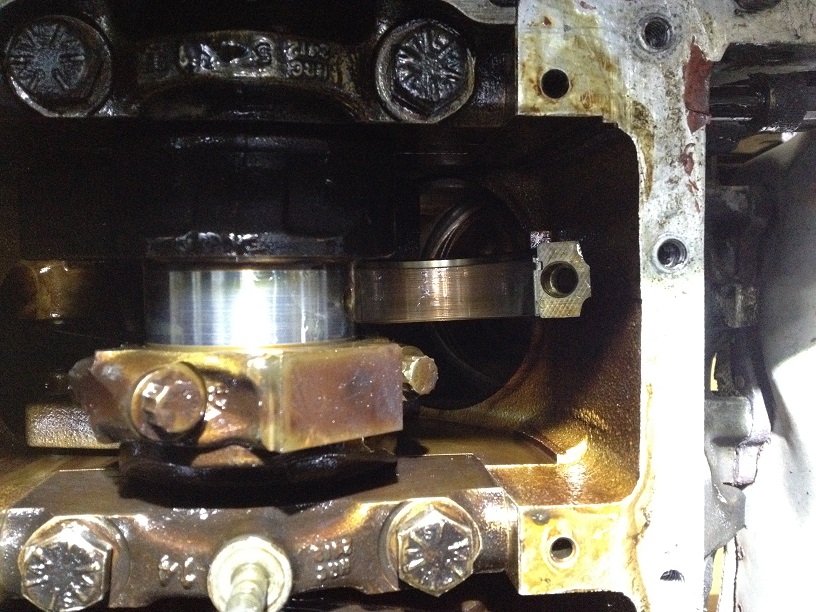
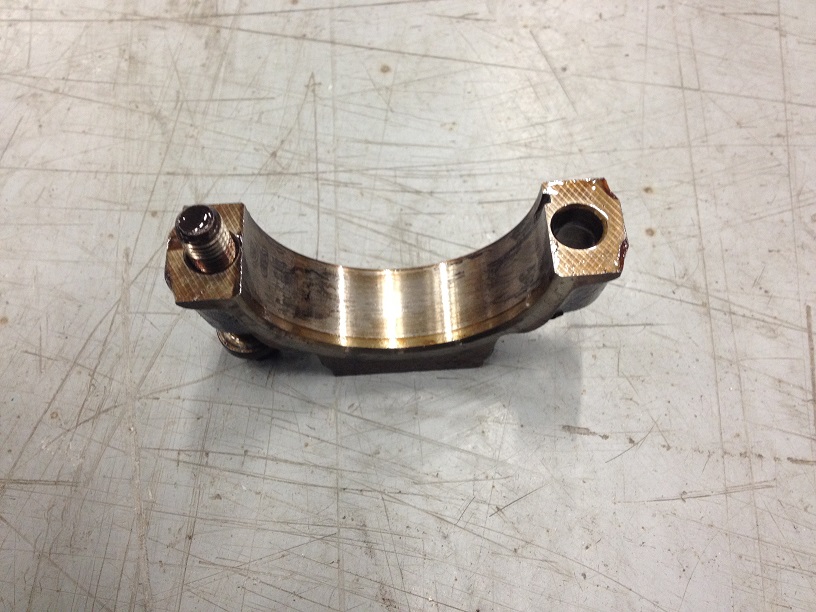
I started with No4 Bearing. Undo the bolts and wiggle the bearing cap out. Note the orientation of fitment as it MUST go back the same way round! There is a number and arrow on the casting, arrow to the front of engine and number is its position (1 is the front, 5 is the rear).
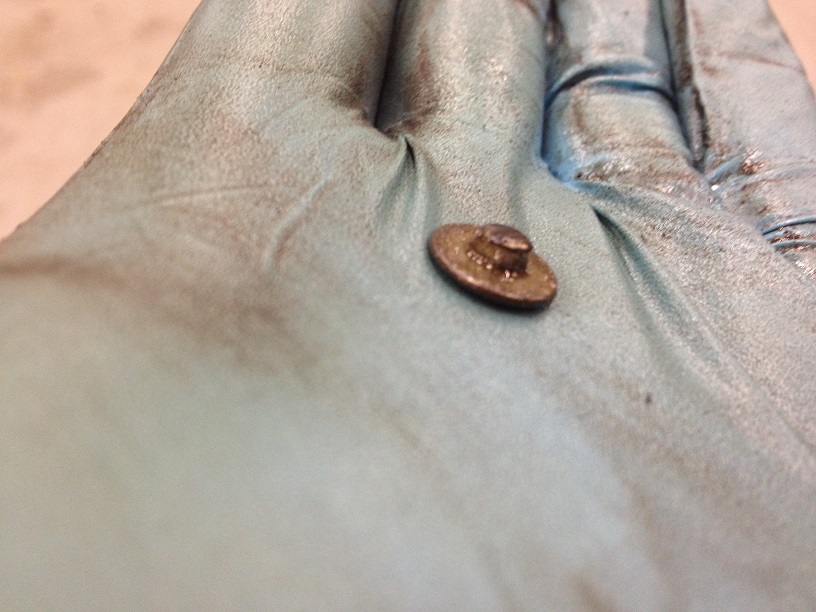
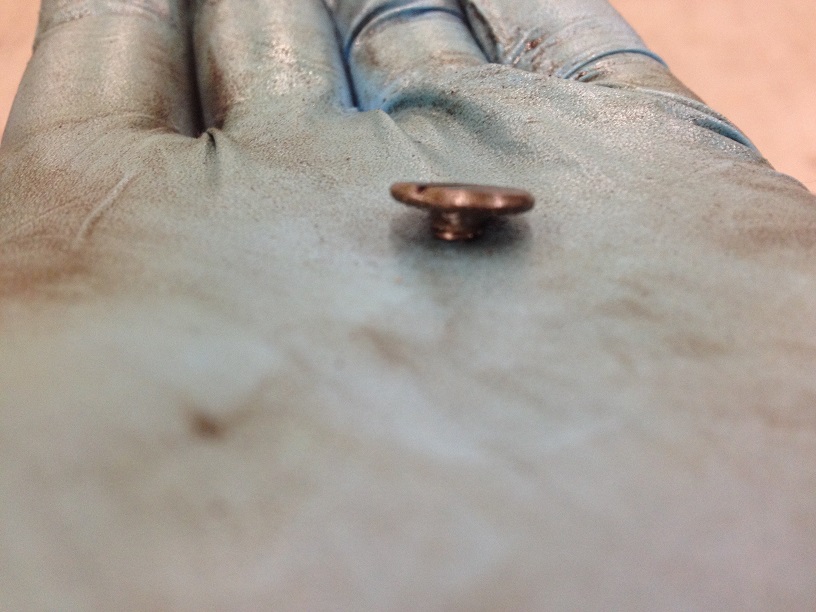
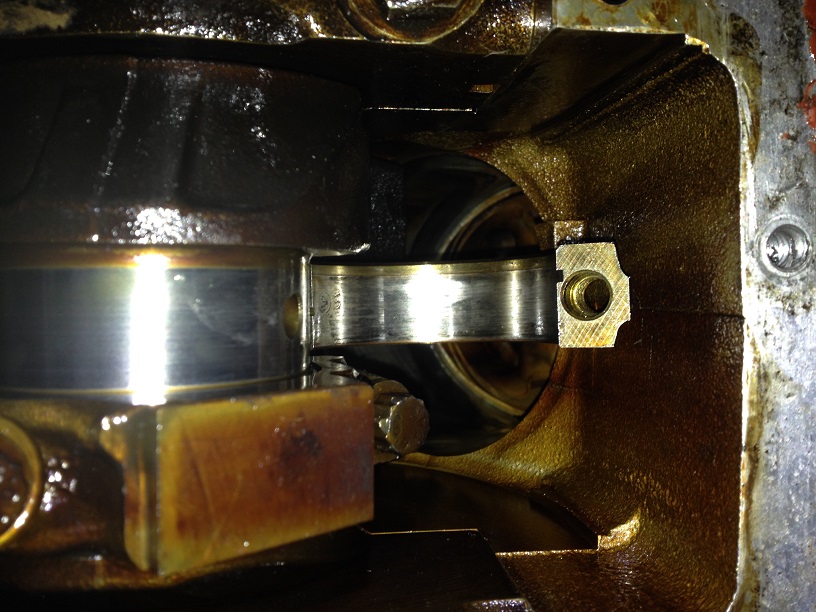
Using a good tip from Tomcat59Alan of a small Copper Rivet or similar to poke in the Crankshaft oil way and turn the crank round and this pushes the top shell out the other side I used a cut down bolts with the top ground down to the right thickness .
The pimple to poke in the oil way cant be too long as the oil way is slanted and the top cant be too thick as it has to pass over the top and under the engine block will pushing the shell out!
Position the pusher and turn the crank .NOTE, the shells have a locating lug so they must be pushed out in the correct direction!
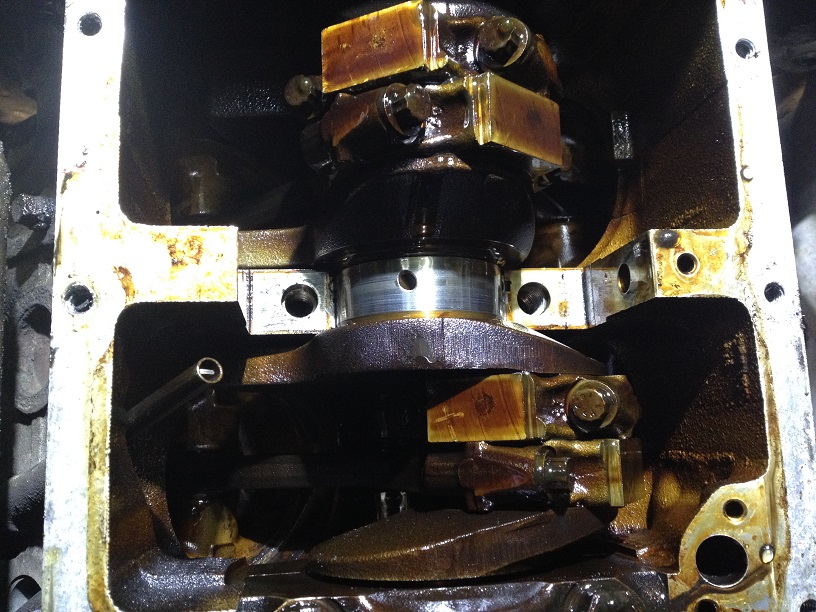
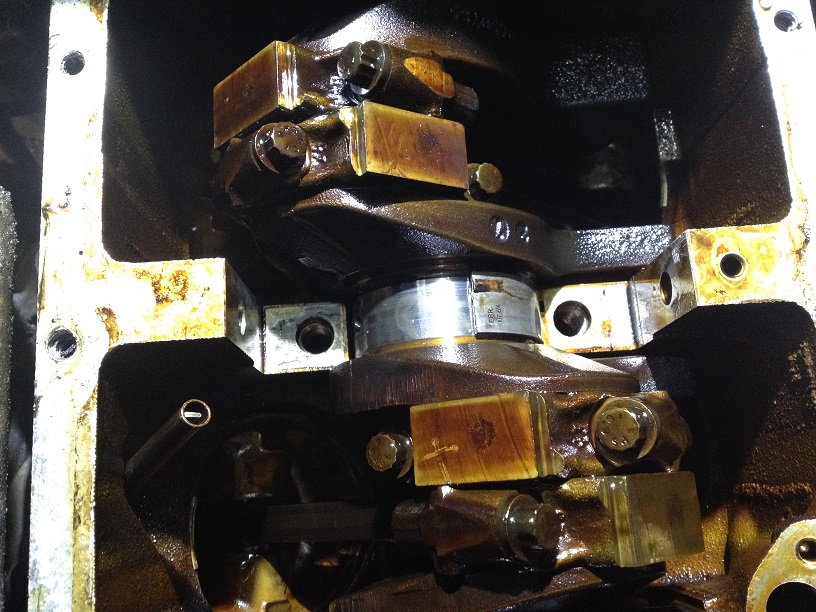
Both Shells out .
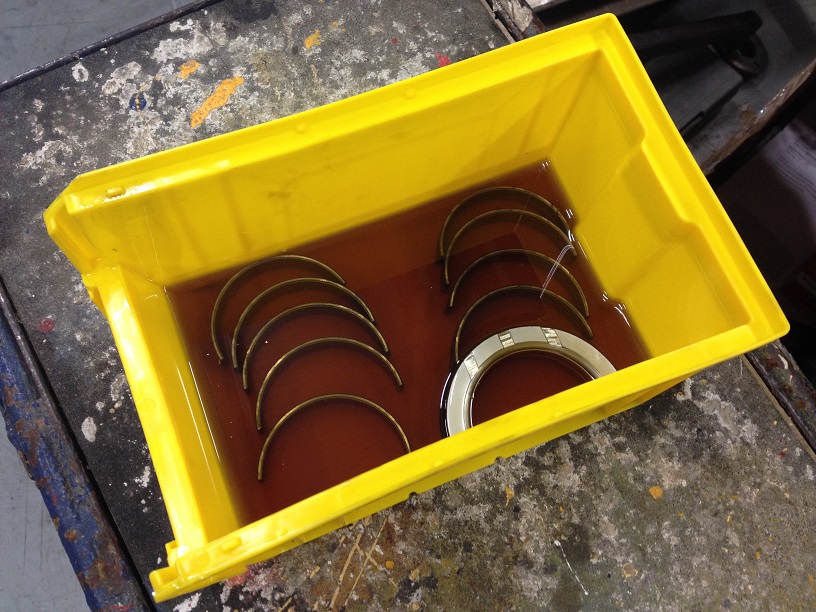
The new shells should be coated in fresh and clean engine oil or assembly lube/oil
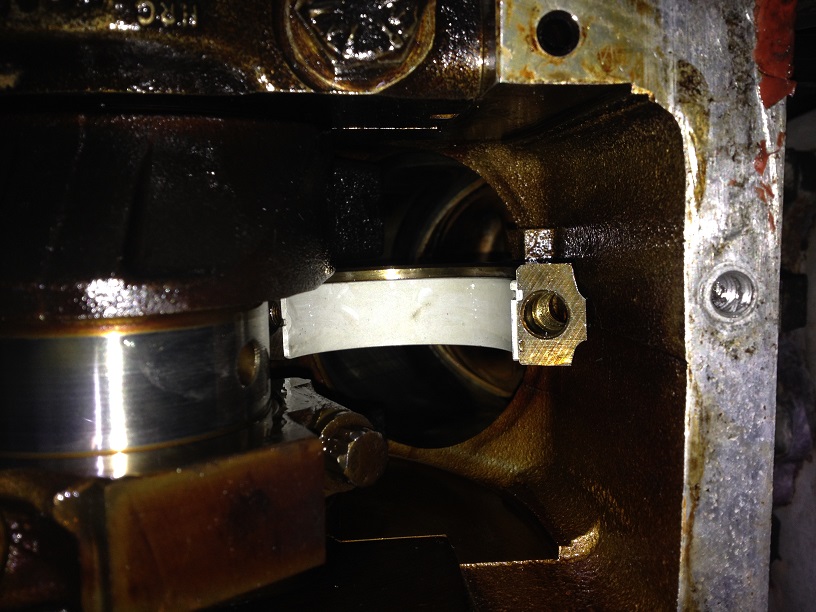
Slide the Top Shell into place. I tried using the same method to push the top shell back (turning crank in the opposite direction) but the little pusher kept slipping under the shell, if this happens you must stop and turn the crank back to get the pusher out as you dont want to damage the shell instead I pushed it as far as I could with my fingers, then gently tapped it home using a drift.
Fit a new shell to the bearing cap and refit, again I did it up to a torque of 5Nm (4lbf.ft), until all the bearings (both Mains and Big Ends) were done!
I then did No1, then 3 and then 2 .leaving 5 till last.
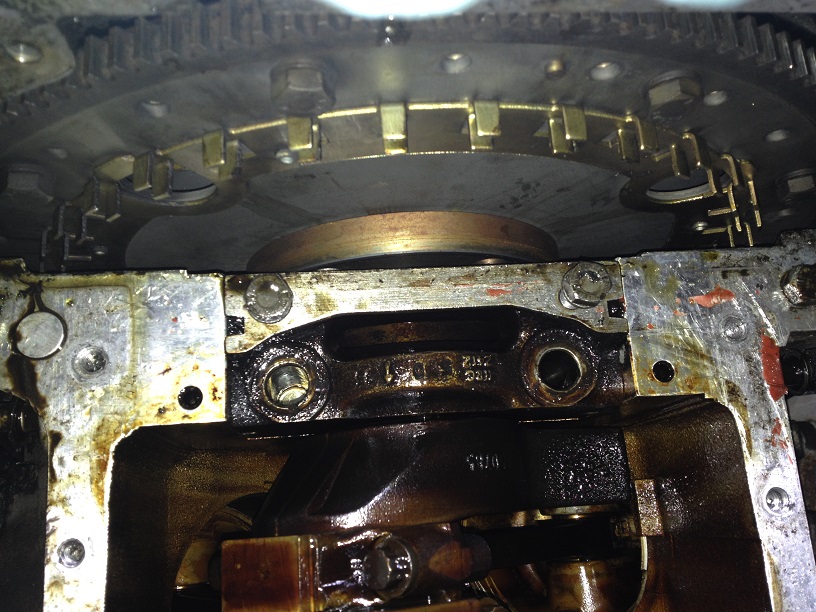
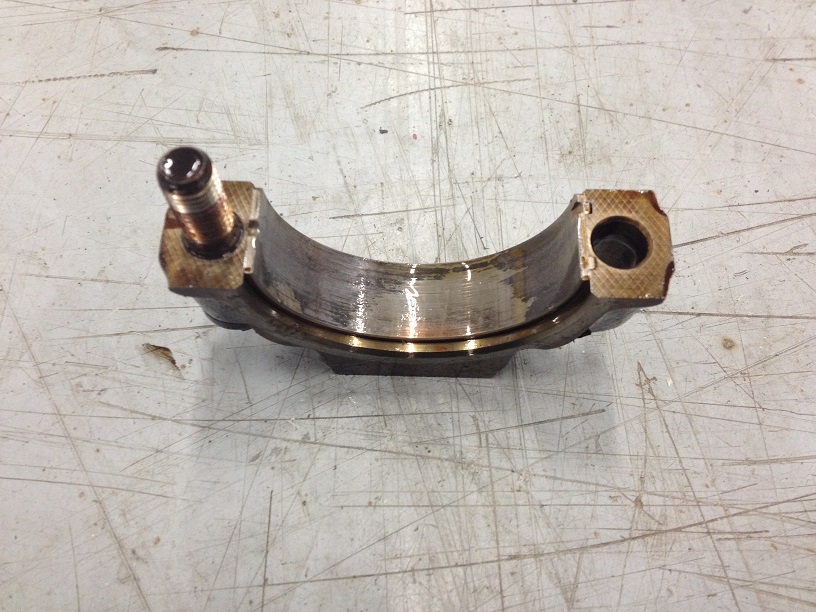
No5 cap is partially hidden under the flywheel cover plate, so pop this off.
This was a little sod to get out!
I tried wiggling it nope
I tried pulling on it with the sump bolts fitted so I could get better hand hold ..nope
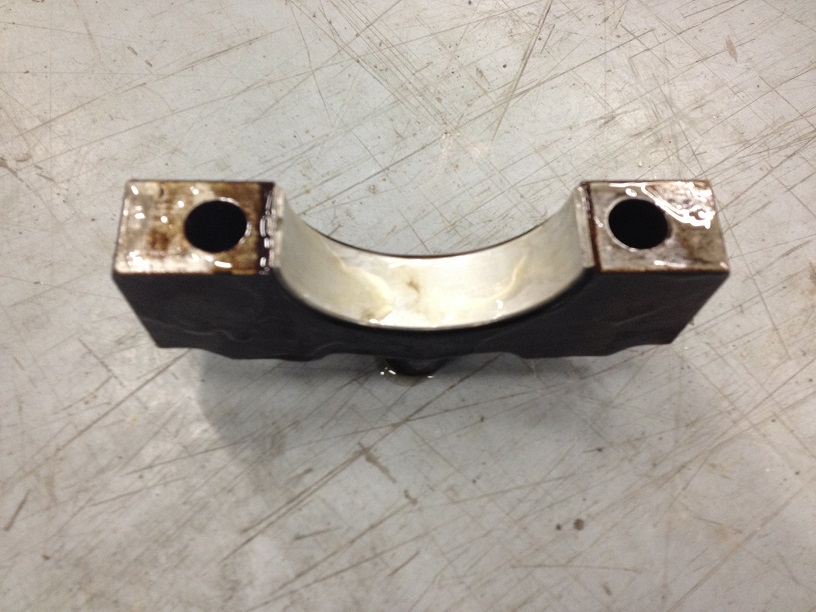
In the end I knocked up a rough puller and used some longer bolts (5/16UNC from memory) and some packing washers to mechanically pull the cap out!
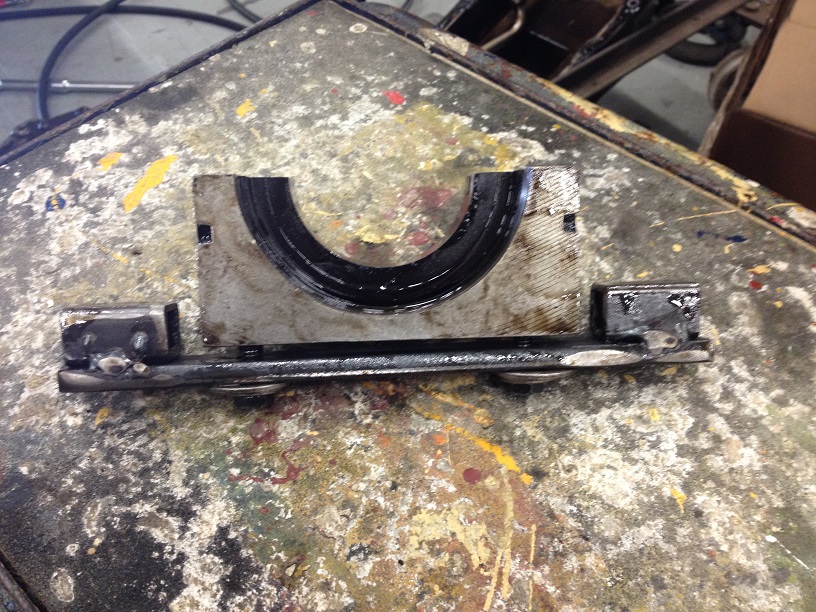
The Puller is a 9 long of I think 5mm or 6mm flat 1 bar welded to the underside is 2 pieces of 20x20 box of an 1 or so long ..2x holes 10mm diameter at 100mm between centres. Please ignore the welding it was early on Sunday morning at this point and I just wanted it out!
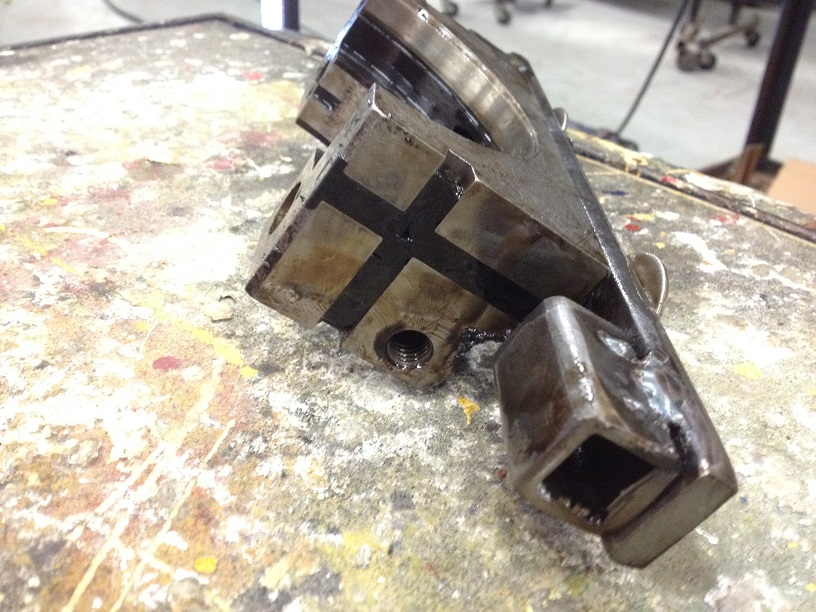
N05 cap is fitted with seals so these will need replacing. The originals are T shaped and the replacements didnt have quite such a large cross bar to them!
The originals were sold and brittle, so little hope of them ever sealing again!
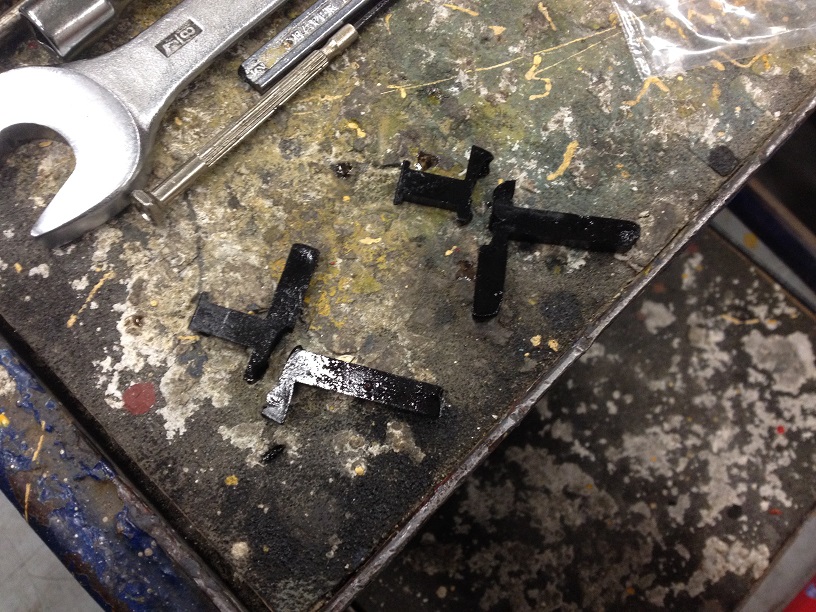

They did extend a tad over the top and bottom of the cap, so I trimmed them back to suit.
A bead of sealant needs to be placed on the mating face of the block at the rear and sides of No5 bearing.
All the Main Bearings done, still not torque up and left a ¼ turn loose.
Move on to the Big End Bearings ..These couldnt have been easier!
Using a 10mm multi-point socket (are they 12 pointed sockets??) I started at the rear of the engine and undid the Big End Cap .on removal note the orientation of fitment as it MUST go back on the same way!
I left one of the bolts in place so I knew which way it would go back!
Once the cap is off, push the piston up the bore to get to the top shell.
Remove the top shell
Refit with a oiled up replacement
Do the same with the bottom shell

On refitment of the cap, use new bolts as these are angular torqued (stretch bolts)
I left them all nipped up so I could torque them all in one go once they were all done!
Repeat another 7 times ..!!!!
Now we get to the torquing up ..
Do the Big Ends first as you still need to rotate the crank shaft to get to all the bolts .even though the crank will still turn with the Mains torque up, it is a little stiff!
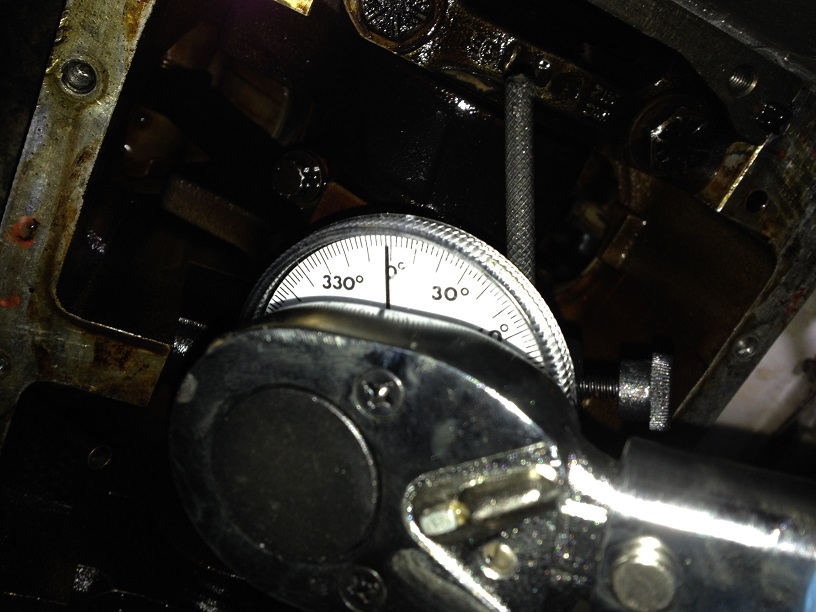
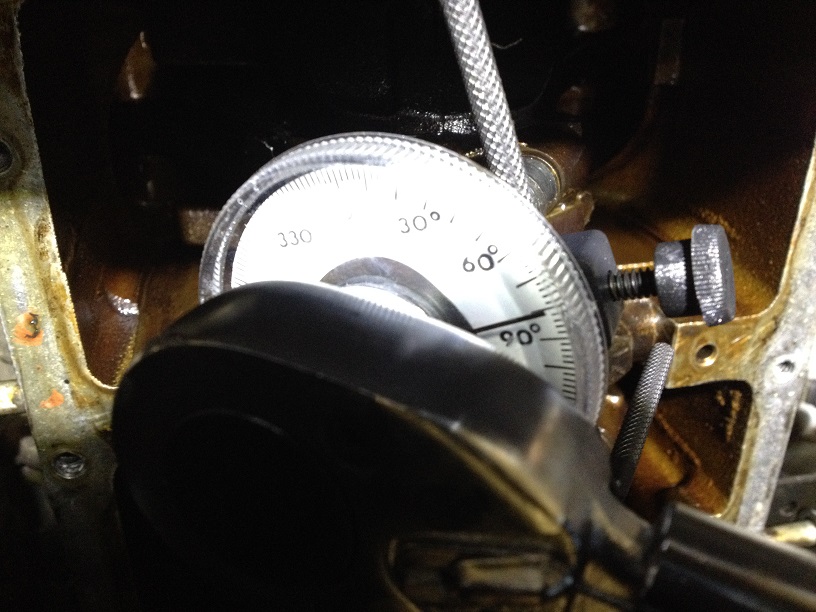
The Bigends need to be first torque to 20Nm (15lbf.ft) and then another 80 degrees
The Main Bearings are tightened in stages and in sequence .
Sequence:
Bearing No3 L then R Bearing No4 L then R Bearing No2 L then R Bearing No1 L then R Bearing No5 L then R
L = Left hand Bolt as lying under the car with your feet poking out the front!
R = Right hand Bolt as lying under the car with your feet poking out of the front!
Stage 1:
Torque Main bearing cap bolts up to 13.5Nm (10lbf.ft)
Then the Side bolts to the same
Stage 2:
Main Bearings No1 4 = 72Nm (53lbf.ft)
Main Bearing No5 = 92Nm (68lbf.ft)
Side bolts to 45Nm (33lbf.ft)
Now everything goes back on!!!!
I replaced the Starter Motor Socket Cap Bolts with Hex Head bolts as Socket Caps, when they get full of gunge, they are notorious for rounding off!, at least with a Hex Head and the correct sized socket, this is minimised!
Pushed the car off the ramps and pushed her outside for filling the cooling system and oil.
With all the fafing around of making the puller, finding a little pusher, taking the front end off, pee breaks, food and cups of coffee .Bleeding the cooling system, refill of fluids etc I finished at 6.50am Sunday morning !!!!!!!!
Home by 8am Sunday and a couple of hours kip!!
All in all not a bad job, just time consuming getting it all ready replacing the actual bearings was simple and easy (bar No5 Bearing Cap!)
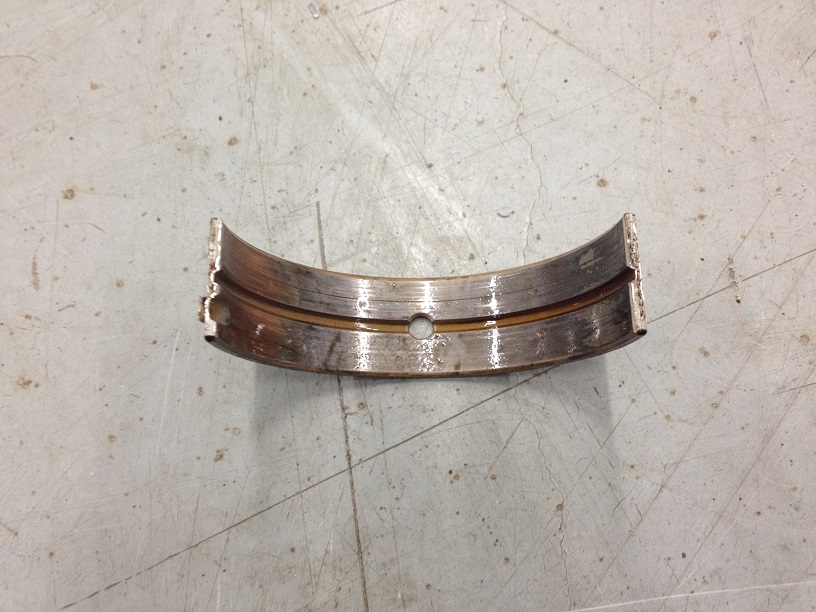
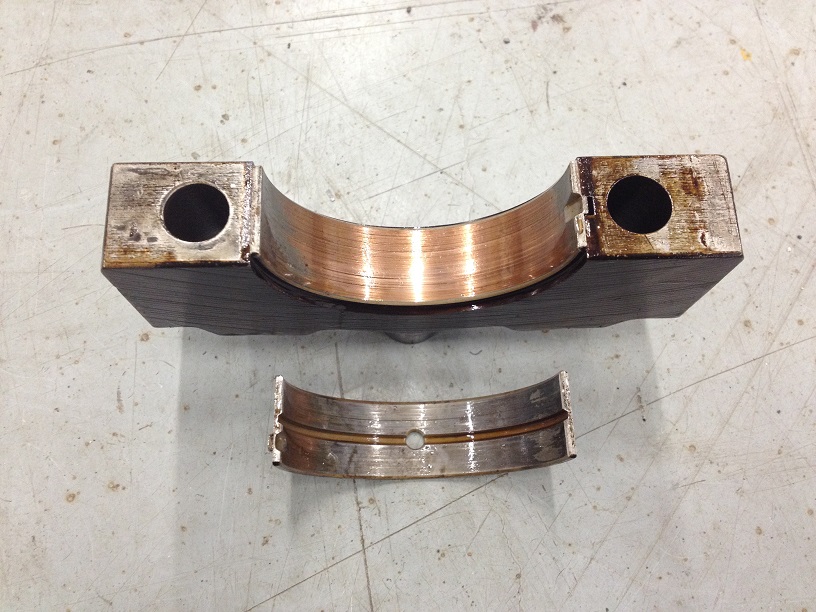
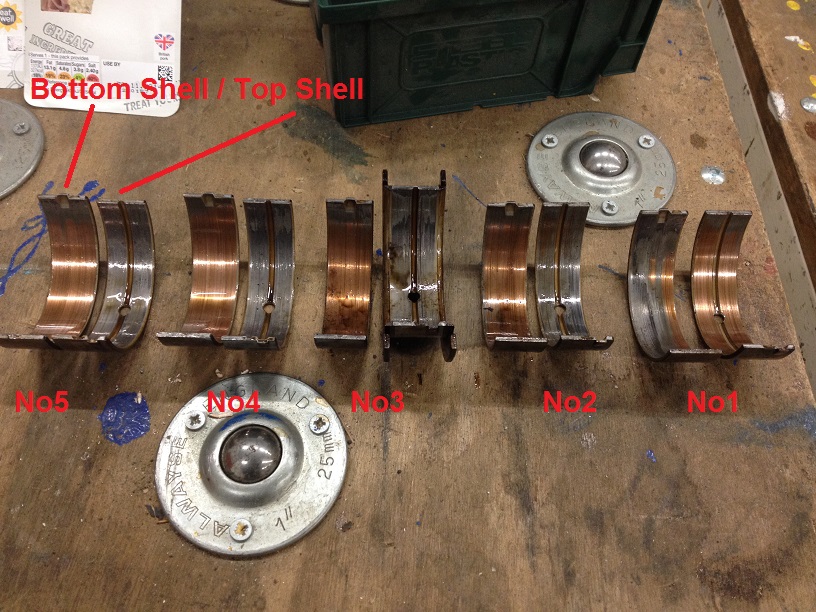
Here are the old shells for photo reference .well worn.
Big Ends
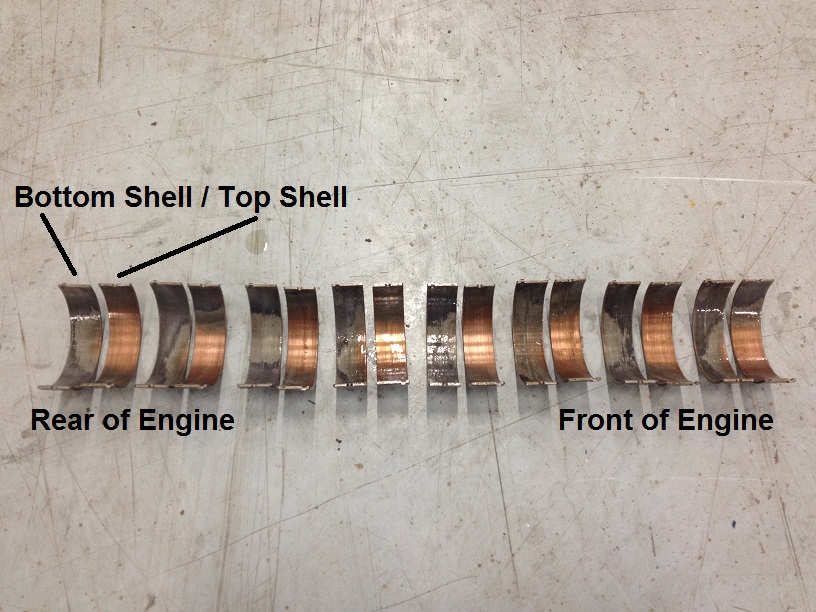
Mains ..
Has it solved the issue .only partially.
Oil pressure is good unless idling for a couple of minutes when the light starts to flicker .pick up the revs to over 1000, and the light goes out .leave to idle again and the light flickers on and off after a minute or so!
I do know my idle speed is a little low around the 500-550 mark where RAVE indicates this should be closer to 700 .maybe that could be a reason.
Anywho, the bottom end is done, I will manage the low idle pressure issue for the time being, as long as I dont allow the light to come on by placing in Neutral and holding the revs up while standing until I can get the idle speed increased ..
A top end refresh of Cam, Followers, Rockers and Shaft wouldnt go a miss, but that will have to be after Crimbo now!!
Position vehicle on ramps and lower to access (to be able the access the plugs easy enough!)
Raise the Bonnet and detach the Struts, position in Service mode and lock the catches on each side
Disconnect the battery in accordance with the Owners Manual (Some require you to turn ignition on, then off and disconnect battery within 17 seconds)
Lucky enough to be working in the workshop so I have access to a high powered LED Flood lamp (No heat Loads of light!).
Drain the Oil from the sump.
Next is to fight with the top Starter Motor bolt .need to remove the starter as one of the Main Bearing cross bolts (socket cap) sits recessed in the block and is hidden behind the starter.
First remove the Power Cables to the Starter and the little connector, this makes getting your hand over the top of the starter to feed the ratchet in easier!
Using extensions and an 8mm Allen Socket, Feed the extensions in from next to the Oil Filter, over the top of the engine mount and using your other hand over the top of the starter, feel for the top bolt and guide the extensions and socket into the bolt ..
Using a few expletives and a good deal of pressure to keep the socket in the socket cap, apply liberal amounts of force and crack the bolt off .Do everything you can to avoid rounding off the socket cap exhaust manifold off job to rectify that!!
Luckily mine cracked off without rounding the socket cap
After reading horror stories of people struggling for hours and sometimes days to get that off, I was lucky and it took me 30 minutes of fiddling and using different combinations of extensions to get the right length!
Next is to remove the spark plugs. This is done so when you get to the bearings, you can turn the crank by hand to get the shells out and position the big ends to undo them!
Label the leads, and remove the plugs mine looked a little old and the gap was over sized, so I replaced all 8 plugs with new on refitment!
Next, undo the billion sump bolts luckily I had access to an air powered ratchet which took a lot of the elbow grease out of this boring and annoying task!
Life was made easier with using one of those Car Inspection Trolley thingies to slide under the car and back out again, rather and lying on my back on the floor!
Once I had undone all but to opposing corner bolts, I jacked the front of the car up (as it was in access height to get easier access inside the engine!) so the sump will clear the steering and track arms.
The hidden Socket Cap cross bolt!
Next, undo the 10 (well I did the first 9 then swore at the last one, explain soon!) Cross Bolts .some are tucked behind oil pipes, but they do move to allow a spanner on some you cant get a ratchet onto due to clearance issues ..mine were sodding tight, so I cut the end off a spanner and slid a 10 length of 20x20 steel box over the end for additional leverage ..
Then I go the to the 10th bolt ..ARRGGGHHHH hidden behind the Filter .no probs, take the filter off .AAARRRRGGGHHHH .still blocked by the bowl the filter screws on to!
After my many trials and troubles with the front cover (covered in other threads of mine) the bloody thing had to come off again ..For the process read http://www.landyzone.co.uk/lz/f10/gems-front-timing-chain-cover-part-1-a-260980.html and http://www.landyzone.co.uk/lz/f10/gems-front-timing-chain-cover-part-2-a-261443.html
Right after spending time getting the thing ready for the work, time to crack on with the Main Bearing replacement.
In order to facilitate rotating of the crank and also to make getting the top shells out easier, I elected to crack off and loosen by about a quarter turn all the main bearing bolts .DO NOT loosen to far as you dont want the crank to drop potentially ruining the rear crankshaft seal!
Refit the Crank pulley (so you can fit the Crank Pulley Holding Tool as per my previous thread) and redo the Crank Pulley Bolt back up again.
Then place a ratchet and socket onto the Crank Pulley Bolt, this allows you to turn the crank by hand easily enough.
I started with No4 Bearing. Undo the bolts and wiggle the bearing cap out. Note the orientation of fitment as it MUST go back the same way round! There is a number and arrow on the casting, arrow to the front of engine and number is its position (1 is the front, 5 is the rear).
Using a good tip from Tomcat59Alan of a small Copper Rivet or similar to poke in the Crankshaft oil way and turn the crank round and this pushes the top shell out the other side I used a cut down bolts with the top ground down to the right thickness .
The pimple to poke in the oil way cant be too long as the oil way is slanted and the top cant be too thick as it has to pass over the top and under the engine block will pushing the shell out!
Position the pusher and turn the crank .NOTE, the shells have a locating lug so they must be pushed out in the correct direction!
Both Shells out .
The new shells should be coated in fresh and clean engine oil or assembly lube/oil
Slide the Top Shell into place. I tried using the same method to push the top shell back (turning crank in the opposite direction) but the little pusher kept slipping under the shell, if this happens you must stop and turn the crank back to get the pusher out as you dont want to damage the shell instead I pushed it as far as I could with my fingers, then gently tapped it home using a drift.
Fit a new shell to the bearing cap and refit, again I did it up to a torque of 5Nm (4lbf.ft), until all the bearings (both Mains and Big Ends) were done!
I then did No1, then 3 and then 2 .leaving 5 till last.
No5 cap is partially hidden under the flywheel cover plate, so pop this off.
This was a little sod to get out!
I tried wiggling it nope
I tried pulling on it with the sump bolts fitted so I could get better hand hold ..nope
In the end I knocked up a rough puller and used some longer bolts (5/16UNC from memory) and some packing washers to mechanically pull the cap out!
The Puller is a 9 long of I think 5mm or 6mm flat 1 bar welded to the underside is 2 pieces of 20x20 box of an 1 or so long ..2x holes 10mm diameter at 100mm between centres. Please ignore the welding it was early on Sunday morning at this point and I just wanted it out!
N05 cap is fitted with seals so these will need replacing. The originals are T shaped and the replacements didnt have quite such a large cross bar to them!
The originals were sold and brittle, so little hope of them ever sealing again!
They did extend a tad over the top and bottom of the cap, so I trimmed them back to suit.
A bead of sealant needs to be placed on the mating face of the block at the rear and sides of No5 bearing.
All the Main Bearings done, still not torque up and left a ¼ turn loose.
Move on to the Big End Bearings ..These couldnt have been easier!
Using a 10mm multi-point socket (are they 12 pointed sockets??) I started at the rear of the engine and undid the Big End Cap .on removal note the orientation of fitment as it MUST go back on the same way!
I left one of the bolts in place so I knew which way it would go back!
Once the cap is off, push the piston up the bore to get to the top shell.
Remove the top shell
Refit with a oiled up replacement
Do the same with the bottom shell
On refitment of the cap, use new bolts as these are angular torqued (stretch bolts)
I left them all nipped up so I could torque them all in one go once they were all done!
Repeat another 7 times ..!!!!
Now we get to the torquing up ..
Do the Big Ends first as you still need to rotate the crank shaft to get to all the bolts .even though the crank will still turn with the Mains torque up, it is a little stiff!
The Bigends need to be first torque to 20Nm (15lbf.ft) and then another 80 degrees
The Main Bearings are tightened in stages and in sequence .
Sequence:
Bearing No3 L then R Bearing No4 L then R Bearing No2 L then R Bearing No1 L then R Bearing No5 L then R
L = Left hand Bolt as lying under the car with your feet poking out the front!
R = Right hand Bolt as lying under the car with your feet poking out of the front!
Stage 1:
Torque Main bearing cap bolts up to 13.5Nm (10lbf.ft)
Then the Side bolts to the same
Stage 2:
Main Bearings No1 4 = 72Nm (53lbf.ft)
Main Bearing No5 = 92Nm (68lbf.ft)
Side bolts to 45Nm (33lbf.ft)
Now everything goes back on!!!!
I replaced the Starter Motor Socket Cap Bolts with Hex Head bolts as Socket Caps, when they get full of gunge, they are notorious for rounding off!, at least with a Hex Head and the correct sized socket, this is minimised!
Pushed the car off the ramps and pushed her outside for filling the cooling system and oil.
With all the fafing around of making the puller, finding a little pusher, taking the front end off, pee breaks, food and cups of coffee .Bleeding the cooling system, refill of fluids etc I finished at 6.50am Sunday morning !!!!!!!!
Home by 8am Sunday and a couple of hours kip!!
All in all not a bad job, just time consuming getting it all ready replacing the actual bearings was simple and easy (bar No5 Bearing Cap!)
Here are the old shells for photo reference .well worn.
Big Ends
Mains ..
Has it solved the issue .only partially.
Oil pressure is good unless idling for a couple of minutes when the light starts to flicker .pick up the revs to over 1000, and the light goes out .leave to idle again and the light flickers on and off after a minute or so!
I do know my idle speed is a little low around the 500-550 mark where RAVE indicates this should be closer to 700 .maybe that could be a reason.
Anywho, the bottom end is done, I will manage the low idle pressure issue for the time being, as long as I dont allow the light to come on by placing in Neutral and holding the revs up while standing until I can get the idle speed increased ..
A top end refresh of Cam, Followers, Rockers and Shaft wouldnt go a miss, but that will have to be after Crimbo now!!
Last edited: