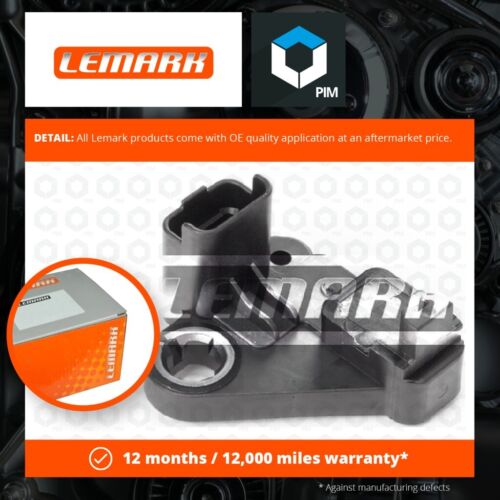
LANDROVER FREELANDER 2 SD4 Automatic - Crank Shaft Sensor keeps failing

This site contains affiliate links for which LandyZone may be compensated if you make a purchase.

anddypandy

New Member
Posts
1
Hi

I had the crank shaft sensor replaced on my FL2 a few months ago after breaking down and home diagnostics showing crank shaft sensor fault. It has been ok for a while but broke down again today with the same fault. I called the AA and they replaced the sensor (I had to pay for the part) which cleared the fault and got me back on the road. AA guy had just driven off when my car started to shudder but didn't cut out as it had earlier, the juddering improved after a few miles and I thought I was ok. However after switching off the engine to pop into the shop it wouldn't start again. AA came out again and thinking the sensor may have been faulty went a sourced an new one and installed it. This time it didn't work, had to be recovered home. The AA guy suggested it might be a problem with the wiring back to the ECU or could be something wrong with the pully on the back of the crankshaft (sorry not very technical). He said I might want to look at getting a mobile auto electrician to come and have a look.

Just wondering if anyone who has had any similar issues can offer advice? Thanks in advance
 
The plug is likely at fault. I replaced mine after several sensor failures in short succession. I found the spring tension on the plug pins wasn't good enough for a firm connection. This seems to cause an issue within the sensor itself, causing it to fail early. The early warning signs seems to be a misfire or drop-out under acceleration, but not always.
Sine replacing the plug, fitting a new OE sensor, and adding dielectric grease on installation , there has been no repeat failure.
Hi John.
Would you say that after market crank sensors are more likely to fail than genuine (LR056028) ones, or is there a good medium out there.
 
Hi John.
Would you say that after market crank sensors are more likely to fail than genuine (LR056028) ones, or is there a good medium out there.
There's evidence that cheap ebay sensors of unknown brand do fail quickly.
I use premium brands myself.
 
There's evidence that cheap ebay sensors of unknown brand do fail quickly.
I use premium brands myself.
John thanks for quick reply do you have any link for decent brands, i have seen these but looks expensive,
(https://www.ebay.co.uk/itm/126063433839) wow


Any good reports of the ones above, by anyone whom have used any.
 
Last edited:
I used a febi when I replaced the plug.
It's been fine since then.
Screenshot_20231219-121023_Gallery.jpg
 
I used a febi when I replaced the plug.
It's been fine since then.
View attachment 305236

John thank you now so ordered to add to my spares just in case :vb-tup:

Hi John.
Don't know if you will read this now or not has you are on the other side since the nasty posts on your threads, shame on those whom did it.

Well it seems i need the crank sensor now, but guess can i find it so have ordered another one, Lucas & a Febi seeing i have two FL2

https://www.ebay.co.uk/itm/313051670303 I am hoping this is genuine and not a copy or another make sent in it's place.

DTC P0335 code

Hopefully it will sort out the recent stuttering and couple of cut outs also changed my 7yr old battery.
 
Last edited:
The new Febi crankshaft was changed and driving is back to normal for now.
ZjVRJqul.jpg
1

I also put a new battery on the car has old one was 7yrs plus at least the 7yrs since i purchased the car anyways.
skzRHuKl.jpg
2

Hawkeye code reading.
qXSbSFtl.jpg
3

The FL2 was jacked up using trolley jack after the wheel nuts had been undone slightly, always good to use an axle stand as well, I didn't because I have faith in my jack.
ELe7Eyjl.jpg
4

Wheel off.
lh8Qe8Nl.jpg
5

Next the wheel arch liner section needs to be removed.
XHyRcMLl.jpg
6

This will have a couple of nuts most likely rusted, also two lower screws under the front of the bumper.
KkAack2l.jpg
7

As you can see i changed mine to rubber grommets/ washers which hold really good.
iLXi6bOl.jpg
8

Remove the lower bumper screws
hCAq96il.jpg
9

KjQEaKcl.jpg
10

Next remove the nuts in my case grommets.
ZeBveACl.jpg
11

iVZgwZvl.jpg
12

YbtfbJLl.jpg
13

ut7XFyLl.jpg
14

The access panel is now easy to remove.
NoWtYjel.jpg
15

L9oHYFfl.jpg
16

Place this out of the way.
PcRycs7l.jpg
17

You should now be able the see the crank pulley and on the left of it the crankshaft sensor.
4GOj8QCl.jpg
18

The sensor plug will have three wires coming from it.
qCEeL7Cl.jpg
19

You can see from this close up the plug is a little contaminated with oil deposits, need to find the cause.
2NcexNil.jpg
20

It might be the crack seal i will know later this month when i do the belts.
DKijwrzl.jpg
21

The belt otherwise looks really for 7yrs old and 17,000 miles.
29Np2vql.jpg
22

VT3XSNul.jpg
23

Anyway enough digressing, the crankshaft sensor is held in place with a 10mm bolt.
v4vwPCCl.jpg
24

Undo this with good six sided socket.
M3LMQ4il.jpg
25

lS2ERG3l.jpg
26

Remove the bolt completely.
Fx4dOvxl.jpg
27

I1gATO1l.jpg
28

You can now grip the sensor plug with wiring and juggle the sensor free, quite easy.
MFTFyGfl.jpg
29

sSLUr4nl.jpg
30

gRHu9cTl.jpg
31

Turn the plug over and you will see a tang this needs to be lifted to unplug the sensor from from wiring.
fa53v9Nl.jpg
32

5j4vnsEl.jpg
33

The sensor is now removed and can be replaced.
jt6FeSMl.jpg
34

Code on the back of mine was/is
rYbfwUkl.jpg
35

You can see where it bolts to the engine also the guide hole for the peg on the back of the sensor.
4GcwmfLl.jpg
36

I purchased three different sensors will talk about that later, decided to go with the Febi one.
kPQjvq6l.jpg
37

The old sensor.
WGqwJdDl.jpg
38

New and old side by side.
scrqfPel.jpg
39

The new one has the same part number so the old one must be Febi? anyone know that fact for sure.
D1Ya4F9l.jpg
40

Plug the new sensor into the the wiring plug and offer it up to the car.
Y4jKapnl.jpg
41

Bolt the sensor back on.
HQ75Uywl.jpg
42

I added a bit of red rubber grease to keep out any water or contamination, hopefully it will help?
bVAsD1Nl.jpg
43

Put the wheel arch access panel back in place, refit the wheel do the wheel nuts up 133Nm check again after about two days, start the car and go for a drive, hopefully all will be good.
 
I had a few jobs to do under the FL2 today checking brake lines etc and Hammerite the sub frame, while i have the lower engine under tray off i noticed that you could in fact fit the crankshaft sensor from under the car, save removing the wheel and wheel arch liner.
0WOiKqBl.jpg
1

Note how there is a recess for the sensor reading end to fit into.
6zrDNmhl.jpg
2
 
Last edited:
Back
Top