Here are what i went through when facelifting the rear end of my L-series FL.
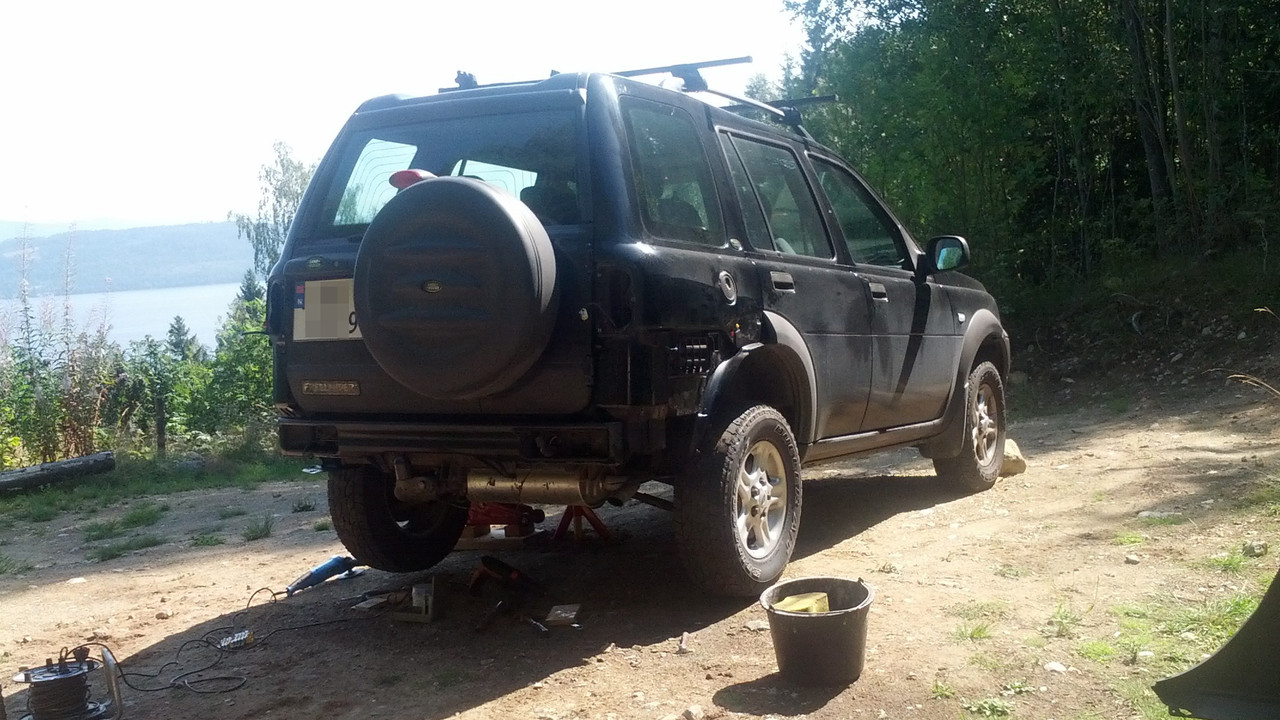
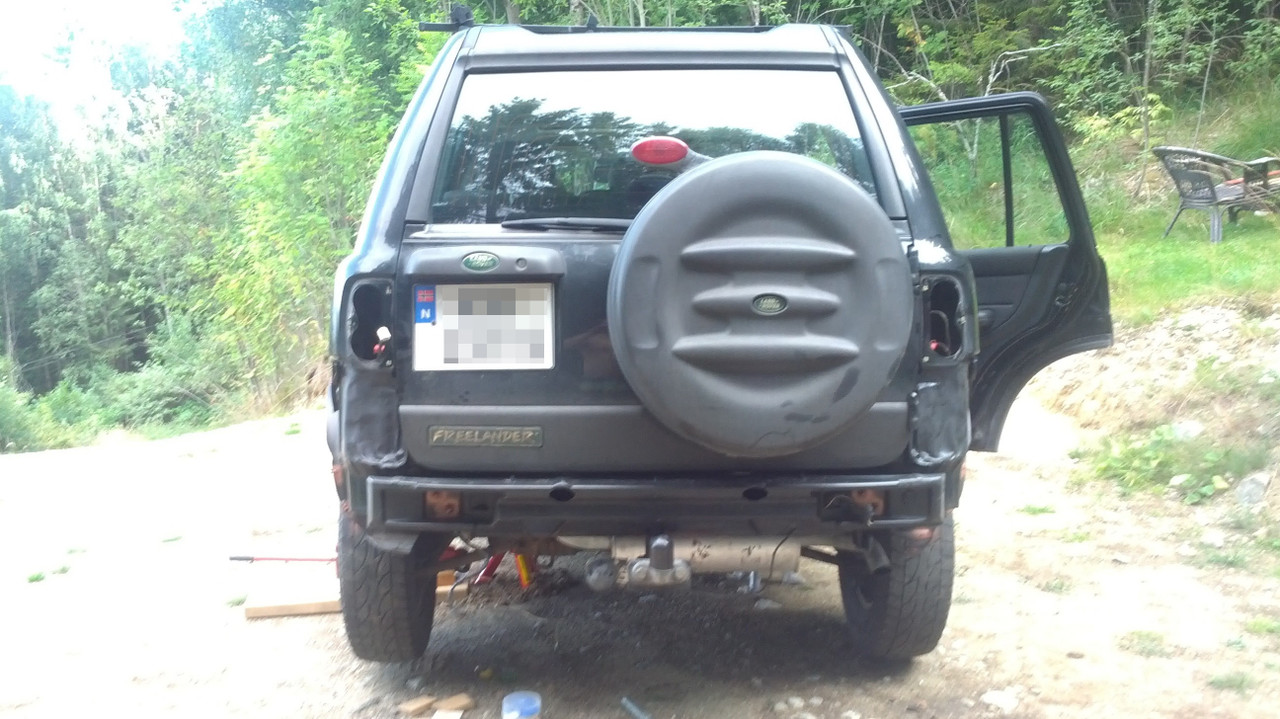
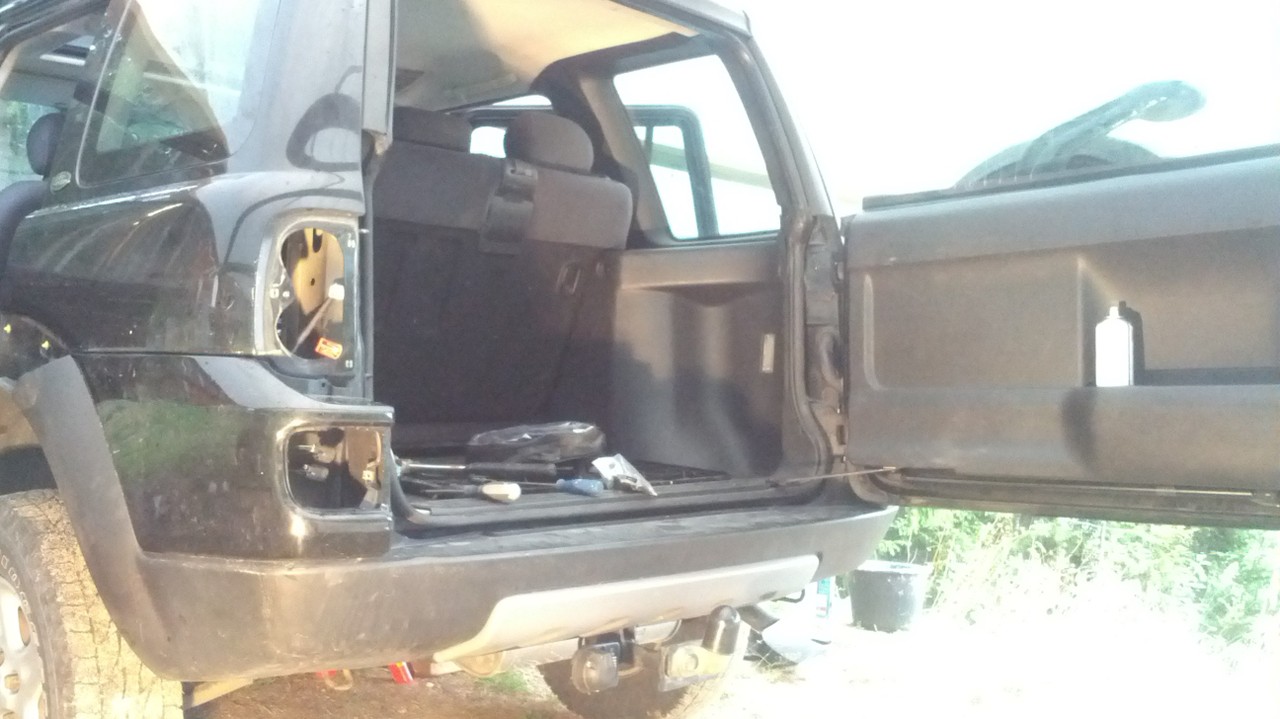
Getting the old bumper of is almost more work than getting the new on. So when your at this stage, youre halfway there.(BTW: You dont need to remove the wheels as mentioned in RAVE to remove the bumper. Just lift and support is enough.):
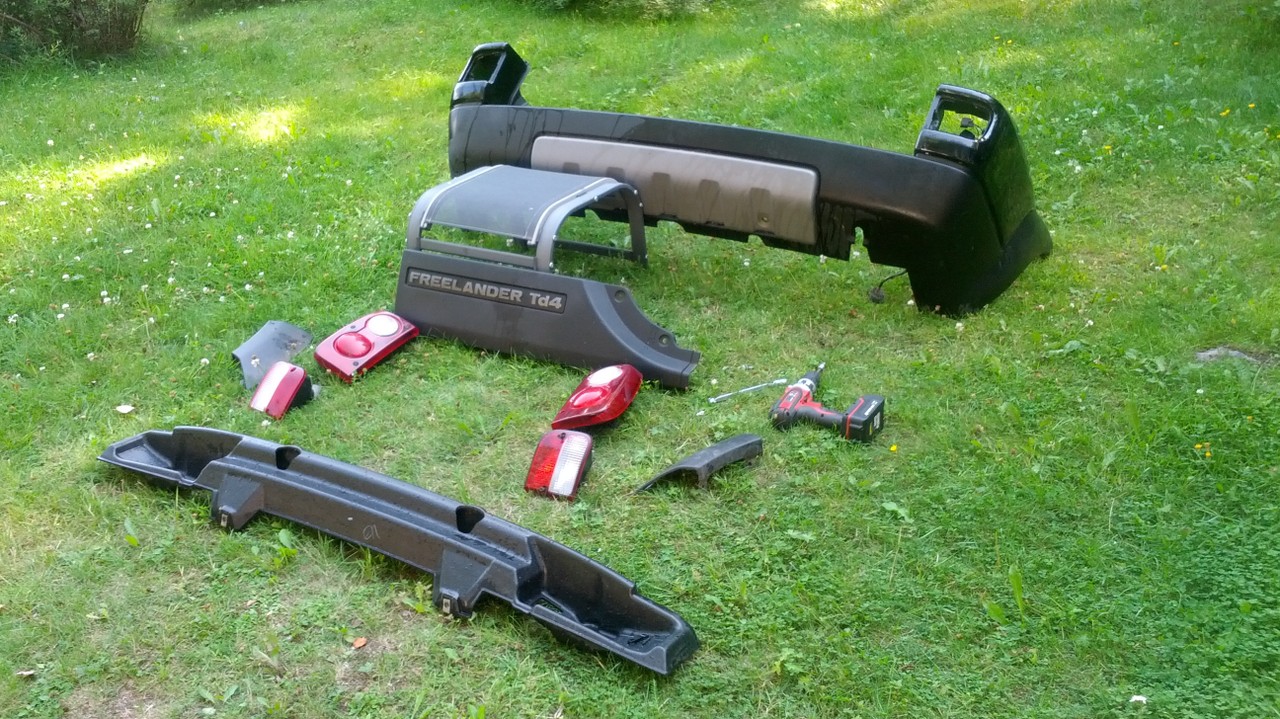
Here are the parts i sourced before i started. I also got the black wheel arches extensions for the doors and the front fenders. New scrivets(5 for fitting the top of the bumper under the tailgate.) and new screws for the wheel arches.
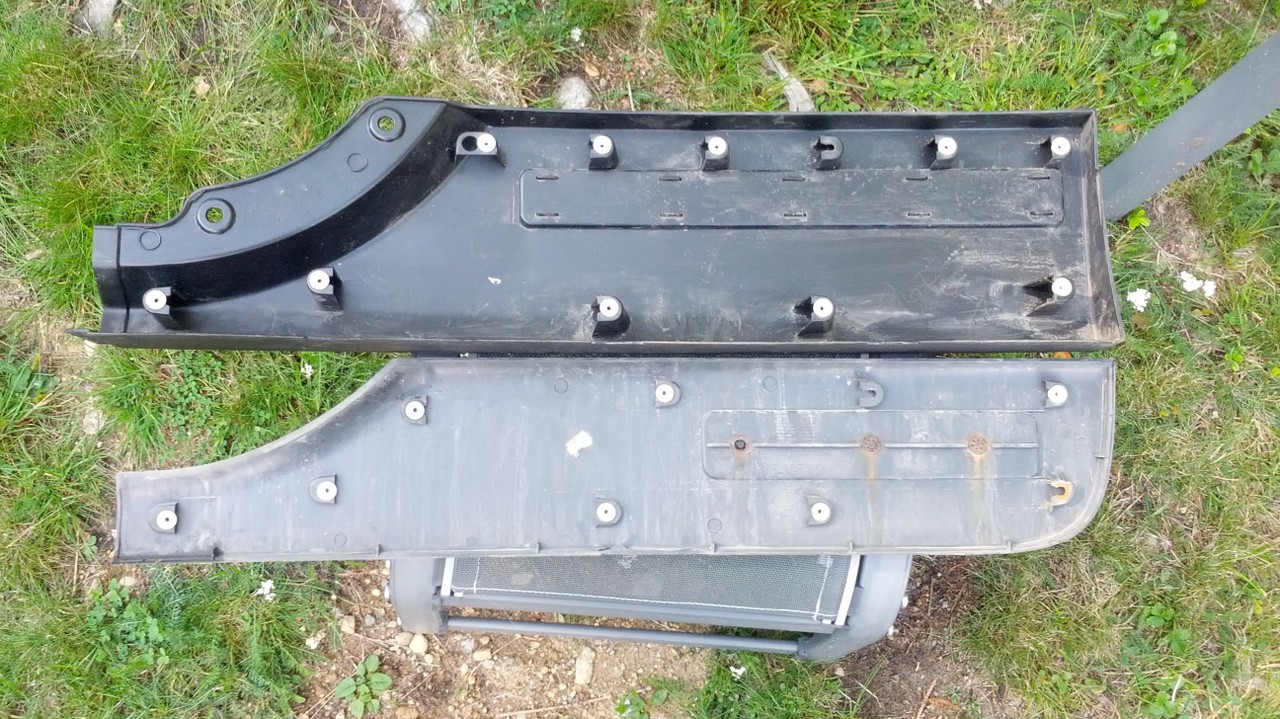
First i started with changing out the rear plastic armature(plastic crashbar)
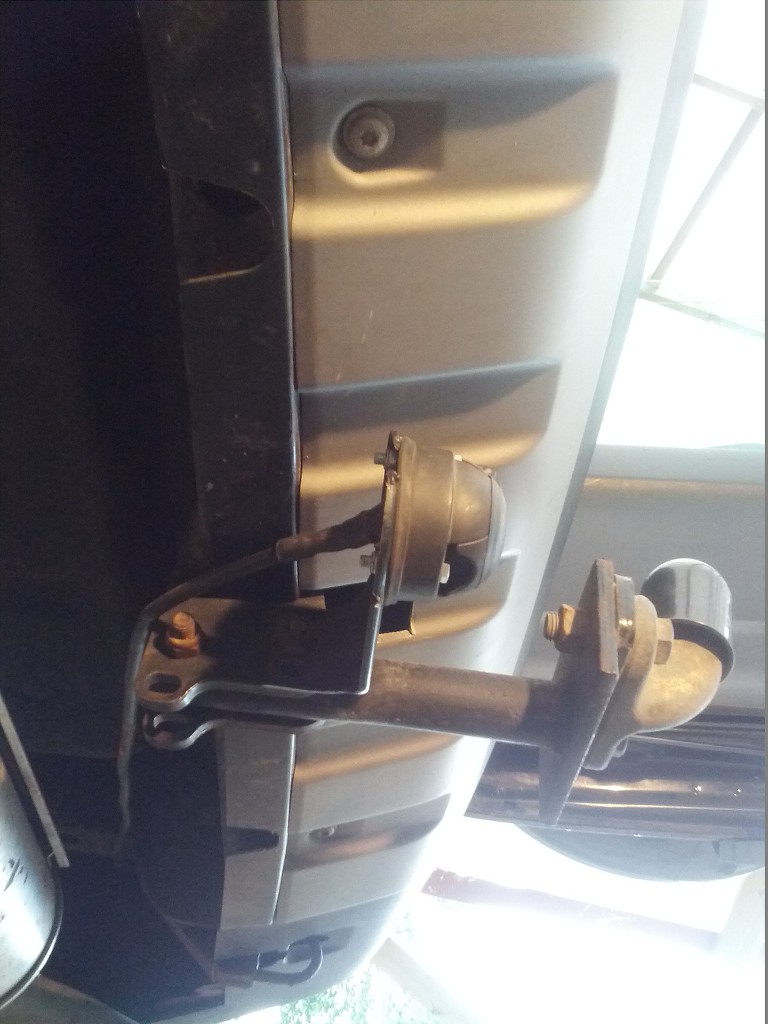
They look quite similar, but there is a few differences. With the pre-facelift armature the 2 bolts that goes from underneath when fitting the bumper wont line up.
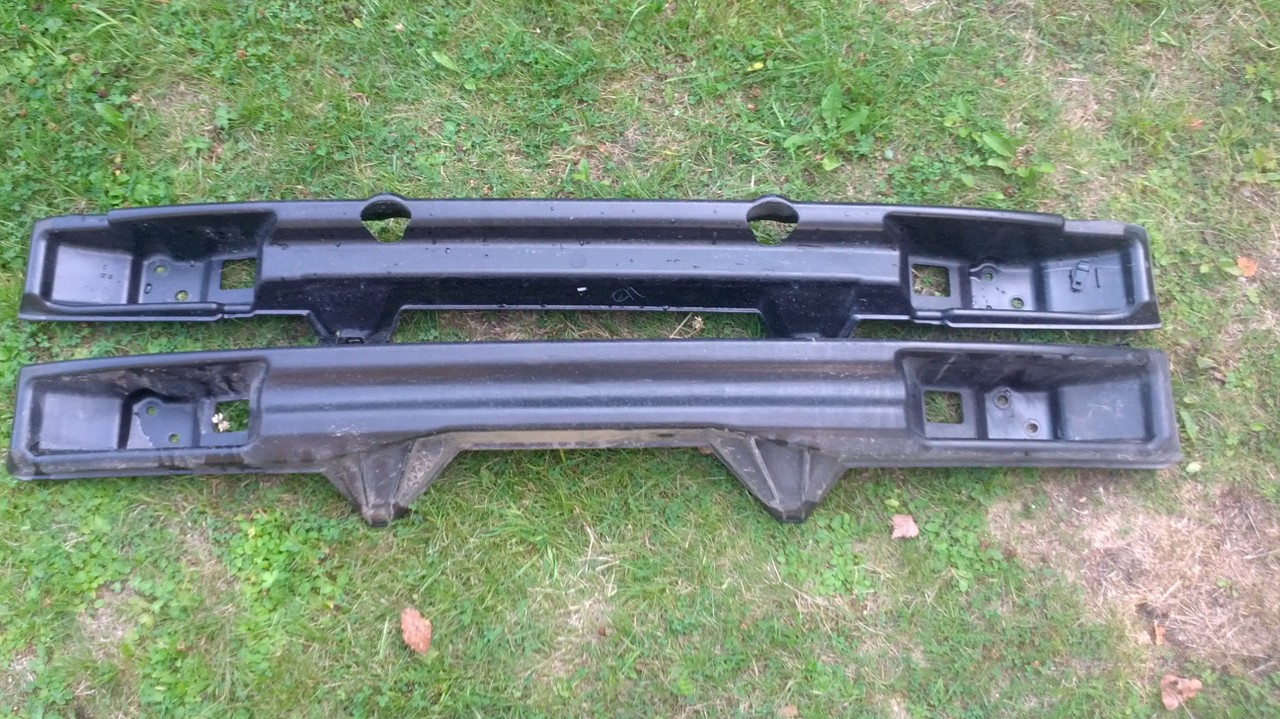
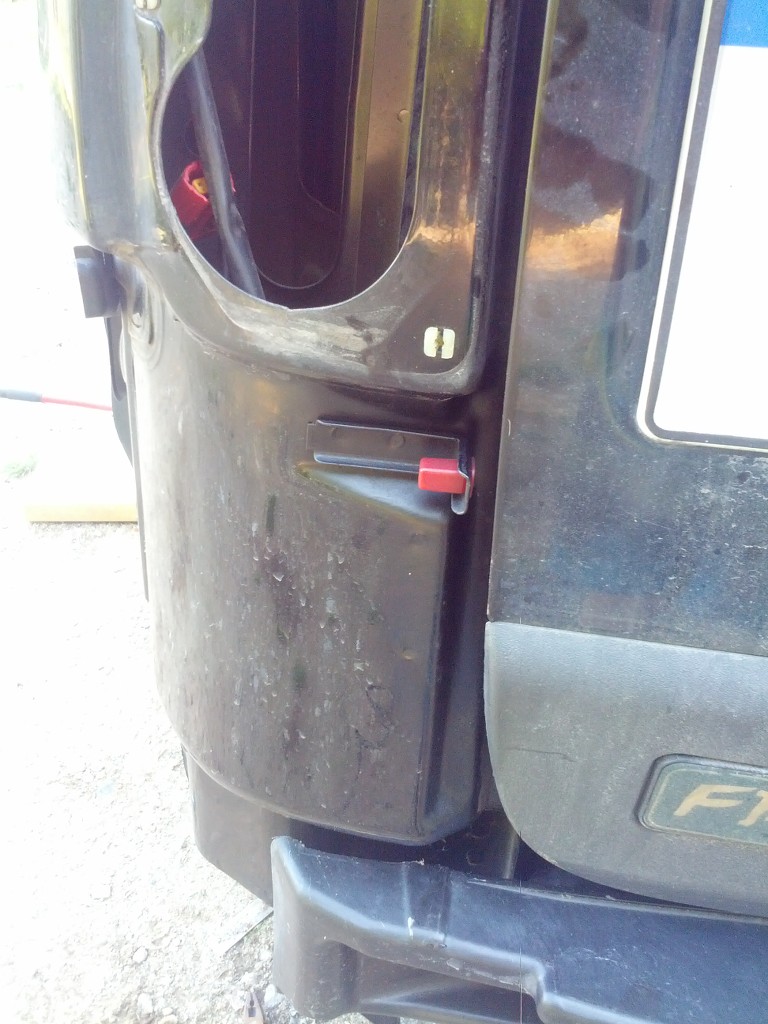
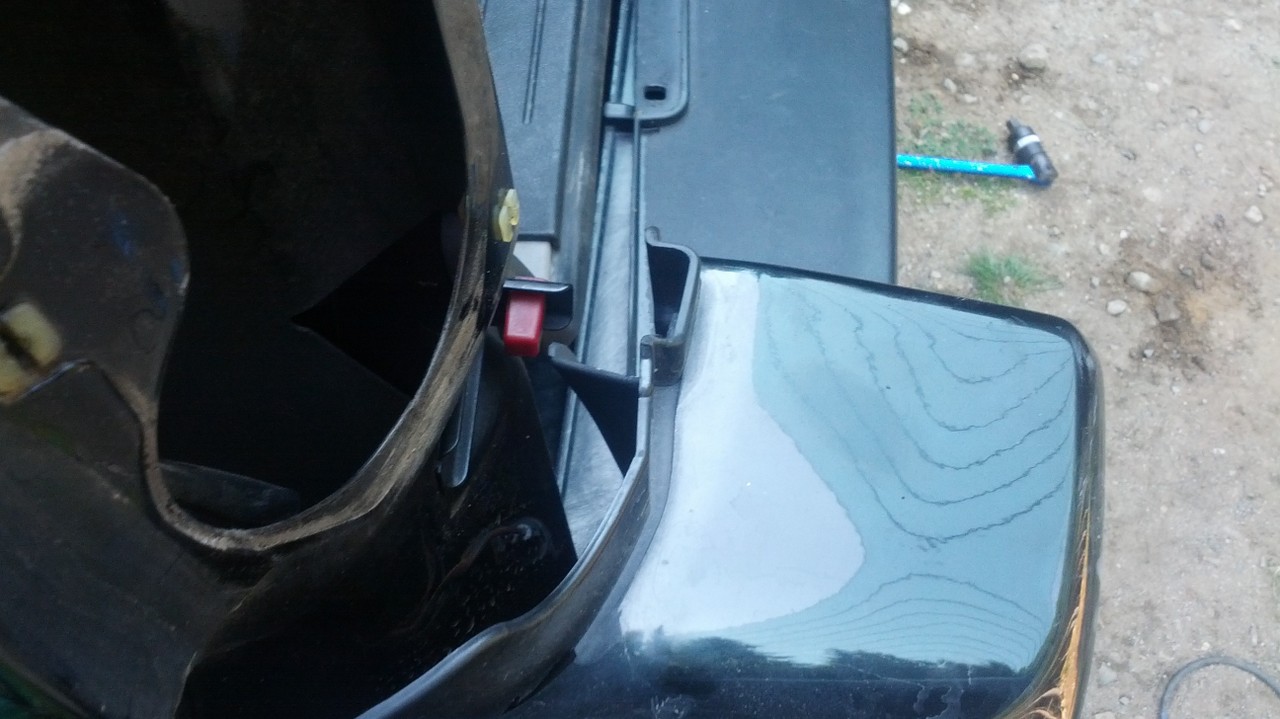
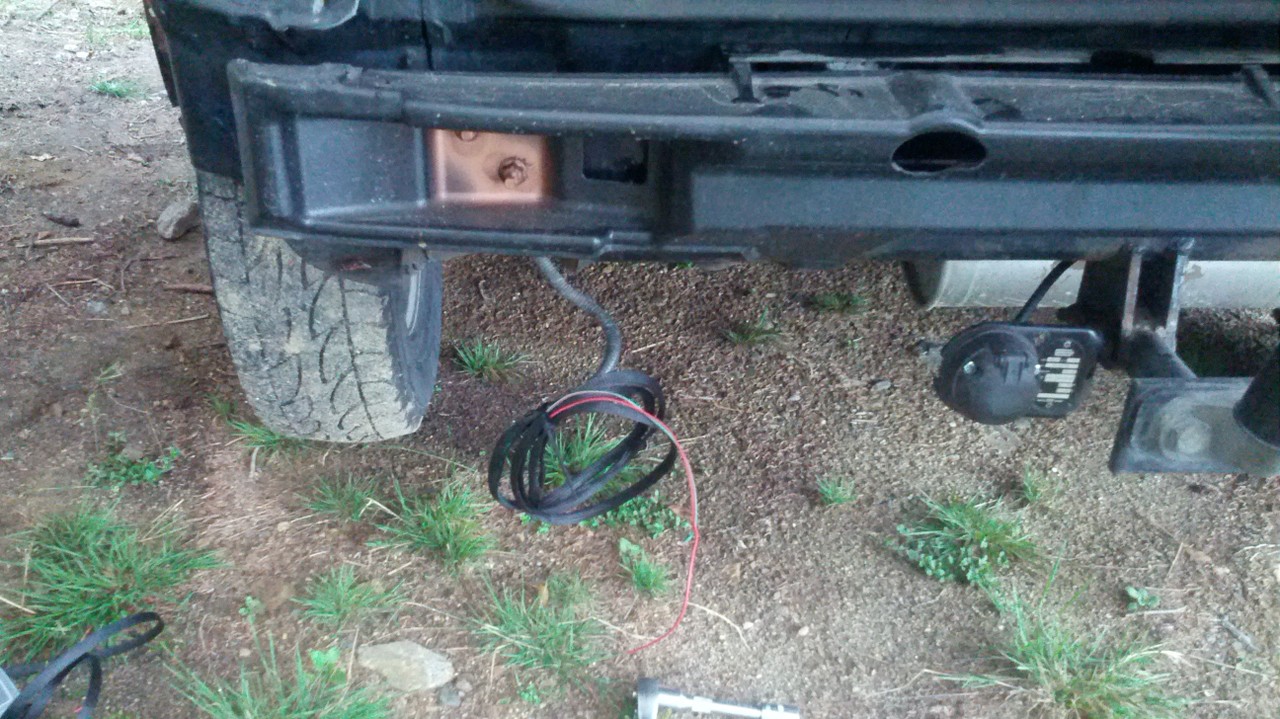
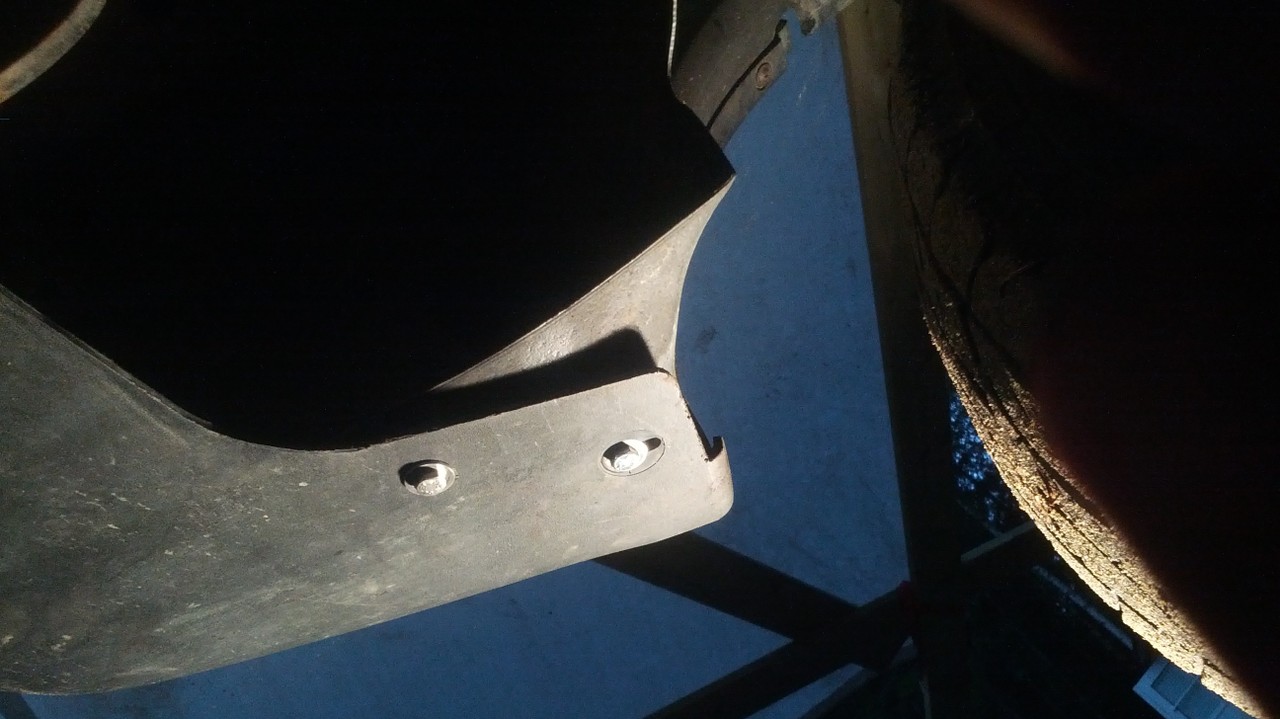
Pre-facelift bumper bracket needs to be removed. The little "bump" underneath also needs to get handled.
Different mounting point.

From the top.
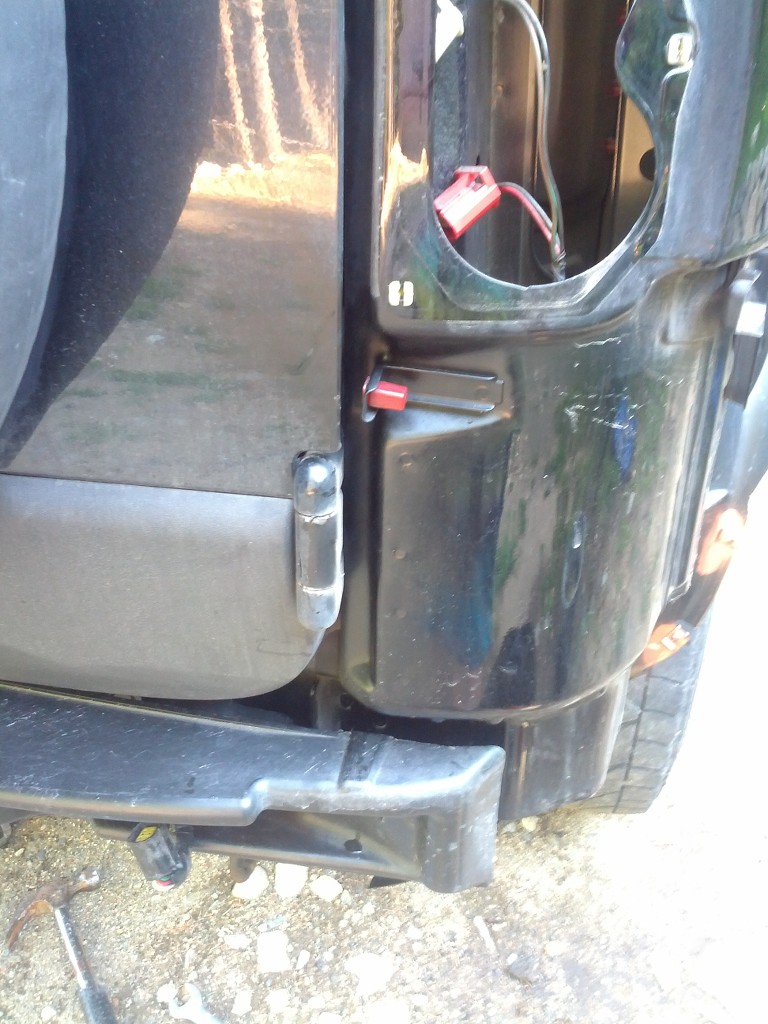

Brackets removed.

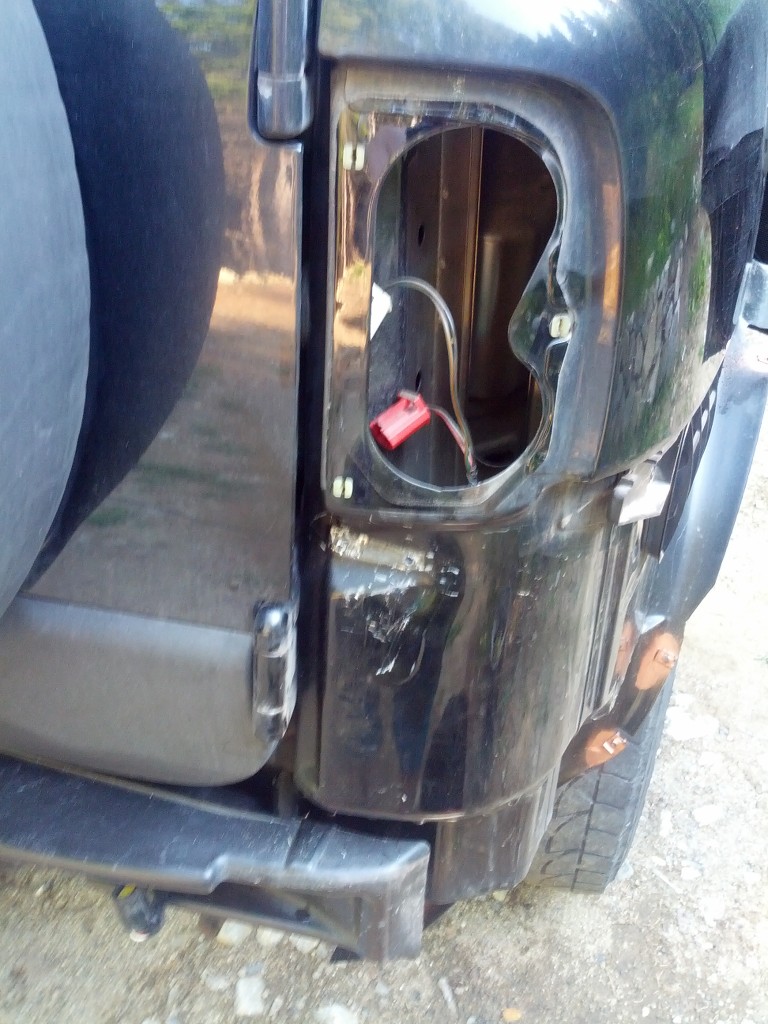
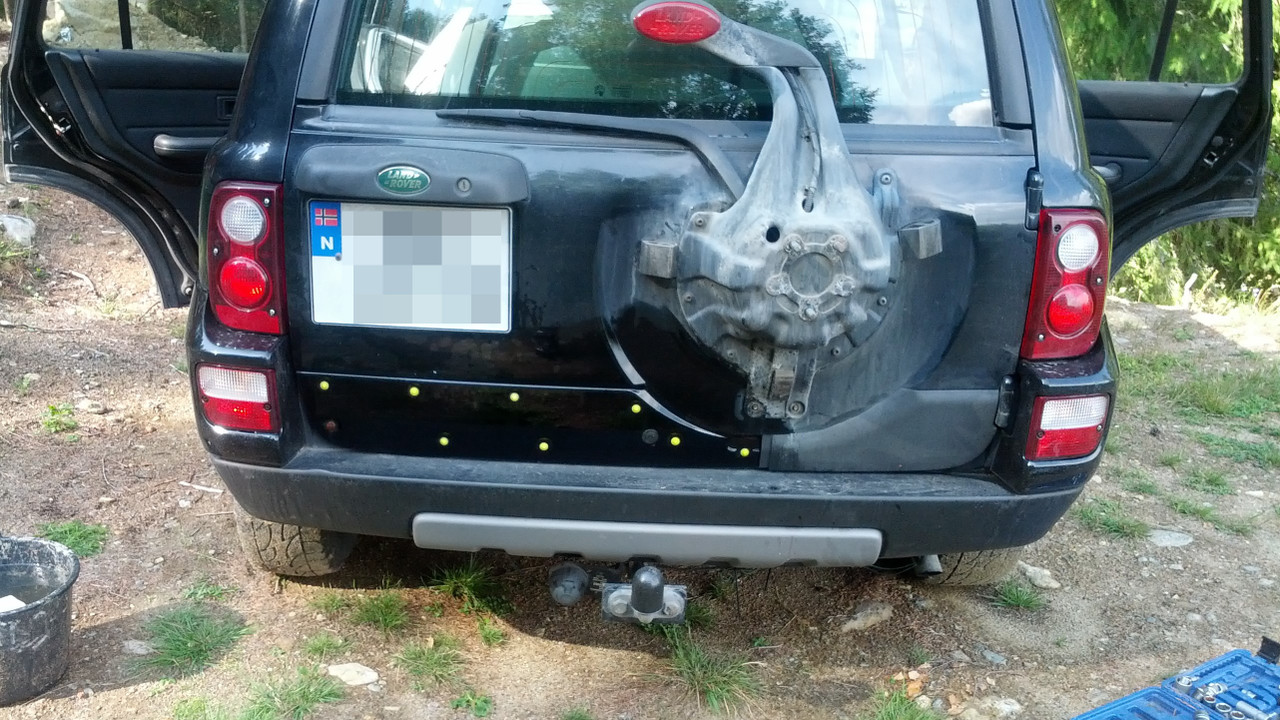
Here is how i handled the little "bump". You can still see marks from the sledgehammer.
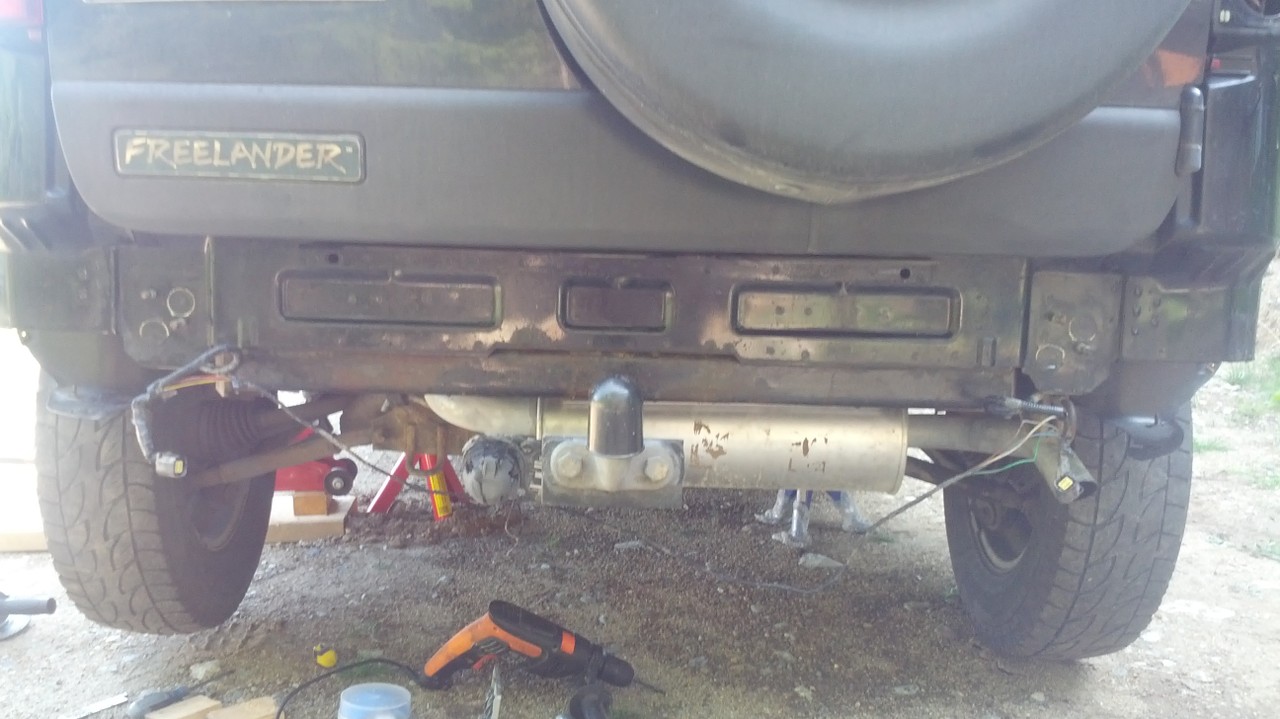
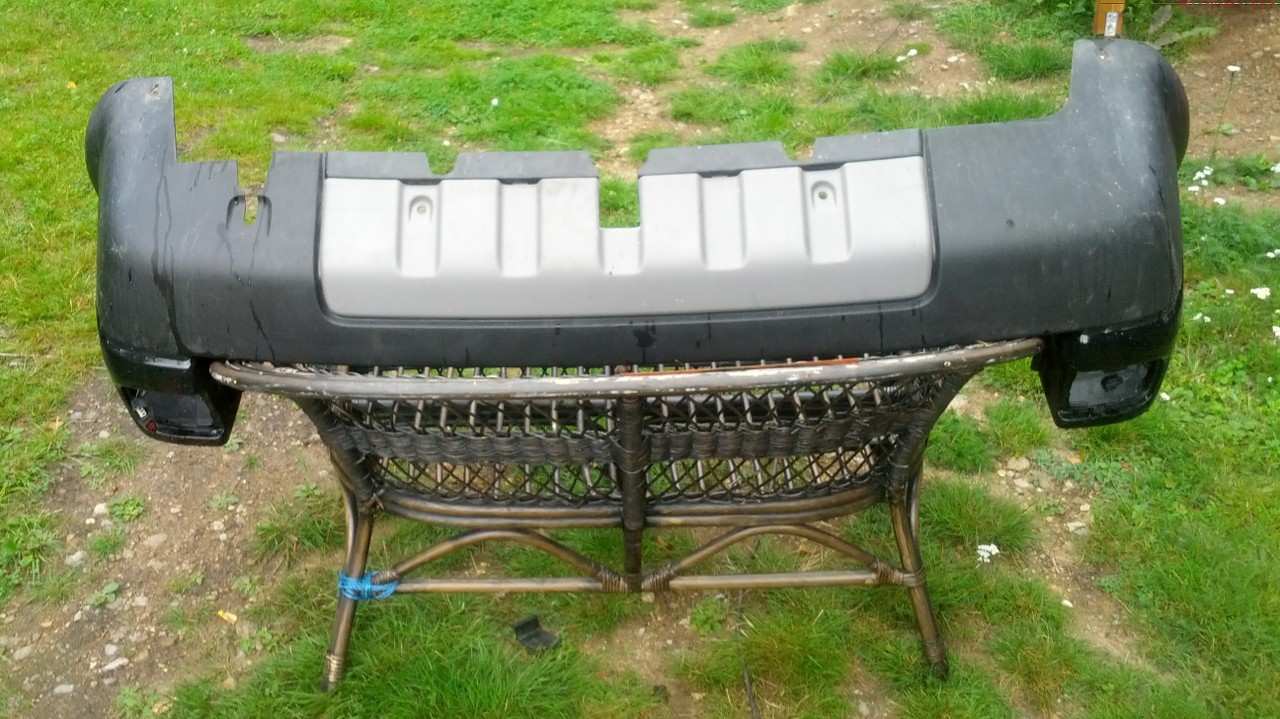
Sanded and rustproofed. It is possible that i "took" too much when sledgehammering the rear end. As you can see a little under here, i needed to make a cutout for the towbar in the bumper. So no matter how much i "took" it just didnt feel right when fitting the bumper.

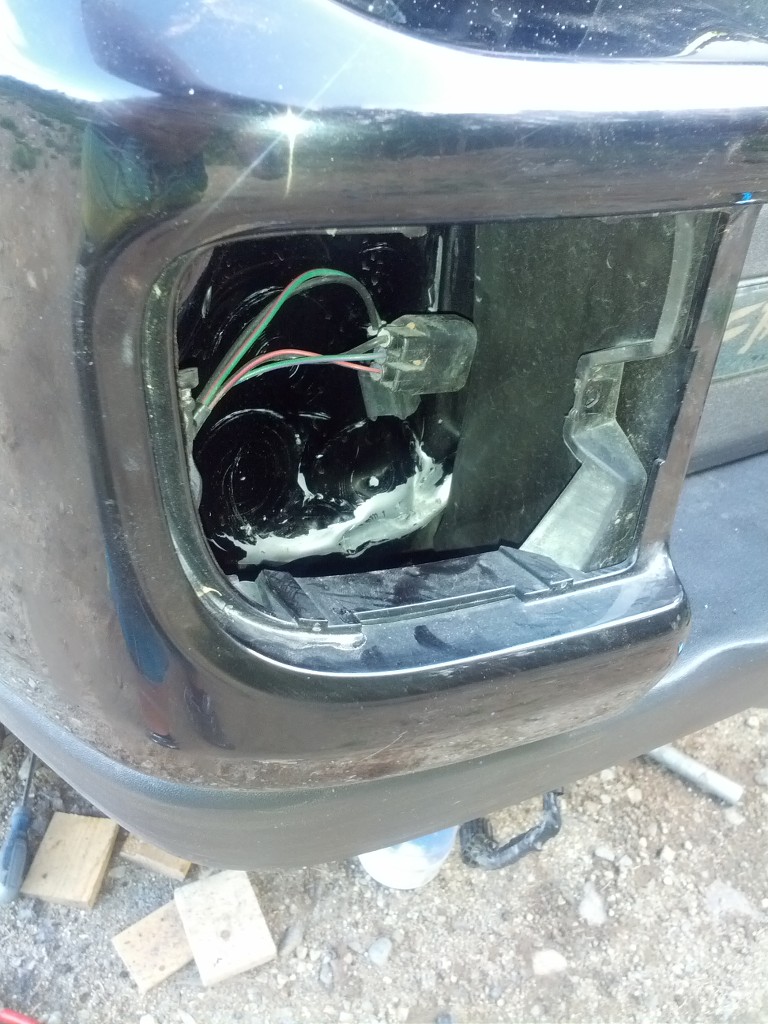
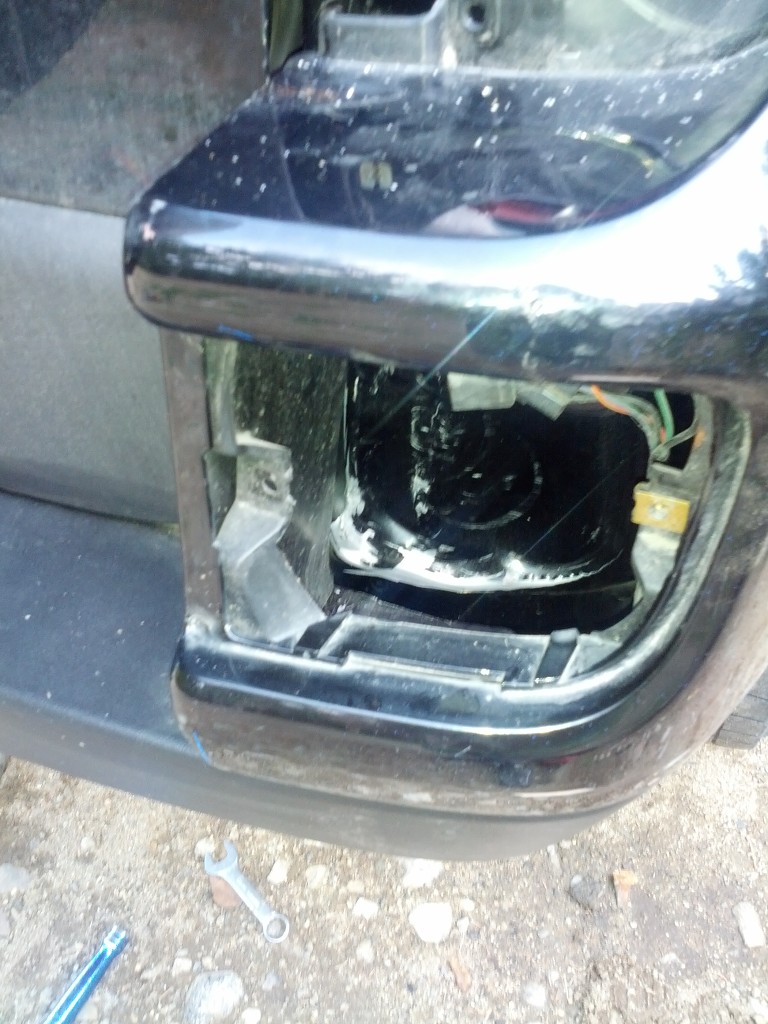
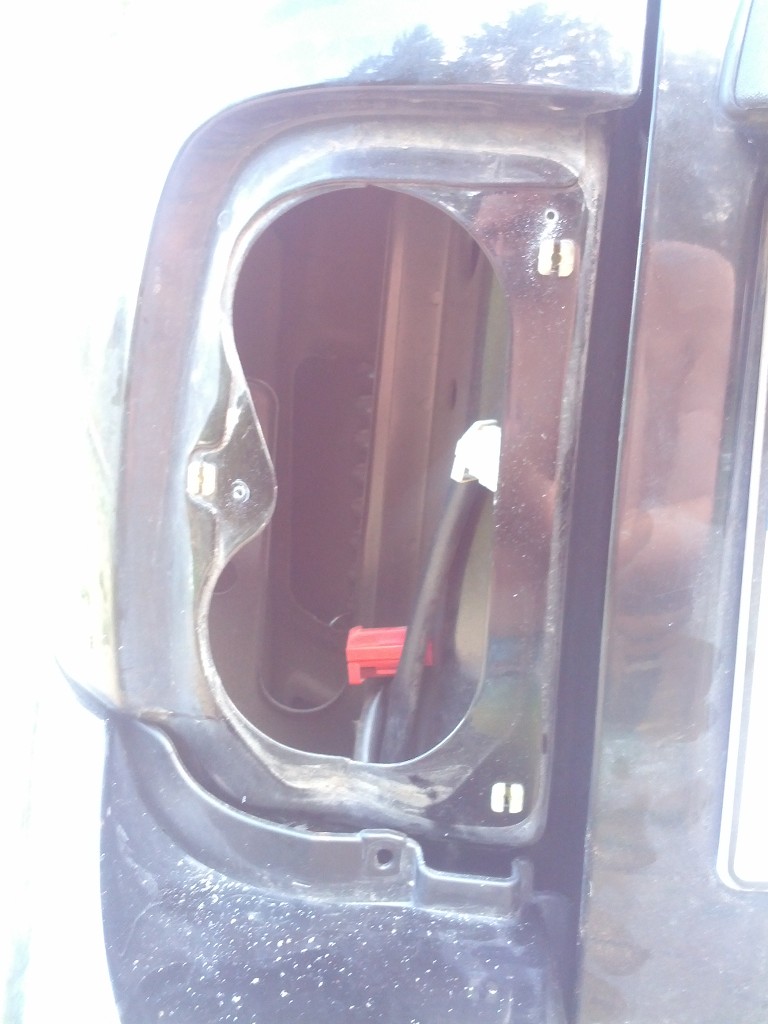
Test fitting the rear light. Not big difference from pre-facelift. But there is a reflector on the bottom and its a bit taller. If you look closely you can also see that only the lower screw is fitted. This one lines up perfectly, so you can use this one as a guide when drilling for the two upper ones.
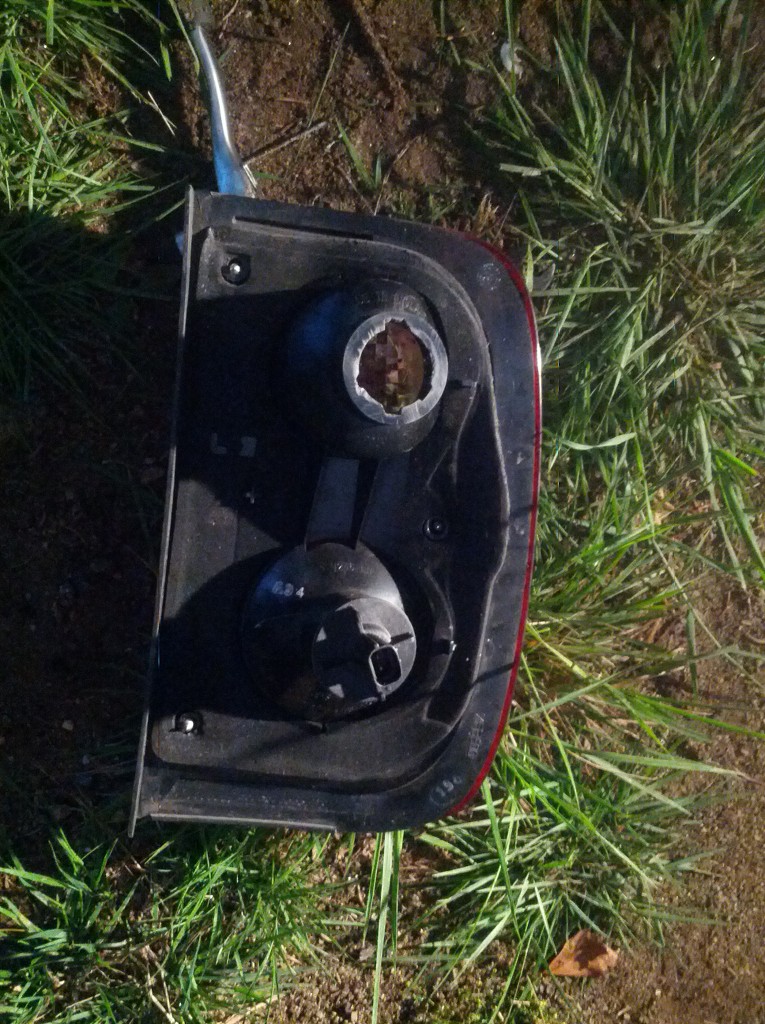
You can buy new bulb holders and rewire. Or you can just do as me and make the old ones fit.
As mentioned earlier, i needed to make a cutout in my bumper for the towbar. If this is just for my aftermarket towbar(Brink 3822) or any pre-facelift towbar i dont know.
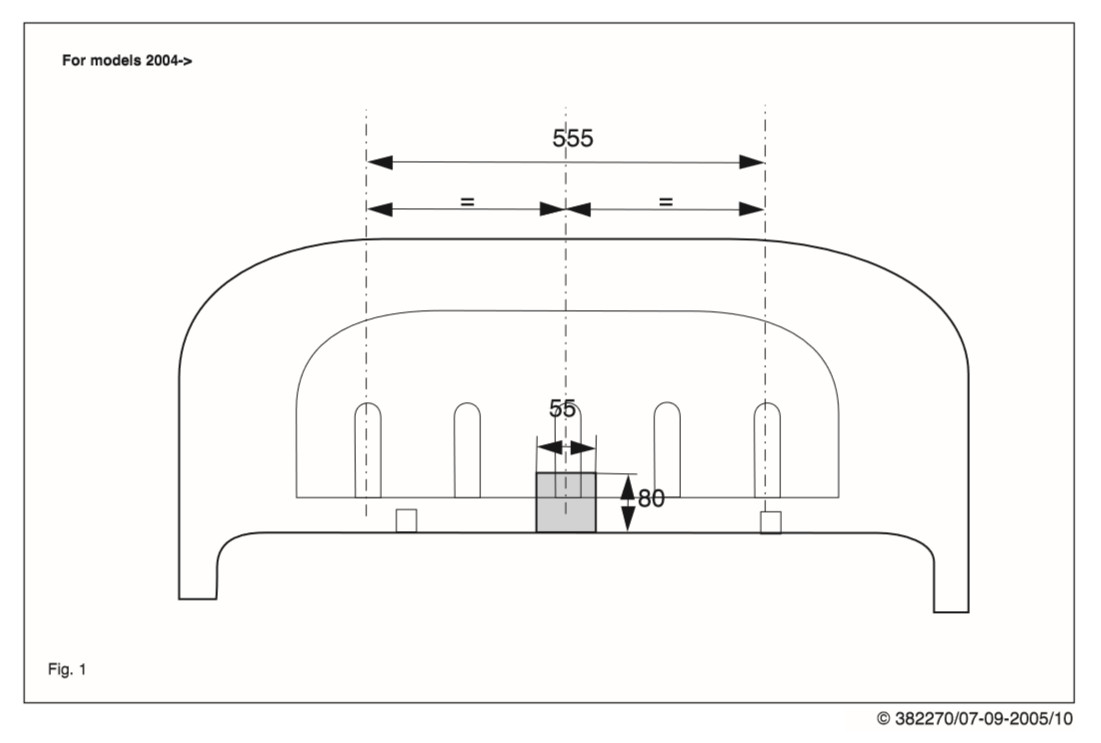
55mm x 80mm how hard could that be?
You tell me
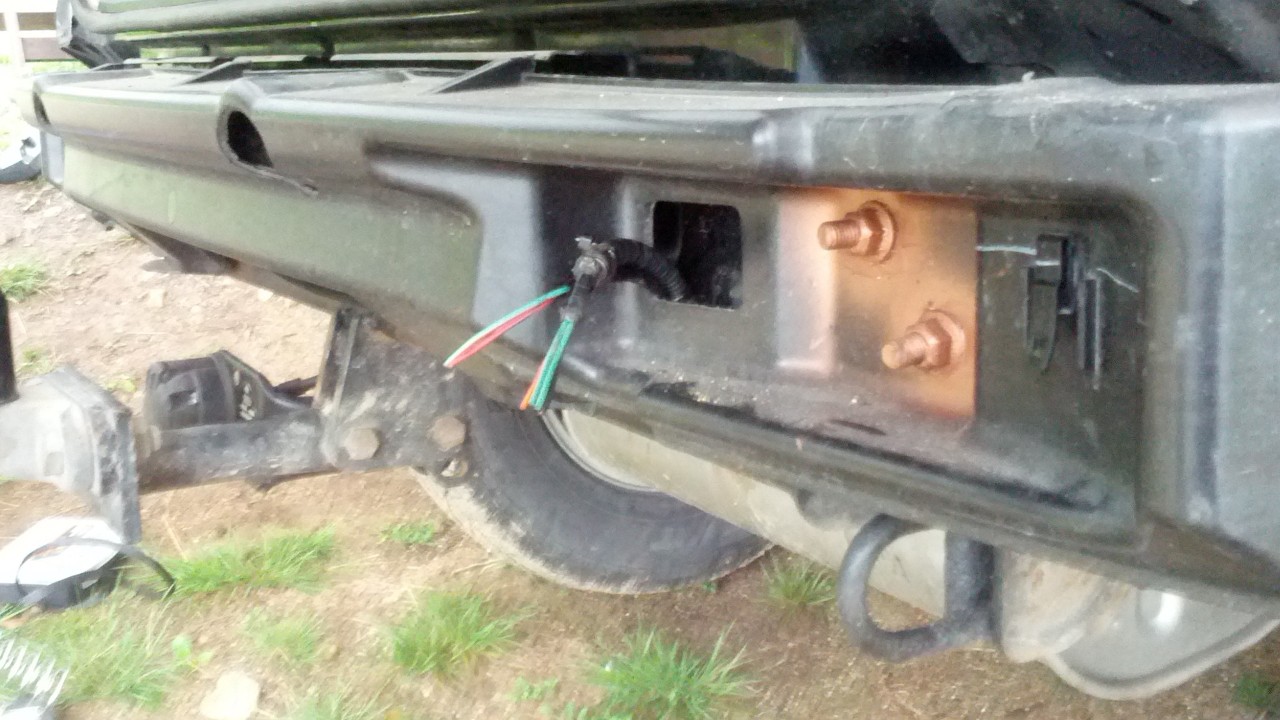
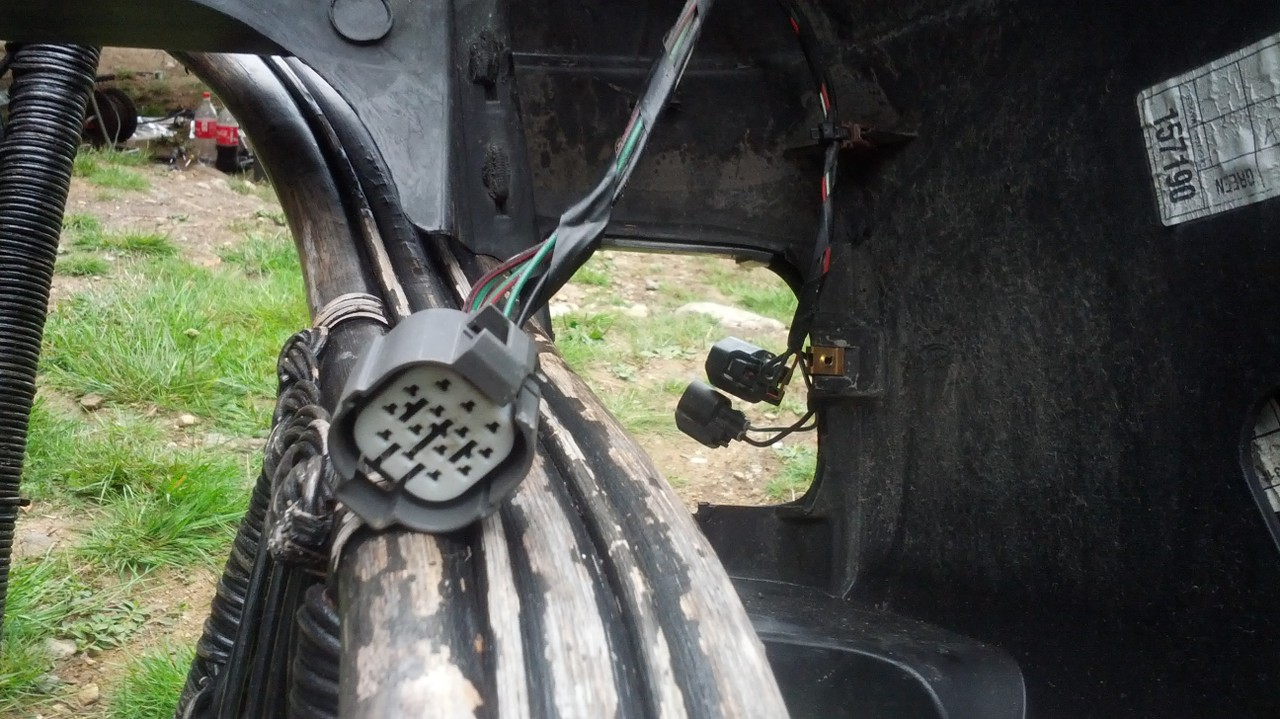
The wiring job is very easy. The wiring colors are the same from 98-2006. So i extended the green/red(LH blink) and red/black(LH driving light, what is the correct name for this light in english?) from the left bumper light. Now, that week i spent taking the wiring loom from the 2003 FL-for-parts apart are starting to pay off. I offcourse got the right wiring colors
Here its joined with 4 wireleads from the RH bumper light. Black is earth, red/orange RH driving light, green/white RH blink and green/purple is stop light.
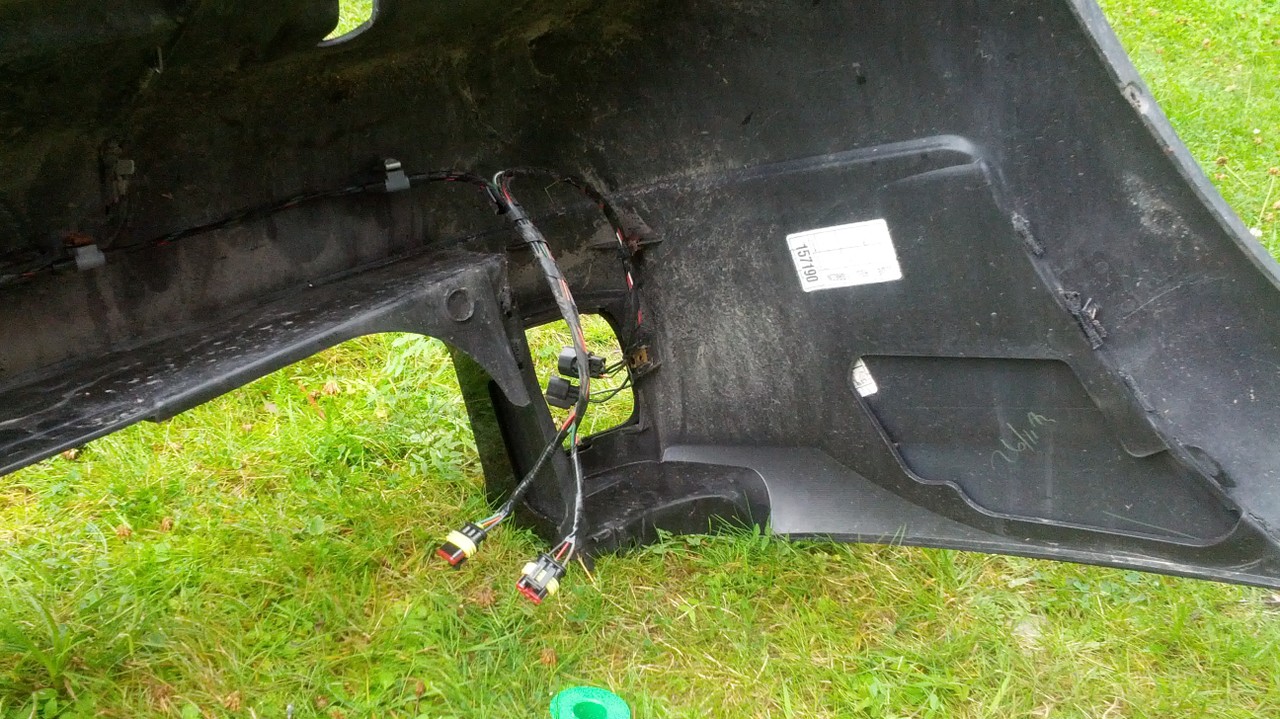
Used some automotive connectors i had laying about.
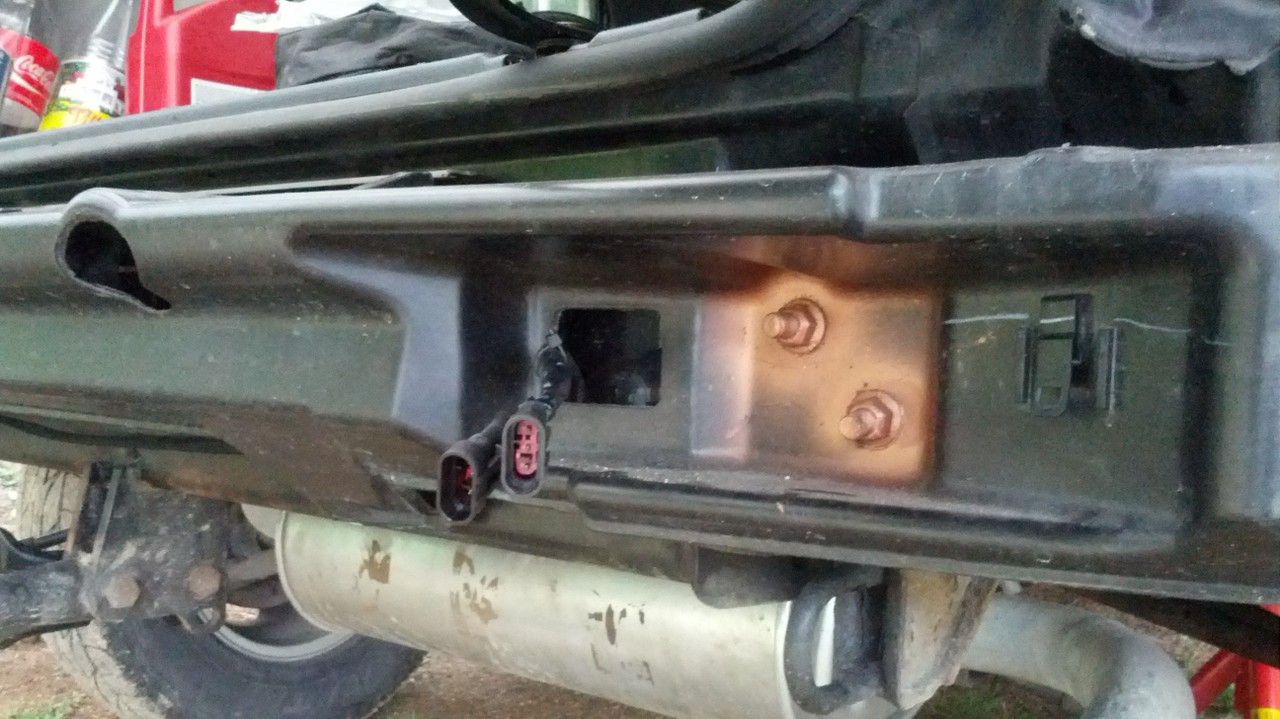
This is the original connector. Couldnt be bothered to source the male connector for it.
Crimped on new female connectors instead.
At this point im ready to assemble everything.
After the towbar bumper cutout, the scrivets went in without any hazzle.
Every bolt and screw is still in the same locations except the two underneath where its fitted to the inner wheel arch plastic. I used two M6 SS bolts with washers and nylon locknuts on each side. I guess some happy camper wont have a problem removing these sometime in the future.
This section will be updated when i get the RH tailgate trim. I seem to have forgotten all about it and i thought i had all the parts for the conversion.
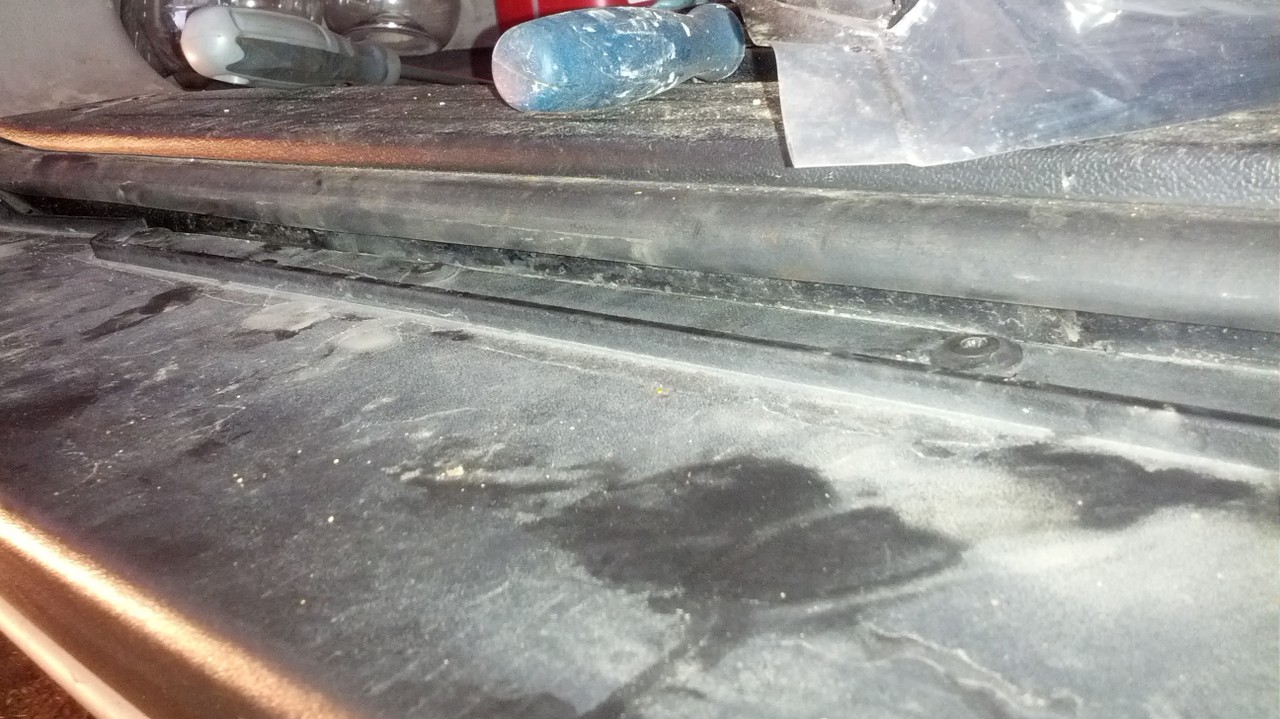
The lower line of "push it on-clips" is the same. Right now i have screwed in three of those white clips in my tailgate for the upper line and i just slide it on. I will fit the yellow "receivers" when i get the RH trim.
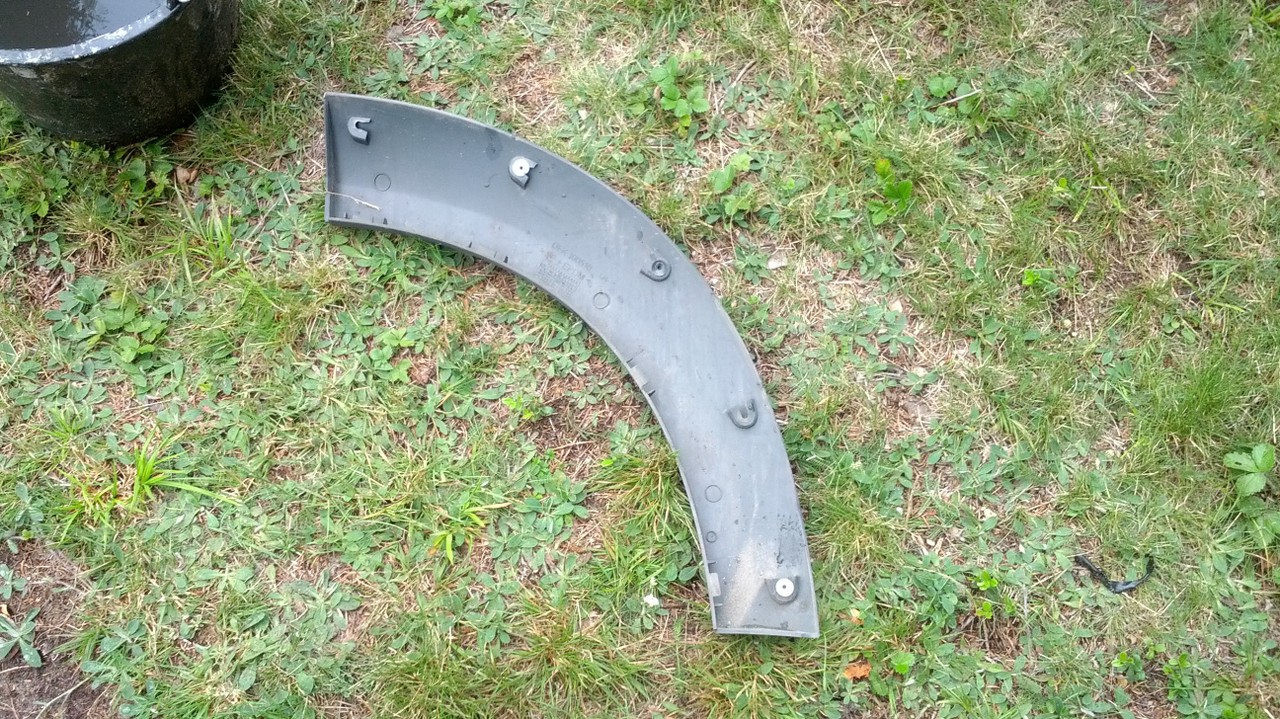
I remember struggling trying to remove the rear door arch extension from the car i scrapped sometime ago. Its not mentioned in RAVE how to do it. But its very easy. Start from the bottom and unclip 1-2-3-4. Then slide it against the rear of the car.
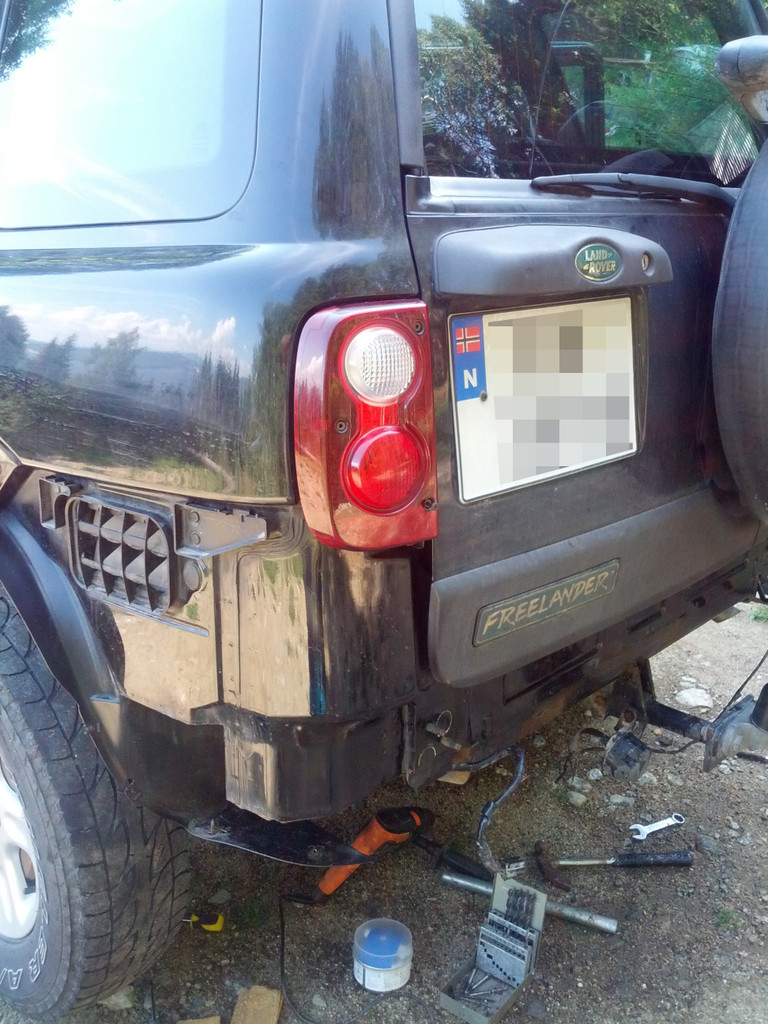
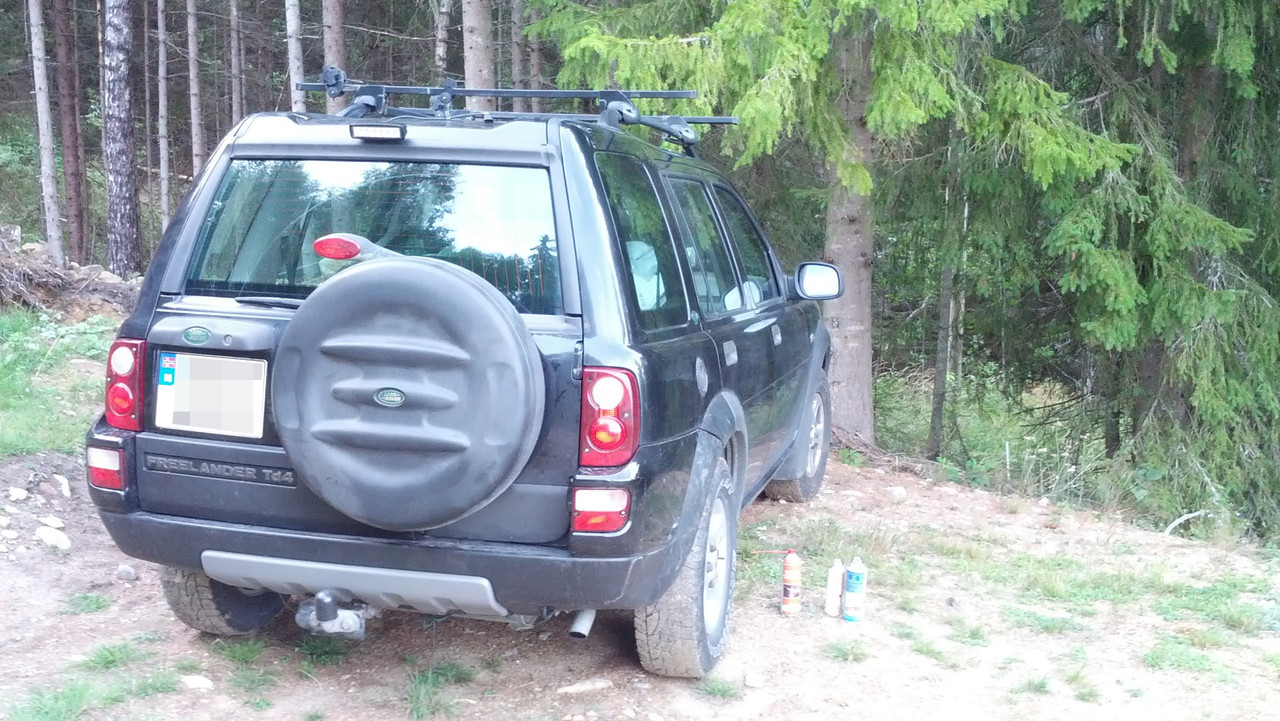
For a trained eye there is only two things "telling" this is not a 2004+ FL. Can you tell?
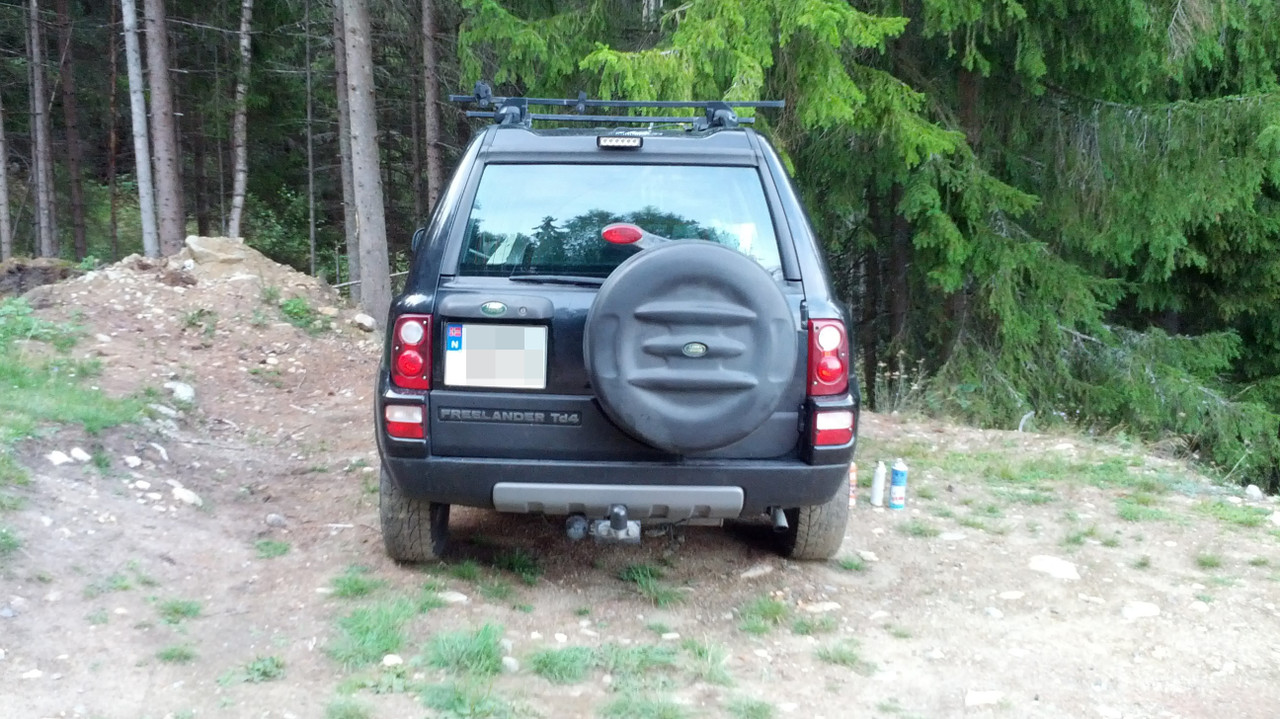
A few parts missing and still need some work. Since this picture was taken i have also changed out the fuel cap for the black one. Changing over lock barrels is very easy. Door arch extensions are also fitted. The worklight is just fitted with double sided tape. Im not sure where to fit it. I think it will be fitted to the left.
Getting the old bumper of is almost more work than getting the new on. So when your at this stage, youre halfway there.(BTW: You dont need to remove the wheels as mentioned in RAVE to remove the bumper. Just lift and support is enough.):
Here are the parts i sourced before i started. I also got the black wheel arches extensions for the doors and the front fenders. New scrivets(5 for fitting the top of the bumper under the tailgate.) and new screws for the wheel arches.
First i started with changing out the rear plastic armature(plastic crashbar)
They look quite similar, but there is a few differences. With the pre-facelift armature the 2 bolts that goes from underneath when fitting the bumper wont line up.
Pre-facelift bumper bracket needs to be removed. The little "bump" underneath also needs to get handled.
Different mounting point.
From the top.
Brackets removed.
Here is how i handled the little "bump". You can still see marks from the sledgehammer.
Sanded and rustproofed. It is possible that i "took" too much when sledgehammering the rear end. As you can see a little under here, i needed to make a cutout for the towbar in the bumper. So no matter how much i "took" it just didnt feel right when fitting the bumper.
Test fitting the rear light. Not big difference from pre-facelift. But there is a reflector on the bottom and its a bit taller. If you look closely you can also see that only the lower screw is fitted. This one lines up perfectly, so you can use this one as a guide when drilling for the two upper ones.
You can buy new bulb holders and rewire. Or you can just do as me and make the old ones fit.
As mentioned earlier, i needed to make a cutout in my bumper for the towbar. If this is just for my aftermarket towbar(Brink 3822) or any pre-facelift towbar i dont know.
55mm x 80mm how hard could that be?
You tell me
The wiring job is very easy. The wiring colors are the same from 98-2006. So i extended the green/red(LH blink) and red/black(LH driving light, what is the correct name for this light in english?) from the left bumper light. Now, that week i spent taking the wiring loom from the 2003 FL-for-parts apart are starting to pay off. I offcourse got the right wiring colors
Here its joined with 4 wireleads from the RH bumper light. Black is earth, red/orange RH driving light, green/white RH blink and green/purple is stop light.
Used some automotive connectors i had laying about.
This is the original connector. Couldnt be bothered to source the male connector for it.
Crimped on new female connectors instead.
At this point im ready to assemble everything.
After the towbar bumper cutout, the scrivets went in without any hazzle.
Every bolt and screw is still in the same locations except the two underneath where its fitted to the inner wheel arch plastic. I used two M6 SS bolts with washers and nylon locknuts on each side. I guess some happy camper wont have a problem removing these sometime in the future.
This section will be updated when i get the RH tailgate trim. I seem to have forgotten all about it and i thought i had all the parts for the conversion.
The lower line of "push it on-clips" is the same. Right now i have screwed in three of those white clips in my tailgate for the upper line and i just slide it on. I will fit the yellow "receivers" when i get the RH trim.
I remember struggling trying to remove the rear door arch extension from the car i scrapped sometime ago. Its not mentioned in RAVE how to do it. But its very easy. Start from the bottom and unclip 1-2-3-4. Then slide it against the rear of the car.
For a trained eye there is only two things "telling" this is not a 2004+ FL. Can you tell?
A few parts missing and still need some work. Since this picture was taken i have also changed out the fuel cap for the black one. Changing over lock barrels is very easy. Door arch extensions are also fitted. The worklight is just fitted with double sided tape. Im not sure where to fit it. I think it will be fitted to the left.
Last edited:
 Number 61: No sexual harassment.