- Posts
- 16,475
Can't seem to post in the Tech Archive anymore!!!
Anyways.....
Practise makes perfect as the saying goes….
In preparation for a mammoth task that is to strip the interior to get the HEVAC unit out of the L322, I didn’t want to spend my bank holiday weekend stripping out the interior only to find I either a) didn’t know how to get the heater matrix out of the unit or b) attempt to do so, break something I don’t have a spare for and have wasted my time, have to put it all back together before Monday evening and still have to do the complete strip out once again only to continue the job at another time!
So after scouring the internet auction site(s) I found that a complete S/H HEVAC unit is only a little bit more expensive than a S/H Heater Matrix…..and would give me the opportunity to strip the unit and get access to the heater matrix as practise.
The Unit I purchased was damaged on delivery unfortunately – a few of the thin plastic outlet horns were snapped and cracked - but that didn’t stop me from being able to practise the strip down to get the matrix out….after all, it is only the matrix I am after!
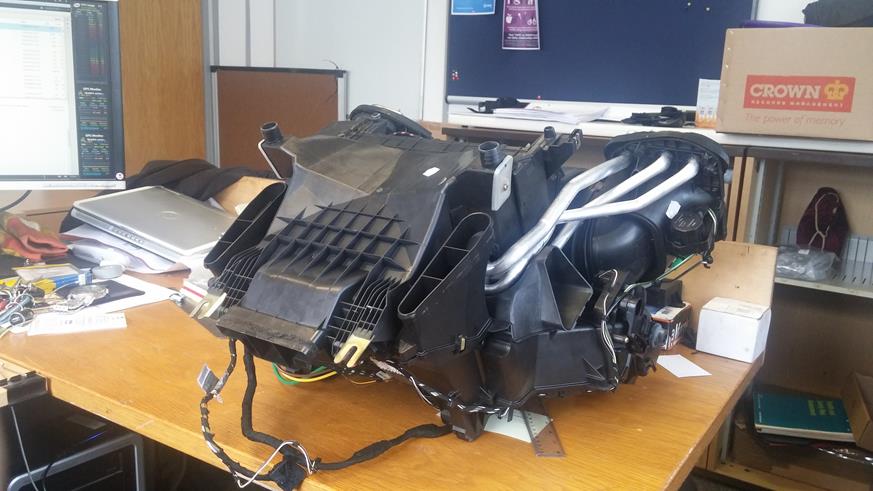
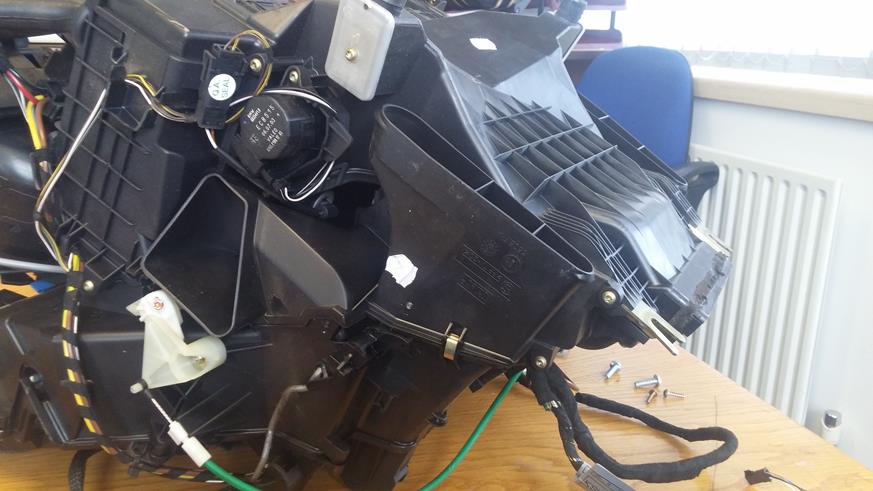
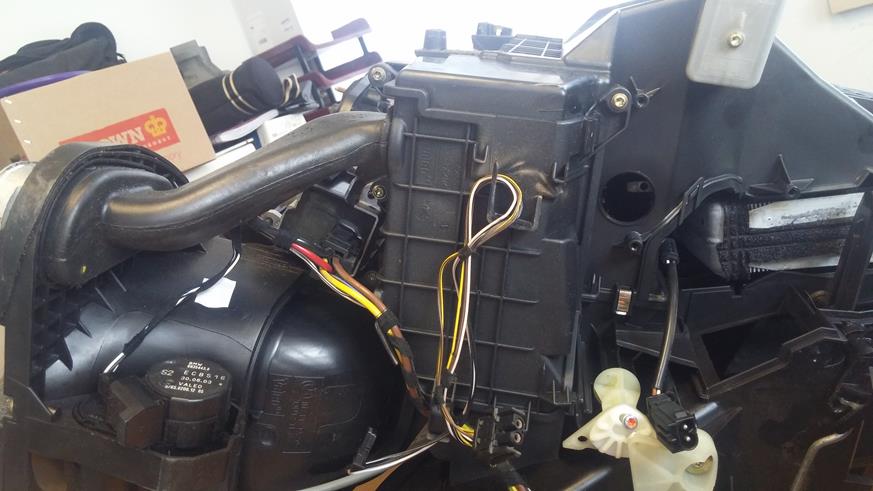
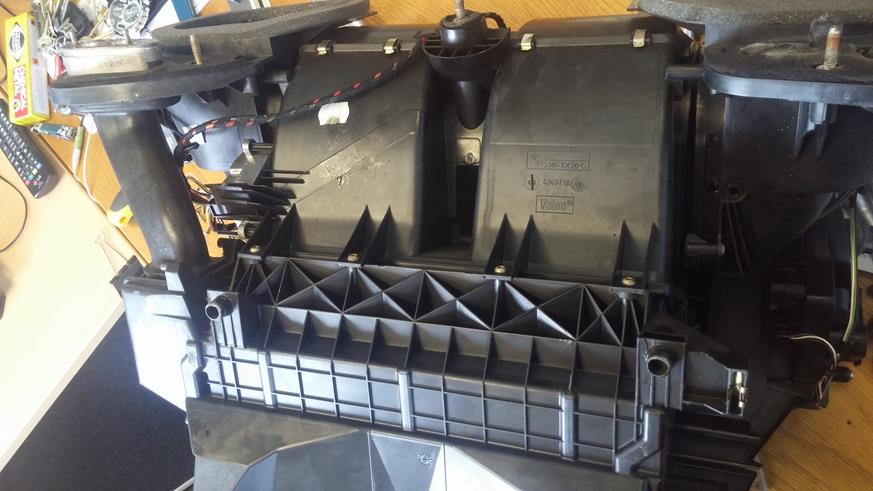
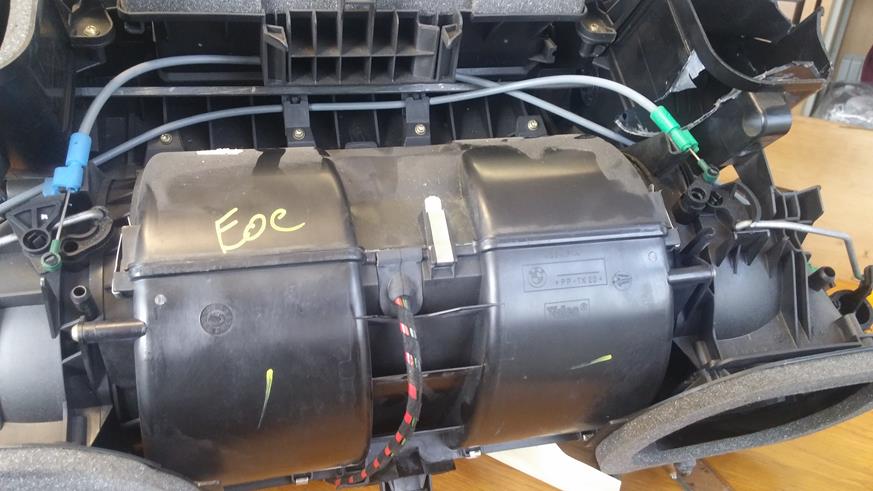
Here is the unit sitting upside down to how it would be orientated in the vehicle….the Heater Matrix sits at the bottom.
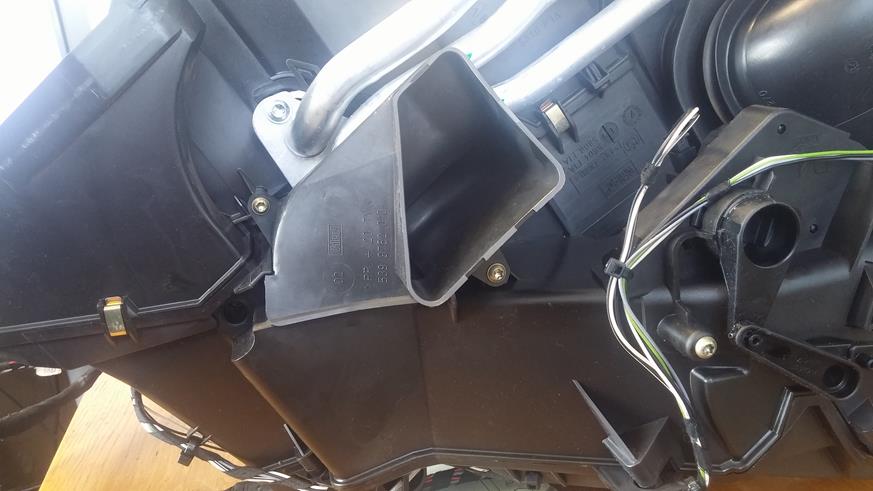
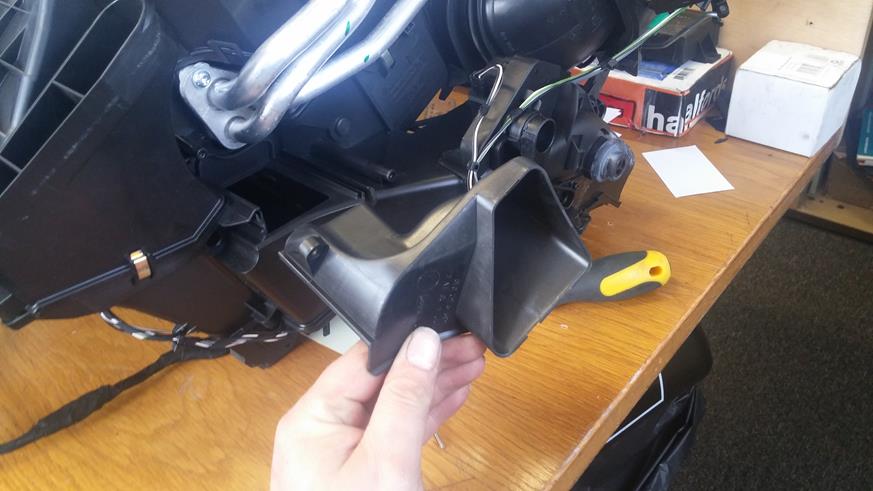
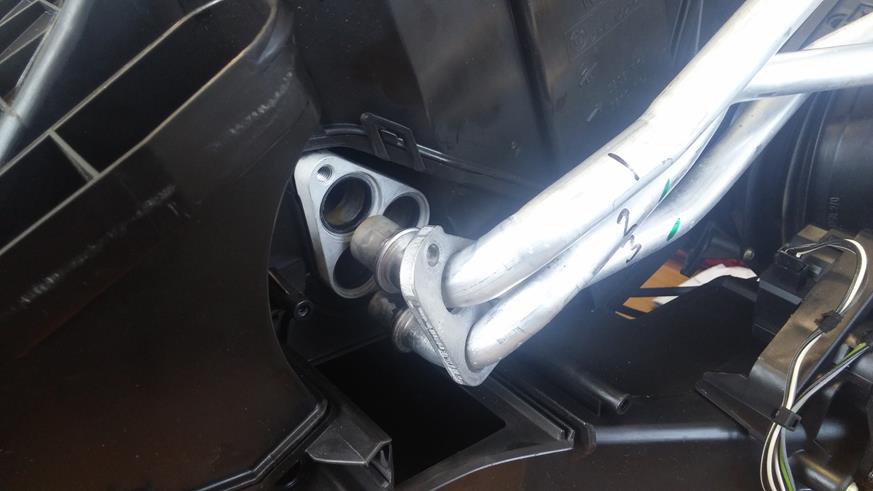
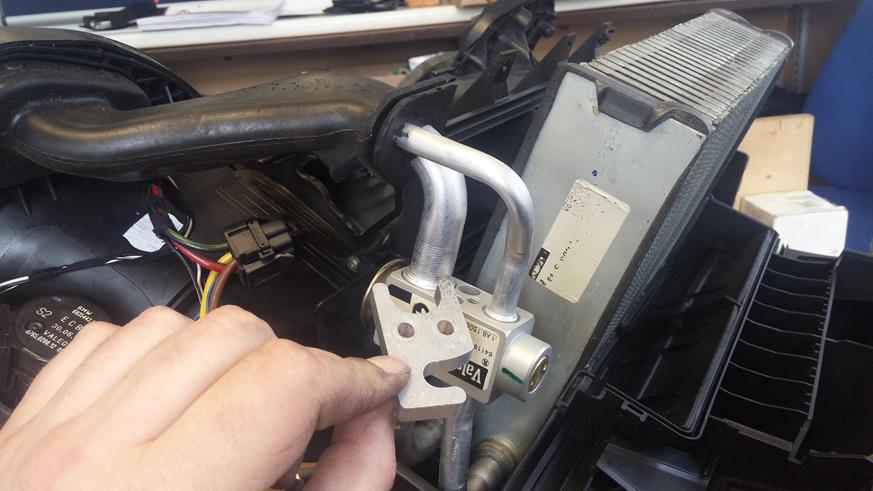
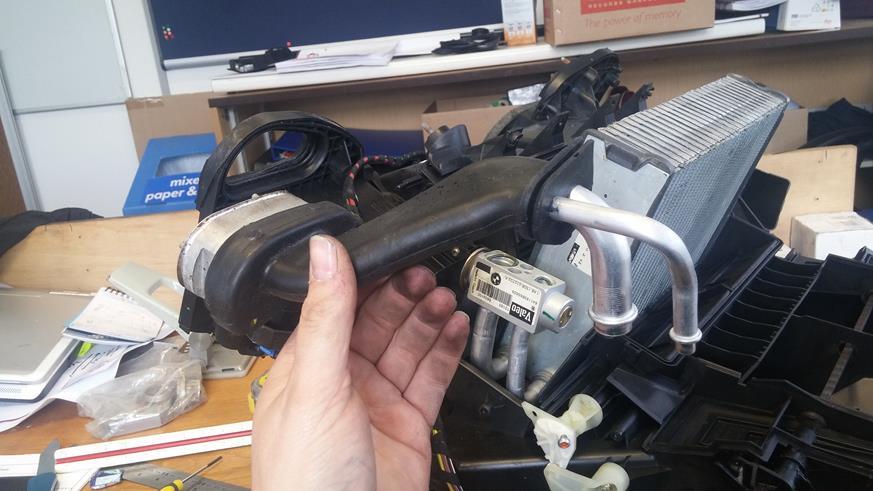
First up is to remove the outlet elbow/horn next to the heater pipes. 2 Torx screws and the item slides out sideways.
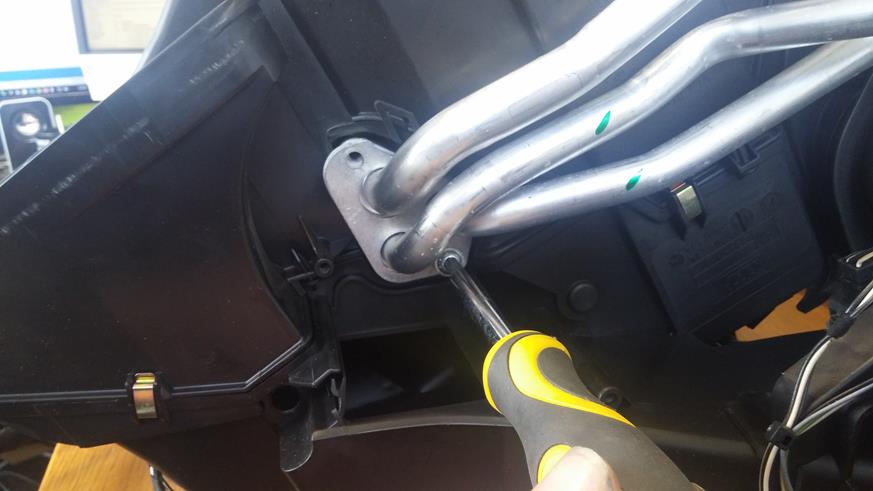
Next undo the 2 Torx screws holding the heater pipe clamp plate in place.
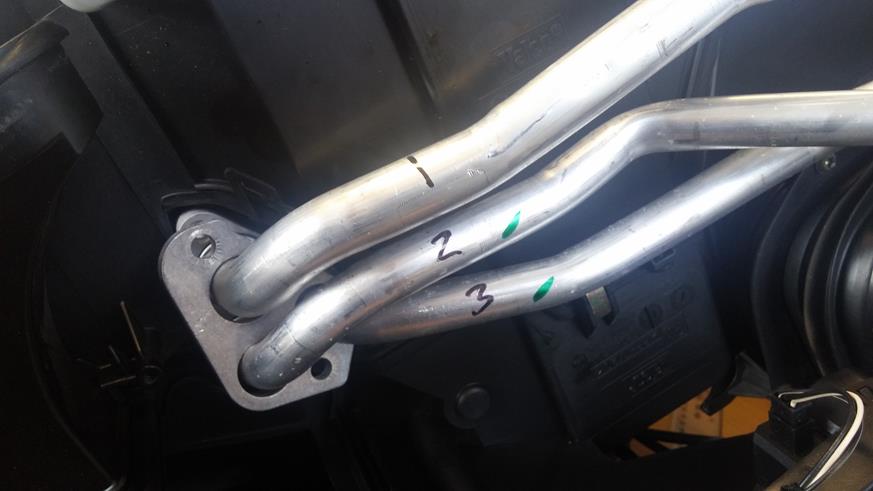
Mark the pipes in the order they are fitted (I am sure they will only go in one way, but better to be sure!
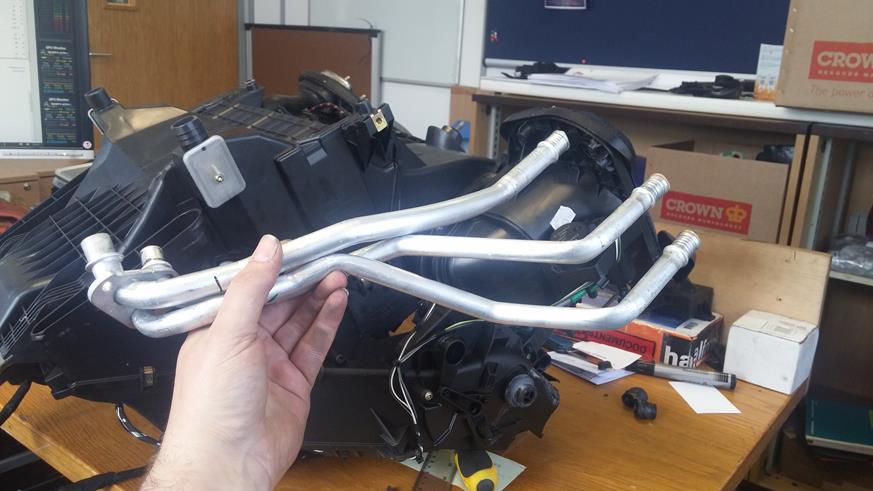
Then with a wiggle and a bit of jiggle, remove the pipes. If reusing the pipes, they can be left to dangle to oneside. It is best to replace the O rings with new on refitting obviously!
Or with some more jiggling, remove them completely if replacing them.
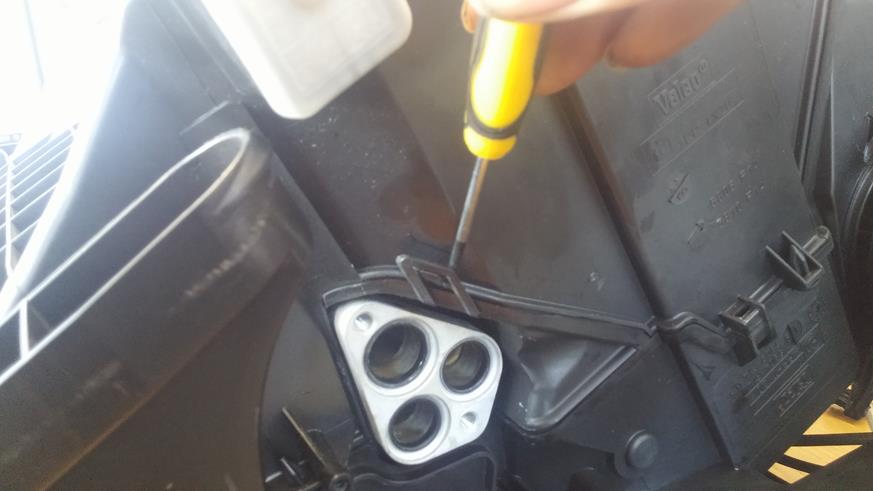
Next is to remove the opposite side outlets. One this side, the bottom facing outlet and the side facing outlet are a single piece held in with 4 torx screws and a spring clip.
The 4th screw is hidden under the side outlet horn.
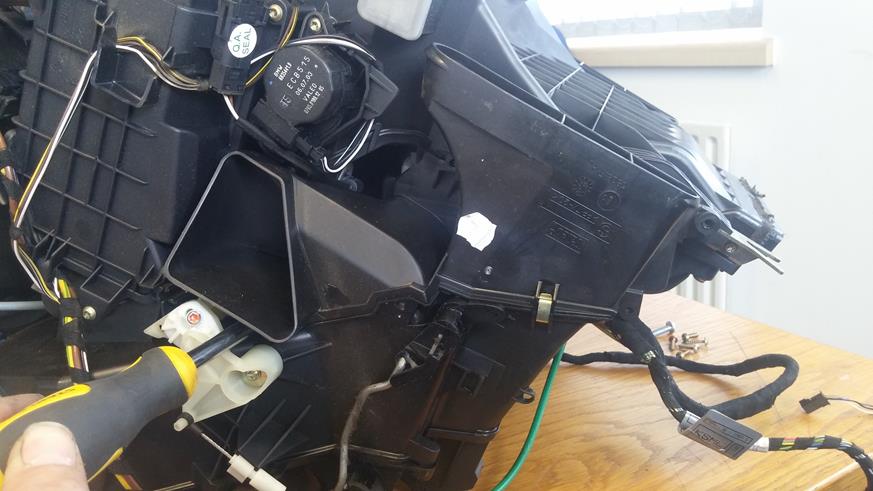
And remove the spring clip

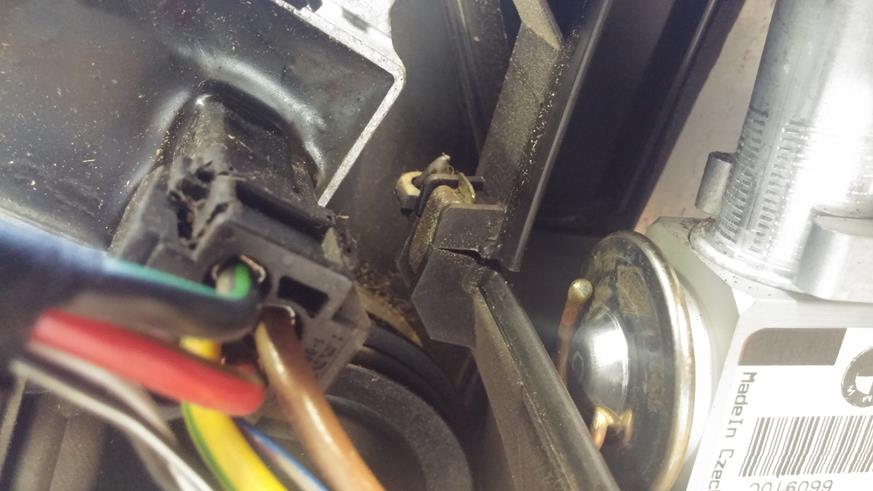
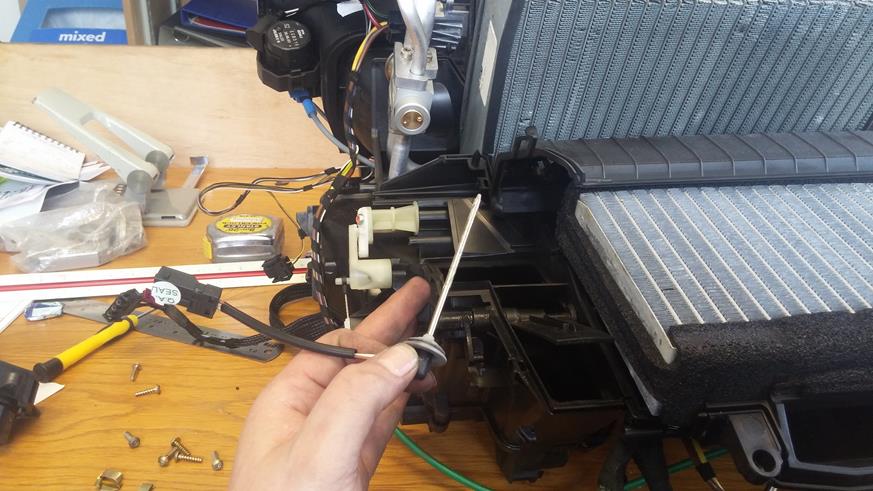
It doesn’t mention this in RAVE, but if the little internal flap is upright, you won’t be able to slide the outlet piece off….so you have to release the little drive rod and then rotate the flap so it is closed , then you can slide the outlet piece off….
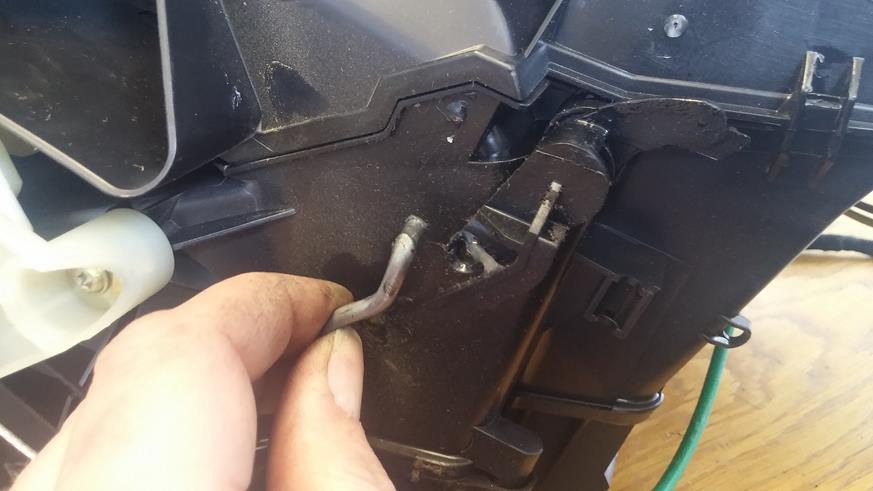
The side of the heater matrix can be seen….
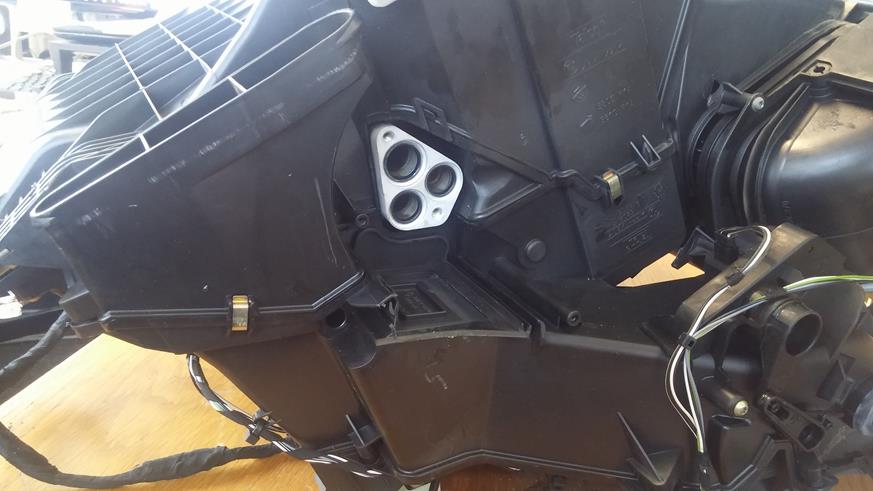
Undo the multiplug to the Condenser/Evap Temp Sensor
And the little plug to the flap motor on the side.
Remove the plug from the Condenser/Evap temp sensor from the unit, this is done by unclipping the little locking tab at the top of the connector
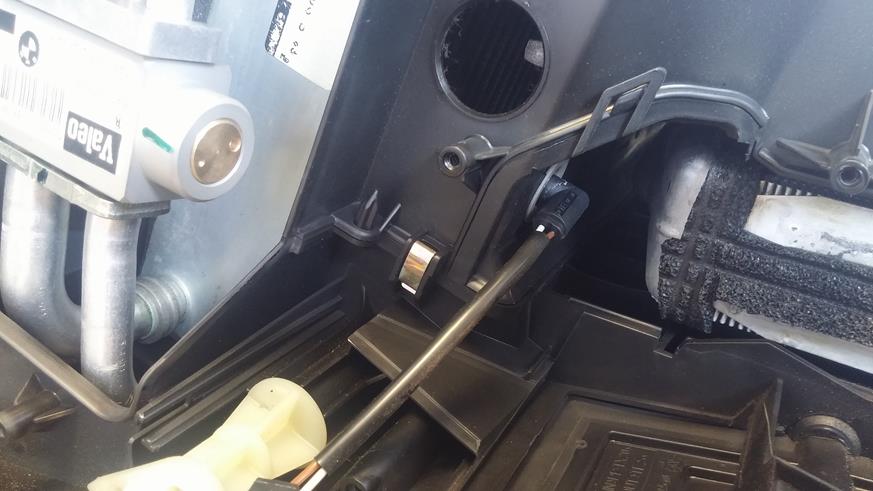
Now…..RAVE says to remove this flap motor….so I did…..but it really isn’t necessary I found out….plus to get the motor back onto its drive rod would be a major PITA….so can be left where it is, just unplugged.
Next is to remove what RAVE calls the TXV cover (I can only think it is something to do with The eXpansion Valve). 4 Torx scres and remove the wiring harness, the cover then slides off to reveal the expansion valve and side of the Condenser.
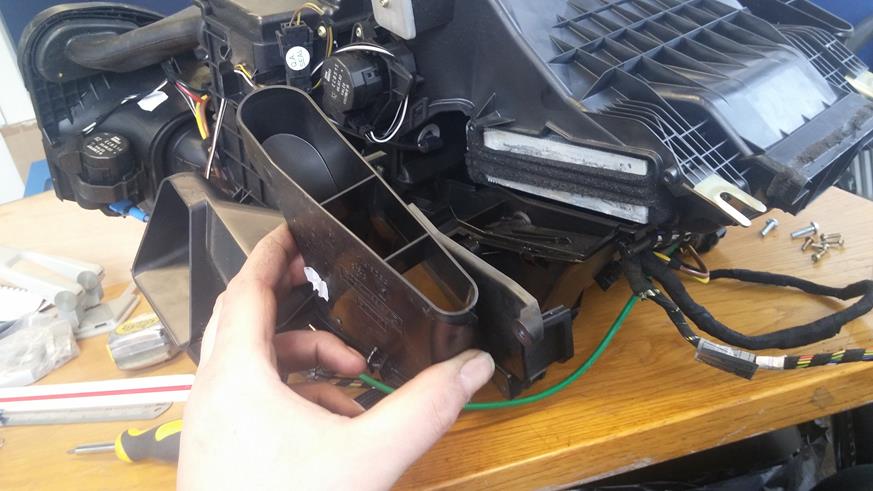
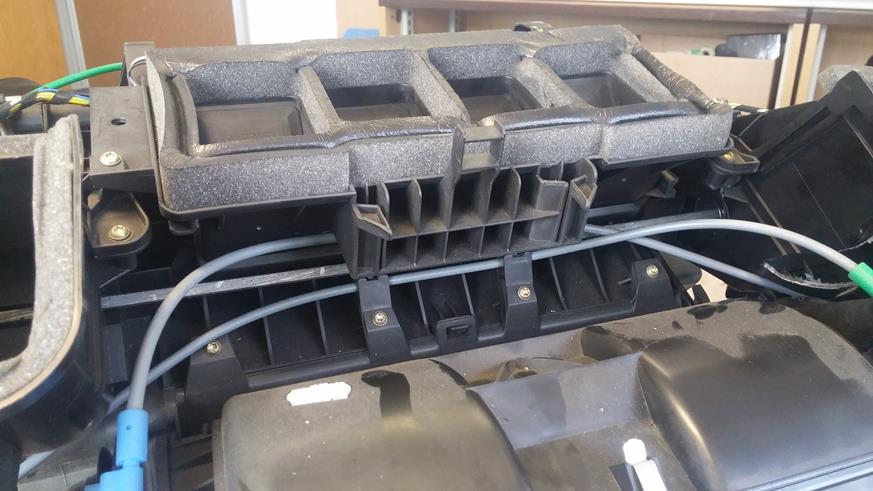
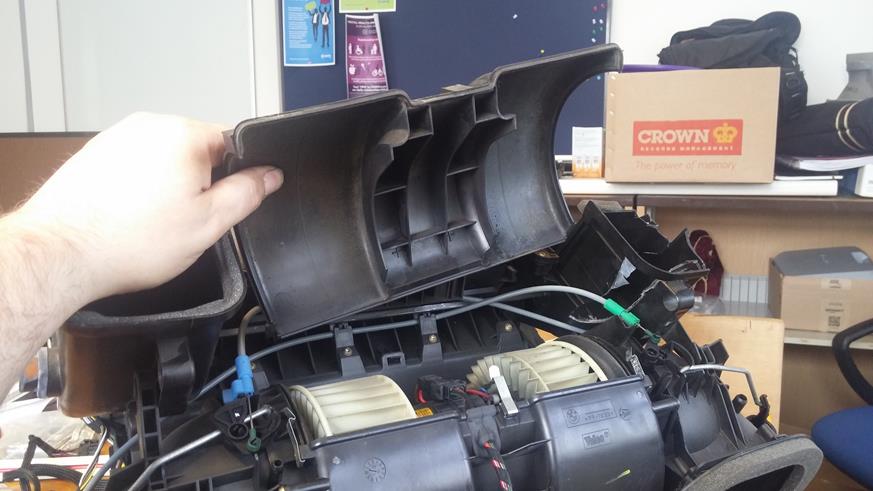
Next is to remove the bottom HEVAC access panel
This is held in place by 7 Torx screws and RAVE says 3 Spring Clips plus a couple of locking tabs…
4 screws here….
2 Spring clips here…..
A spring clip on the opposite side…..
And 3 Torx screws on the reverse side by the rear outlet horn…..
Two locking tabs (one on each side)…..
OHHHHH…..and the 4th spring clip RAVE never mentions…..caused me to scratch my head a few times before I found it…next to the Blower Motor Resistor!
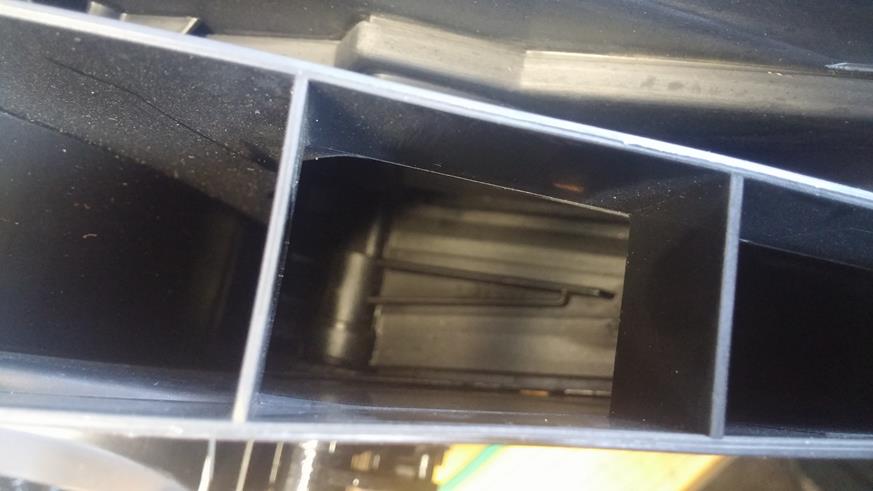
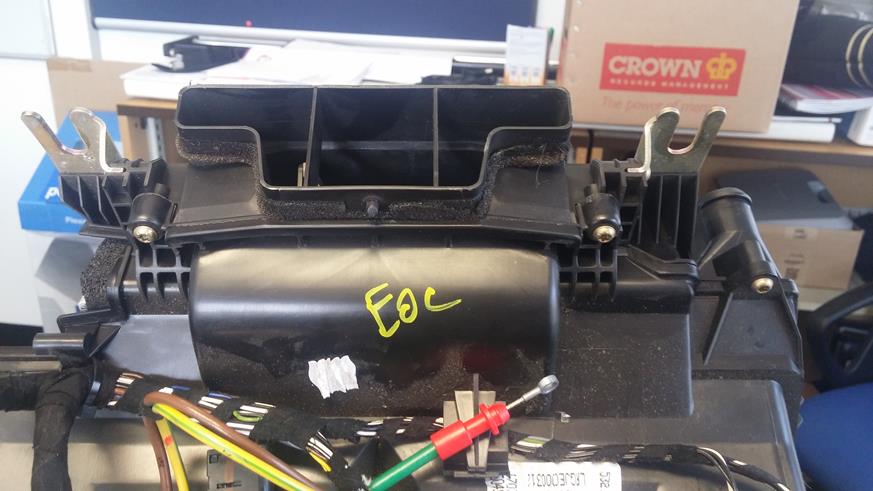
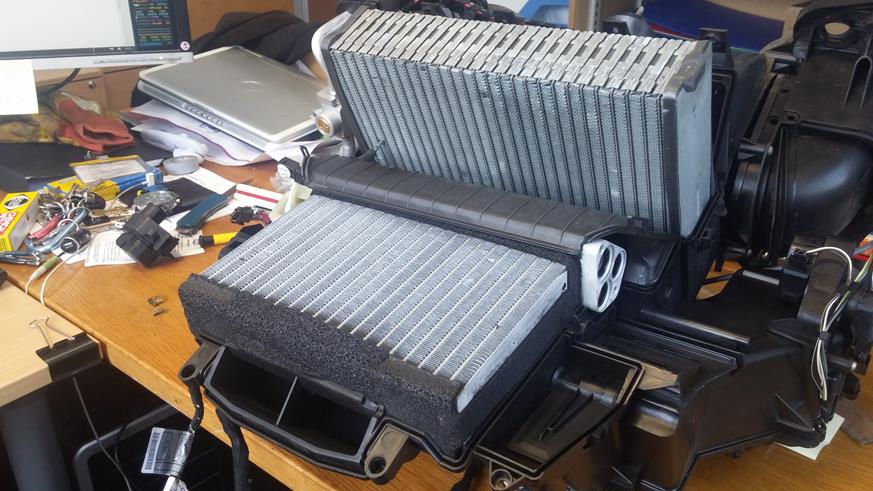
The panel can now be lifted away exposing the Heater Matrix (horizontal) and the A/C Condenser (Vertical)

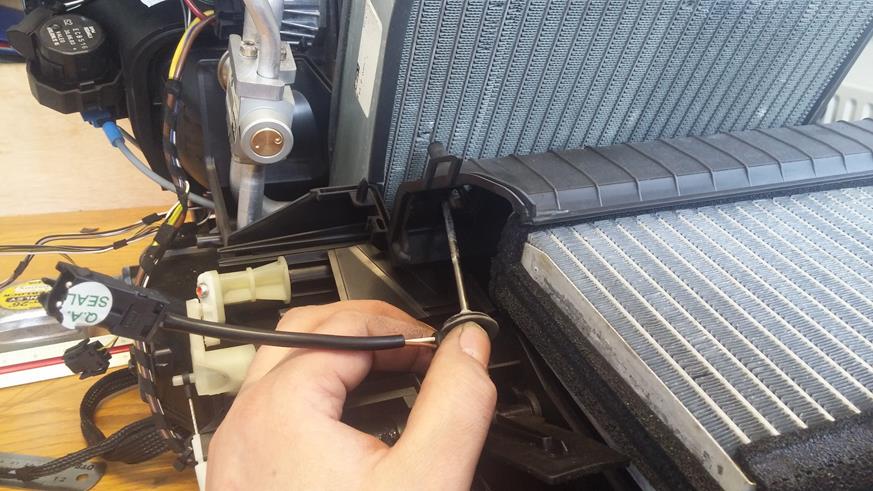
Carefully withdraw the Condenser Temp Sensor from the housing
Remove the plastic cover
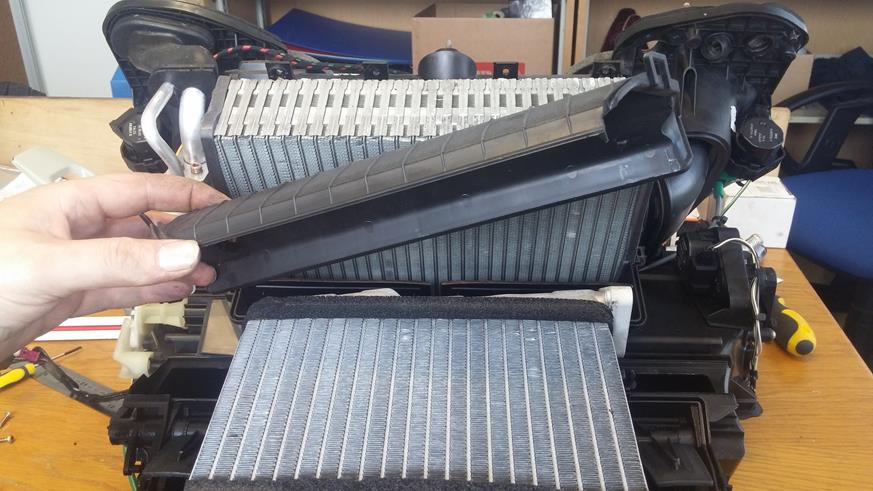
And lift out the Heater Matrix…..
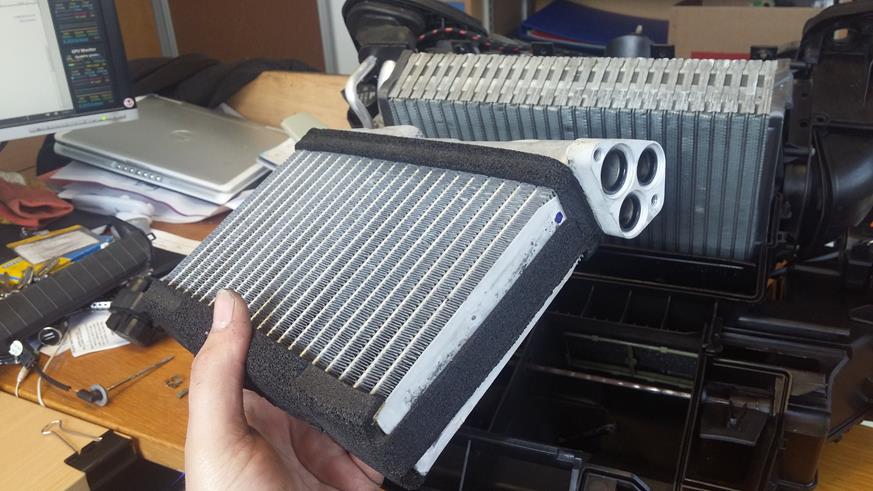
To refit is the reverse obviously……
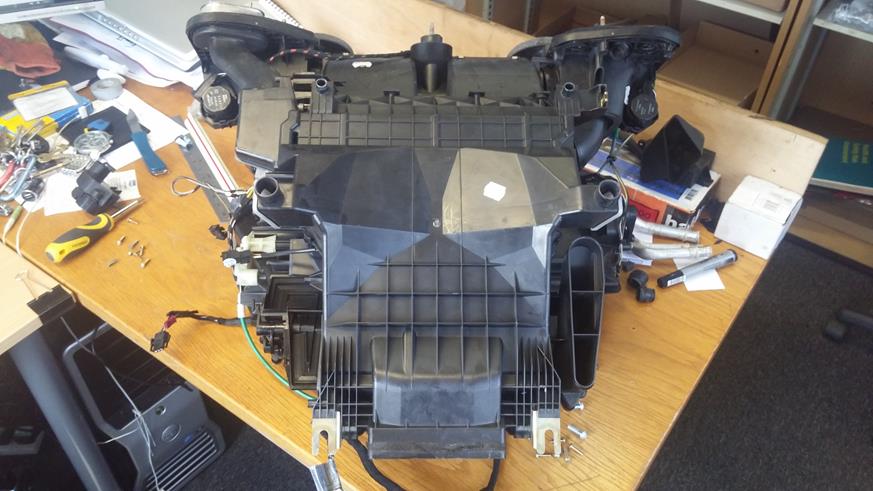
Now, As I had it in pieces, I thought I would carry on and take a few other pieces off to show how that is done too….
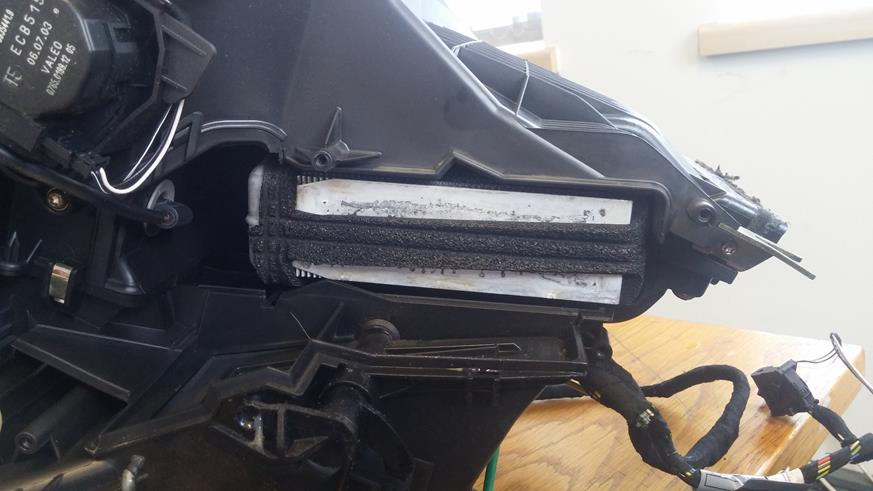
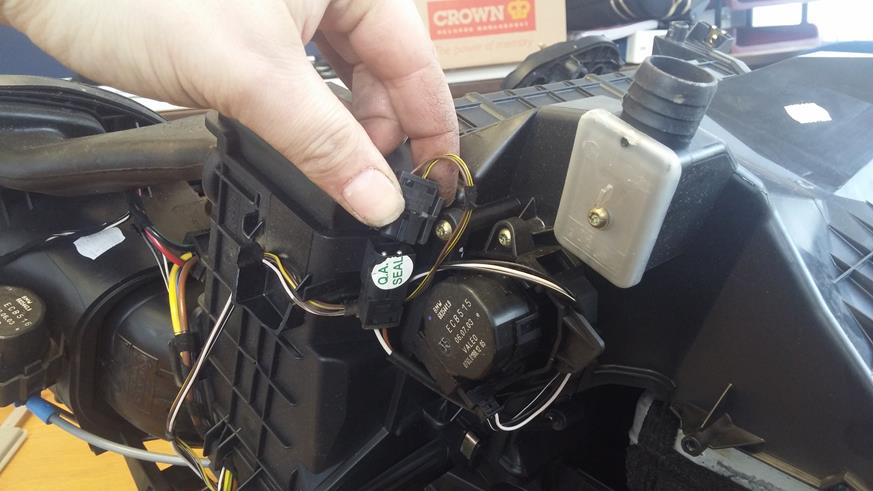
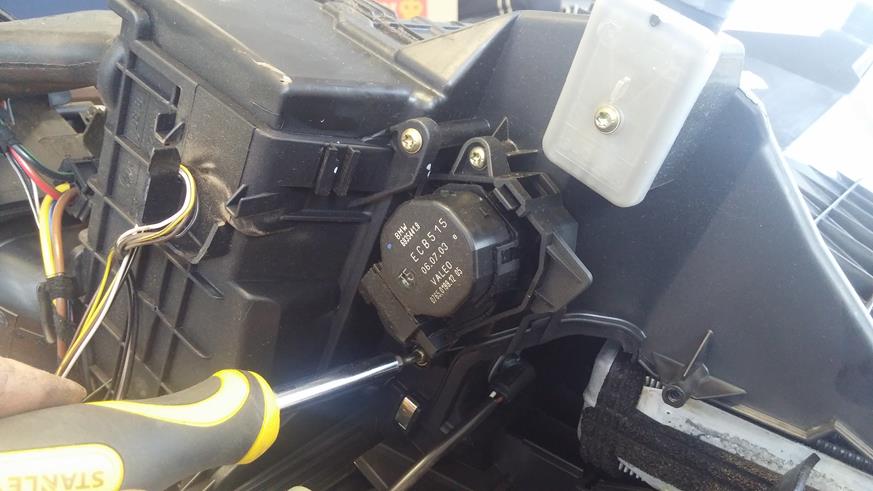
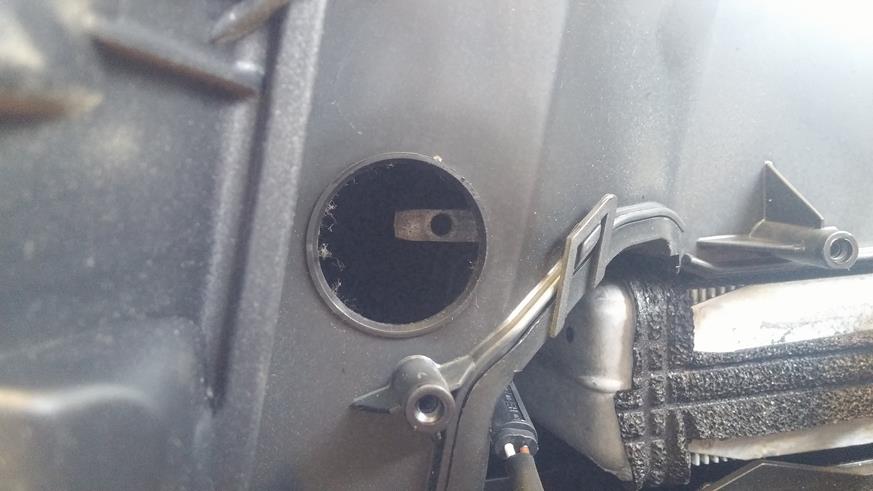
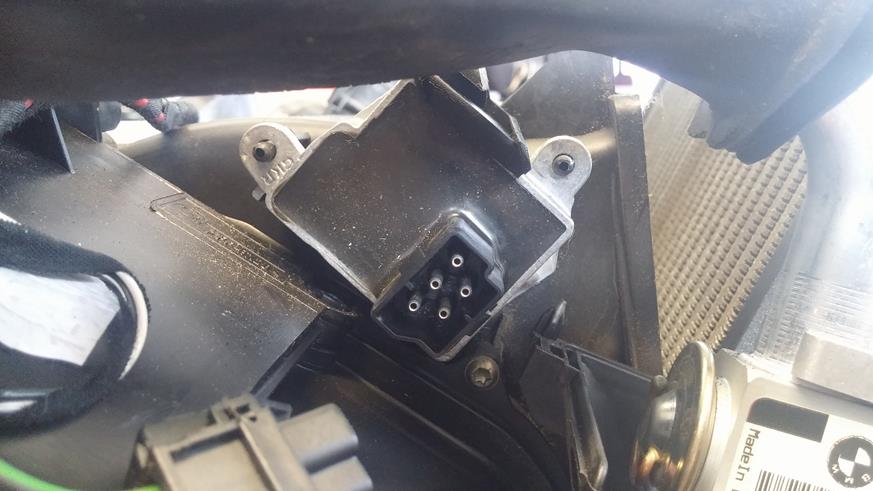
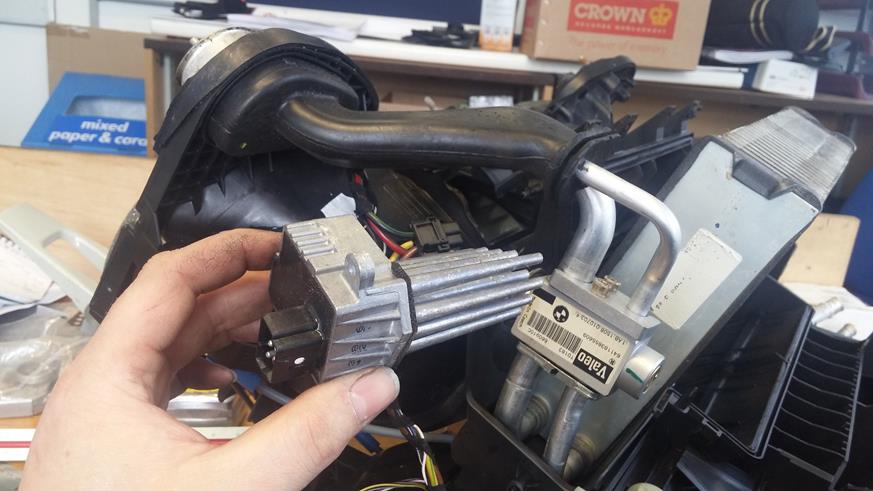
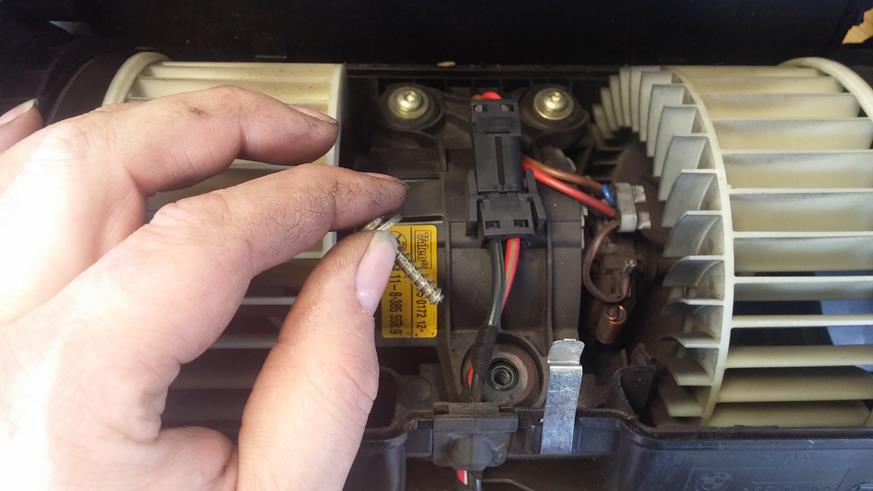
First is the FSR (Final Stage Resistor). This can be done with the HEVAC unit in the car and is accessed from the side of the unit once the transmission tunnel side pieces are removed for access etc….
Now my pics show the HEVAC unit upside down as it is sitting on my desk!!
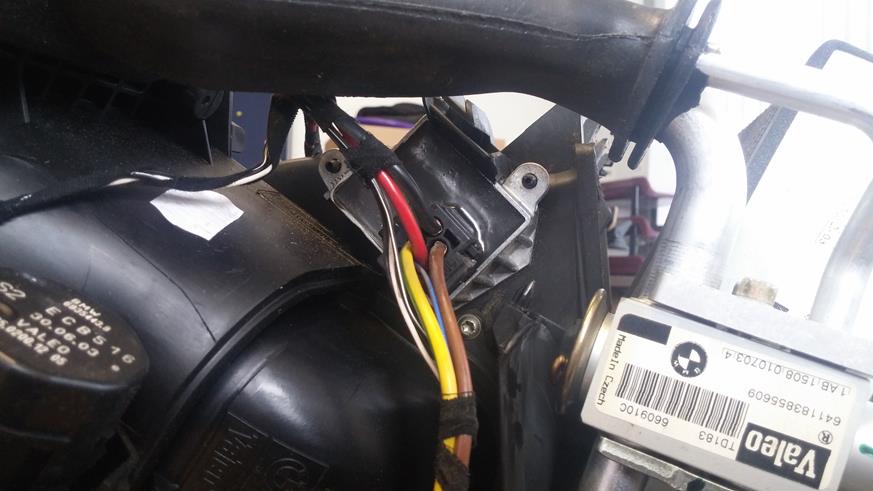
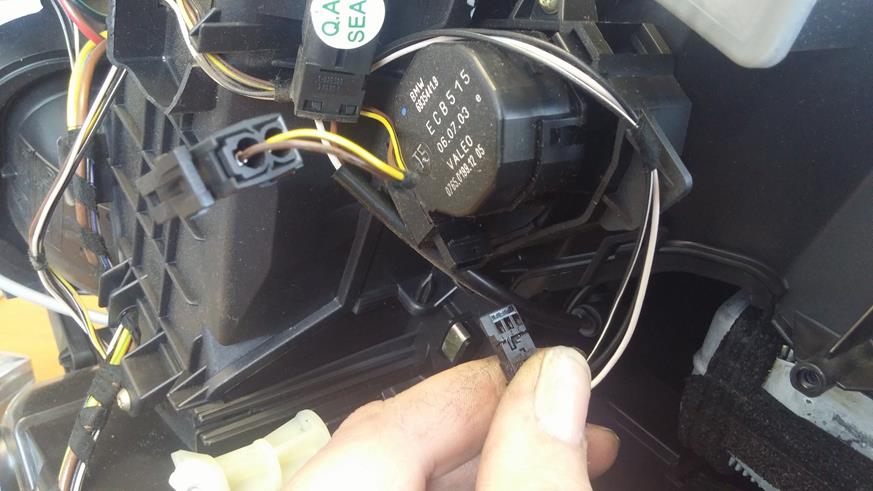
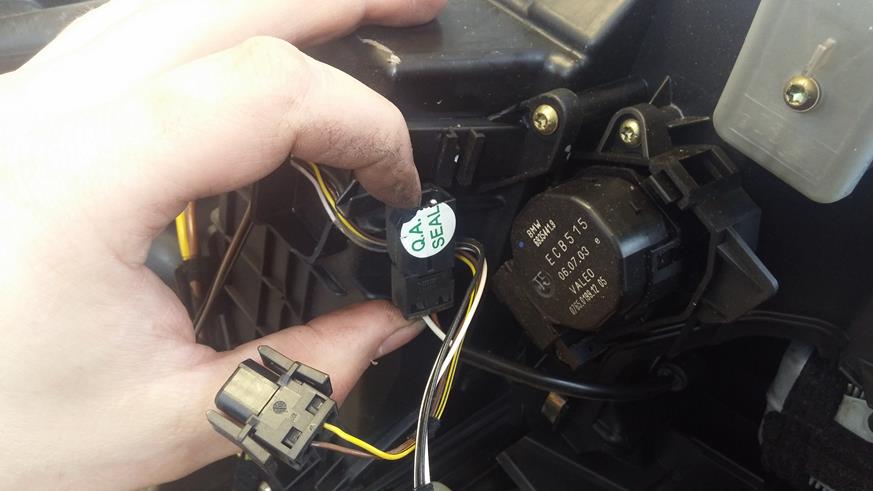
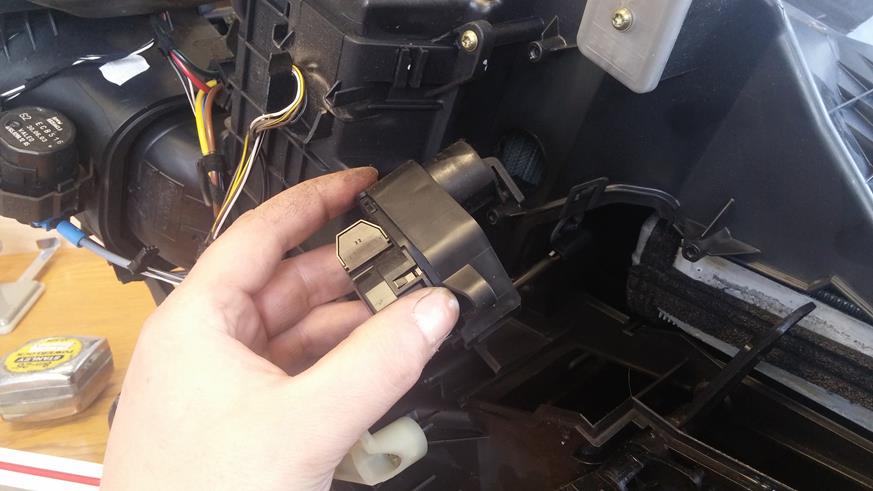
Pop off the multiplug
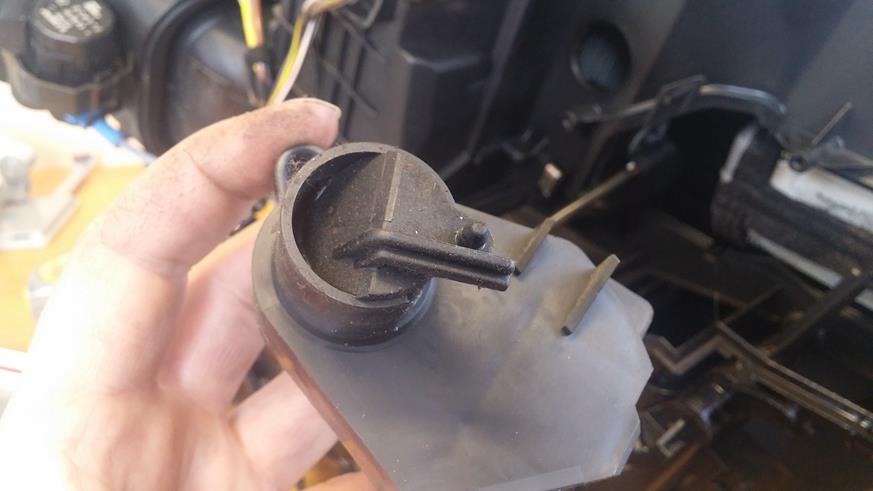
Lift the plastic locking tab and withdraw the FSR
To remove the Expansion Valve and Condenser….
Undo the two clamp bolts.
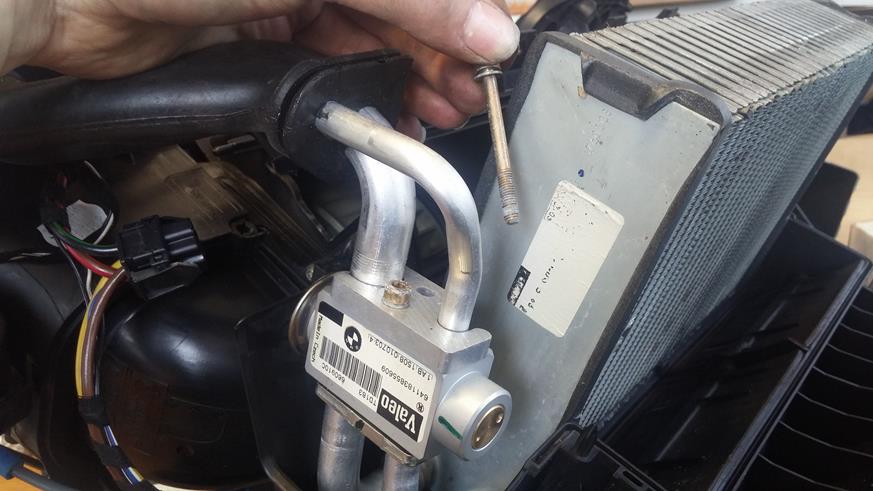
And remove the top and bottom clamp plates
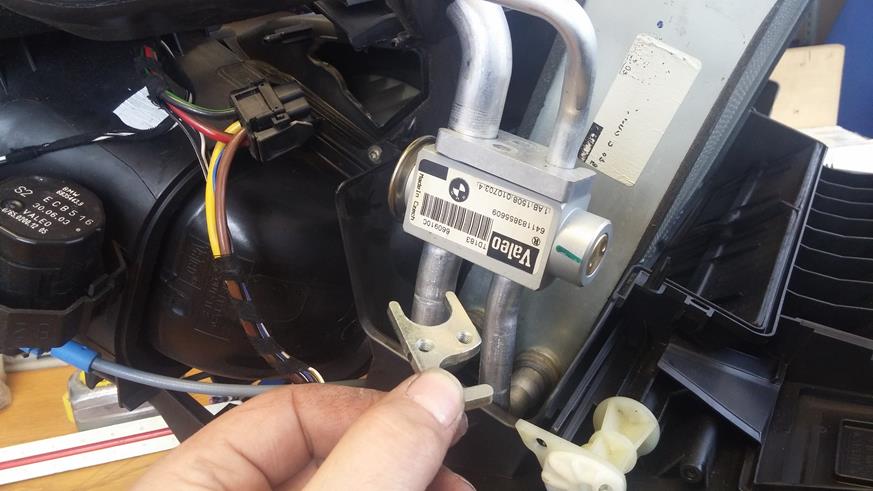
Lift off the refrigerant pipes…
And lift out the Condenser, being careful to not drop the Expansion Valve (or better still take that off too!!!)

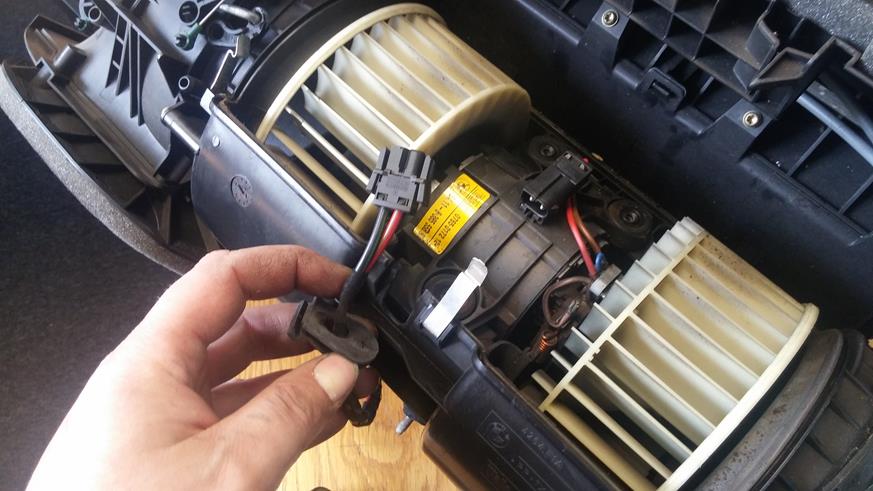
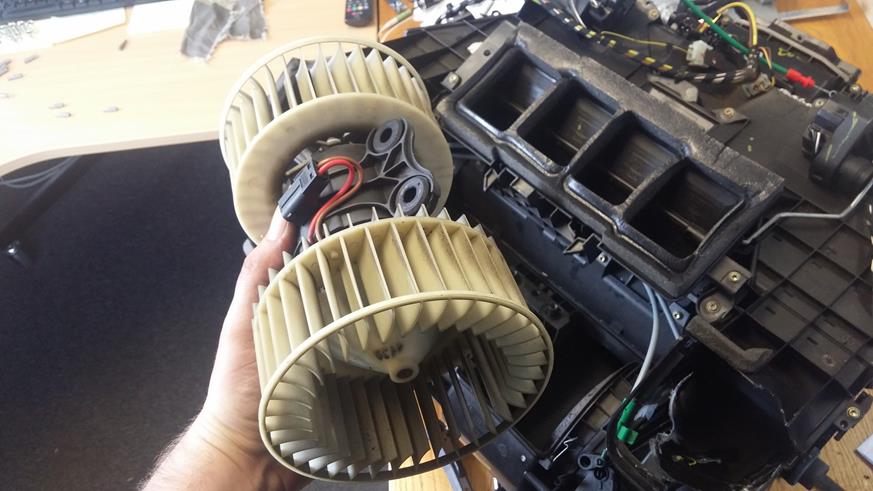
Now….what about the Blower Motor??
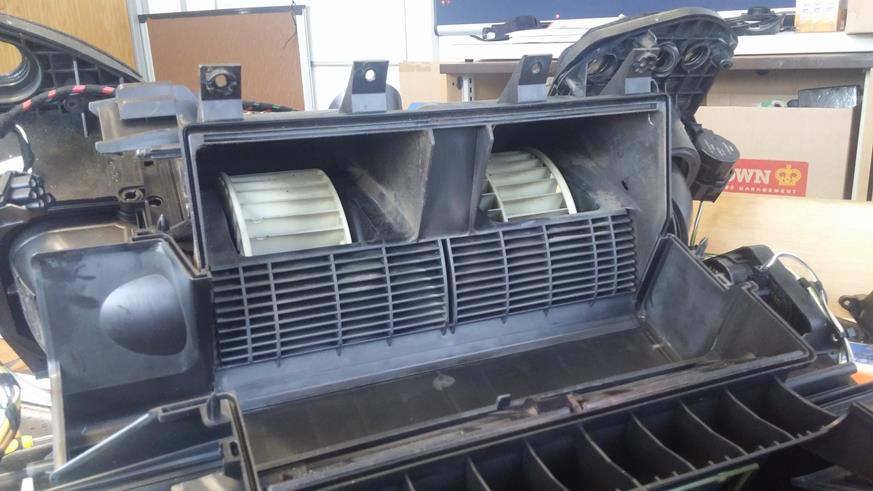
There should be a Flap type motor mounted here….on the replacement unit I have purchased, this was missing….remove it if it is there!
Anywho, undo the 3 spring clips holding on the fan cover
And remove…..
Undo the 3 Torx screws holding the Motor in place
Unplug the motor wiring multiplug
And withdraw the motor…..simples
Now, all of that was actually a piece of cake……
The fun begins in a couple of weeks’ time, when I begin to strip the interior down over 4 days!
I will endeavour to do a How To for that….and the number of pics will hopefully be vast.
I have not yet found a comprehensive How To on the internet for me to look at and research before I begin…only a few odd photos of before and after….none that actually detail the whole strip out….if you know of one I would be grateful to see/read it!!
Anyways.....
Practise makes perfect as the saying goes….
In preparation for a mammoth task that is to strip the interior to get the HEVAC unit out of the L322, I didn’t want to spend my bank holiday weekend stripping out the interior only to find I either a) didn’t know how to get the heater matrix out of the unit or b) attempt to do so, break something I don’t have a spare for and have wasted my time, have to put it all back together before Monday evening and still have to do the complete strip out once again only to continue the job at another time!
So after scouring the internet auction site(s) I found that a complete S/H HEVAC unit is only a little bit more expensive than a S/H Heater Matrix…..and would give me the opportunity to strip the unit and get access to the heater matrix as practise.
The Unit I purchased was damaged on delivery unfortunately – a few of the thin plastic outlet horns were snapped and cracked - but that didn’t stop me from being able to practise the strip down to get the matrix out….after all, it is only the matrix I am after!
Here is the unit sitting upside down to how it would be orientated in the vehicle….the Heater Matrix sits at the bottom.
First up is to remove the outlet elbow/horn next to the heater pipes. 2 Torx screws and the item slides out sideways.
Next undo the 2 Torx screws holding the heater pipe clamp plate in place.
Mark the pipes in the order they are fitted (I am sure they will only go in one way, but better to be sure!
Then with a wiggle and a bit of jiggle, remove the pipes. If reusing the pipes, they can be left to dangle to oneside. It is best to replace the O rings with new on refitting obviously!
Or with some more jiggling, remove them completely if replacing them.
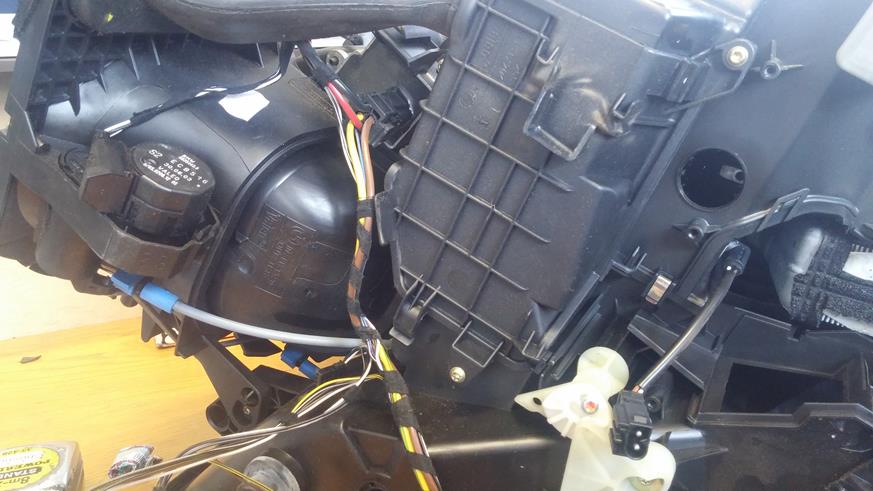
Next is to remove the opposite side outlets. One this side, the bottom facing outlet and the side facing outlet are a single piece held in with 4 torx screws and a spring clip.
The 4th screw is hidden under the side outlet horn.
And remove the spring clip
It doesn’t mention this in RAVE, but if the little internal flap is upright, you won’t be able to slide the outlet piece off….so you have to release the little drive rod and then rotate the flap so it is closed , then you can slide the outlet piece off….
The side of the heater matrix can be seen….
Undo the multiplug to the Condenser/Evap Temp Sensor
And the little plug to the flap motor on the side.
Remove the plug from the Condenser/Evap temp sensor from the unit, this is done by unclipping the little locking tab at the top of the connector
Now…..RAVE says to remove this flap motor….so I did…..but it really isn’t necessary I found out….plus to get the motor back onto its drive rod would be a major PITA….so can be left where it is, just unplugged.
Next is to remove what RAVE calls the TXV cover (I can only think it is something to do with The eXpansion Valve). 4 Torx scres and remove the wiring harness, the cover then slides off to reveal the expansion valve and side of the Condenser.
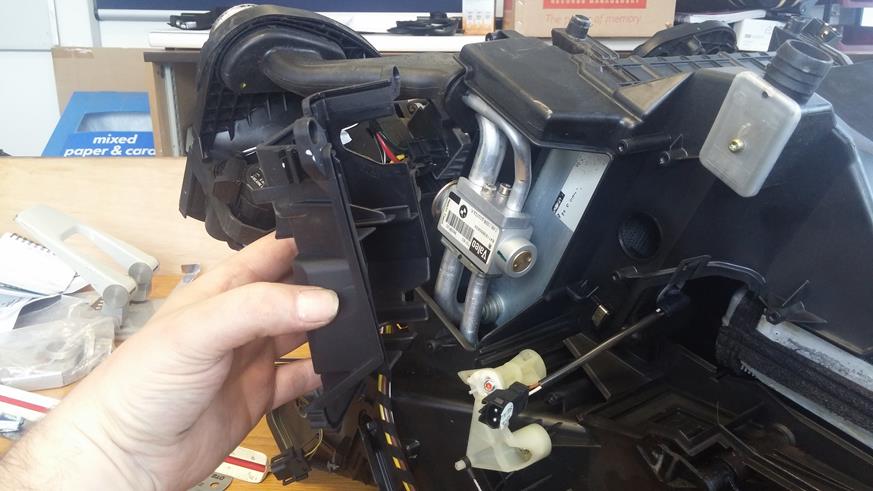
Next is to remove the bottom HEVAC access panel
This is held in place by 7 Torx screws and RAVE says 3 Spring Clips plus a couple of locking tabs…
4 screws here….
2 Spring clips here…..
A spring clip on the opposite side…..
And 3 Torx screws on the reverse side by the rear outlet horn…..
Two locking tabs (one on each side)…..
OHHHHH…..and the 4th spring clip RAVE never mentions…..caused me to scratch my head a few times before I found it…next to the Blower Motor Resistor!
The panel can now be lifted away exposing the Heater Matrix (horizontal) and the A/C Condenser (Vertical)
Carefully withdraw the Condenser Temp Sensor from the housing
Remove the plastic cover
And lift out the Heater Matrix…..
To refit is the reverse obviously……
Now, As I had it in pieces, I thought I would carry on and take a few other pieces off to show how that is done too….
First is the FSR (Final Stage Resistor). This can be done with the HEVAC unit in the car and is accessed from the side of the unit once the transmission tunnel side pieces are removed for access etc….
Now my pics show the HEVAC unit upside down as it is sitting on my desk!!
Pop off the multiplug
Lift the plastic locking tab and withdraw the FSR
To remove the Expansion Valve and Condenser….
Undo the two clamp bolts.
And remove the top and bottom clamp plates
Lift off the refrigerant pipes…
And lift out the Condenser, being careful to not drop the Expansion Valve (or better still take that off too!!!)
Now….what about the Blower Motor??
There should be a Flap type motor mounted here….on the replacement unit I have purchased, this was missing….remove it if it is there!
Anywho, undo the 3 spring clips holding on the fan cover
And remove…..
Undo the 3 Torx screws holding the Motor in place
Unplug the motor wiring multiplug
And withdraw the motor…..simples
Now, all of that was actually a piece of cake……
The fun begins in a couple of weeks’ time, when I begin to strip the interior down over 4 days!
I will endeavour to do a How To for that….and the number of pics will hopefully be vast.
I have not yet found a comprehensive How To on the internet for me to look at and research before I begin…only a few odd photos of before and after….none that actually detail the whole strip out….if you know of one I would be grateful to see/read it!!
Last edited:
 well done good luck on the real job.