So I've got the landy back from the welders. A good independent landy garage. Fitted replacement footwells. Good work. Apart from the spare holes on both sides. On the drivers side there's one down on the flat lip beside the floor plate and another up on the sloping section to the right of the accelerator pedal. WTF are they for? Are possibly for fixing an inner wing valance? They are Britpart footwells.
You are using an out of date browser. It may not display this or other websites correctly.
You should upgrade or use an alternative browser.
You should upgrade or use an alternative browser.
Footwells
- Thread starter John S
- Start date
This site contains affiliate links for which LandyZone may be compensated if you make a purchase.
Land Raver
Well-Known Member
- Posts
- 2,015
- Location
- In the dog house
The one behind the accelerator is for a pedal stop I believe. The other one could be the full beam pedal switch for a Series 2 maybe? Nothing a couple of rubber grommets won't sort for a few pence.
So, I've sussed what the holes are for....the cover plate and cover box. The latter for 2.25 petrol only. These are totally missing on mine, probably rotted away years ago. I can see what I need from the parts and workshop manual. Could someone explain where they fit at the top. Thanks.
Actually thinking about it I think the bit that attaches to the top of the wings isn't meant to come off! I remember having trouble with captive bolts (usually captive nuts but these were bolts) and that's why I drilled them out. Also I don't think those bits are in the picture...
Yeah that's what I can't figure out. That's the diagram. Mine are so long gone there's no trace and with the refurbished bulkhead I'd like to fit new ones to protect the bulkhead. There's nothing under the front wings I can see where it fixes. I'm wondering if that fixing bracket in the diagram is part of it. I'll have another nose in daylight.
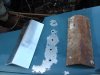
Made wing portion out of thick alluminium for mine unfortunately had to rivet them on as PO had rivet steel which was coroding the wing.
If you make some up fix them with Tiger seal.
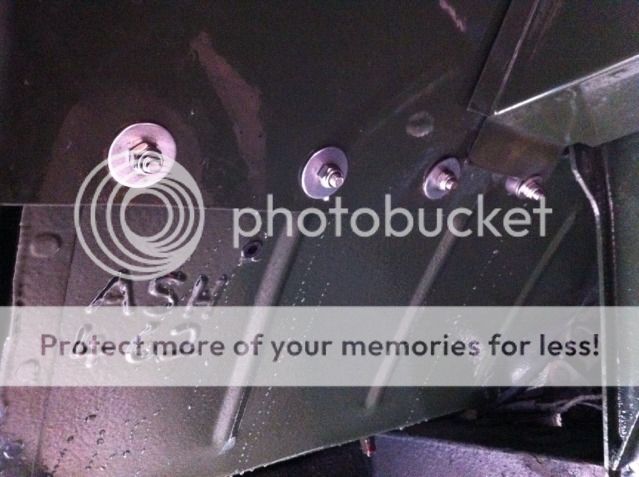
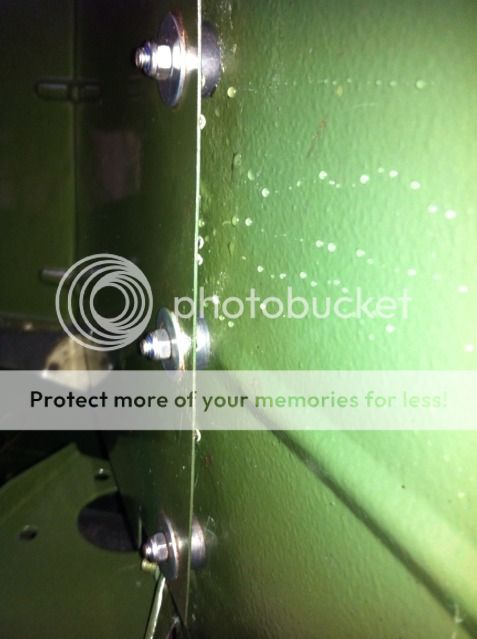
When you fit the mud shields put a spacer or double nuts between the plates and the footwell so the crap can fall down the gap , ie if it sits at that point it attracts water and quickly causes the footwell and the mudhsield to rust.
If you make some up fix them with Tiger seal.
When you fit the mud shields put a spacer or double nuts between the plates and the footwell so the crap can fall down the gap , ie if it sits at that point it attracts water and quickly causes the footwell and the mudhsield to rust.
Attachments
just to add - the bracket Blackburn shows in his picture is not in the picture I made of the parts book. I'm guessing that's part of the whole wing assembly - perhaps on a different page in the parts book - I'll check tomorrow (book's downstairs and I ain't going back down tonight if I can help it!)
Land Raver
Well-Known Member
- Posts
- 2,015
- Location
- In the dog house
YRM metal solutions sell new brackets to fit to the top inside of your wings. Two options for fitting....either rivet them on (will leave 3-4 rivets visible form the top of the wing) or you can bond them on with a strong metal adhesive like JB Weld. YRM metals solutions also sell galvanised mud shields and steering cover box too which fit perfectly well (I've fitted them to mine).
Excellent. Thanks. I've been on their site for other stuff recently but wasn't looking for these parts. The parts diagram and workshop manual have no proper detail of this fitting. Thanks too Blackburn I understand what you mean.last thing I want is to cause the refurbished bulkhead to start corroding again least ways not like that. If LR bad built / designed better wheel arch valances' and mud shields there wouldn't be half the corrosion and the like. Same as the silly hollow rear crossmember with opening facing the wheel which throws all the crud in. Anyway thanks everyone for your help. I think I'll get sorted now.YRM metal solutions sell new brackets to fit to the top inside of your wings. Two options for fitting....either rivet them on (will leave 3-4 rivets visible form the top of the wing) or you can bond them on with a strong metal adhesive like JB Weld. YRM metals solutions also sell galvanised mud shields and steering cover box too which fit perfectly well (I've fitted them to mine).
Land Raver
Well-Known Member
- Posts
- 2,015
- Location
- In the dog house
It's a good idea to use some washers or small rubber spaces when you attach the splash plates to the bottom of the footwells. This is a great rust trap otherwise as leaves and mud collect where the two parts touch and water doesn't drain properly.
Good suggestion. At least an inch gap and regular flushing to stop crud building up. A muddy off road trip would I imagine fill it with crap. I didn't know about these cos the previous owner did a bulkhead repair bits of metal plate so I've not seen the mounting holes before.It's a good idea to use some washers or small rubber spaces when you attach the splash plates to the bottom of the footwells. This is a great rust trap otherwise as leaves and mud collect where the two parts touch and water doesn't drain properly.
I doubt you'd need an inch as the holes probably wouldn't line up but 3-5mm would be enough. When I replaced the splash plates there is a 90 degree angled piece on the underside of the top of the wing which is fibreglass. I've put a piece of plastic across covering the 2 bolts holes to spread the load as the original splash plate had broken the fibreglass and opened up the holes. I doubt the fibreglass is original but there is chequer plate on the top of the wing so couldn't see how it was attached or if it had been repaired in the past.
Land Raver
Well-Known Member
- Posts
- 2,015
- Location
- In the dog house
Here is when I did mine. I left about a 1cm gap between the mud shield and the footwell. I used rubber spacers to avoid vibration and water getting through the holes. ( these were actually little rubber feet designed for heavy ornaments but a couple of tap washers would also be as good - they compress well to form a seal too when tightened. Stainless fixings for ease of removal again in the future.
Similar threads
- Replies
- 3
- Views
- 849