Differential rebuild?

This site contains affiliate links for which LandyZone may be compensated if you make a purchase.

Blackburn

Well-Known Member
Posts
3,105
Location
Tyneside
Had a spare diff that I had removed awhile back as it had too much backlash.
Today I decided to strip it down with the aim of rebuilding it.
Bearings are quite worn and pitted other than that all seems ok.
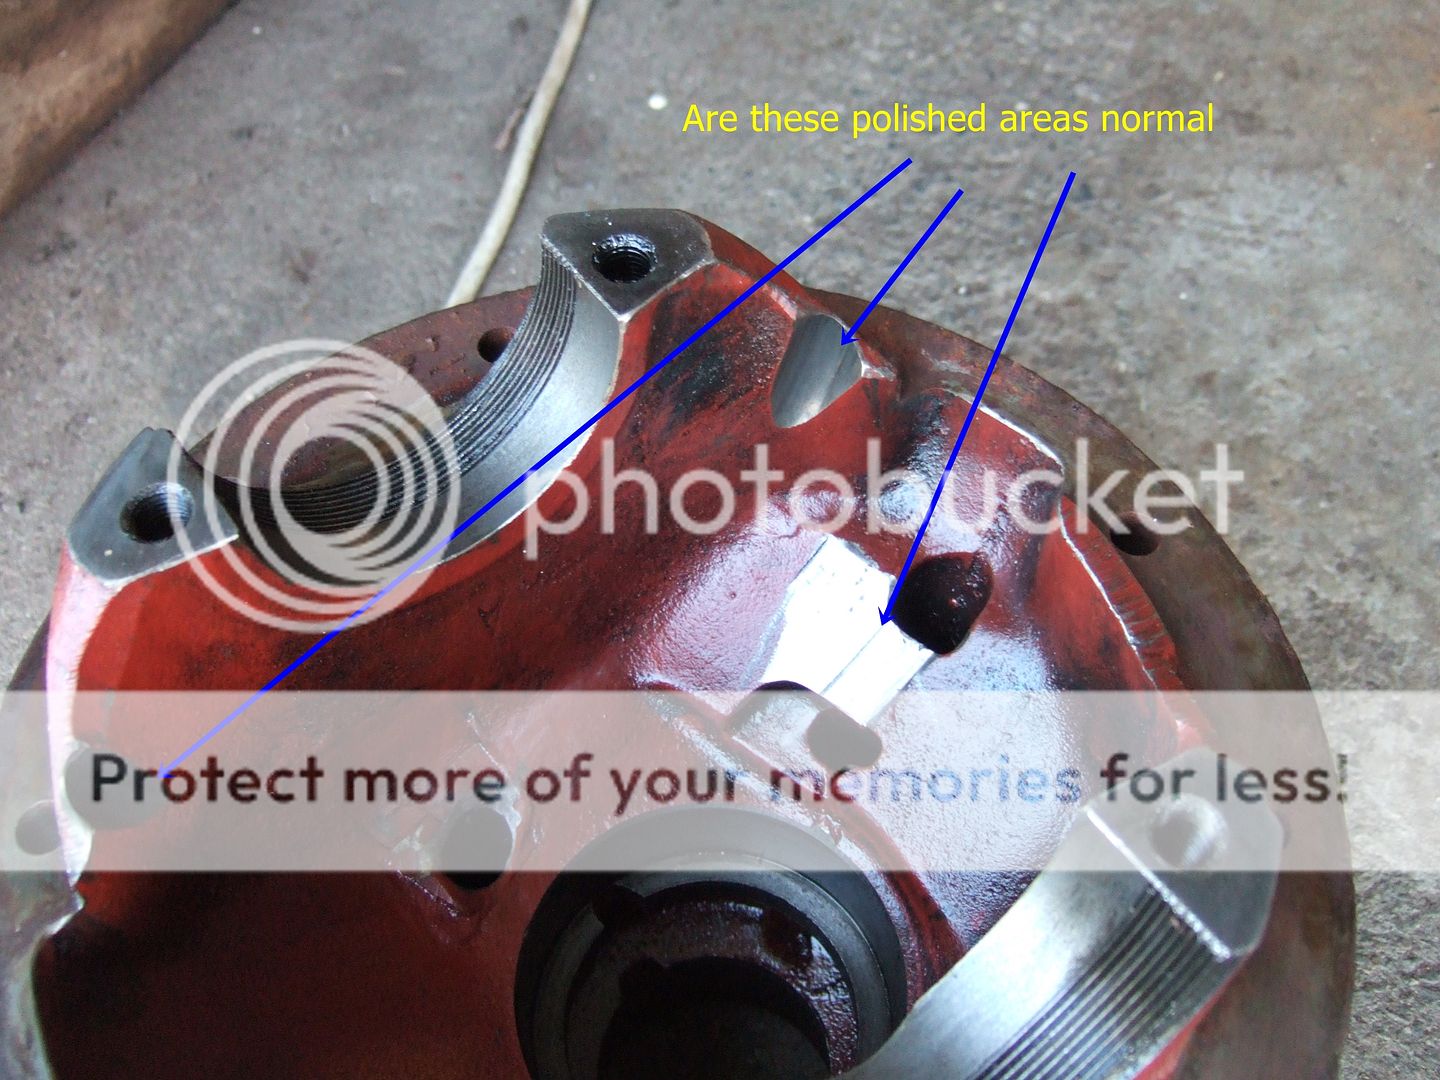
The casing has some bright shiny sections which seem odd has anyone come across this before.

Flange seal land is badly pitted, but did not leak prior to removal seal was old leather type.

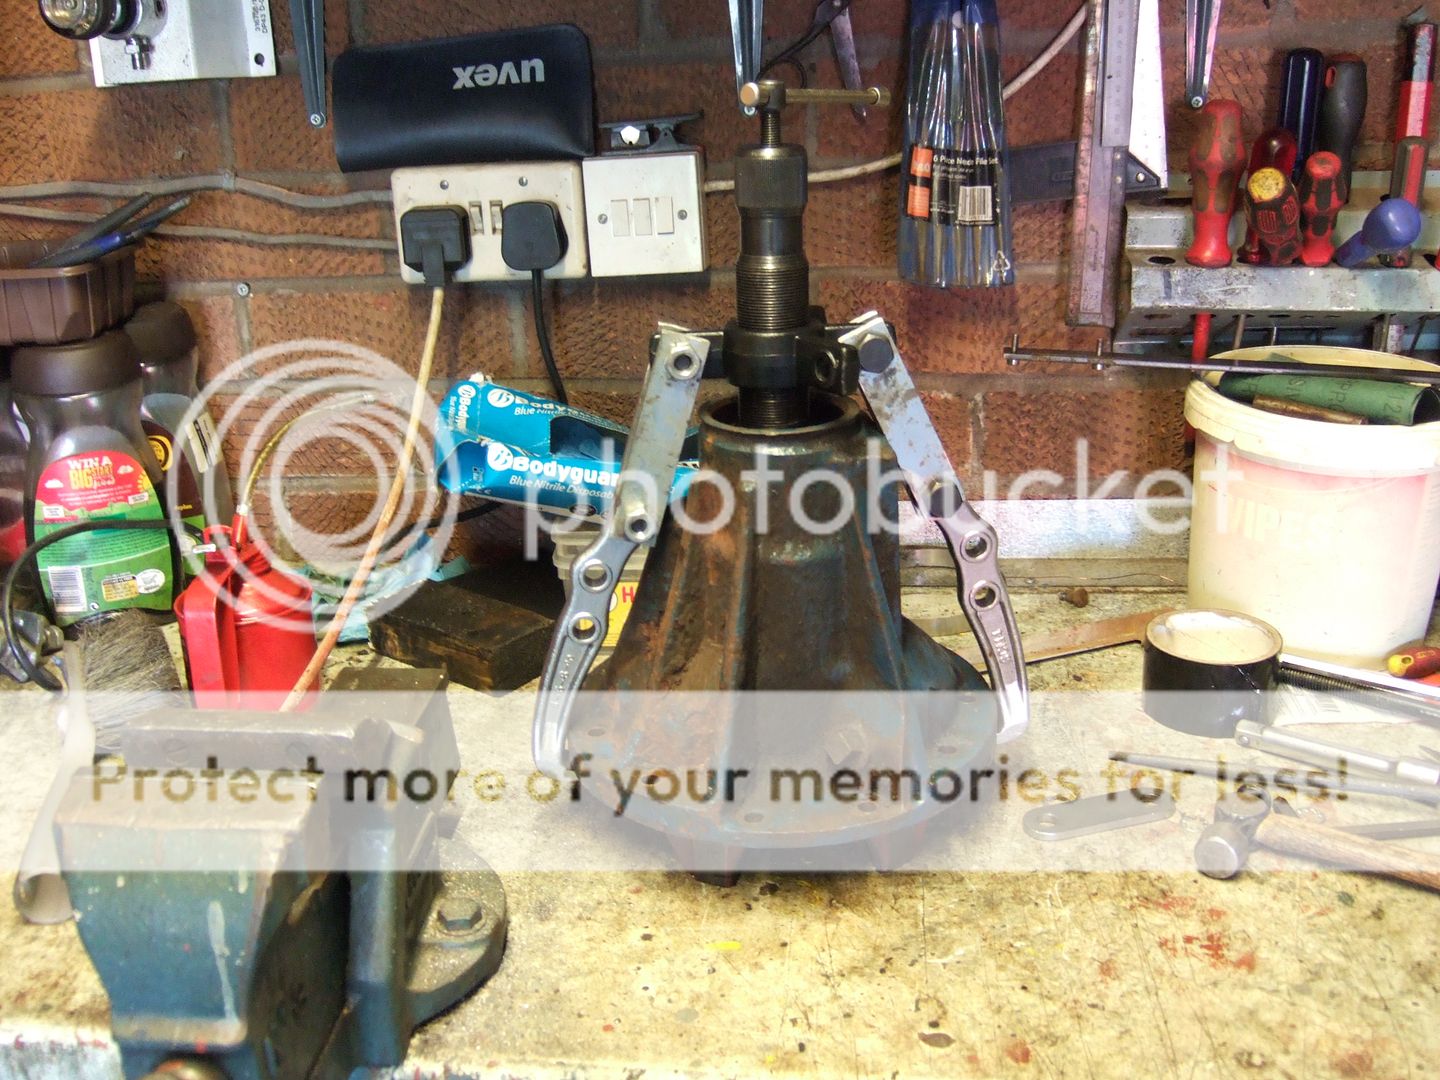
Managed to get all bearings out using my puller but will need to sort a press to get new outers into housing

 
The polished areas in the first pic don't look good .. They could be where someone's ground the casing out for a different crown wheel, but it looks like the crown wheel may also have moved some time in the past, probably destroying it and the pinion maybe ..:)
 
have you a pic of the diff carrier, it might explain cut out on the bearing support casting, why dont you just drift old races out ,use the puller or press to fit the new races,hope you marked bearing caps so you know which is which
 
There is no sign of mark on diff carrier , I re inserted it after removing pinion and a good 5mm between the shiny metal and diff rotating gear wheel, could it be caused by debris in the oil that the cog will splash around.
Will get a couple more pics thursday.
Will try freezer and oven for bearing outers , did that with a gearbox rebuild.
Cleaned the casing today ready to treat rust. Will leave painting it till I have the pinion bearing outer tracks fitted.
its not debris its been altered to take a different diff carrier at one time
 
A bit more progress on this today had been waiting of a bearing puller kit.
Got pinion inner bearing off quite easily.

The diff centre bearings where more problematic as puller would not fit under lower lip so cut roller cage off and pulled bearing from top lip 1st one came quite easily as I had partially cut it with a dremel trying to remove without puller.Second one need a light application of heat before it give in.


Diff carrier, pinion shaft and outer shells of Casing pinion bearings in freezer overnight , diff casing , diff carrier bearings and inner pinion race ready to go into oven for warming to 90 deg C prior to assembly Sunday.
 
Diff casing heated to 95deg C bearings out of freezer inner dropped in with a light tap outer went straight in.
Pinion bearing heated to 65deg c and dropped straight on to the frozen shaft,
Diff carrier bearings warmed to 55 deg C and tapped onto the frozen carrier these where quite tight.
Got a coat of primer on casing then realised that I had not ordered new dust shield for new output flange old one does not want to come off so new one ordered from Autoparts.
.
Going to need to store this diff for awhile before I use it could I coat it internally with Waxoil to stop it corroding or am I better of coating it with EP90 and wrapping bit in oily rags.
 
Got the pinion back in today then fitted diff carrier , struggled to get the backlash right till I noticed I was using the inch numbers on my metric dial gauge.
Waiting of a new dust cover for pinion so that to fit along with oil seal , then a coat of black paint.
No pics today me phone battery was flat.
 
Same pinion going back in so just compared old bearing heights to new and all the same so no height check .
Preload at the lower end of the spec with same shims as original.
 
How've you set the pinion height & bearing preload?

You don't set pinion height you set intrusion and pre load. If the old intrusion shims are used should not be a long way out. Pre load of carrier bearings is done by adjusting crown wheel in until there is no backlash. Then adjusting opposite bearing in until you get 7 thou backlash.
 
Used the same shims for pinion preload 1st time I fitted them there was no preload took them out to check thicknesses and noticed one of them had an indent in its face so refitted with indent toward smaller diameter on shaft now had preload .
I used a small spring balance to test how much force to turn pinion from flange bolt hole .
 
Back
Top