90 expedition storage thread

This site contains affiliate links for which LandyZone may be compensated if you make a purchase.

james6546

Well-Known Member
Posts
3,043
Location
Ashbourne
After our attempted expedition to Portugal it is clear that a 90 isn't the perfect expedition vehicle. Though seeing as it would be a shame for it to go after rebuilding it I am going to attempt to kit out the back in order to make the most of the available space.

There aren't many threads on this, so thought I would do one.

I (with with the suggestion from bankz) have decided to make a draw for the load bed area of my 90 and probably some kind of racking once I work out how to do it.

I am still in the planning phase, but so far the spec is going to be:

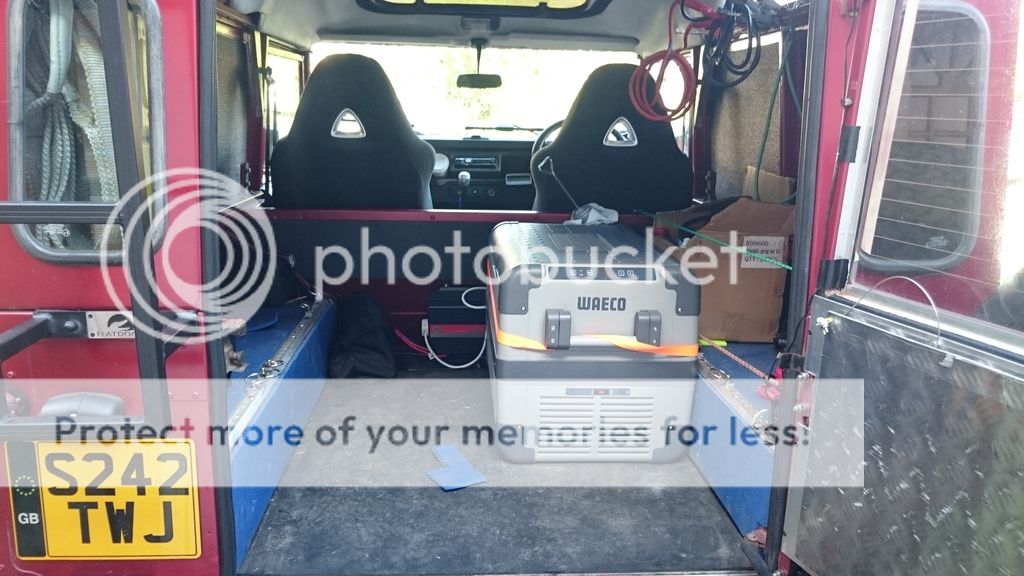
- will take up the whole of the load bed area and will come up level with the wheel arches so I can tuck the fridge away in a corner.
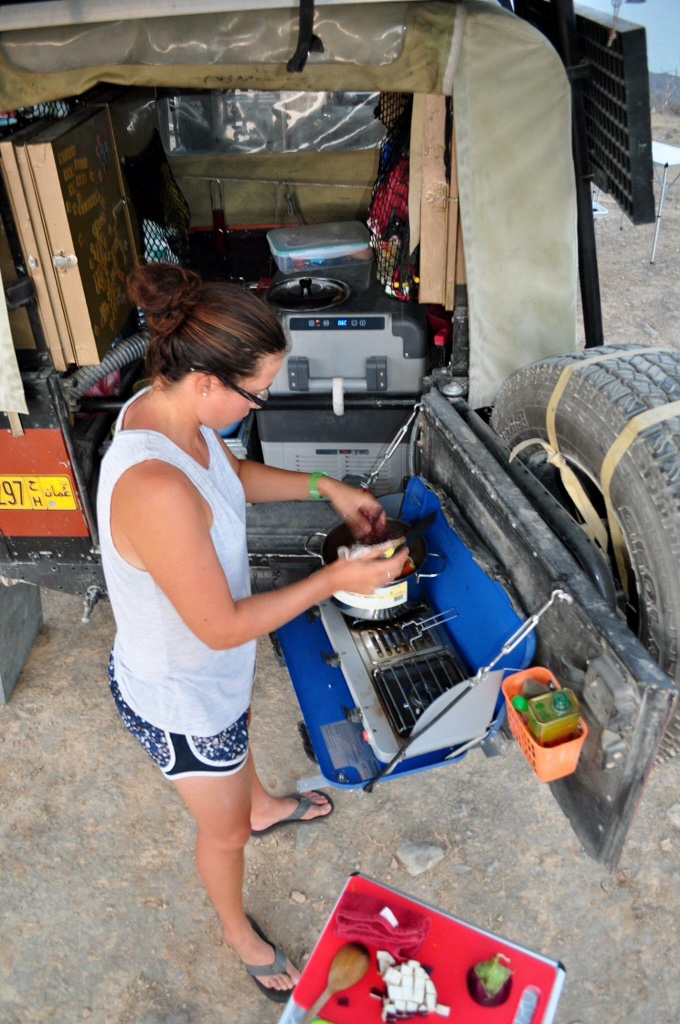
- the 1/2 nearest the door will be a draw with sections for cookware, probably cooker as it is a pain to store, tea making stuff etc.
- the front half will consist of compartments (I think 2) for lesser used stuff such as spare parts and tools. These will just lift up and will be assisted by gas struts. Maybe lockable for security.
- I am going to build sound proofing into everything

So far for materials I'm thinking MDF for the main build, with either carpet or some kind of rugged matting on top (suggestions pls) so that it is still usable for the dog. Then the front will be checkerplated to make it a bit more rugged. Sprayed black though as I'm not a massive CP fan.

How does that sound?

Also, what KG do my draw runners need to hold? 60KG should be plenty right?

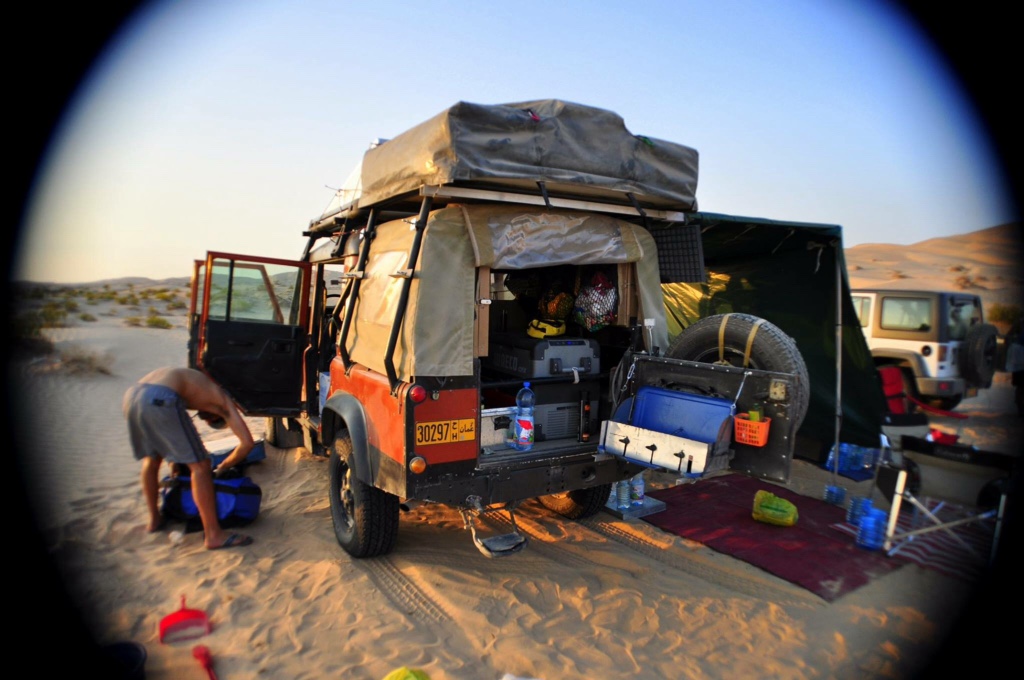
And cos everyone likes pictures, here is the starting point.

DSC_0107_zpsf16vfpl6.jpg
 
This is a variation on a similar theme that I did to my 90 about 6-years ago, it is not what you are after (it is a much more basic affair) but the principle is the same.

My goal was to have all my bits & pieces safely stored away but a decent (flat) load-bed that I could load up.
The two crates are standard euro containers that I bought from Screwfix, they slide in & out oftslide in & out easily enough despite being very heavily loaded and can just be pulled out and removed if necessary. My other storage area is visible just behind the centre bulkhead, I lined the bodywork with ply (the whole set-up is made up of either 12mm or 18,mm ply, can't remember which) and the lid just lifts out using the round finger-holes.
The whole lot was topped off with ribbed rubber matting and alloy angle on the edges. There are also a selection of tie-down points for securing items on the load-bed.

It has stood the test of time very well.
I don't use it for expedition work but as a general load-lugger and the fact that I can access most items even with the bed fully loaded is a real boon, obviously I worked out what items I am likely to need on a regular basis and put them in the crates, items that I rarely use are in the forward box.


Don't know about the storage situation, but what's wrong with your paintwork? Looks nice and shiny in that shot. :confused:

It's fine from a distance, it was just a bit damp in the shed when it was painted so it isn't very shiny, and has mostly come back to primer on the roof!

This is a variation on a similar theme that I did to my 90 about 6-years ago, it is not what you are after (it is a much more basic affair) but the principle is the same.

My goal was to have all my bits & pieces safely stored away but a decent (flat) load-bed that I could load up.
The two crates are standard euro containers that I bought from Screwfix, they slide in & out oftslide in & out easily enough despite being very heavily loaded and can just be pulled out and removed if necessary. My other storage area is visible just behind the centre bulkhead, I lined the bodywork with ply (the whole set-up is made up of either 12mm or 18,mm ply, can't remember which) and the lid just lifts out using the round finger-holes.
The whole lot was topped off with ribbed rubber matting and alloy angle on the edges. There are also a selection of tie-down points for securing items on the load-bed.

It has stood the test of time very well.
I don't use it for expedition work but as a general load-lugger and the fact that I can access most items even with the bed fully loaded is a real boon, obviously I worked out what items I am likely to need on a regular basis and put them in the crates, items that I rarely use are in the forward box.


That looks a really nice job. I may steal the ali edging and tie downs ideas.

I want a very similar thing, just with a draw at the front so I can segment it off for all the different stuff such as mugs, cutlery etc.
 
I didn't really get a chance to design much on mine as I didn't have totally blank canvas to start with, example being a roll bar going through the rear of the car just inside the door which gets in the way a bit.

I opted for cupbards bolted together onto a frame that was easy to secure to the car. I didn't have a draw system... in fact I'll put some photos up after this reply.

My lessons learnt, (110 DC)
1) Put your fridge low - I have the same fridge as you and it's it's useful to have to low to get things out from the bottom without having to remove EVERYTHING. I have HD shocks so maybe I loose an inch. But be careful putting the fridge higher.
2) if possible leave the possibility of retreating in the back - maybe a 90 is too small. but if the weather is truly bad, sitting inside and eating is good. at the least, leave access from the front.
3) Netting bags EVERYWHERE. Any corner or top space that didn't have a cupboard or gas bottle in it has a netting bag for bits. Amazing how such a simple thing gives so much help.
4) Folding cooker on the back door. Easy to do, makes it so simple to just start cooking

If I was doing it all again, I'd do it differently. but there are some things I like a lot. i wish I could go in through the windows as well to get stuff.

Thanks man.

I have done the cooking platform on the back door thing, it is good.

I do like the look of the opening side hatches, but they are a little out of the price range at the moment...

You have the same (but maybe bigger) fridge as me, didn't you find that it got in the way a lot?

What I'm thinking is that if I made a solid bottom platform (and fitted a step), I could climb in to get stuff out of the fridge. I know what you are getting at, but I don't think climbing in would be any less awkward than currently trying to access the bottom of the fridge! Though I do have it further back than you. I guess I could cut the fridge into the draws I am making, but would have to make sure the cooling vents are free...

Fair point about being able to sit in the back. It might be a bit of a struggle in a 90, but I will bear it in mind when I do the build. If I make the draws it might leave me with enough space...
 
One thing I want to do to mine is to have a sort of slide out table that pulls out to the length of the rear door.

Got it pretty much worked out but at a loss where to get sliding rails long enough... Any help?
 
:D:D:D Let me know!

Me and a few mates often go shooting, rarely space to set up, clean, fix etc... So my idea was to create a pull out table to provide table space. Maybe even a canopy!
 
I will take some pics of mine and post up for you tomorrow. fairly simple and low cost yet really user friendly with everything to hand. I have done the Morocco thing and done many smaller trips through Europe. mines been fantastic.

One thing that would be helpful to know, are you planning a trip alone or with someone and for what duration? all makes a difference when considering space for luggage and the amount of clothes you will need to take with etc.

Cheers,

Glenn
 
Back
Top