Freelander 1 2004 KV6 weird vacuum hose

This site contains affiliate links for which LandyZone may be compensated if you make a purchase.

Liam Deeney

Member
Posts
35
Location
Dorset
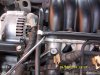
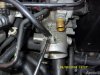
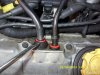
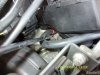
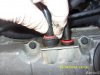
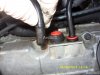
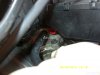
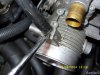
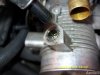
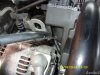
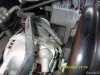
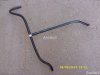
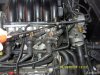
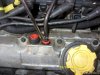
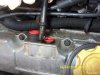
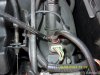
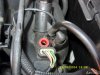
Hi all - new to the forum - I am looking for a part number for a vacuum hose that looks different to every manual and picture I've seen,
cG1O0OH.jpg

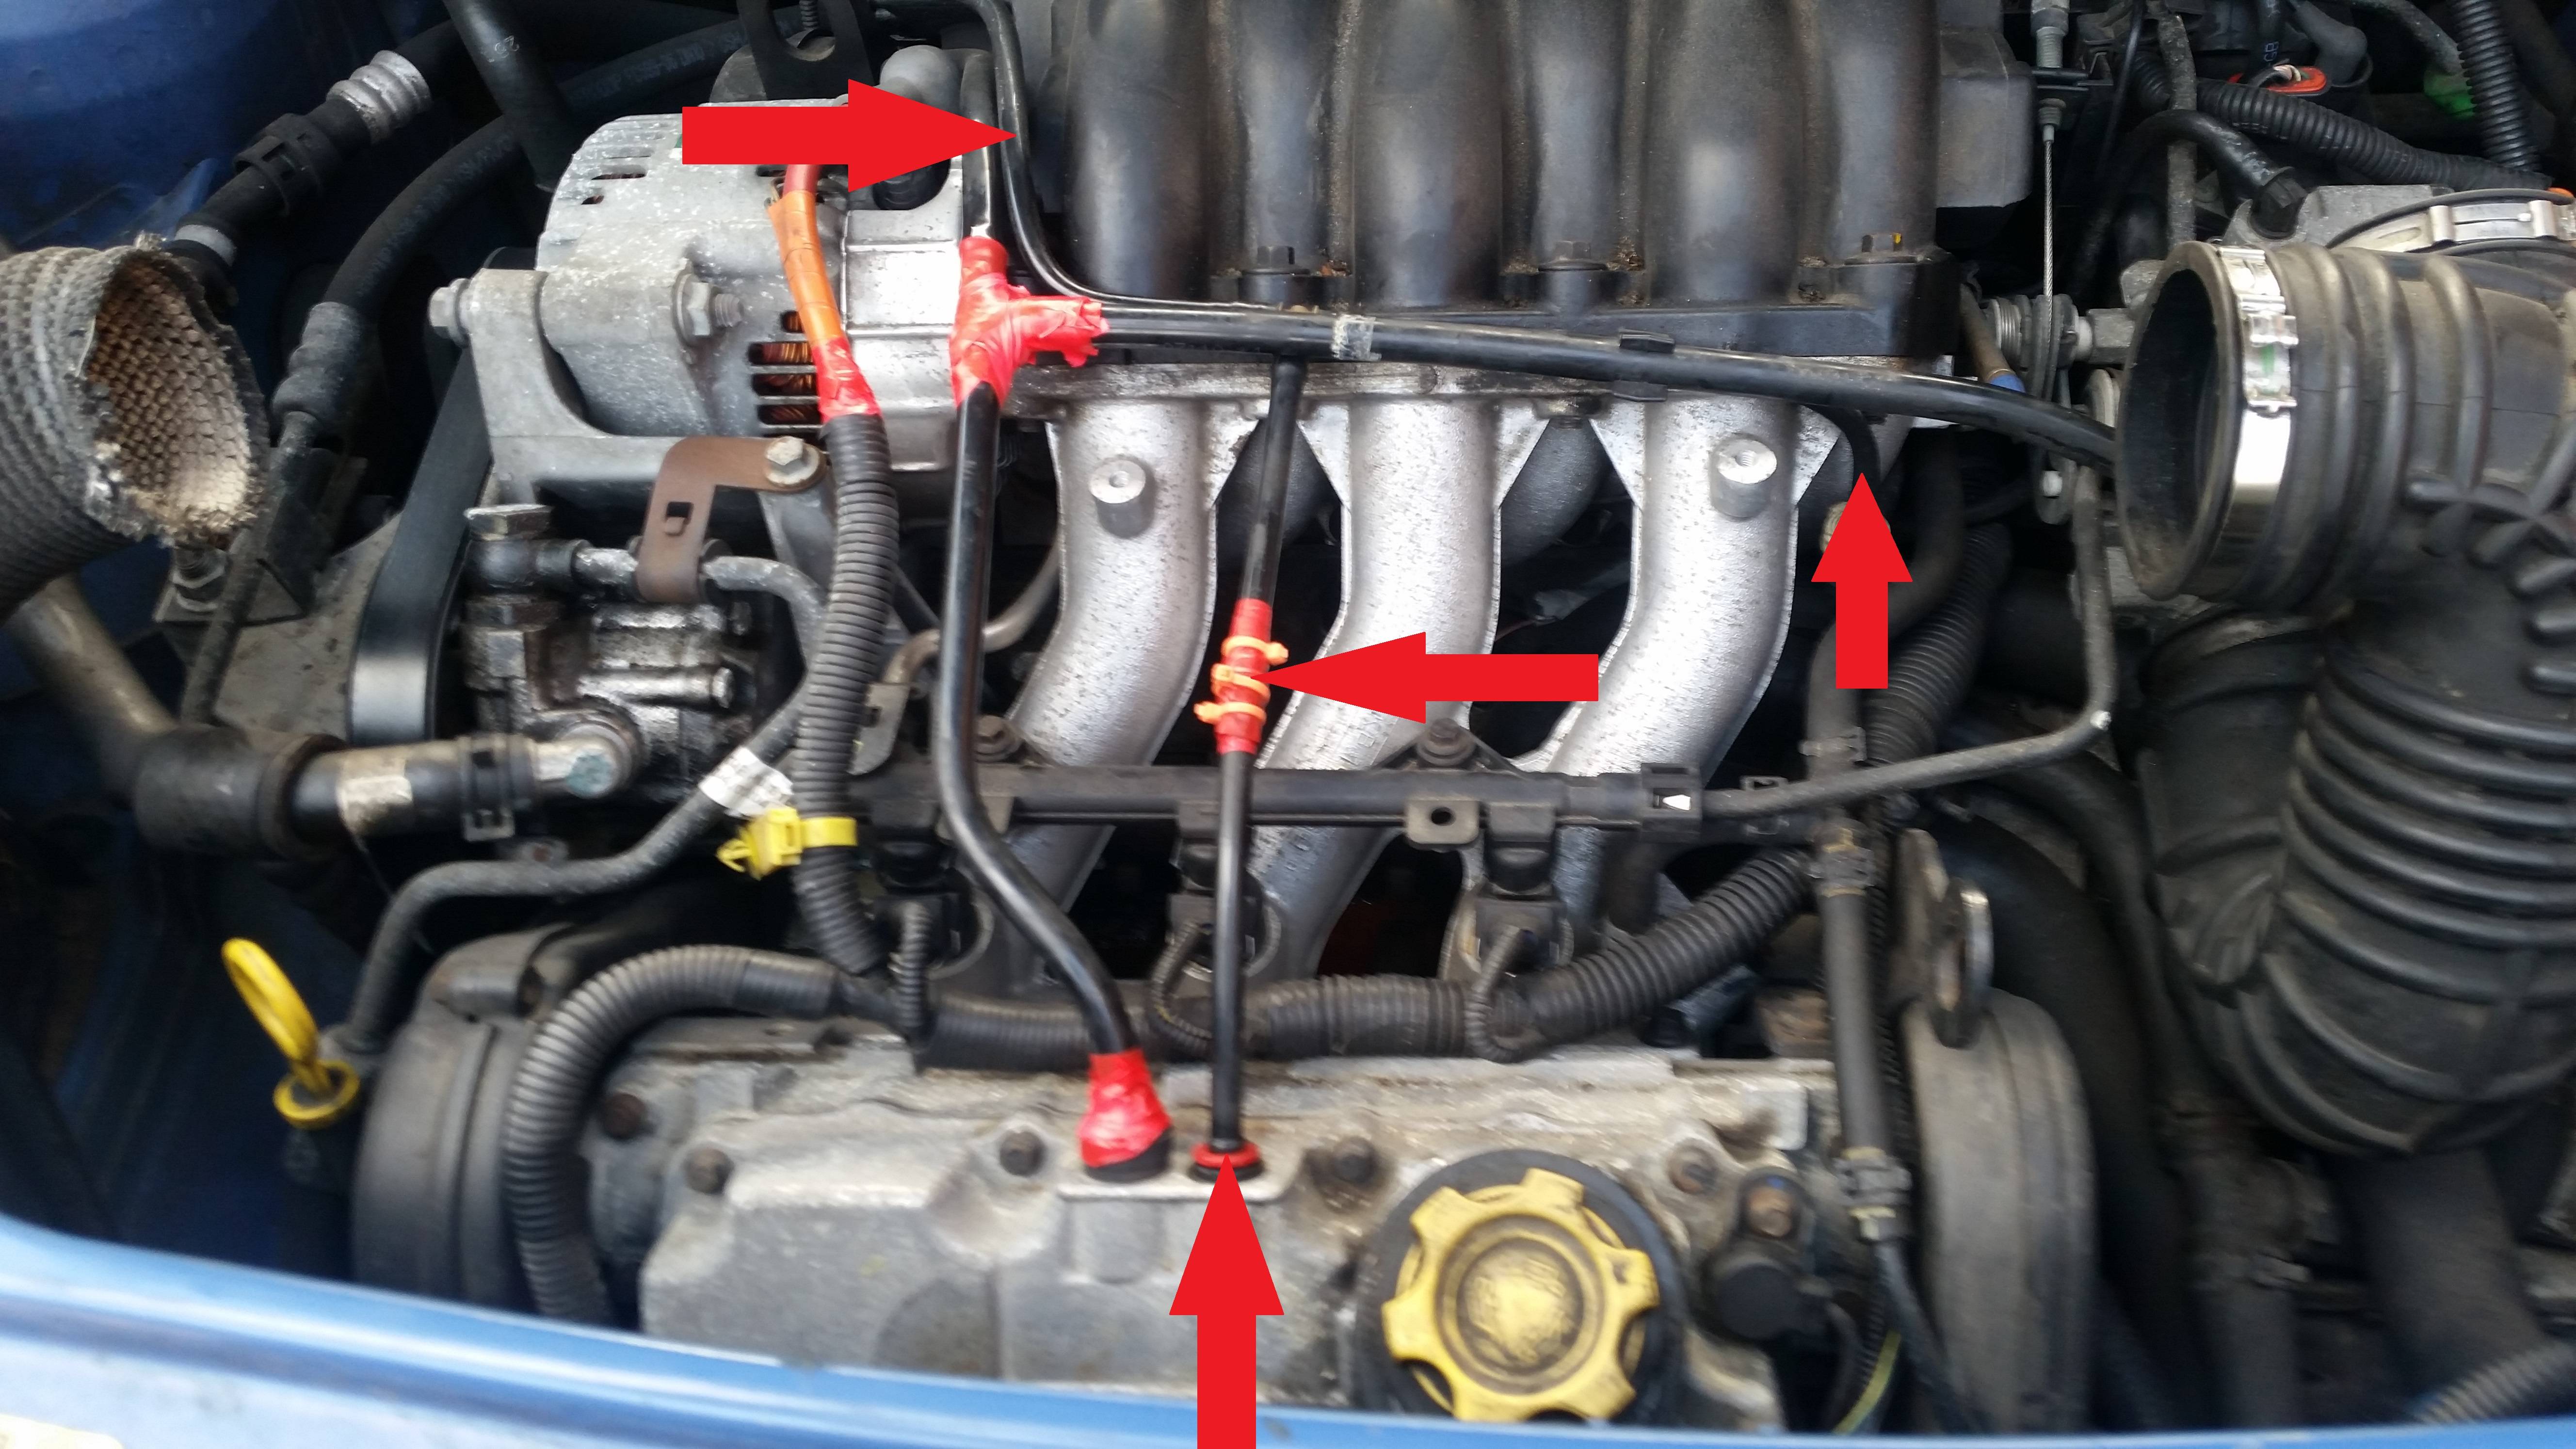
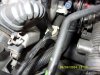
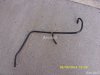
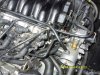
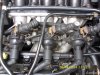
Most it seems go from the bottom and then right, whereas mine goes bottom, right AND left. As you can see I've bodged a repair as the previous owner cracked the breather and vacum hoses and just left them exposed. Breather hose wave very easy to find... the vacuum... not so much. Any ideas?
 
Thanks for the reply however neither of these are the vacuum pipe indicated. http://www.ebay.co.uk/itm/MG-ZS-ZT-...2.5+V6&hash=item3f72dd04cc:g:~nkAAOSwQJ5USjZm is the part I have already on order - the breather hose however the vacuum has a 90' angle on the left just after the T junction and on the right it is shorter than the vertical length and again has a 90 angle in it - the other hose you posted appears to be the breather hose at the back of the engine which is fine.
 
Thanks for the reply however neither of these are the vacuum pipe indicated. http://www.ebay.co.uk/itm/MG-ZS-ZT-ROVER-45-75-V6-ENGINE-BREATHER-PIPE-LLH102660-NEW-ORIGINAL-PART-/272510026956?fits=Car+Make:Rover|Cars+Type:2.5+V6&hash=item3f72dd04cc:g:~nkAAOSwQJ5USjZm is the part I have already on order - the breather hose however the vacuum has a 90' angle on the left just after the T junction and on the right it is shorter than the vertical length and again has a 90 angle in it - the other hose you posted appears to be the breather hose at the back of the engine which is fine.

Those are the only beather pipes fitted to the EU spec KV6. The US spec KV6 a slightly different configuration. All EU spec were the same.
I suspect someone has messed around with yours, hence the different routing.
 
This is what I am worried about - there are literally no references to the pipe I have - proabably has been bodged. Looks like I need to take it apart and figure out what on earth they've done. Probably someone who didn't want to buy the official part so just made their own :(
 
If the Freelander V6 is the same as the MGZT 190 V6, then the breather pipe should run the same route on the engine here are few pics below maybe they will help, I do know that the large breather pipe as a different bend on it that goes into the throttle body.

Photo's of the large breather pipe below.
 

Attachments

  • SDC11801.JPG
    SDC11801.JPG
    266.2 KB · Views: 1,643
  • SDC11802.JPG
    SDC11802.JPG
    236.1 KB · Views: 1,449
  • SDC11803.JPG
    SDC11803.JPG
    304.8 KB · Views: 2,364
  • SDC11805.JPG
    SDC11805.JPG
    270.1 KB · Views: 1,304
  • SDC11806.JPG
    SDC11806.JPG
    234.2 KB · Views: 1,177
  • SDC11807.JPG
    SDC11807.JPG
    215.1 KB · Views: 1,045
  • SDC11808.JPG
    SDC11808.JPG
    271.7 KB · Views: 1,131
  • SDC11809.JPG
    SDC11809.JPG
    179.4 KB · Views: 1,128
  • SDC11810.JPG
    SDC11810.JPG
    218.2 KB · Views: 1,235
  • SDC11811.JPG
    SDC11811.JPG
    162.8 KB · Views: 1,359
  • SDC11812.JPG
    SDC11812.JPG
    289.5 KB · Views: 1,156
  • SDC11813.JPG
    SDC11813.JPG
    220 KB · Views: 1,160
  • SDC11814.JPG
    SDC11814.JPG
    434.1 KB · Views: 1,075
These are the photo's of the thinner breather pipe below. hopefully these will give you an insight to how they route Arctcic2
 

Attachments

  • SDC11815.JPG
    SDC11815.JPG
    309.1 KB · Views: 880
  • SDC11816.JPG
    SDC11816.JPG
    254.8 KB · Views: 827
  • SDC11817.JPG
    SDC11817.JPG
    224.4 KB · Views: 1,092
  • SDC11818.JPG
    SDC11818.JPG
    322 KB · Views: 1,350
  • SDC11819.JPG
    SDC11819.JPG
    258.5 KB · Views: 1,131
  • SDC11820.JPG
    SDC11820.JPG
    264.9 KB · Views: 1,412
  • SDC11821.JPG
    SDC11821.JPG
    204.9 KB · Views: 1,085
  • SDC11822.JPG
    SDC11822.JPG
    442.7 KB · Views: 863
  • SDC12004.JPG
    SDC12004.JPG
    392.4 KB · Views: 2,875
  • SDC12040.JPG
    SDC12040.JPG
    293.1 KB · Views: 1,276
All EU spec KV6 breather pipes are the same in the Freelander or MGR cars.
They do get brittle with age, so some bodging can take place.
Arctic2's pics of the Rover installation, are the same as the KV6 Freelander.

There was a slightly different layout after late 2003. The air assisted injectors were dropped in favour of a more modern design. This led to the elimination of one pipe on the throttle body, where it linked to the inlet manifolds. The removed pipes were blanked off with plastic plugs. However the two breather pipes remained unchanged.
 
Last edited:
Thanks for all the great info - I've see the pipe that Nodge has mentioned which goes from the lower connector at the front of the engine (next to the breather pipe connector) that doesn't have the throttle body so I will get one of those. If I'm lucky the pipe that splits left doesn't go anywhere and is capped - however I'm worried that it's plugged into something. I will have a look when I can and will update. Really appreciate you all helping a noob.

edt:

Perhaps the bodged the vacuum enhancer in?

http://workshop-manuals.com/landrov...v6/overhaul/seals_manifold_chamber_from_03my/

or used a pipe/line from a completely different engine?

http://www.pixels1.com/cars/cars/photos/rover/rover-800/825-kv6-head-gaskets/hg-04.jpg
 
Last edited:
Someone has just made a mess of your engine's breathers. Just get the correct pipes and replace both. Then you'll see how they are suppose to go:
;)
Nice pic of the Rover 800 KV6 engine. Notice the alloy manifold. That was a fantastic design, which was dropped in favour of the plastic thing that BMW supplied. I did try to find an alloy intake some time back for my ZS180, but never found one.
 
Oooookay. The vacuum pipe going left definitely does go somewhere and the breather pipe is also different to those posted or described.


Descriptions on pictures. I think looking at it that it is a factory part (2004 V6 sport) and unplugging that left side seems like a very bad idea.
 
Right.... so that pipe I have is rubbish and I need the front vacuum pipe and one of these!
http://workshop-manuals.com/landrov...old/component_information/diagrams/page_1493/
Ha - got there in the end. I hate to think about the reasoning of doing this but it certainly isn't good!

It looks to me (and correct me here as I'm probably wrong) that the little box at the back with the wires coming out of it should connect to the air intake as a breather hose, not the vacuum line..... in which case my how the heck is this engine running!

Thanks again for all the help - the bit I was missing was the box at the back with the wires and where the tube came from.


edit: wait........ looking at it the vacuum enhancer, is meant to connect to the braking system. Should I be worried?

http://workshop-manuals.com/landrover/freelander-b/brakes/repairs/vacuum_enhancer_kv6/

http://workshop-manuals.com/landrover/freelander-a/brakes/brake_system_layout_(kv6)/
 
Last edited:
Currently yellow is connected to the vacuum hose connector at the bottom front of the engine... the red is connected to where the right hand side of the standard vacuum hose is meant to be connected (directly down from red, small circular red connector as seen in your image.
 
Sounds like the pipes are all wrong. The servo vac pipe should go into the 9mm red hole (circled yellow)
The vac booster (circled red) may or may not have the electrical connection made. This is dependent on year. It will still connect to the plenum and servo with the 9mm pipe.
Your best bet is to order whatever pipes are wrong and replace the lot, so it matches with my picture;)
 
Am doing - I just didn't think it could be *that* wrong...... apparently it is. Not happy with the chap I bought this from. Not happy at all.
 
Am doing - I just didn't think it could be *that* wrong...... apparently it is. Not happy with the chap I bought this from. Not happy at all.
I'd be worried about what else has been bodged. If the breather pipes are so messed up. What else has been bodged on these complicated and reasonably fragile engines.
 
Back
Top