110 defender rebuild project and v8 conversion

This site contains affiliate links for which LandyZone may be compensated if you make a purchase.

farmershort

Well-Known Member
Posts
1,067
Location
West Berkshire
Hi All,

As some will know already, I've recently bought my donor vehicle, and have been busy planning and arranging the various rebuild components.

Currently I have a 3.9 serp v8 engine on it's way to John Eales for rebuild, and a Richards galv chassis on order.

John will be turning the old 3.9 into a 4.6 with a few mods. Output is estimated at around 270bhp.

I have spoken with Aschrofts about the gearbox & transfer box refurb. As soon as I manage to secure a v8 R380 bellhousing, I will be sending them off for refurb & strengthening.

I'm also chatting with exmoor trim about the interior styling - but this is probably a long way down the road.

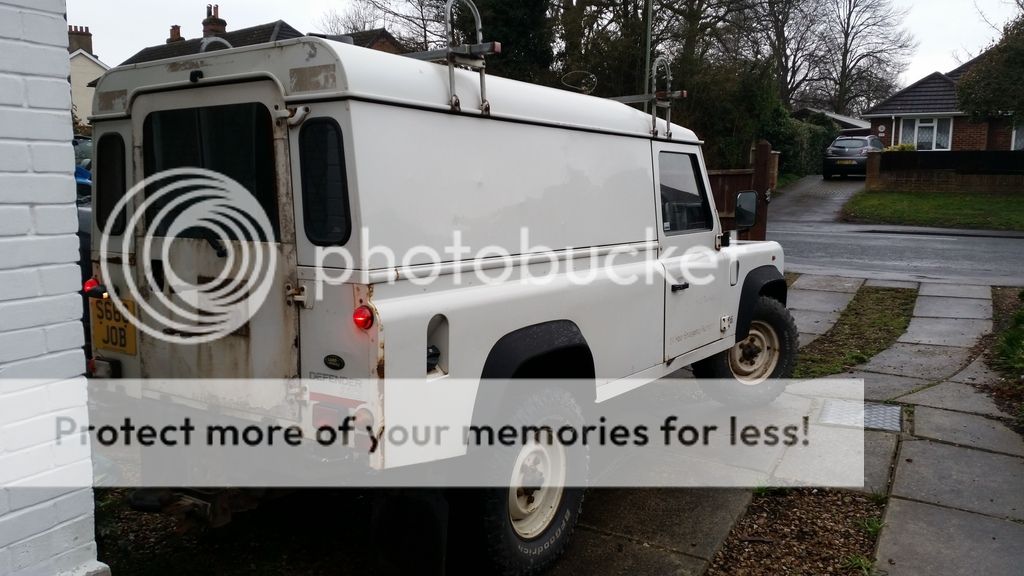
Well, here's the donor... A 1998 110 defender 300tdi:


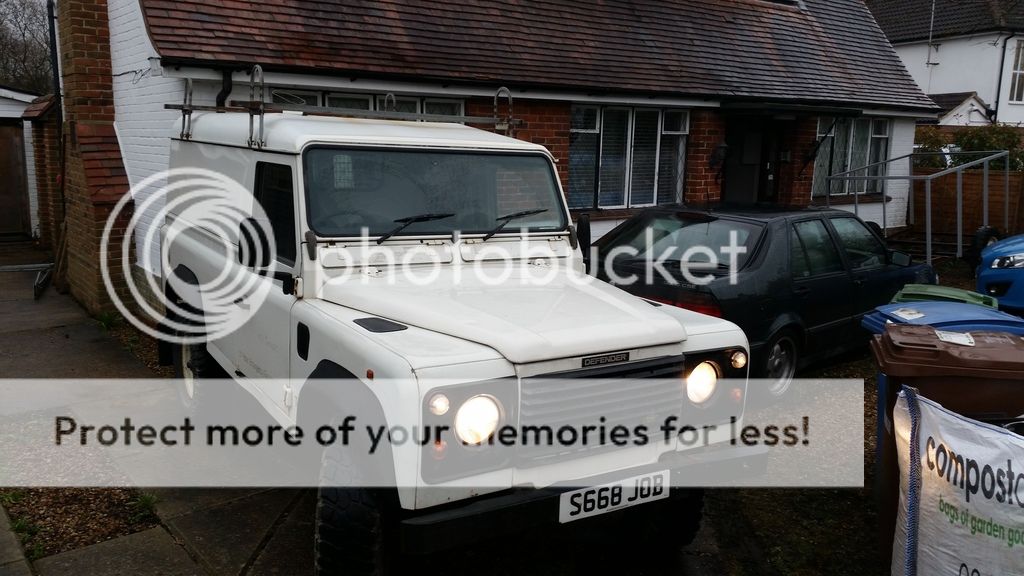
There was the faded signs of a telephone number on one of the doors, so I thought I'd chance it and give them a ring to see if anyone knew it's history. After a couple of days wait, a very nice chap got back to me and said that he used to own it. It had been owned by his company over the last 6 or so years. They only sold it 8 months previous to me buying. One of the best bits of info that came out of the phone call as that this 110 had a brand new 300tdi engine just 72,000 miles ago!!!! Offers on a postcard!

Rough plan for the rebuild is thus:

get landy jacked up onto stands, and remove the wheels.
Remove radius arms and axles (and associated) and strip for shot blasting
clean & paint refurbed axles and other metal work
rebuild diffs
.
.
.
.
That's as far as I've got in my head so far.

These are the things I know I need to source:

v8 R380 bellhousing
Roof in good condition
new rear door

If anyone has any great time-saving hints, they'd be most welcomed. I'm keen to avoid the silly mistakes that generally lead to having to re-do a job.

Thanks

Adam

p.s. I'm also doing a blog about the rebuild, so I'll try and get the blog posts to feed into this thread - blog here: http://farmershort.co.uk/blog
 
Last edited:
Great project !!!

Any idea what you gonna do to the body ?
Personally love the 110 soft tops (like richard hammond ones)
 
Like Groundhog Day this. Not only did I make my 110 HT into a Megasquirted 4.6 RV8, but my donor was a White one as well. Only difference is mine was a 200tdi.

You might have a bonus if you can recoup some of your build money by selling the 300tdi engine. The funds I received from my original engine bought me a brand spanking RV8 block from Keith Gott LR.
 
Update time!

I've had a pretty productive day today, and have reminded myself why I much prefer working on a landy than any other vehicle! I didn't even have to jack it up to do half of the work!

Todays aim was to get the rear axle removed. I figured the rear would be easier than the front, so a nice warm-up.

I started by removing the rear prop shaft - rear section first, then pull the the shaft out of the splines, and set about the old "hand-brake rotate" game to get the other end off.


Next, I started looking at the suspension and working out what I could and couldn't remove whilst the landy was still sitting on it's wheels. I decided it'd be safe enough to remove the struts, so undid the top & bottom nuts on each, and compressed them to get them out. They certainly weren't a matching pair, and one of them was certainly past it's best. I did have to get the mole grips on one of the strut tubes to stop it spinning as I undid the lower bolt.


Then I had to have a little think about what I could do next... safely...

I decided it was time to jack the landy up, and started by jacking the chassis. As I jacked the chassis up, I noticed the springs pop out of the upper seats.... I took this as a sign! I set up the axle stands under the chassis, and then undid the clamps at the bottom of the springs. The springs then came out easily.


Once the springs were out I undid the bolts at the chassis end of the trailing arms. Then I began jacking up the axle itself, and got some stands under it.

Once the wheels were off the ground, I took them off, giving far more visibility. After a bit of buggering around with the position of the axle stands (trying to make sure they weren't in the way of the axle end of the trailing arms), I could get onto the other end of the trailing arms. The first trailing arm bolt (axle end) came out pretty easily, but the other side then had nothing to push against.... This meant the axle wanted to twist under the land (pivoting at the a-frame ball joint)... Luckily the axle is big enough to wrestle it all to completion. Once all the trailing arm bolts were out I could drift the arms out of the chassis end holes.


Next, I cut the flexi brake hose which goes from the chassis to the axle, and undid the axle breather bolt.

Finally, I removed the split-pin from the crown-nut under the a-frame balljoint, and "drifted" the joint apart.... less of a drift, more of a bloomin great whack!


Then... I realised this is silly job to try and do on your own!


Luckily I switched back to brain rather than brawn, and brought out some more equipment!


Adam 1 - 0 Landy


I've left the A-frame attached at the moment, but I'll get that off before I set about getting the front axle off.

It's a day of sorting the garden out tomorrow, but I hope to get back to the landy on monday.
 
Last edited:
I managed to get a couple of hours of "landy time" yesterday, which was nice. Not as much time as I'd hoped, but still useful.

I tried to remove the bolts which secure the A-frame to the chassis-mount to begin with.... Not a chance! Not even with my biggest breaker bar and my whole weight on it!

Having decided that I can just grind those out later, I moved to the front axle.

To begin with, I undid the ball joints at either end of the cross-rod:


and


Then I undid the bolts on the damper (steering damper?) and the whole lot came out:


I couldn't figure out how to remove the pan-hard rod. This bolt came out fine:


But the other bolt is the other way around, so the head of the bolt fouls on the axle...

Here's the free'd end:


and the non free'd end:


Next I set about removing the track-rod from the rear of the axle area... after popping off the ball-joints, I realised I also needed to remove the plate from here:


and track-rod was out:


The final job for the day (as I thought it would be quick!) was the front drive shaft... As I already have the back of the landy on stands, there was no option to roll it forwards a little to rotate the bolts.... This meants undoing the top 2 bolts was a bit of a pig. I undid the axle end first, so that I could at least rotate the other end to make like easier... It wasn't much easier!


That was it for the day. Next jobs are:

Cut flexi hose for brakes
Undo axle breather
Remove struts
Unbolt chassis-end of radius arms
Jack up & remove springs
(Hopefully) pull the axle out complete with radius arms!

Then...

Think about getting the gearbox & t-box out... they'll be going to Ashcrofts for a refurb as soon as I can find one of those sodding bellhousings.


Once the gearbox and t-box are out and ready to be sent away, I can work on the axle strip-down. I'm hoping I can get the axles stripped, blasted, painted, and rebuilt in time for the new chassis arriving.
 
Looks like it's all coming apart nicely. To get my Panhard rod bolt out I had to jack up a little to enable the bolt to clear the spring and axle. There should be room, you just have to pick the sweet spot.
 
Great level of detail above, thanks for putting in the effort as I will be reading avidly. Nut & bolt details - good effort!
 
Thanks for the comments chaps!

Brown - Yeah I hoped it might be a case of jacking it.... it looked sort of like that was the most likely answer as I was staring at it, but of course that will keep until just before I'm ready to whip the axle out (which is the next job).

I have an exam (professional cert) on friday this week, so all of my free time is given to revision until after that.
 
I had a busy but pretty satisfying day yesterday - passed my exam in the morning with a pretty high score, then a few hours at work, then home to sort out that front axle!

As I mentioned in the last detailed post, I still had the 2 chassis-to-axle rubber brake lines to cut, and the axle breather bolt... so that was the first job.

Next I undid the nut on the bottom of the front shocks... shocks started spinning again, so I had this arrangement:


Eventually you also need to undo these 2 smaller nuts (15mm iirc), which secure the spring seat plate onto the axle:


Push the shock up out of the way... this will enable you to get to the head of those 15mm bolts:


Next, I undid the rear (chassis end) bolts from the radius arms... 30mm I think. At some point pre-jacking or during-jacking you'll want to try and remove the rear section of the bush, so that the radius arms can just fall out of the holes when you pull the axle away.


I then had a terrifying 30 minutes of jacking up the body, then the axle, then rearranging things.... running around checking all stand were ok.... etc etc. In the end I had the front of the chassis jacked up, and then jacked the front axle up enough to get each wheel off. After I'd got one wheel off, I secured that corner of the landy with a chassis stand, and an axle stand, then switched to the next corner. After all of that messing around, I ended up looking at this:


You can now see those 2 15mm spring seat bolts have gone, and the spring is all-but ready to come out. I jacked the chassis up as much as I would dare, and lowered the axle on that side as much as I dared. In the end this still wasn't enough to give the spring clearance (needs a good inch or 2 clearance). I got my Draper-Professional spring compressors out and used those to give it a squeeze. Once I'd got an inch or so clearance, I was able to remove the spring. Axle then goes back on an axle stand on that corner, and I can repeat on the other side. Sorry, no photos of the spring compressing.... mostly as spring compressors make me very nervous! Just to add, the draper compressors have 2 "hooks" at either end, and I used 2 compressors - one on either side.

Once both of the springs were off, I just levered the axle forward a little, and the radius arms dropped out nicely. I then had another complicated few minutes the engine crane to get to this stage:


You can see here from the location of the axle stands, that I had to take the axle out sideways.... not ideal, but my driveway construction meant that it was much safer to support the chassis on the front beam.


Look Ma! No wheels!


So, I think I'll call that Adam 2, Landy 0.

It's another gardening & housework day today, but tomorrow I'll hopefully set about getting the axles a little more stripped down.
 
Haha! Yeah I was wondering whether I'm making life harder for myself further down the line!

Given that I have about 5 weeks till my galv chassis is delivered, I really wanted to get the axles ready to go under it. Then I've got a lovely rolling chassis which I can move around if/when required.
 
In short.... Yes, you've made life hard for yourself :p
I'd have took body off first, it's a days work and the time you'd haved saved removing axles afterwards would have worked right.
But I can see your way of thinking :) Suppose it means you don't have to store all the panels yet either this way.

Either way I'll look forward to the rest of this build :)
 
Yeah that was the other factor... I have no where handy and secure to store the body panels at the moment... They're pretty safe whilst still attached to the chassis I reckon!
 
Well it seems I hadn't made life quite hard enough for myself! I went for a 2nd stage interview today and it looks like I've got it! That means moving house from Hampshire to Berkshire at some point soon! The upshot being that I need to get the axles ready for the new chassis, and I need to strip the donor so that is can be transported!

I do make life difficult for myself sometimes!
 
Back
Top