Matt Baxter
Active Member
- Posts
- 551
- Location
- Fleet,welding up a disco
If you want to take a look at mine just shout mate
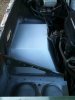
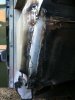
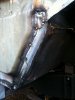
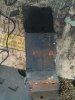
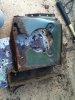
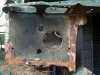
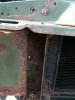
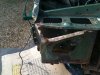
 was a horrible abortion of metal that simply covered over the rusty stuff. I had great pleasure in cutting all this out. so another patch panel was created and I seam welded the whole edge to make sure it was strong. Well you might as well as your here eh
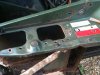
 so I wouldn't recomend these front dislocation cones, then again perhaps its just me fitting them wrong :doh: but then again she is fooking high the front edge of the bonnet now sits just above my elbow.
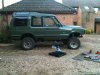


And another weekend has gone and what the hell happened?
So do you ever get that feeling that the days merge into weeks and the weeks into months and then suddenly you realise that the repair your doing today wasn't there when you started 11months ago......... seems like a weekend like that.......
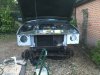
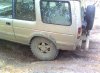
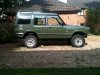
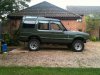
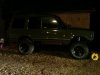
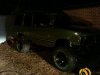
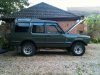
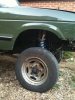
Well boyz she is back on her wheels and holding her arse off the ground without the aid of axle stands and if you ever wonder what a disco looks like with a 3" lift on the suspension and a 2" lift on the body, well here she is. Yes she is on standard wheels but the new ones arrive tomorrow
I have posted a standard height then 2" body lift and finally a 3" suspension lift.
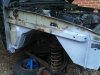
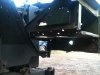
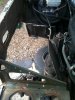
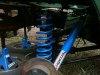
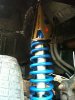
The suspension is great and you can see a real difference from the old rear suspension and then the new components. The front set up is particularly nice although it is let down by no bumper or lights at present.
so a big thanks to Gummy Bear who came ad painted the underneath for me and then helped with the seating of the springs.
So how did it all go I hear you ask.
Well Saturday started off with me painting the rear of the chassis in readiness for the new items. Then with the help of Gummy Bear the front suspension was stripped off and he then painted the front whilst I built up the rear.
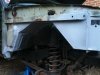
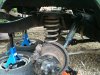
I am still unsure if the disslocation cones at the rear (they are hooked) are fitted correctly but wont really be able to tell until I do the good old articulation test
Anyhow the front set up looks great. The base of the springs are at a very acute angle compared to the dampers although it seems to sit OK. The front cones are a pain in the arse and are very close to the dampers at full articulation. Already the dampers have some paint missing which has ****ed me off
With all the front and rear done it was time to put her back on her wheels and after much expectation of how high she would be, it was an anticlimax to have her sit just as high as she was when on the stands
so what left to put back on?
- Front and Rear brake pipes
- Exhaust
- Headlights - oh yeah how do the plastic mounts fit on anyone...
- Front brace between the body mounts
- Boot floor - now steel or chequer plate ....... ummm
- Rear Bumper
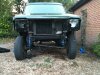
- Front Winch Bumper
- Wheels Arch Extensions
- Snorkel
- Fit the interior
Yeah thats another weekend gone
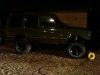
Hope you all like the picks and I will post another pic as soon as the new wheels are fitted tomorrow......get in there, Event tyres are supplying and fitting 4 GT radial adventuros in 33x12.5x15 for £98 each including VAT. Now thats a bargain.....
I did have a look at a lot of equipment on the market and thought that Terrafirma represented good value for money. I am dissappointed with the front cones though. I do plan on having the springs fastened at the top and the dis cones at the bottom eventually.mate, thought myn was bad, u done a good job tho! Looks mint!
tx I cant wait to sort the front end out with a bumper as it looks like a stock car at present. Lights on tonight or tomorrow I think.
), but ive shorted the chassis a lil bit so it dont stick out so much, will let you know how it looks when its on My missus has some photos with a flash so I will post them asap.Welcome To LandyZone, the Land Rover Forums!
Here at LandyZone we have plenty of very knowledgable members so if you have any questions about your Land Rover or just want to connect with other Landy owners, you're in the right place.
Registering is free and easy just click here, we hope to see you on the forums soon!