Discovery 2 Leaky Roof - A drips Blog

This site contains affiliate links for which LandyZone may be compensated if you make a purchase.

blgdave

Active Member
Posts
164
Location
Whangarei, New Zealand
Hi Folks,

Not your usual thread of how to fix the discovery series 2 leaking roof problems, not even a how to thread I suppose? But just thought a few wanting to tackle the job might get inspired by my current ongoing works...

I have had the drips and the steamy windows for around 18 months now. I did the usual fix of Gaffer tape over the glass to frame which lasted a short while. But with the sun here and the extra rain during wet season it eventually started to pass again!

I did try a second layer of gaffer tape hoping it would last me until summer (I live in upside down world by the way) but this pretty much started to leak straight away.

Maybe now leaking around the frame to roof also? I had enough and decided it was time to remove the headlining and have a look see!

With my car being an overseas model with three zones of AC vents it was slightly different, but not by very much.

So out with the lining...


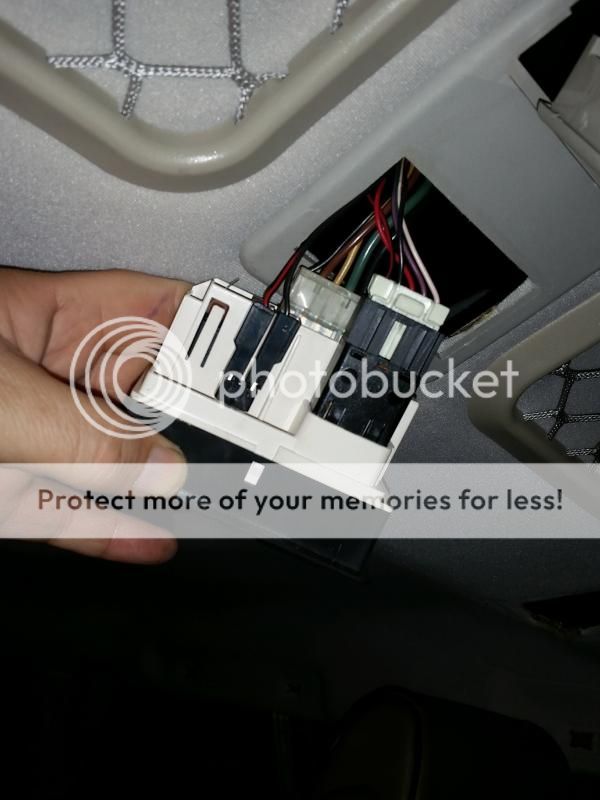
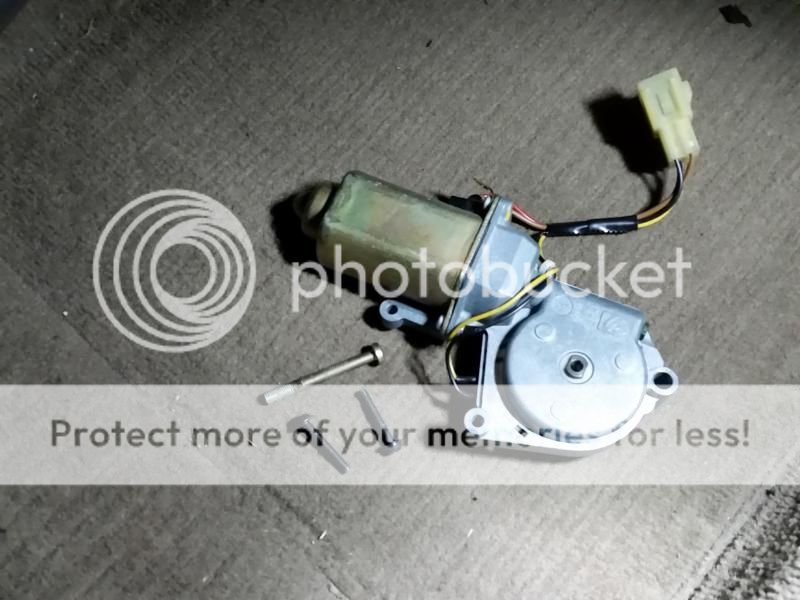
I have electric roof, but they just take an extra three screws and a tug and they are away...


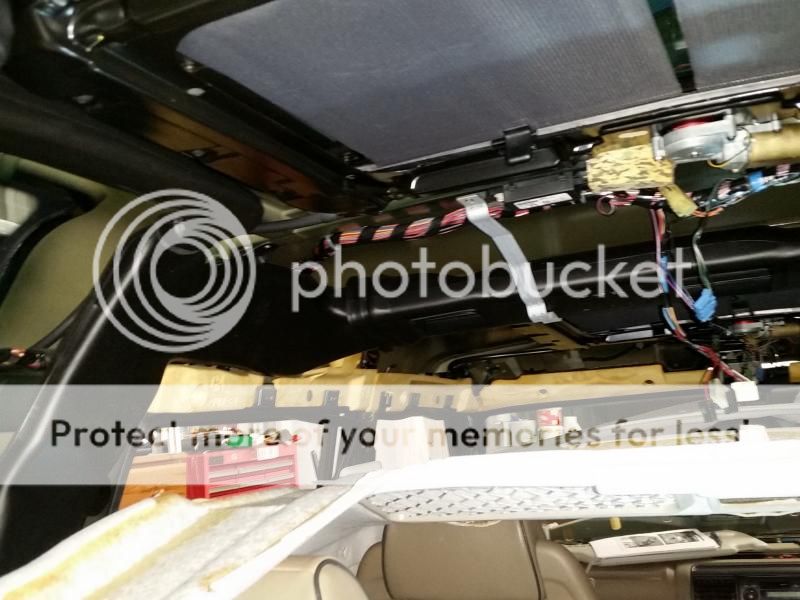
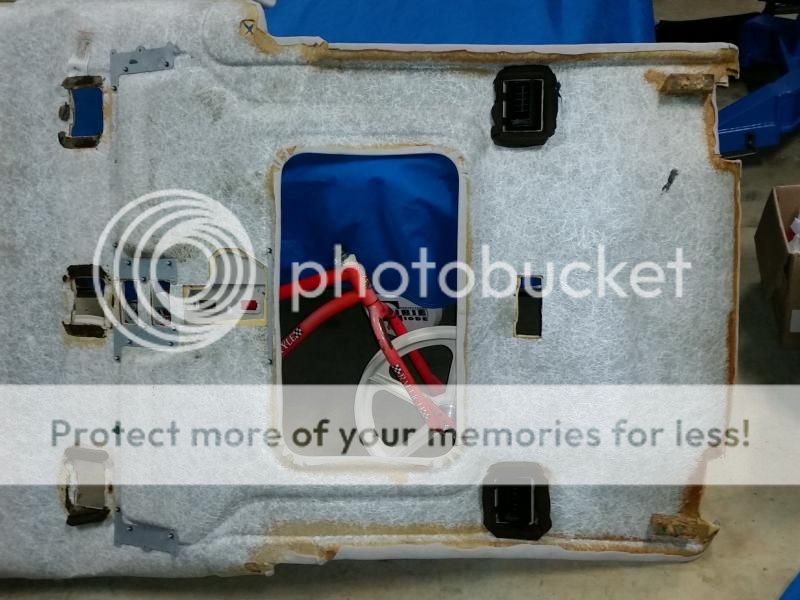
Lining away and unplugged what was left...


Lining checked and was not that bad stain wise...


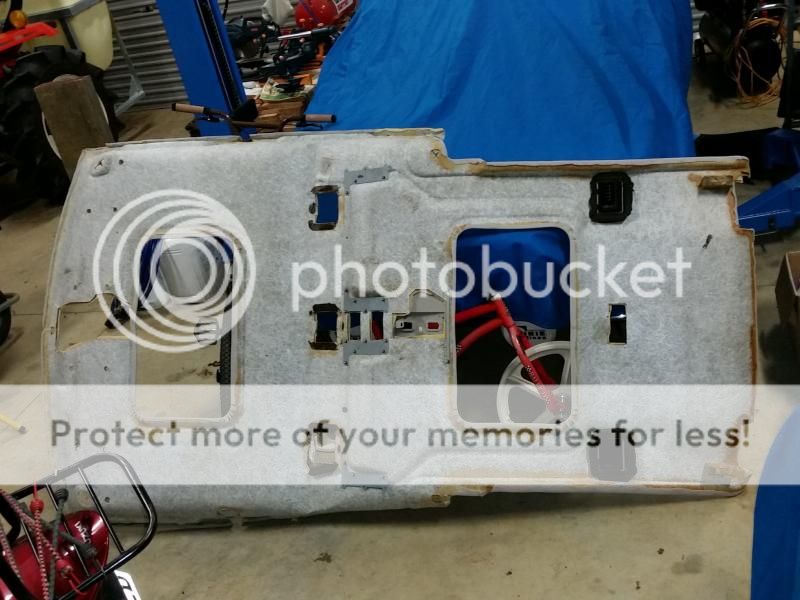
Noticed the extra AC vents have perished foam, so going to cut out and replace these...


Next time to check out the frames...
 
Roof frames still had some water in them and I could see a very small amount passing the poor silicone seal on the plastic cups. But was surprised to see them still solid and attached

There are four of them to check. Two per roof. Look like this for those not yet been in there...


Noticed the condensation on the inside of the roof.

What I will say is the hose was a swine to remove! I had to heat it up then use a 90 degree pick to force open the tube before they would pull free. I took my time as I did not want to break the plastic. Success!!
 
Day 3...

I undid all the torx screws and dropped the frames down. Well, in my case the rear one was trapped by the AC ducting but with a big of twisting and wiggles I got it to pull free towards the front. That was me by the way, not the frames! :)

Once the frames were away the glass roof just pushes up and rests on the car roof, no screws this time!

I then had to look at the residue left behind from my bodge, sticky as!!!

Ouch, check out that sticky stuff...


Out with the WD40 for good ole soaking!!


Enough for that night...
 
Sunday morning and after an hour or so with the WD and a scraper it was looking much better...


Too hungover to carry on so gave them a wash and stuck em back in the shed
 
Earlier on tonight and I am happy enough with the outside...


Have to give it thought about removing the glass or no? The seals look good but hard to really say. Anyway, turned the frames over and scraped off the tiny amount of sealer Landrover splashed out on.

All now clean on both sides!
 
Another tonight update, the roof itself had residue sealer so gave them a good scrape clear...


Got my eye on the lacquer damage now. The sun can get harsh here and its broken down the top coat. I am wondering if it will buff up if anyone has painting experience??


I will have a go tomorrow and see how it looks??

Also notice the roof bars there and wonder if they ever leak? Thinking I may as well remove them but see thick pads under each foot. Wonder if these will break when I remove the bars??

Looking inside the bolts (that I can see) have no signs of water damage. But for how long?? They do look clean inside though?


Looking at the back, the dreaded AC vents are still laughing at me! I cant see the two rear nuts as they are hidden behind. To make it worse the ducting is held in place with rivets, so would need to drill the buggers out...


Not that hard to do, but hassle all the same! I will go look for some replacement roof bar gaskets and remove them if I can find new ones!
 
Last job today. I hooked up the compressor and blew out the four drain tubes. Front two were clean as a whistle and dry as a bone. Offside rear blew straight through and sounds clear at the back of the car. But the nearside rear may have been slightly blocked as a small amount of water blew out...


As you can its very clean water, so maybe just sat in the line? Anyway, all four are working just fine so I am happy there!

That's it for today. Time for bed me thinks, been a successful day. I will update as I move on for anyone keen to see.

Cheers all...
 
Good write up.
I keep meaning to sort mine out. But the only problem is that it is my only transport (apart from the os') so if something gets broken then i'm screwwed.
 
You can actually remove all the trim and lining and still drive your car. This part only takes a couple of hours if you are working alone. Even if you break something it wont stop the car driving at all.

Also if its your drain pots that are damaged then these can be fixed with the roof frame still in place so you can even do these and still use the car.

I would recommend removing each roof completely though. This is about a 15 minute job per roof maximum. Just do one at a time? Mine took longer to remove all of the goo, but this could have been done with each roof in place.

I would say you could remove a roof, clean and resel in an hour easy. There is nothing to break at this stage as its just about 10 torx srews and they pop out.

Even if you did get stuck then just have a sheet of perspex to stick over there while you are working on it. You could even then still drive the car if you gaffer it down all around? I would use something fairly rigid though, to avoid it being blown out if you open a window!

Its really simple and can be done on a driveway and keep using the car if you had to. Go for it!!
 
Tonight I finished off removing the seal from under the second roof glass frame...


Under tray from inside the car looks like this by the way...


Stared to clean up the loose silicone sealant around the drain cups, but then decided better remove them all together. They pull out with a little lever action from inside easy enough...


I have read that foks have issues with the drain cups and hose connectors breaking. Looking at mine they are in as new condition and I don't really see how they can break??


So that's my roofs front and rear all cleaned up and ready for new seals and refitting. BUt decided that work must go further...
 
Excellent thread, looking forward to the next episode as I'm building up to doing this myself on my new-to-me TD5.

I also want to remove the headliner as some of it has dropped and looks a little bit 'baggy' so needs some attention.

I don't have rear aircon so how difficult would it be to get the headliner out - is it just a matter of removing all the plastic fittings or am I missing something? Are there hidden clips/fasteners?

Your advice would be much appreciated BigDave, from another Big Dave :D
 
Decided tonight that I need to paint the roof external sun damage by the way. So going to remove my roof bars.

Passenger side had wide section of AC ducting in the way of the rear bolt...


I had to drill out three rivets and also two sections of the sound proofing material. Was still a bit of a mission but with some added persuasion and a bit of a talking to, it did pop out and so is removed...


No real sign of leaks here either, but still going to remove them all the same...


Drivers side comes out much easier. Just had to drill out one rivet and it pulled free with ease...


That's enough for today, not really in the mood.

I see Rimmer sells the roof bar gaskets so off to order a set up just now. They deliver pretty quick to NZ which is good!

Does anyone else have all of this AC ducting by the way???
 
Hi Dave, glad the threads has helped. Gives me inspiration to crack on if I do updates!

Removing the headlining is really quite easy to be honest. I used some of the guides referenced in here and other sites and made a bit of a how to guide for myself. I added some notes to this as I went along so I would know how to put it back together again!

There are several hidden fasteners and clips that just pull away with the panels and some screws/nuts hidden behind courtesy lights and the like. But with the guides already given its a methodical procedure and can be done by yourself in a couple of hours taking your time.

Having rear AC just made it tighter to remove the rear drip/drain under tray so yours will be even easier! Also if you do the roof bars you wont have the extra drilling and twisting to do.

Cheers
 
Last edited:
Hi Dave, glad the threads has helped. Gives me inspiration to crack on if I do updates!

Removing the headlining is really quite easy to be honest. I used some of the guides referenced in here and other sites and made a bit of a how to guide for myself. I added some notes to this as I went along so I would know how to put it back together again!

There are several hidden fasteners and clips that just pull away with the panels and some screws/nuts hidden behind courtesy lights and the like. But with the guides already given its a methodical procedure and can be done by yourself in a couple of hours taking your time.

Having rear AC just made it tighter to remove the rear drip/drain under tray so yours will be even easier! Also if you do the roof bars you wont have the extra drilling and twisting to do.

Cheers

Thanks mate, that's very helpful.

I only picked up the car a week ago, so since then it's been a process of evaluation and analysis of what needs doing - then getting stuck in changing filters, fluids, belts etc.

I'm awaiting delivery of some parts before the next phase of work, so because it's a warm sunny day I think I'll get on with some Waxoyl-ing of the chassis, while it's still in good shape.

Lots to do but she's a great Disco, she just needs TLC.


Dave
 
Just had a short spell in the shed tonight. Had to work out how them roof bar feet work out.

Front N/S looked very slightly damp but no real trace of leakage?


Rear N/S was dry and the other side was the same...


Front bar gaskets looked like this...


Rear ones like so...


Not seen many pictures of these and was unsure how they worked so I had to pull one apart...


Gaskets are made of two pieces stuck together for some reason. The upper one just goes inside of the bar and does not really do any sealing other than something for the pad to push against maybe?


Oddly the drivers side front bar had a plastic washer on the top side against the roof, but none of the other three did?
Oh yes, if anyone removes theirs then don't worry about loosing the washer on the nut as its some kind of fancy one piece item so does not come apart. The washer spins on the nut, which is something new to me and a nice touch from Land Rover!


That's everything off that needs to be off now!
 
Last edited:
Looking at the top of my roof now. The paint damage is a real strange pattern and at each of the sun roofs? What I pan to do now is just sand it all back for a good key and then do a wide satin black stripe right over the roof to tidy it up. See how it looks anyway? Looks like this just now...

 
When I took over ownership the roof only had slight fade on the roof. So it got worse with a couple of summers. So maybe did have previous rubbing issues that started it off? Just looks weird how its gone in certain locations. The areas behond the front sunroof would also not get touched if anything wa sup there due to the raised rear section. Just magic maybe??

Tarpaulin you say? There are actually two in the shots. The one higher up is on my lift and close to the Landrover, thats a Mk1 RS1600 that I am currently rebuilding the straight cut gearbox on. The white rims you see a glimps of on the ground is a Mk2 Mexico racecar that I am building with YB Cosworth engine. Keeps me off the streets!!

Cheers
 
Back
Top