- Posts
- 16,482
Following the discovery of a tiny hole and leak in the front face of the Radiator and losing about a litre of coolant every 10 days or so. I decided it was time the change the Radiator.
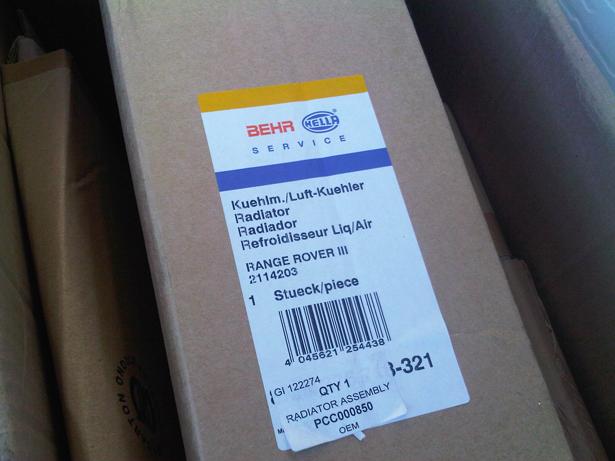
Island4x4 where the cheapest option with the best delivery deal (£163.99 delivered and VAT – Nov 2012) – no affiliation just a satisfied customer....Delivered within 2 days (Ordered on a Friday evening – delivered first thing Tuesday), the unit is a genuine Hella/BEHR OEM radiator and came very well packaged.
In order to remove the rad easily it is best to remove the Viscous Fan and Shroud, there are reports of being able to do it without removing them, but space is limited, and the last thing I wanted was to bounce the rad off the fan or shroud while sliding it back in again!
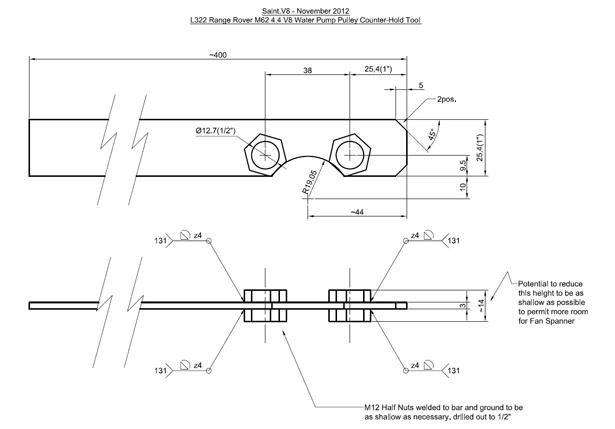
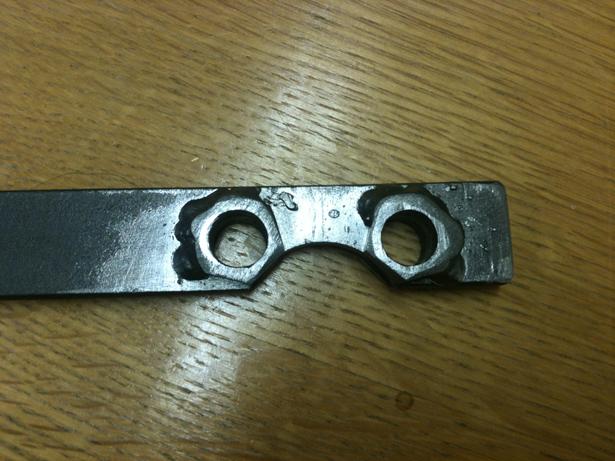
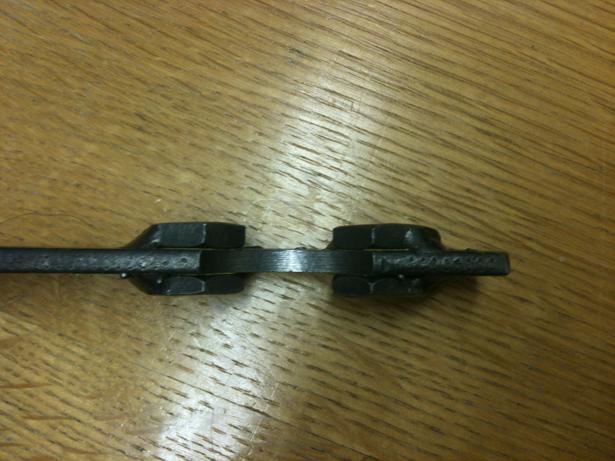
The VC Fan can be undone with a sharp tap on the spanner, but I have never really had much luck doing that, plus my VC Spanner is quite short and there wasn’t much spanner to hit......not having the correct tool to hold the pulley, I decided to fabricate one. I used a length of 1” flat bar about 3mm thick and 4 M12 Half Nuts, the assembly is below:
So on to the job:
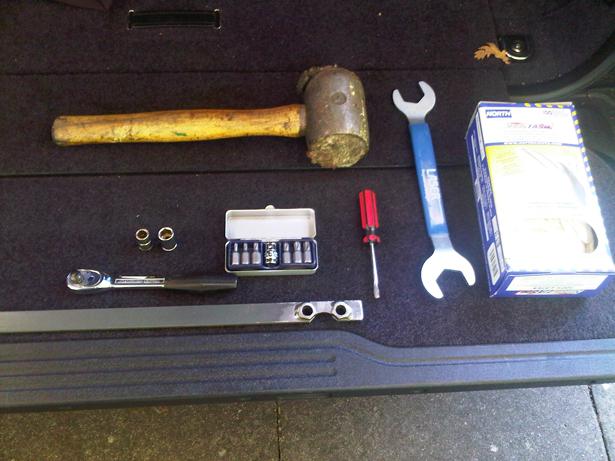
Make sure you have everything to hand:
Gloves
Pulley Spanner
32mm VC Fan Spanner
Hammer/Rubber Mallet
10mm Socket for Under Tray Bolts
13mm Socket for Radiator hold down Pins
T25 Torx bit for Transmission Cooler Bracket
Screw Driver for Pipe clips and Bonnet Struts
5mm Allen Key for Engine Acoustic Cover
Pliers (as I couldn’t get a small pipe off the intake duct)
Side Cutters for snipping cable ties (if necessary)
Funnel and Hose
Coolant and Water
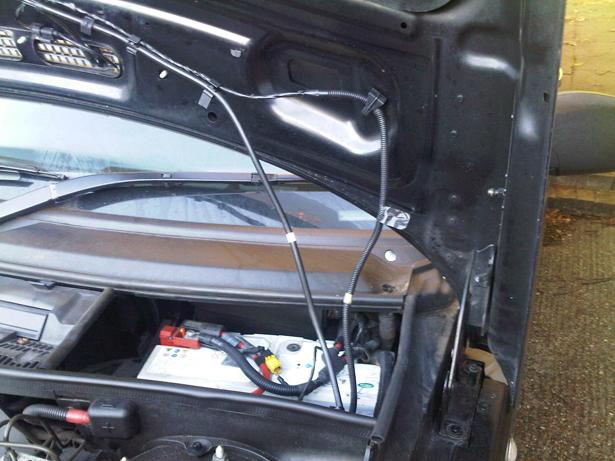
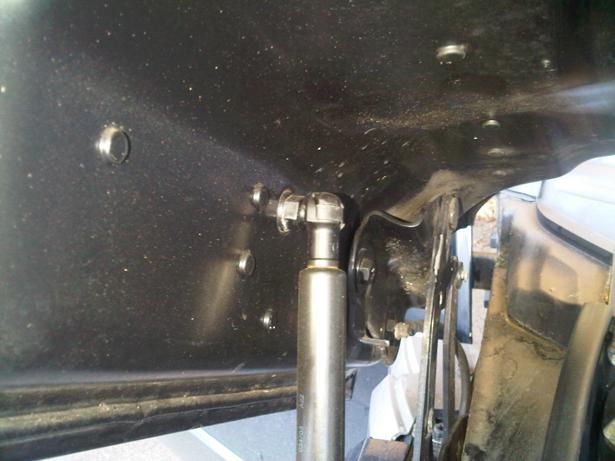
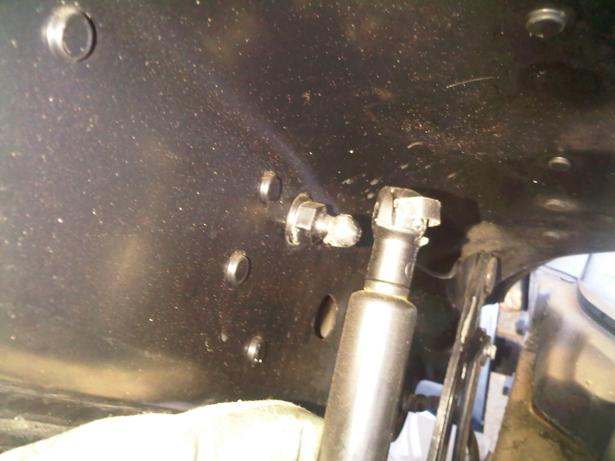
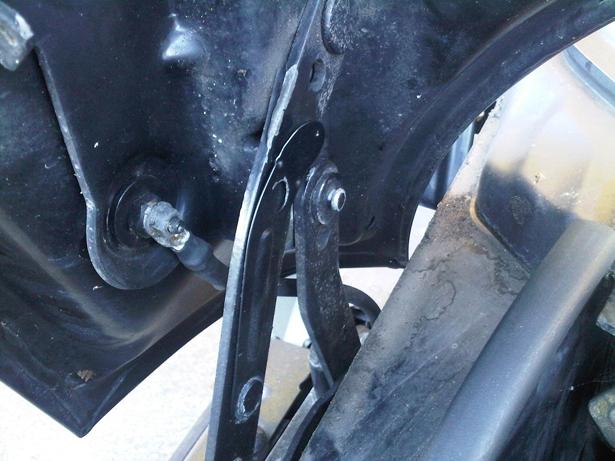
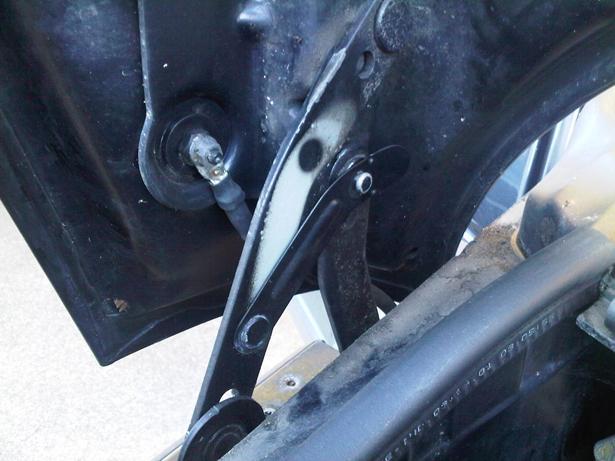
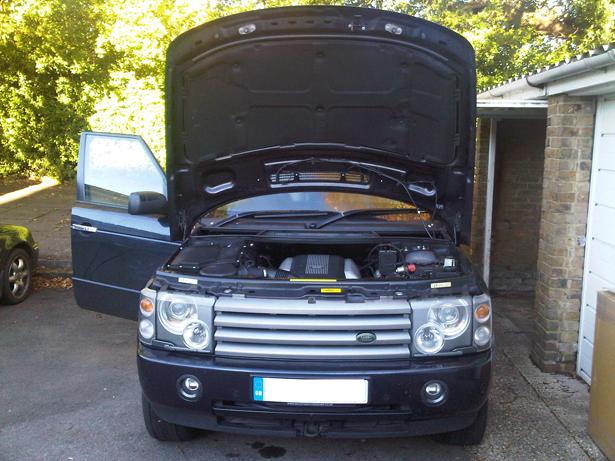
Land Rover very kindly made access to the engine bay easy on the L322 by including a ‘Service Mode’ this can be accomplished by unclipping the bonnet struts from the top clip and then pushing the bonnet vertical and engaging the spring loaded stays to hold it in place – brilliant!! Remember to unclip the wiring and washer pipes first....
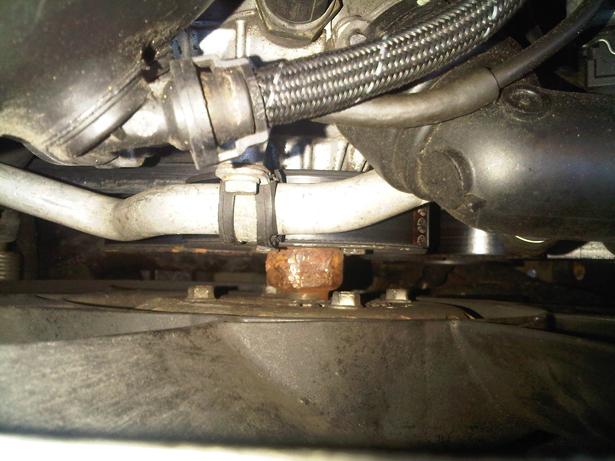
The first job before you drain anything is to get the fan off, as this is by far the most annoying part, as the last thing you want to do is drain your coolant out and then not be able to proceed due to missing tools or stubborn VC fan nut. As can be seen the pulley bolts are recessed into a dish on the pulley so I made a tool to hold the Pulley bolts and fitted half nits to the bar to reach into the recess and hold the bolts.
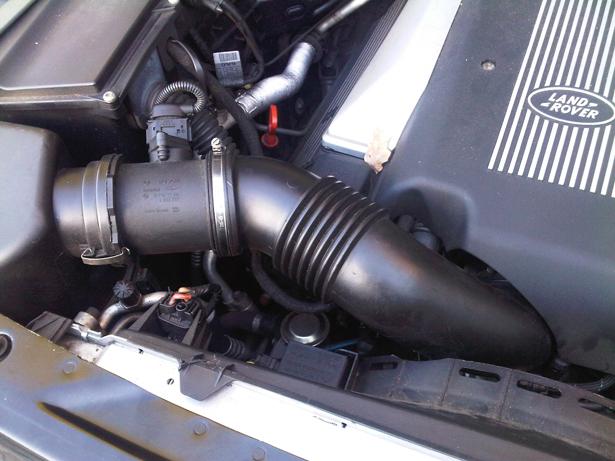
In order to get better access and room to the Water Pump Pulley and getting the fan and cowl out I removed the Intake ducting, to do this use a 5mm allen key and remove the acoustic cover, Unscrew the jubilee clips for the ducting and pull off the ducting, remove the two small pipes to it, I used a pair of pliers on one as I couldn’t get it to budge, and remove the two clips to the MAF and place out of the way. This opens up the front of the engine for much better access.
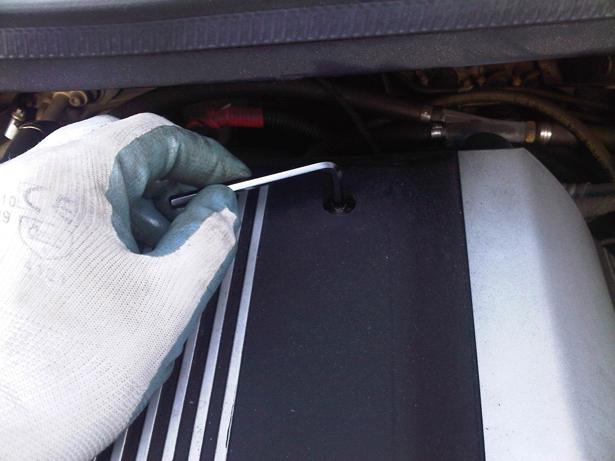
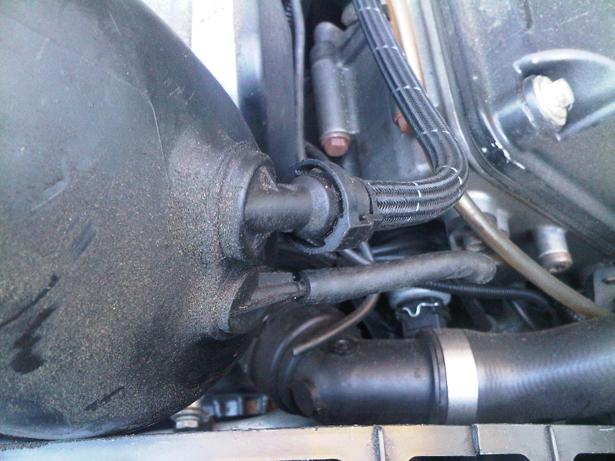
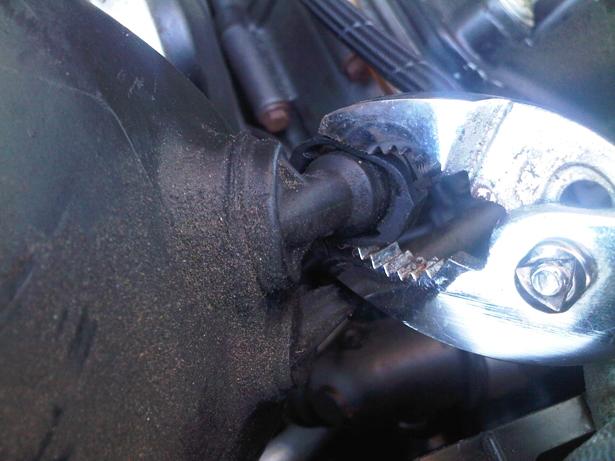
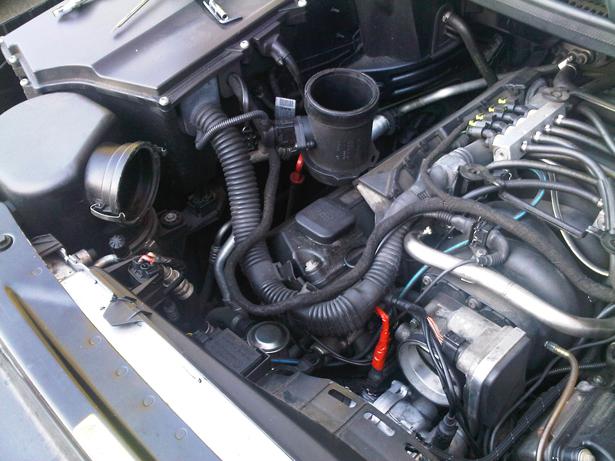
Put the Special Tool in place along with the Fan Spanner and undo in the direction of rotation, in this case undo clockwise (Left Hand Thread) and then spin the fan blades to undo the nut – viola off she comes, if you are removing for access only – be careful not to allow the fan to fall into the Radiator
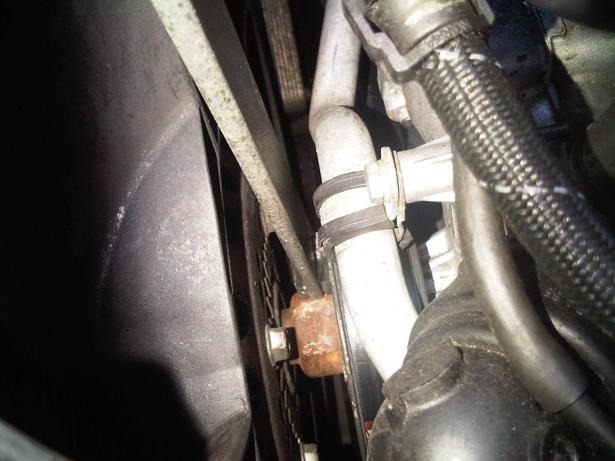
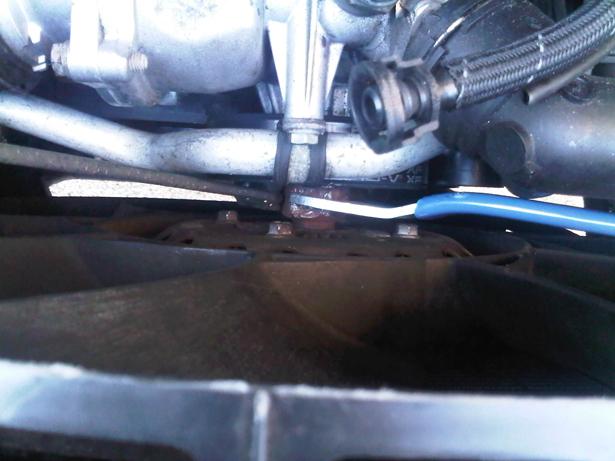
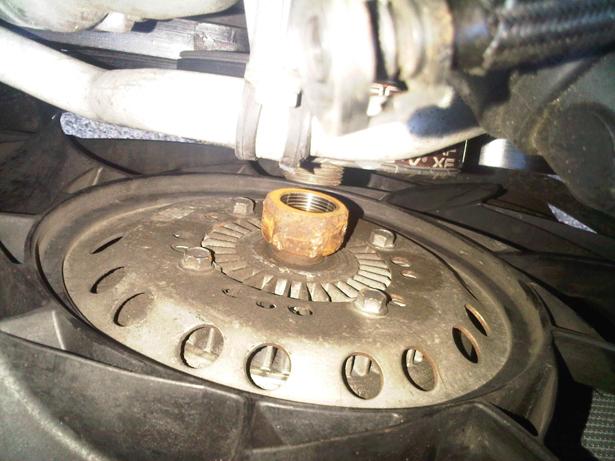
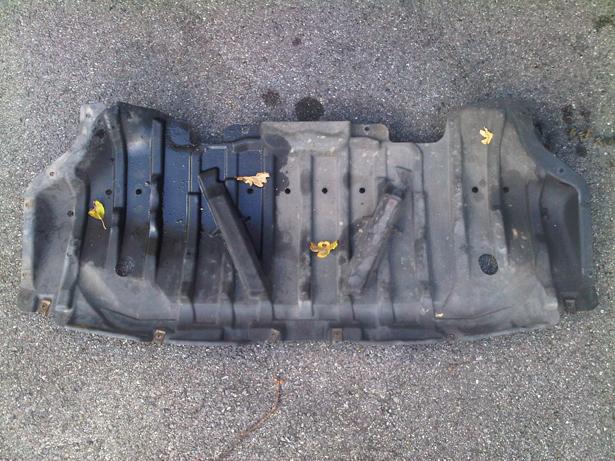
Now thats off and done, time to get under the car and remove the splash shield, this is held on with 15 or so 10mm spanner sized bolts - as you can see with mine the wet patch from the Radiator leak!
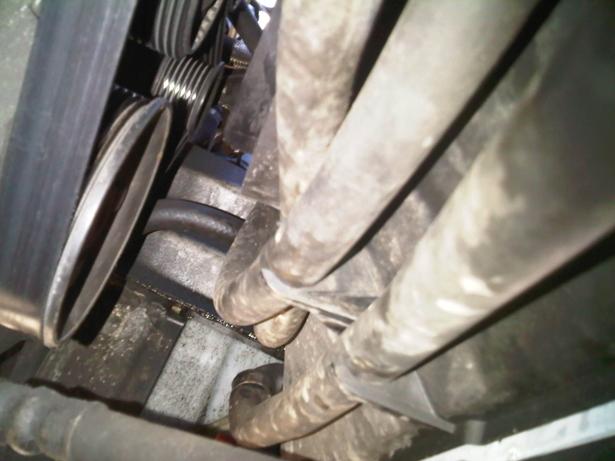
Time for the fan shroud, mounted on the shroud are two Electrical connection. The first one is fitted with a clip and slides down (mine was held on with a cable tie!) and the second is clipped on which to remove you first slide to the right towards the fan and lift the edge closest to the fan, then slide to the left and lift that edge up. Tuck to the side out of the way. Then Unlip the two hoses on the Right hand side of the shroud and get underneath and unclip the three hoses from the bottom of the shroud.
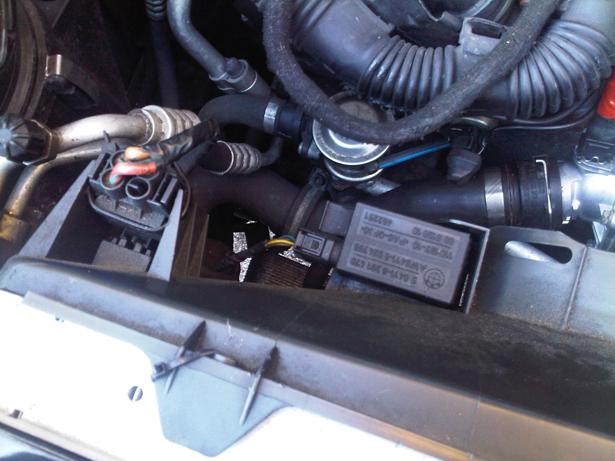
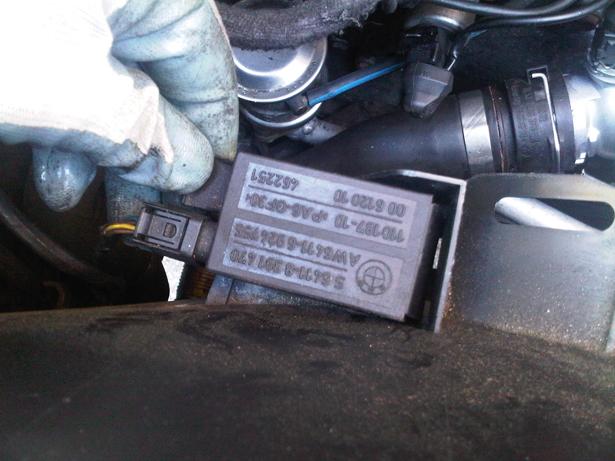
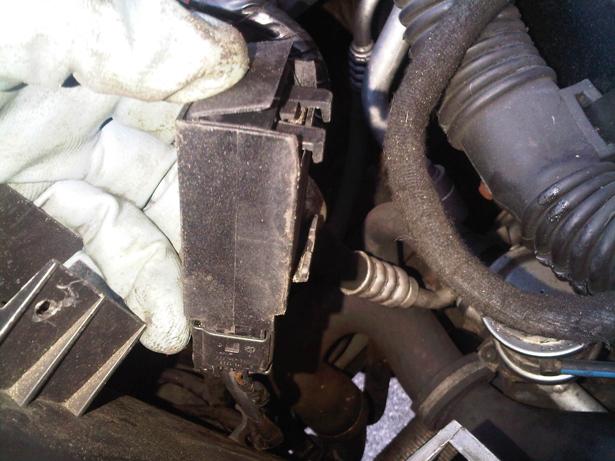
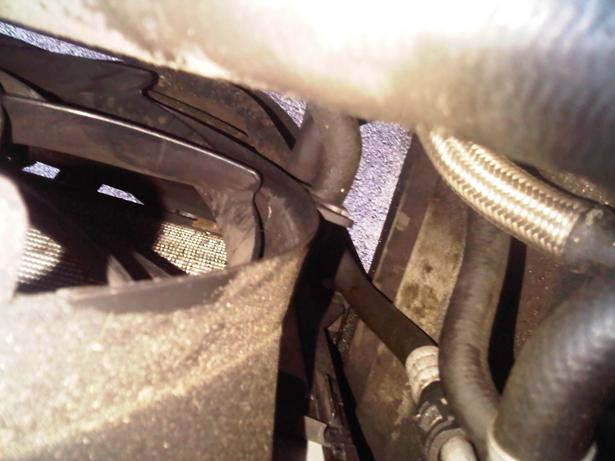
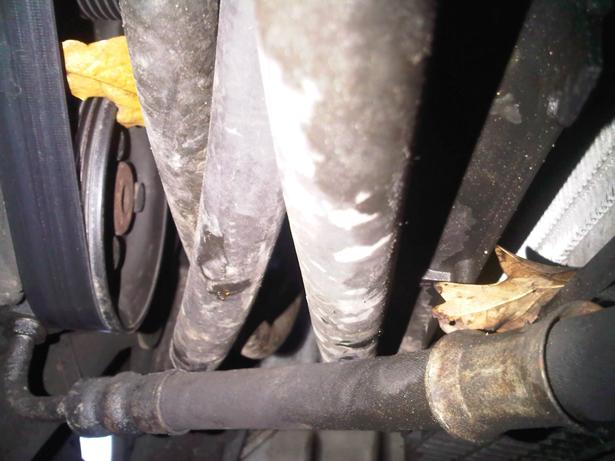
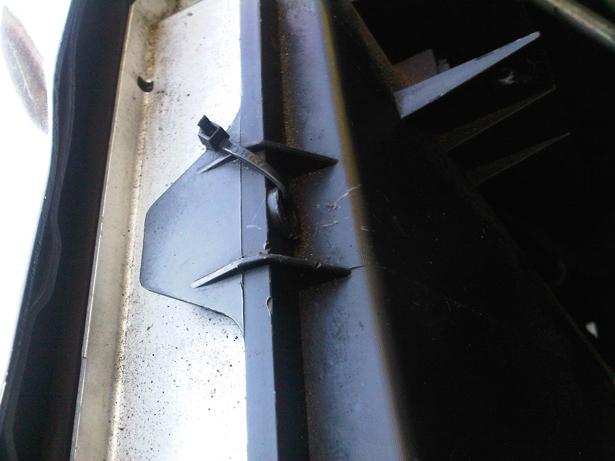
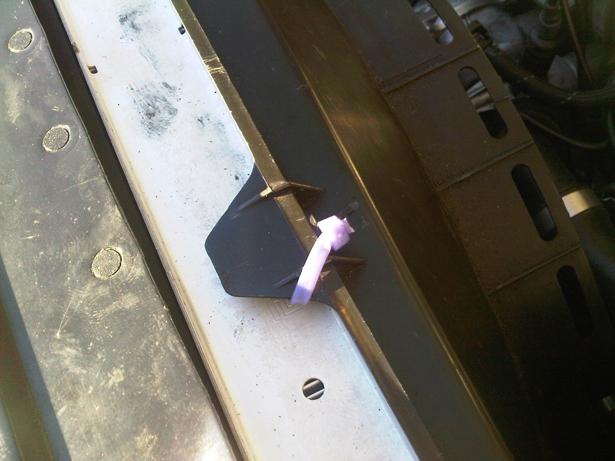
Now unclip the top of the shroud, it should be fitted with push pins, so lever the centre pin out and the pull the whole clip out of the shroud (mine was held on with small cable ties so I used a pair of side cutters to snip them off) With a wiggle you can now lift the fan and shroud out in one go.
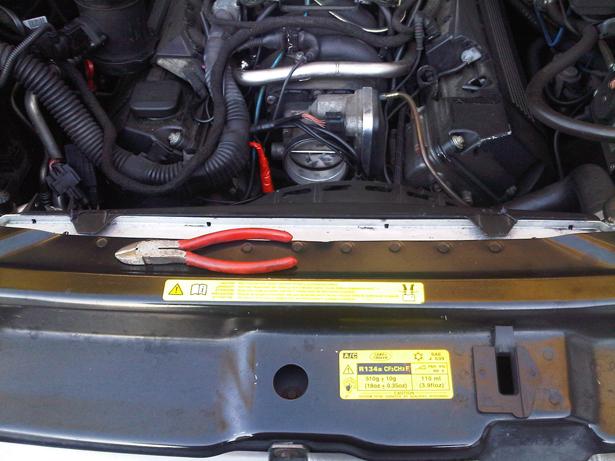
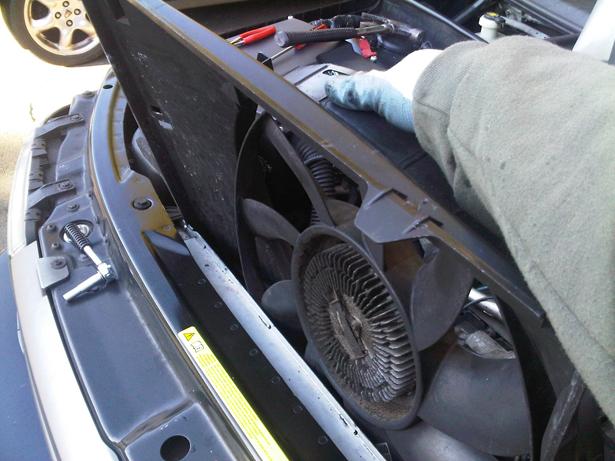
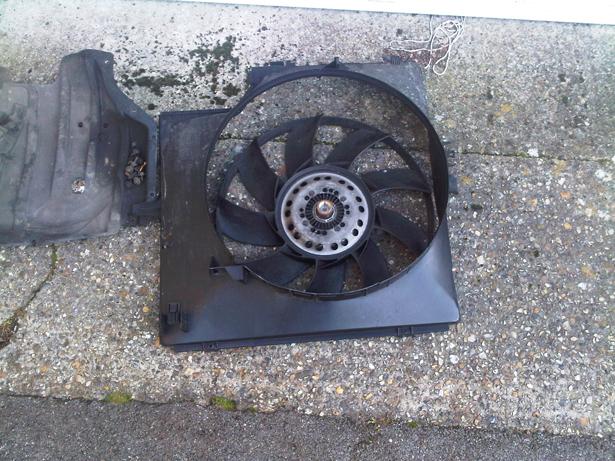
You can now see the Radiator back face....
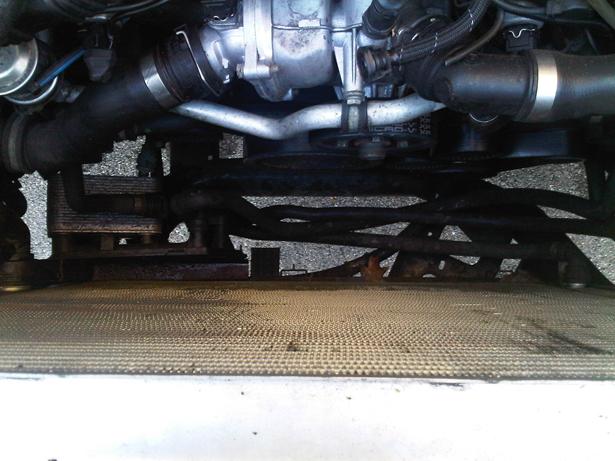
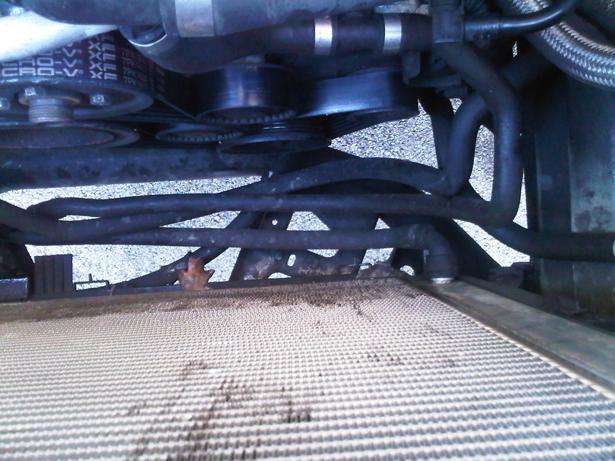
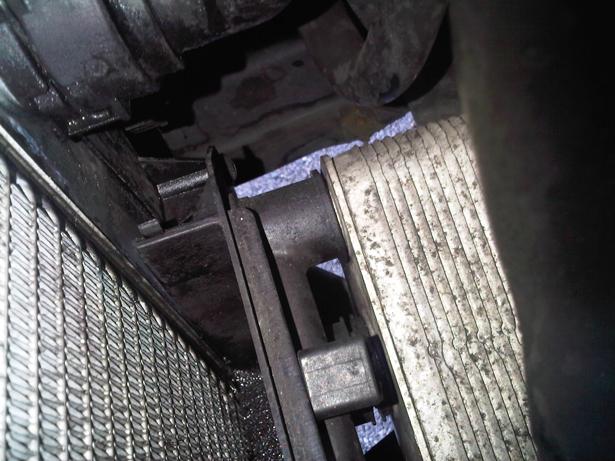
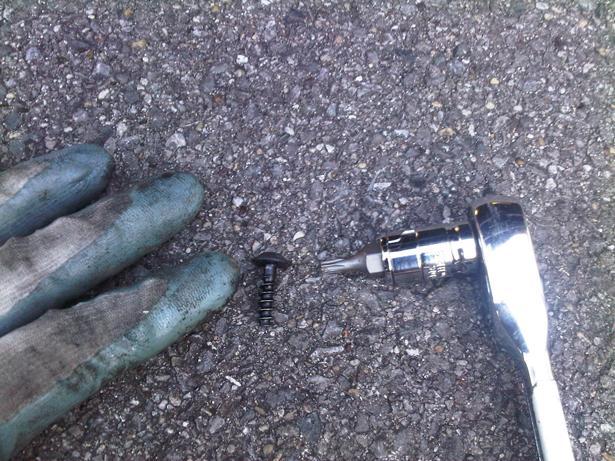
Now to remove the Transmission cooler bracket. This is held in place with a single T25 Torx screw at the top left corner. Undo this, I found access easier from underneath and little quarter turns of the ratchet. Once the screw is out, lift it up and push it rearward – it only moves about an inch backwards, so don’t force it to much.
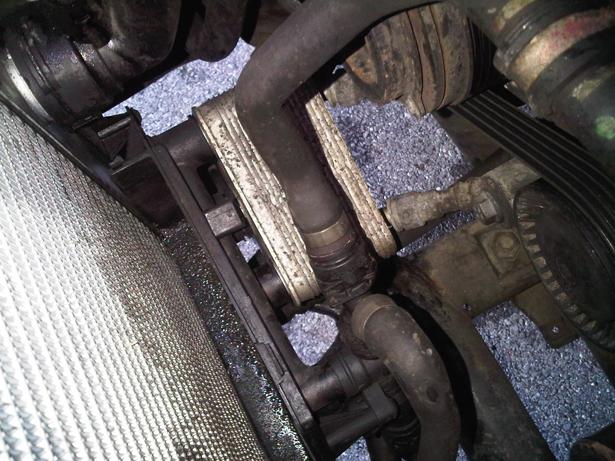

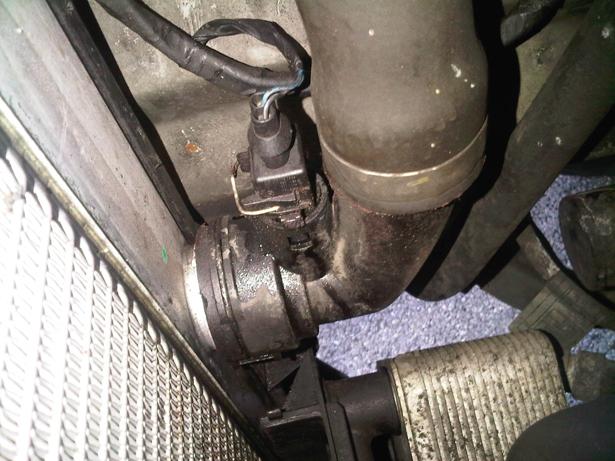
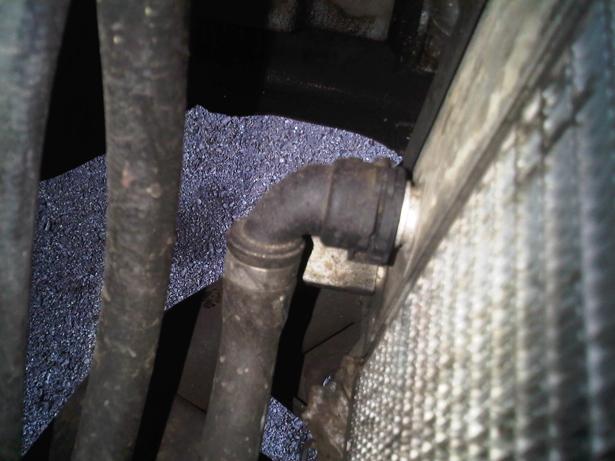
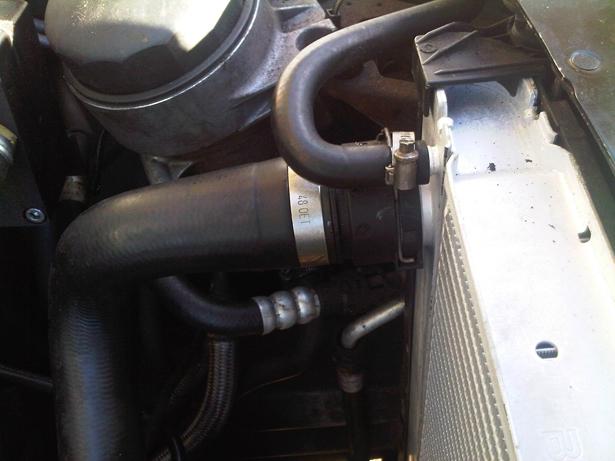
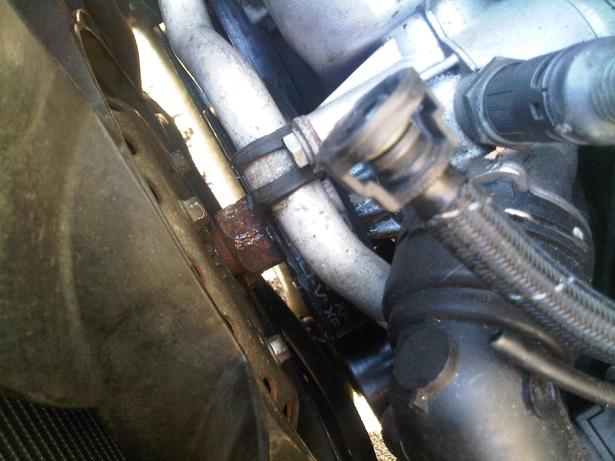
The 4 Pipes attached to the Rad – Bottom Hose, Bypass Hose(?), Top Hose and Expansion/Bleed Hose.
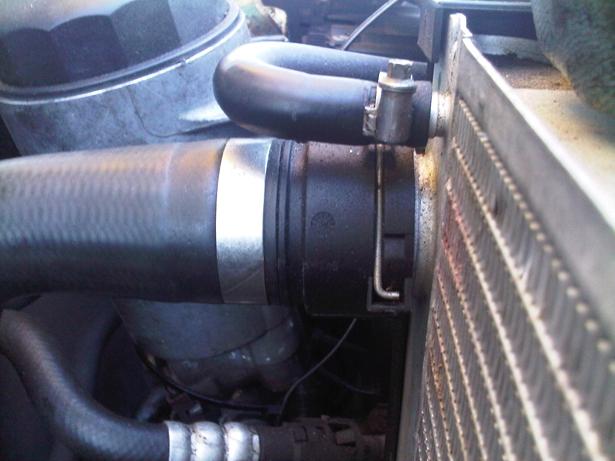
Now we have got access to everything, time to drain the Radiator. Now because the engine is cold, the Stat is closed, so by draining the Radiator, you are only draining the Rad, Transmission cooler, Alternator and Expansion tank...the block and Matrix should still be ull as this is held behind the closed Stat. Open the Expansion tank and bleed screw. At the bottom of the Radiator is a drain tap, you can attach a hose to this and drain into a bucket for reuse (if clean and fairly new). Note: this little valve can be stiff and there have been reports of it shearing off as it’s only plastic...if that happens, you can drain most of the rad from the bottom bypass hose.
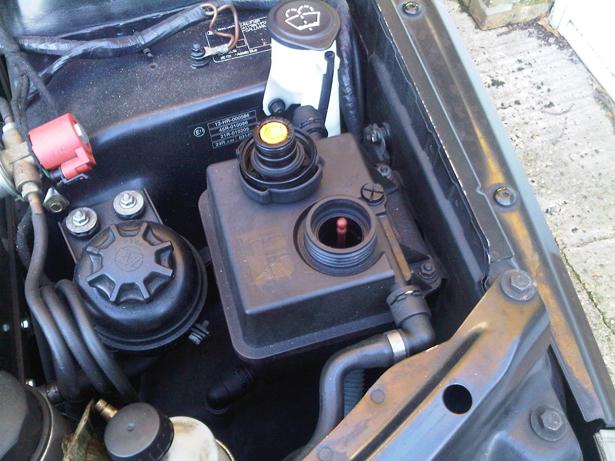
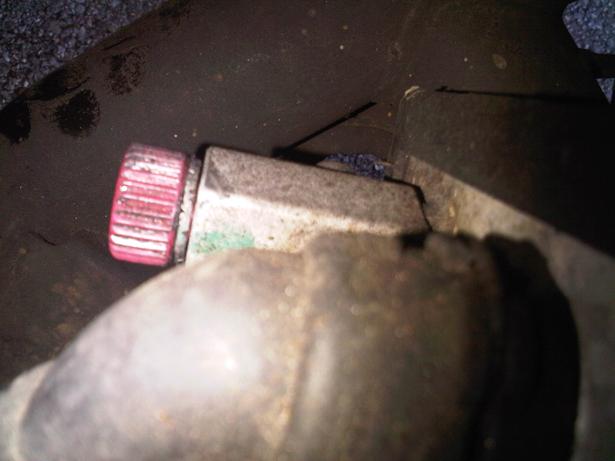
Once the Rad is drained, you can undo and remove the 4 hoses. Lift the wire clips on the 3 main hoses, and undo the jubilee clip on the bleed/expansion tank hose.
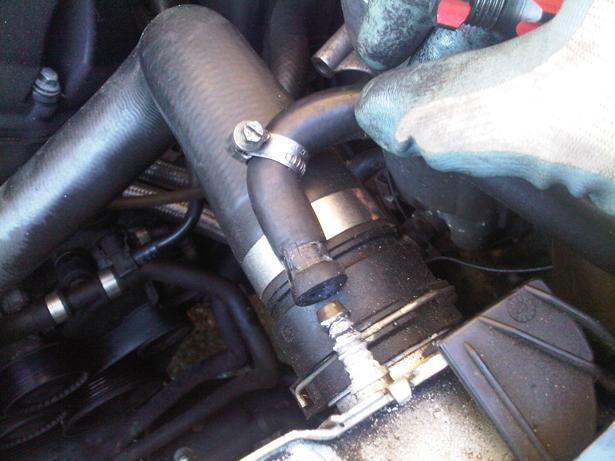
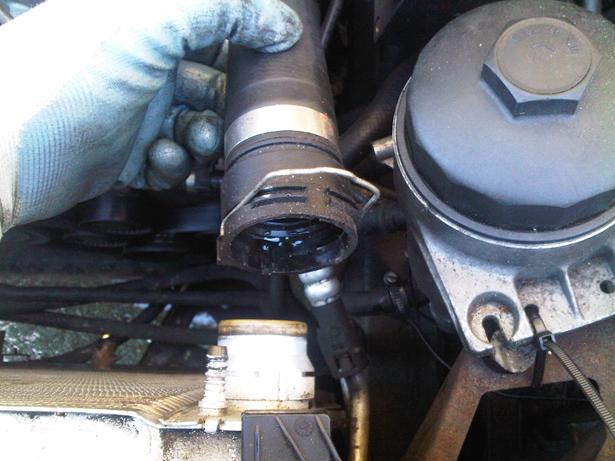
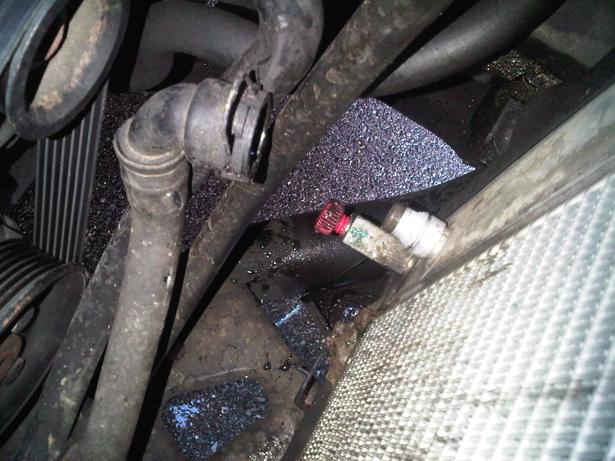
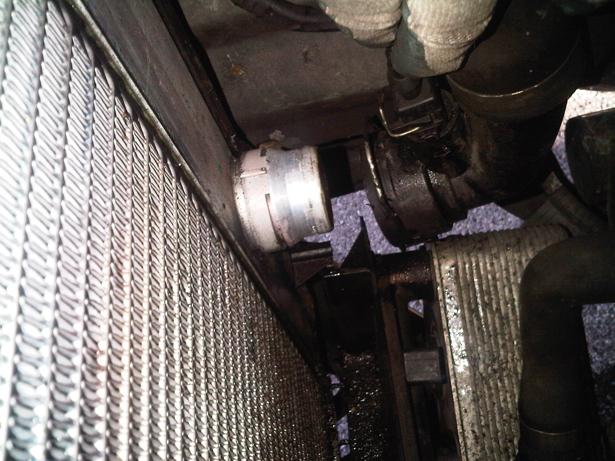
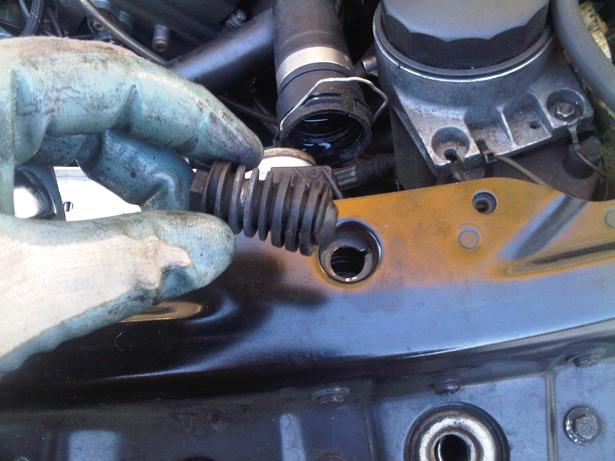
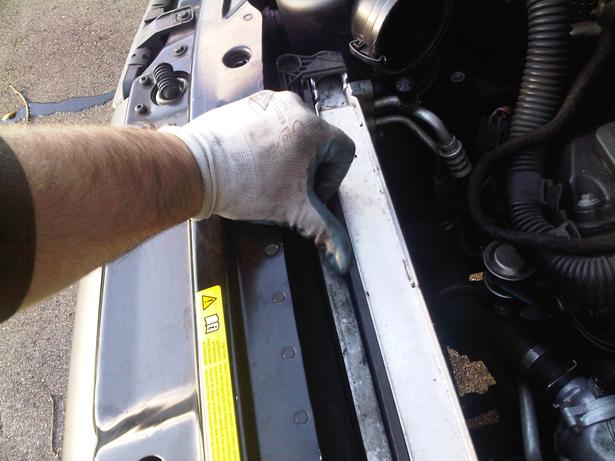
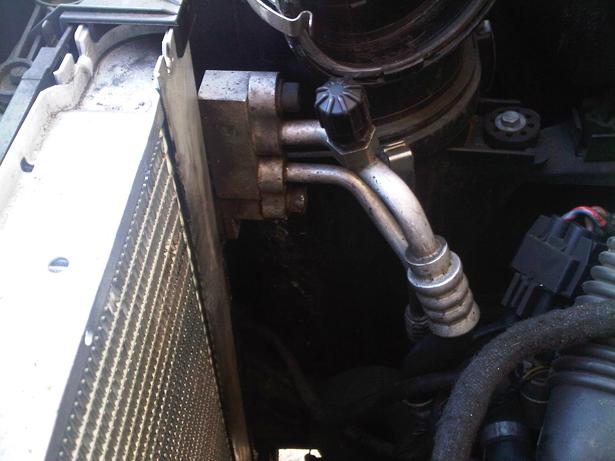
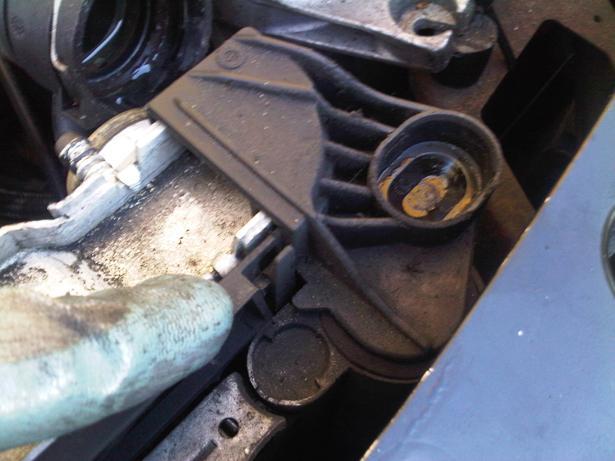
With the Rad Drained and the Hoses off, time to remove the Radiator Securing bolts using a 13mm socket. These simple unscrew from the top of slam panel. Once these are out, gentle push the Rad towards the Engine as its meant to pivot, be careful of the A/C hoses connected to the Condenser. Once the Rad is pushed rearward, unclip the plastic end caps by pushing the little lever tab and lifting off the caps.
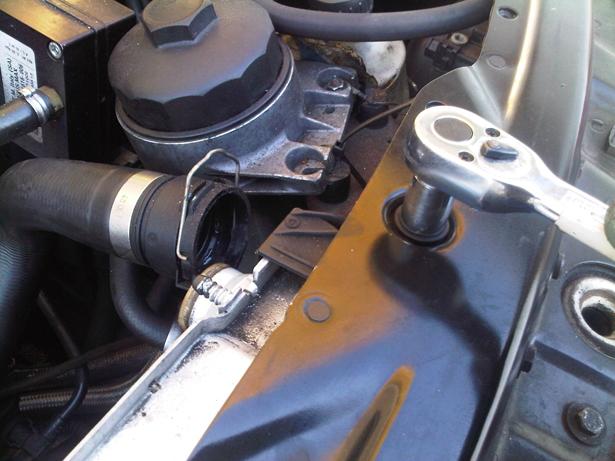
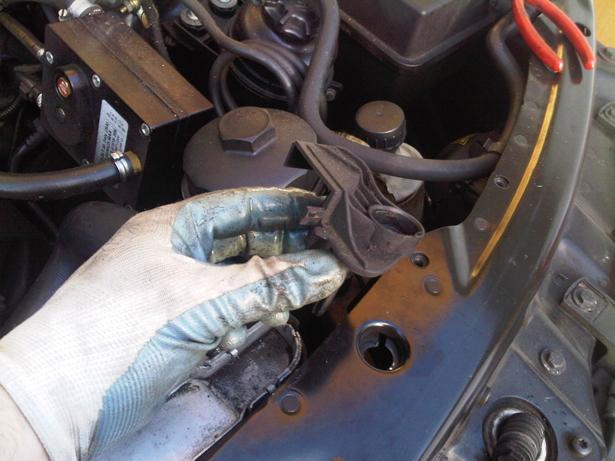
Now you can lift the Rad out of the car, being careful not to catch it on anything if you intend to refit the original!!
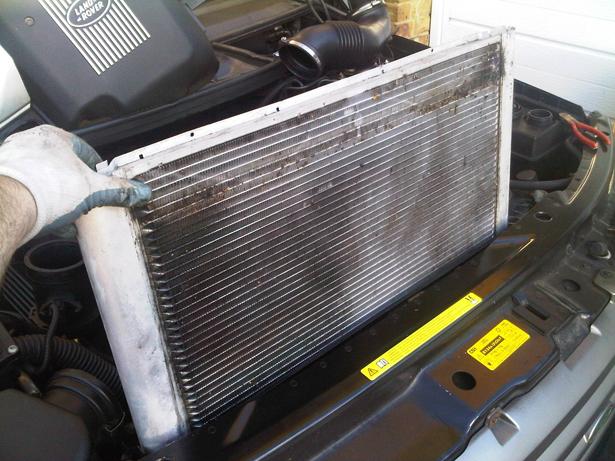
A quick inspection can see where the leaks have occurred....
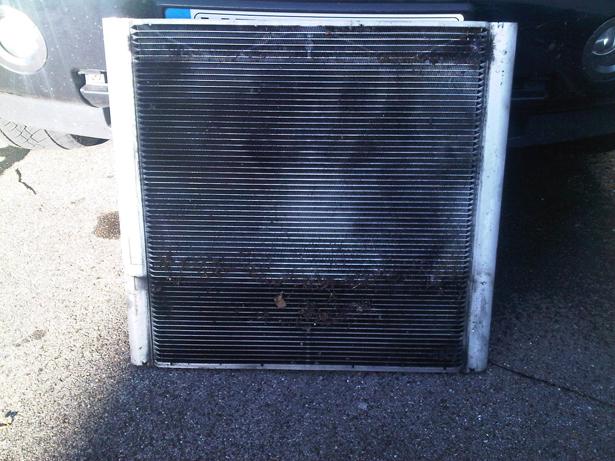
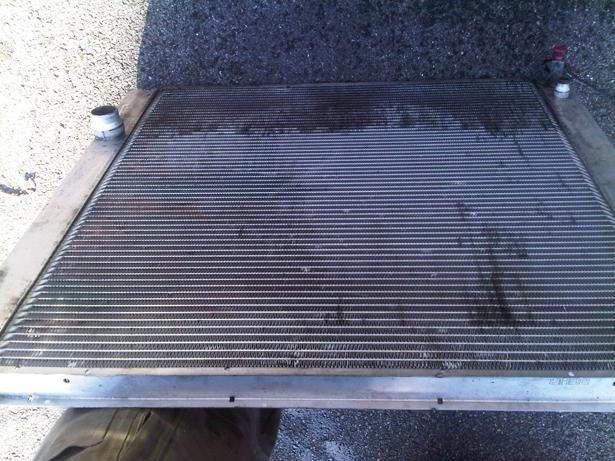
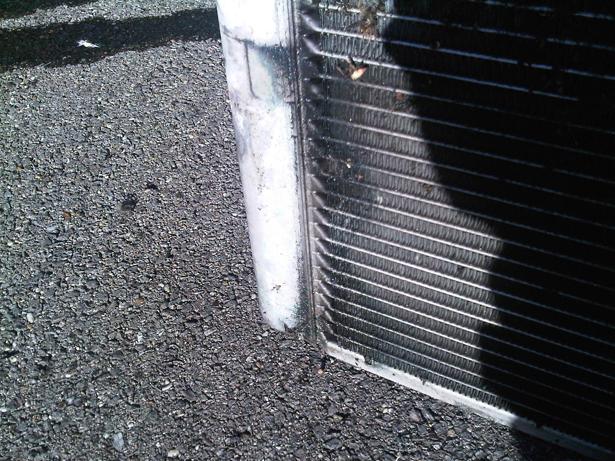
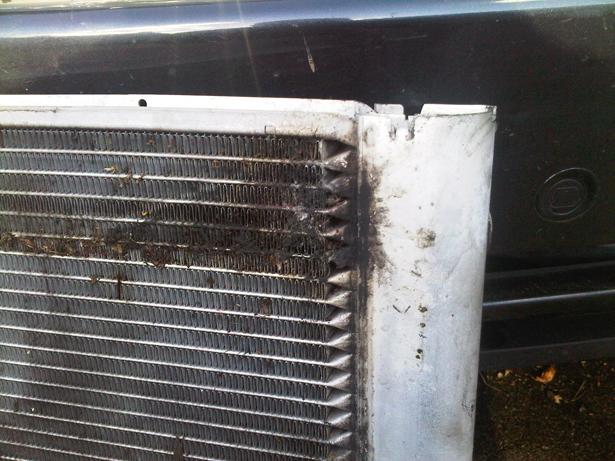
Carefully unpackage the replacement Rad and give it a once over for any signs of non-conformance or damage...Before fitting, make sure the drain valve at the bottom is closed.
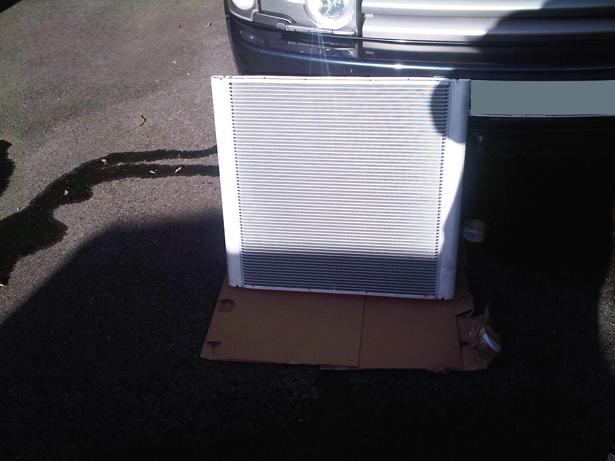
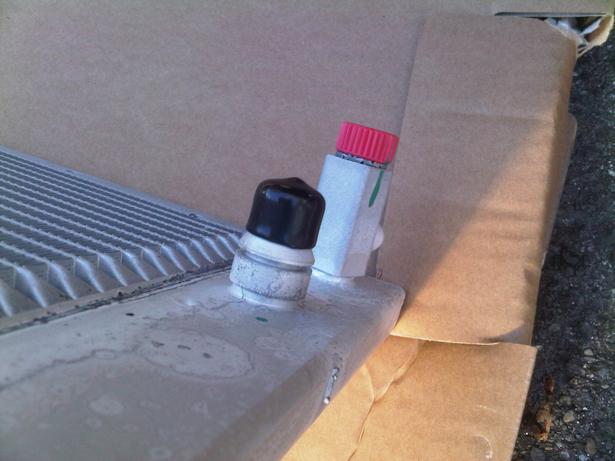
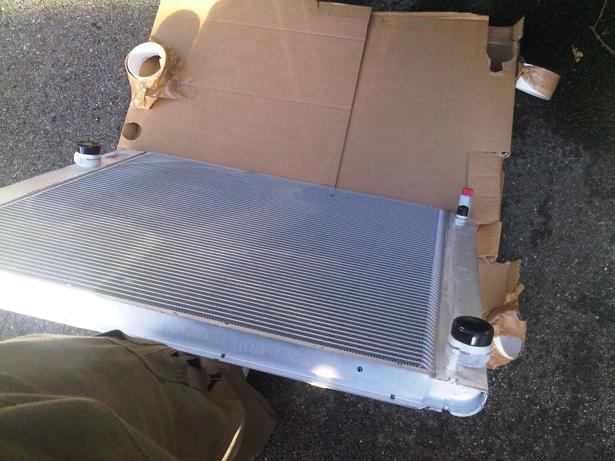
Carefully slide the Rad into place, being very careful of the edges of the Slam Panel....
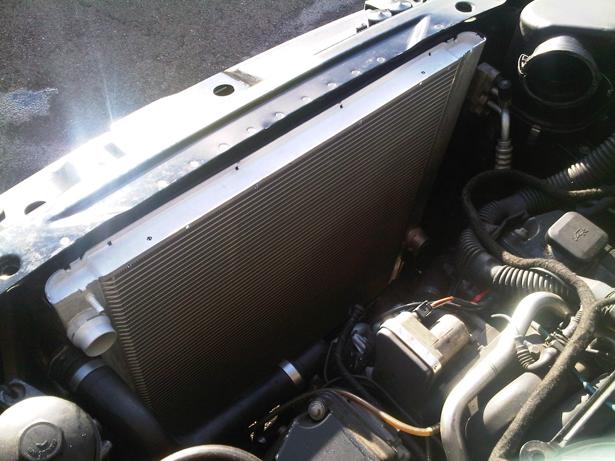
Reattach the Transmission Cooler and replace the Plastic Clips – this part was fiddly but with a bit of patience they fitted back on. Rescrew down the Rad Securing Bolts.
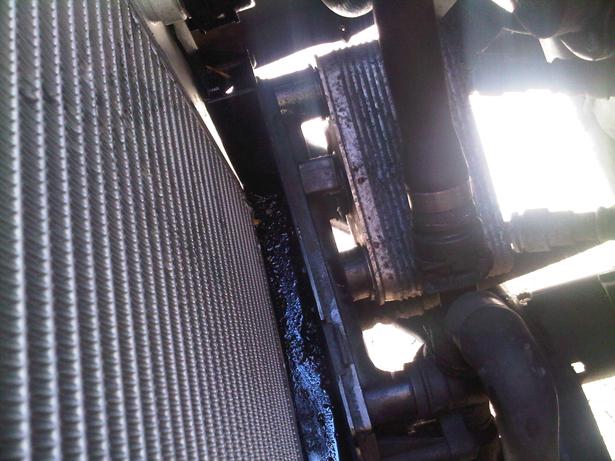
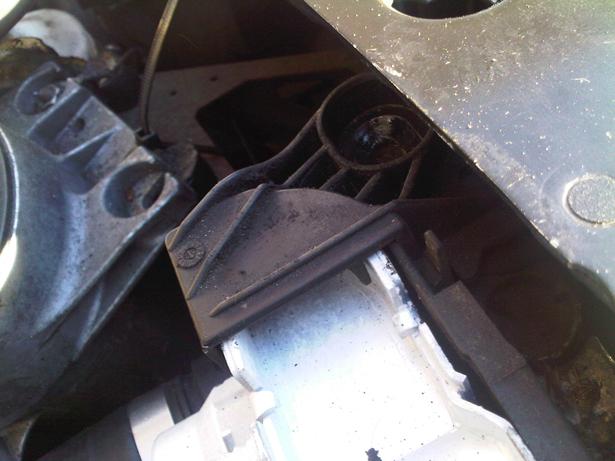
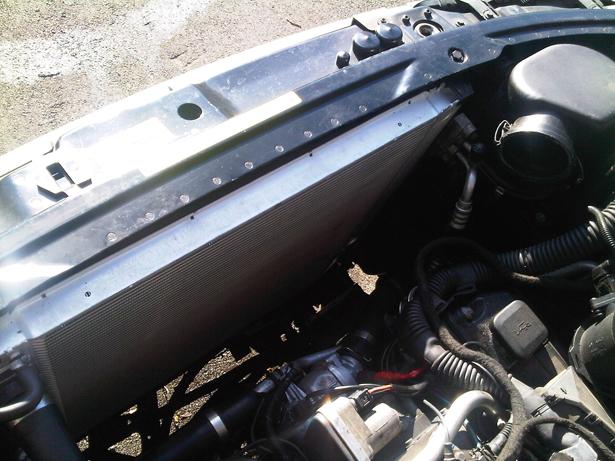
Reattach the 4 hoses....
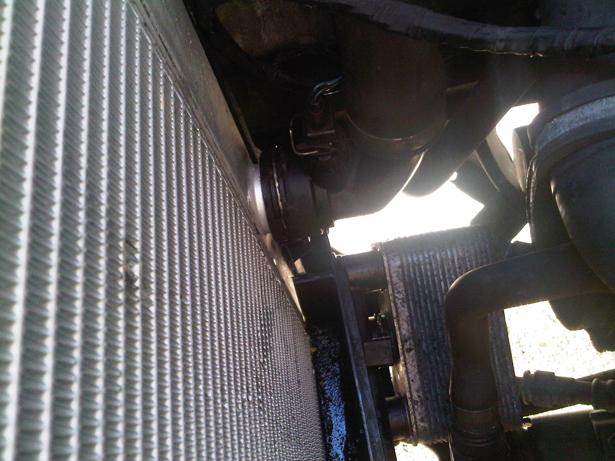
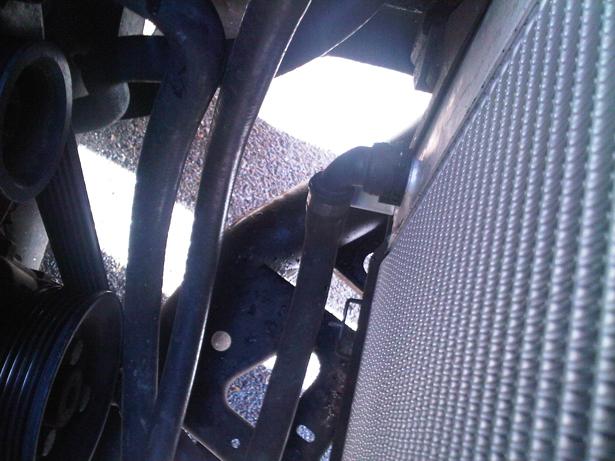
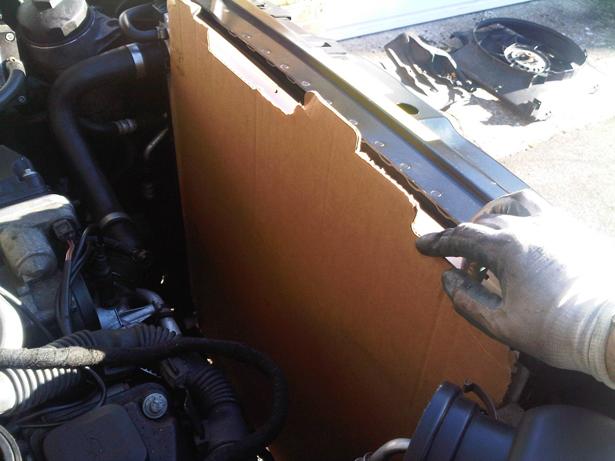
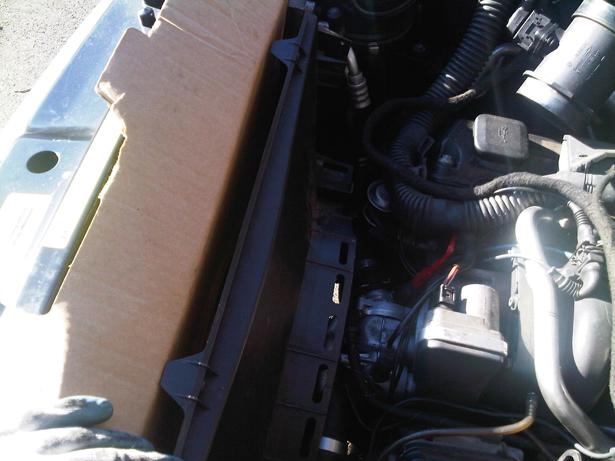
Using a piece of cardboard to protect the new Rad from damage, replace the Fan and shroud, again using the special tool to do up the fan nut...Remove the cardboard and reclip or attach the fan Shroud making sure the clips engage at the bottom. DON’T FORGET TO RECLIP THE HOSES AT THE BOTTOM AND SIDES OF THE SHROUD ELSE THEY WILL GET DAMAGED....
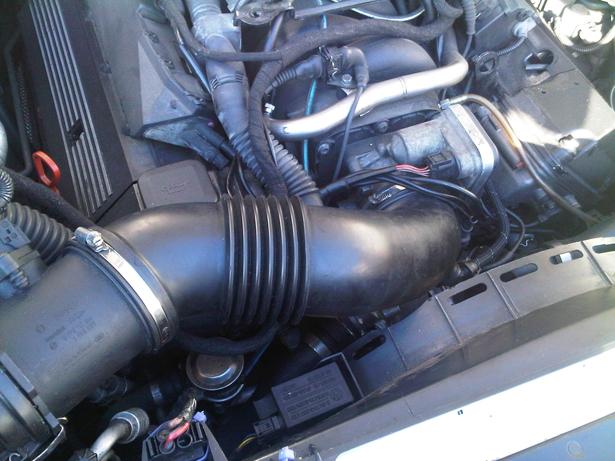
Replace the Intake ducting remembering to replace the two little pipes connected to it, and replace the MAF and Engine Acoustic Cover. Replace the Electrical equipment clipped to the side of the shroud.....
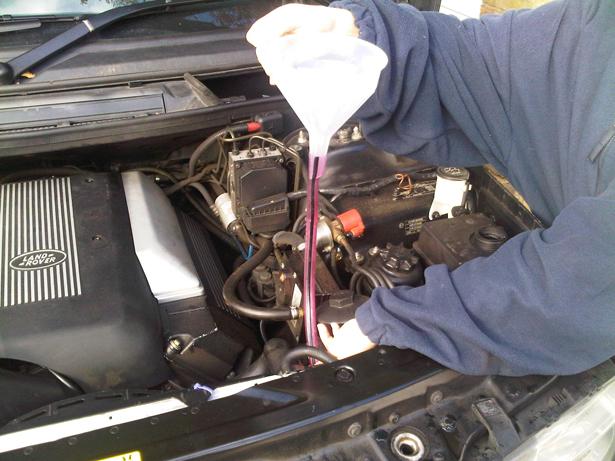
Double check all connections and hoses are in place and time to refill the Rad. Using a hose and funnel, remove the Rad Top Hose and fill directly into the Rad until it over flows then replace the Top Hose – doing this saves time filling through the Expansion tank. Make sure the bleed screw is open, and fill through the expansion tank till that over flows. Start engine and bring to temp, burping the top hose along the way and topping up the expansion tank to keep it up to level. Close the bleed screw and monitor levels and burp hoses. Switch off and allow to cool down to cold and then check levels again, top up if necessary (Check RAVE for procedure).
JOB DONE!!!!
Island4x4 where the cheapest option with the best delivery deal (£163.99 delivered and VAT – Nov 2012) – no affiliation just a satisfied customer....Delivered within 2 days (Ordered on a Friday evening – delivered first thing Tuesday), the unit is a genuine Hella/BEHR OEM radiator and came very well packaged.
In order to remove the rad easily it is best to remove the Viscous Fan and Shroud, there are reports of being able to do it without removing them, but space is limited, and the last thing I wanted was to bounce the rad off the fan or shroud while sliding it back in again!
The VC Fan can be undone with a sharp tap on the spanner, but I have never really had much luck doing that, plus my VC Spanner is quite short and there wasn’t much spanner to hit......not having the correct tool to hold the pulley, I decided to fabricate one. I used a length of 1” flat bar about 3mm thick and 4 M12 Half Nuts, the assembly is below:


So on to the job:
Make sure you have everything to hand:
Gloves
Pulley Spanner
32mm VC Fan Spanner
Hammer/Rubber Mallet
10mm Socket for Under Tray Bolts
13mm Socket for Radiator hold down Pins
T25 Torx bit for Transmission Cooler Bracket
Screw Driver for Pipe clips and Bonnet Struts
5mm Allen Key for Engine Acoustic Cover
Pliers (as I couldn’t get a small pipe off the intake duct)
Side Cutters for snipping cable ties (if necessary)
Funnel and Hose
Coolant and Water

Land Rover very kindly made access to the engine bay easy on the L322 by including a ‘Service Mode’ this can be accomplished by unclipping the bonnet struts from the top clip and then pushing the bonnet vertical and engaging the spring loaded stays to hold it in place – brilliant!! Remember to unclip the wiring and washer pipes first....


The first job before you drain anything is to get the fan off, as this is by far the most annoying part, as the last thing you want to do is drain your coolant out and then not be able to proceed due to missing tools or stubborn VC fan nut. As can be seen the pulley bolts are recessed into a dish on the pulley so I made a tool to hold the Pulley bolts and fitted half nits to the bar to reach into the recess and hold the bolts.
In order to get better access and room to the Water Pump Pulley and getting the fan and cowl out I removed the Intake ducting, to do this use a 5mm allen key and remove the acoustic cover, Unscrew the jubilee clips for the ducting and pull off the ducting, remove the two small pipes to it, I used a pair of pliers on one as I couldn’t get it to budge, and remove the two clips to the MAF and place out of the way. This opens up the front of the engine for much better access.


Put the Special Tool in place along with the Fan Spanner and undo in the direction of rotation, in this case undo clockwise (Left Hand Thread) and then spin the fan blades to undo the nut – viola off she comes, if you are removing for access only – be careful not to allow the fan to fall into the Radiator


Now thats off and done, time to get under the car and remove the splash shield, this is held on with 15 or so 10mm spanner sized bolts - as you can see with mine the wet patch from the Radiator leak!

Time for the fan shroud, mounted on the shroud are two Electrical connection. The first one is fitted with a clip and slides down (mine was held on with a cable tie!) and the second is clipped on which to remove you first slide to the right towards the fan and lift the edge closest to the fan, then slide to the left and lift that edge up. Tuck to the side out of the way. Then Unlip the two hoses on the Right hand side of the shroud and get underneath and unclip the three hoses from the bottom of the shroud.


Now unclip the top of the shroud, it should be fitted with push pins, so lever the centre pin out and the pull the whole clip out of the shroud (mine was held on with small cable ties so I used a pair of side cutters to snip them off) With a wiggle you can now lift the fan and shroud out in one go.


You can now see the Radiator back face....


Now to remove the Transmission cooler bracket. This is held in place with a single T25 Torx screw at the top left corner. Undo this, I found access easier from underneath and little quarter turns of the ratchet. Once the screw is out, lift it up and push it rearward – it only moves about an inch backwards, so don’t force it to much.


The 4 Pipes attached to the Rad – Bottom Hose, Bypass Hose(?), Top Hose and Expansion/Bleed Hose.


Now we have got access to everything, time to drain the Radiator. Now because the engine is cold, the Stat is closed, so by draining the Radiator, you are only draining the Rad, Transmission cooler, Alternator and Expansion tank...the block and Matrix should still be ull as this is held behind the closed Stat. Open the Expansion tank and bleed screw. At the bottom of the Radiator is a drain tap, you can attach a hose to this and drain into a bucket for reuse (if clean and fairly new). Note: this little valve can be stiff and there have been reports of it shearing off as it’s only plastic...if that happens, you can drain most of the rad from the bottom bypass hose.


Once the Rad is drained, you can undo and remove the 4 hoses. Lift the wire clips on the 3 main hoses, and undo the jubilee clip on the bleed/expansion tank hose.


With the Rad Drained and the Hoses off, time to remove the Radiator Securing bolts using a 13mm socket. These simple unscrew from the top of slam panel. Once these are out, gentle push the Rad towards the Engine as its meant to pivot, be careful of the A/C hoses connected to the Condenser. Once the Rad is pushed rearward, unclip the plastic end caps by pushing the little lever tab and lifting off the caps.


Now you can lift the Rad out of the car, being careful not to catch it on anything if you intend to refit the original!!

A quick inspection can see where the leaks have occurred....


Carefully unpackage the replacement Rad and give it a once over for any signs of non-conformance or damage...Before fitting, make sure the drain valve at the bottom is closed.


Carefully slide the Rad into place, being very careful of the edges of the Slam Panel....

Reattach the Transmission Cooler and replace the Plastic Clips – this part was fiddly but with a bit of patience they fitted back on. Rescrew down the Rad Securing Bolts.


Reattach the 4 hoses....


Using a piece of cardboard to protect the new Rad from damage, replace the Fan and shroud, again using the special tool to do up the fan nut...Remove the cardboard and reclip or attach the fan Shroud making sure the clips engage at the bottom. DON’T FORGET TO RECLIP THE HOSES AT THE BOTTOM AND SIDES OF THE SHROUD ELSE THEY WILL GET DAMAGED....


Replace the Intake ducting remembering to replace the two little pipes connected to it, and replace the MAF and Engine Acoustic Cover. Replace the Electrical equipment clipped to the side of the shroud.....

Double check all connections and hoses are in place and time to refill the Rad. Using a hose and funnel, remove the Rad Top Hose and fill directly into the Rad until it over flows then replace the Top Hose – doing this saves time filling through the Expansion tank. Make sure the bleed screw is open, and fill through the expansion tank till that over flows. Start engine and bring to temp, burping the top hose along the way and topping up the expansion tank to keep it up to level. Close the bleed screw and monitor levels and burp hoses. Switch off and allow to cool down to cold and then check levels again, top up if necessary (Check RAVE for procedure).

JOB DONE!!!!
Last edited:
