Hippo
Lord Hippo
- Posts
- 55,898
Updated 29 July 2015
This write-up shows the steps I took to change the rear diff mounts on my Freelander 1 2001 v6. The front (centre) mount failed, so needed replaced. One of the rear mounts was starting to fail too, so I changed all 3 rear diff mounts at the same time. The video below shows the movement of the failed front mount. If yours is ok, it won't move as much as this.
YouTube- Freelander 1 2001 v6 Centre Diff Mount Fail
Note: I have no financial gain from writing this guide or being a member of the forum. I don't sell parts or own a business. I own a Freelander and have done for many years which is why I'm a member of this forum.
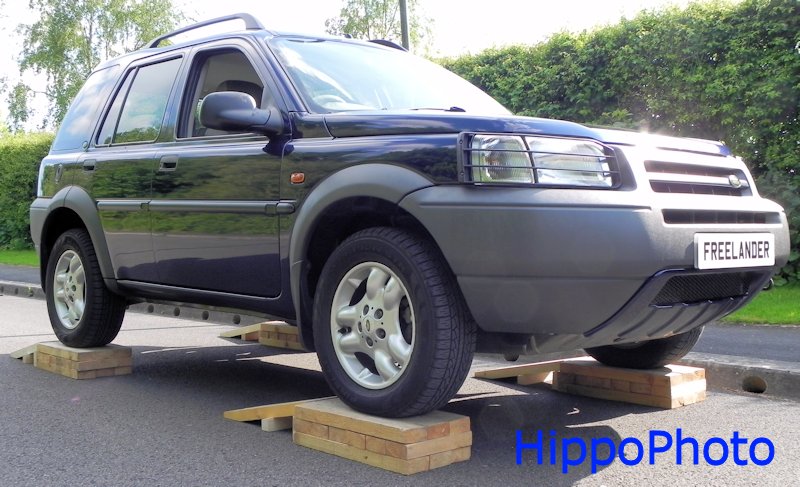
To access the underside of my Freelander I use 4 wooden HippoRamps, which I can drive up. This lifts the car 6 inches in the air for better access underneath. Also keeps it stable and level to work under.
HippoRamp build instructions over ere: http://www.landyzone.co.uk/land-rover/hipporamps-how-to-guide.257760.html
Warning: You need to chock the front wheels to stop your Freelander rolling. Don't rely on the handbrake on its own.
hipporamps EGR3kqR
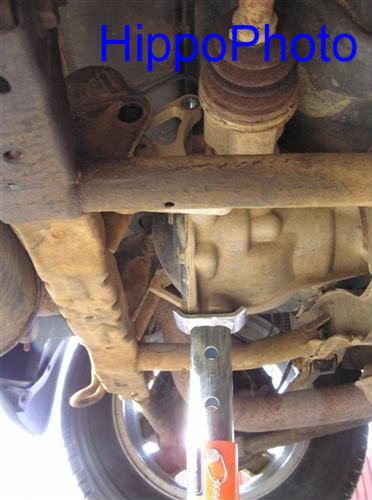
Land Rover produces a special jig to correctly align the rear diff when replacing the mounts. As I don't have access to the jig, I took several different measurements to help me locate the diff in the same place later on. It's easy to replace the mounts without the jig. The measurements I took were optional.
P2271801 QllJ1VB
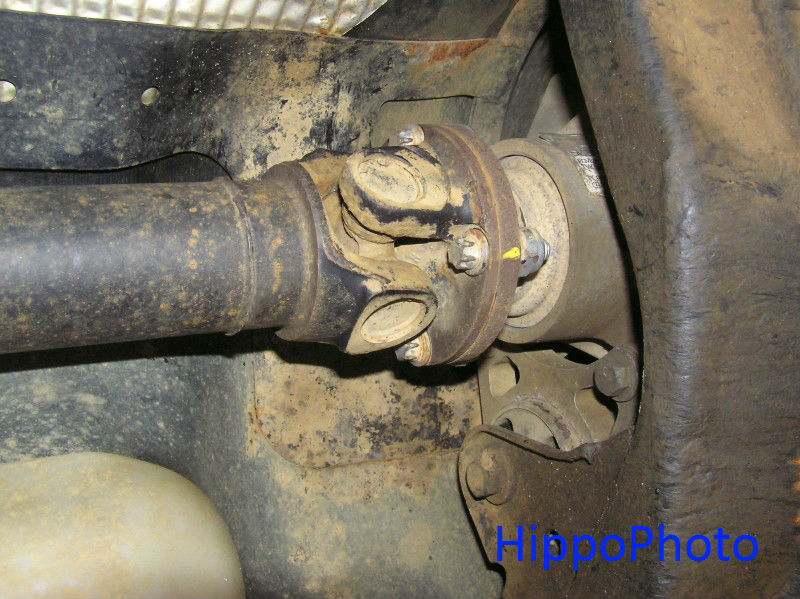
Disconnect the rear propeller (prop) shaft to rear diff connection shown above. E12 torx bolts and 17mm nuts x4. If you can't reach the nut at the top, drive the car forwards 10 inches. This will rotate the propeller shaft 90 degrees.
reardiff i6x8NPF
Separate the prop shaft from the rear diff and support. I used an axle stand. The rear prop shaft weighs 7kg. If it's allowed to drop, you risk damaging the universal joint at the other end.
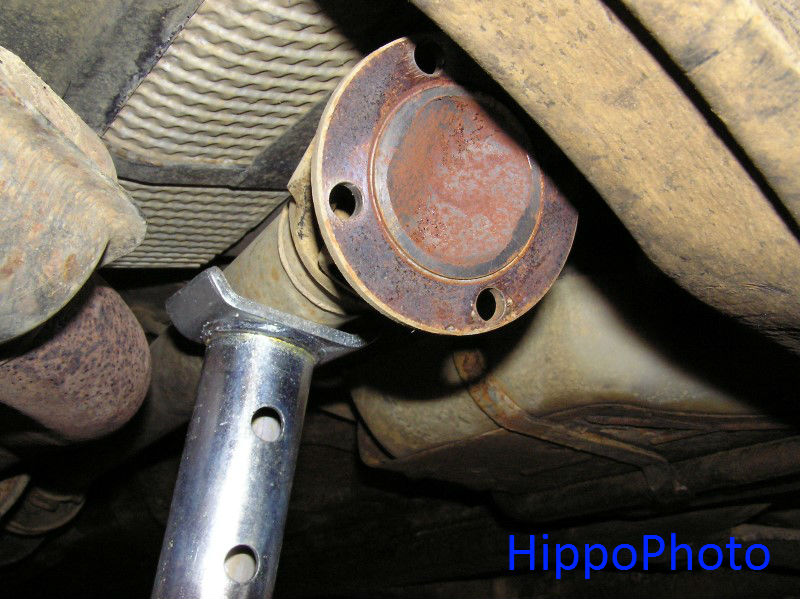
rearprop QG4NFDX
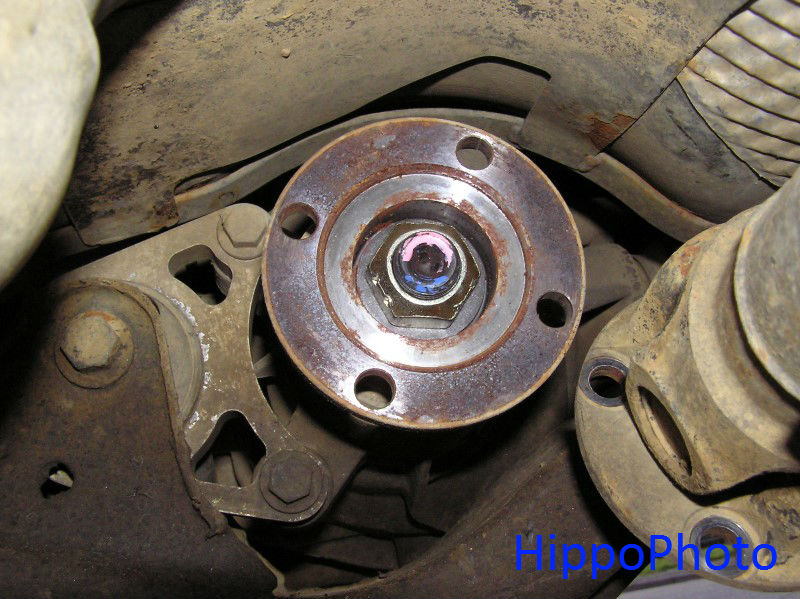
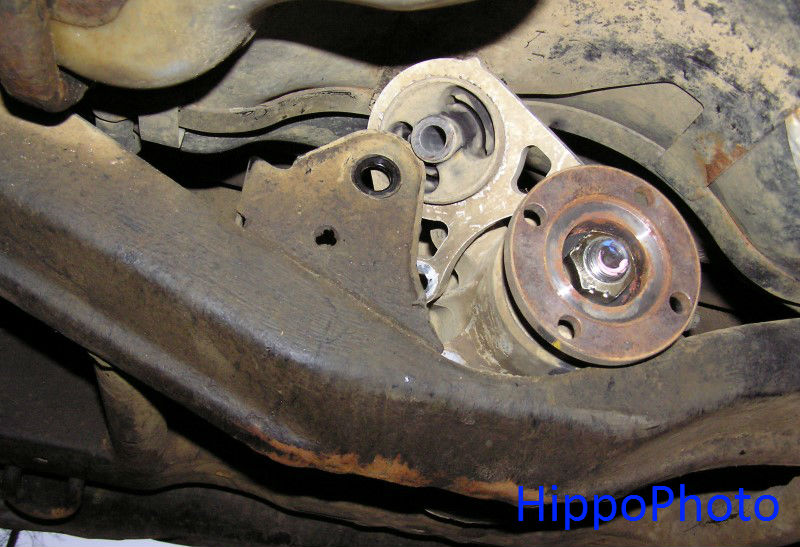
Support the rear diff. I used an axle stand.
P3061827 uBNMKIg
All the diff mounts use captive nuts. Hence you only need to remove the bolts.
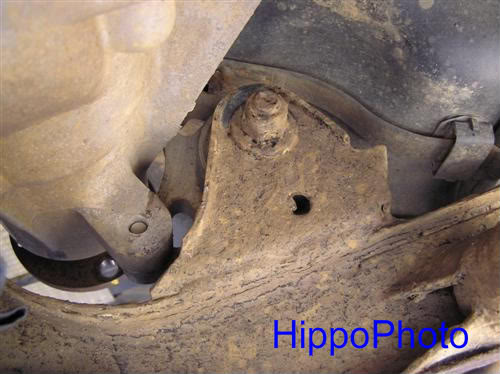
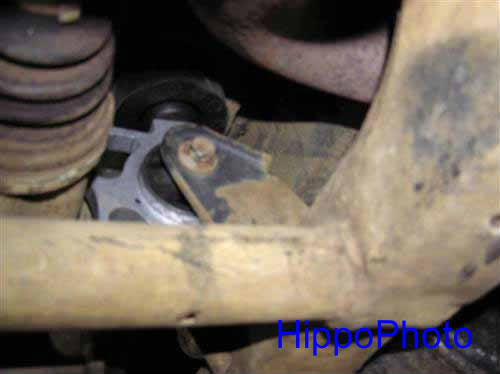
Pictured below is the right hand side (RHS) diff mount. Loosen the 2x 13mm bolts securing the mount to the diff. Now loosen the 15mm bolt securing the mount to the frame.
P3061813 K9worUT
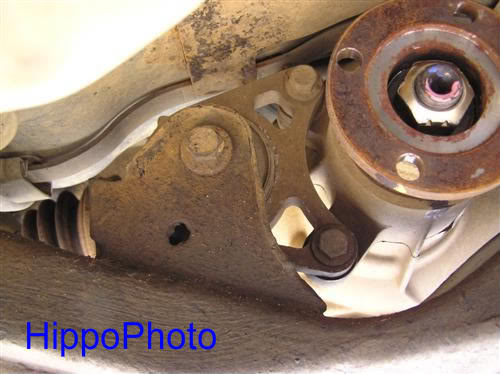
Pictured below is the left hand side (LHS) diff mount. Loosen the 2x 13mm bolts securing the mount to the diff. Now loosen the 15mm bolt securing the mount to the frame.
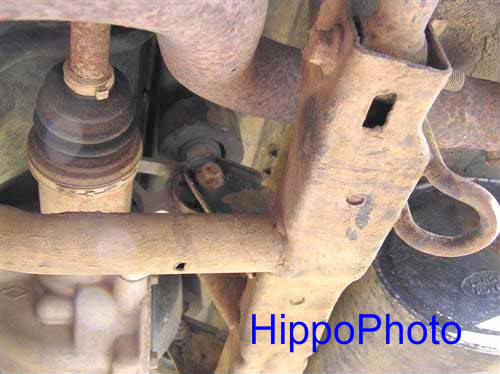
P3061814 3dNzYIv
View of both the LHS and RHS rear diff mounts from underneath.
P3061820 xdmolvD
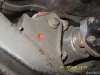
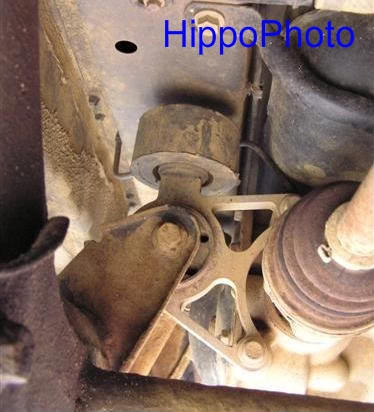
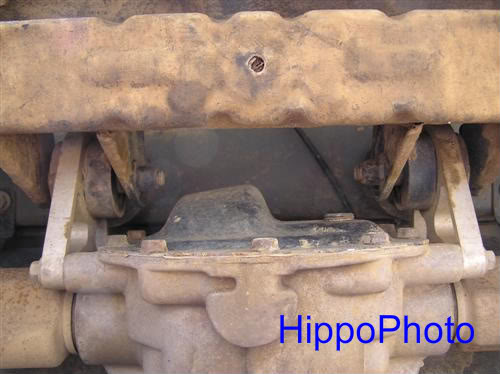
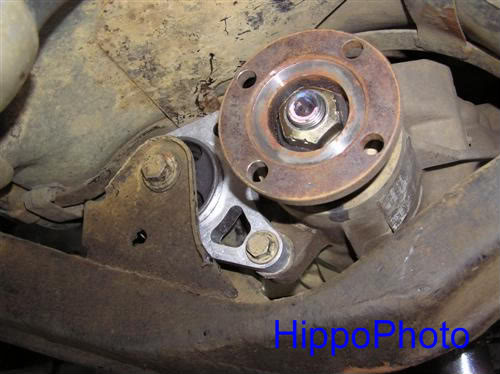
Rear view of the centre (front) diff mount.
P3061824 VAqs8HP
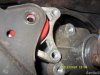
Pictured below is the centre (front) diff mount. Loosen the 2x 13mm bolts securing the mount to the diff. Now loosen the 15mm bolt securing the mount to the frame.
P3061826 ZZ618yE
With the diff still supported, remove all 3 bolts on the RHS rear diff mount. Remove the mount from the bracket and replace with a new mount. Fit the larger bolt through the bracket first, then the other 2 bolts holding the diff. Leave the bolts finger tight for now.
P3061827 uBNMKIg
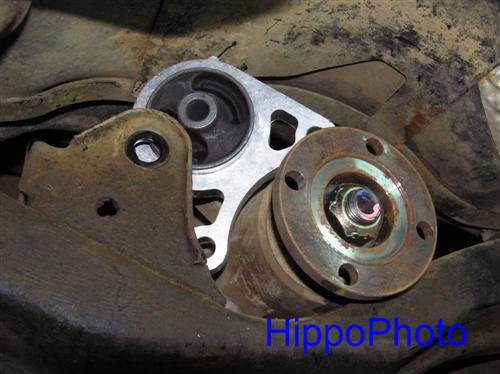
New RHS diff mount pictured below fitted.

P3061868 1IHnblt
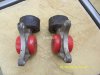
3 rear mounts pictured below. Note the difference between the RHS and LHS new mounts.
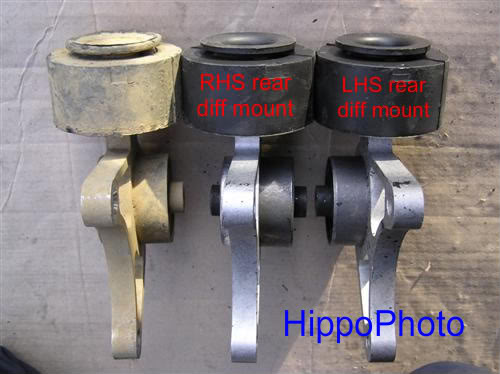
P3061831 STTohMi
Below are examples of the length of bolts securing each diff mount.
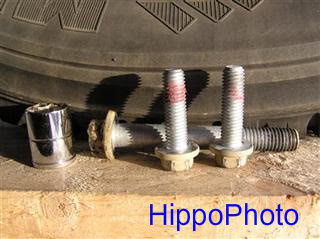
P3061839 jkBKNIK
With the diff still supported, remove all 3 bolts on the LHS rear diff mount. Remove the mount from the bracket and replace with a new mount. Fit the 15mm bolt through the bracket first, then the other 2 bolts holding the diff. Leave the bolts finger tight for now. The bolts on the mount are a little difficult to get to. Easily done if you have an extension bar and elbow. New LHS diff mount pictured below fitted.
P3061867 0QChPQc
The centre diff mount is the most difficult to replace due to lack of space. Make sure you remember how you took it out of it's bracket to help you to know how to fit the new one. Support the diff and remove the RHS rear mount centre bolt, then remove the diff centre mount bolts, then replace the centre mount. Lever the diff a bit with a length of wood if you need too. Be careful and don't force anything. Removing the RHS rear mount centre bolt allows you to push the front of the diff away from the centre mount, to allow for more room to replace the mount. You can then replace the centre mount, reposition the diff and refit the rear RHS mount centre bolt.
With the diff supported, loosen and remove the 15mm bolt securing the RHS rear diff mount to the bracket. Push the front of the diff away from the centre mount whilst taking care to continue to support the diff, and remove the old centre diff mount and replace with a new one. Push the diff back to it's central position and refit the 15mm bolt through the RHS rear diff mount. Now fit the bolts which secure the centre diff mount. Fit the larger bolt through the bracket first, then the other 2 bolts holding the diff. Leave the bolts finger tight for now.
P3061840 WMMV0t3
P3061860 CLBwewX
With all the bolt loose the diff should locate itself naturally. If you took measurements before then use them to confirm the alignment/position of the diff whilst following the steps below.
Whilst all 9 diff mounts are finger tight, allow the diff to sit centrally and align.
Torque the 2x 13mm bolts securing the centre diff mount to the diff, to 65Nm.
Torque the 2x 13mm bolts securing the RHS diff mount to the diff, to 65Nm.
Torque the 2x 13mm bolts securing the LHS diff mount to the diff, to 65Nm.
Torque the 15mm bolt securing the centre diff mount to the bracket to 120Nm.
Torque the 15mm bolt securing the RHS diff mount to the bracket to 120Nm.
Torque the 15mm bolt securing the RHS diff mount to the bracket to 120Nm.
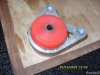
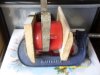
New centre diff mount pictured below fitted.
P3061864 UQyevJD
Connect the rear propeller shaft to the rear diff. Use a small amount of grease on the mating faces. E12 torx bolts and 17mm nuts x4. Torque is 65Nm. If for some reason the prop has turned and the holes don't line up, put a long screw driver through the rear prop shaft universal joint and turn the rear prop shaft. Make sure the Freelander is held stationary whilst doing this.
P2271801 QllJ1VB
Lower your Freelander to the ground and test-drive.
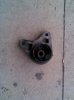
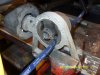
Old centre diff mount pictured below. Rips through the rubber either side of the centre support tube have caused this mount to fail.
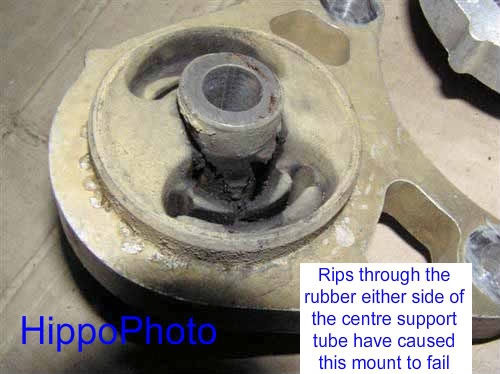
P3061855 U4CjDMW
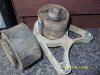
Old and new mounts.
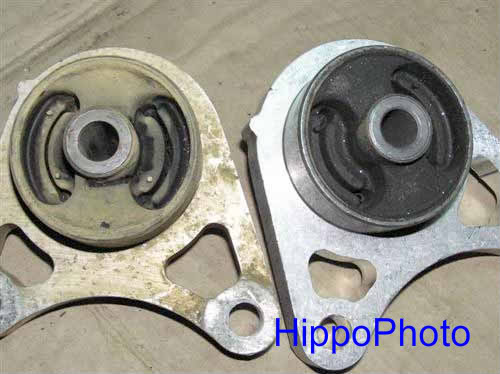
P3061857 PRjB7mo
This write-up shows the steps I took to change the rear diff mounts on my Freelander 1 2001 v6. The front (centre) mount failed, so needed replaced. One of the rear mounts was starting to fail too, so I changed all 3 rear diff mounts at the same time. The video below shows the movement of the failed front mount. If yours is ok, it won't move as much as this.
YouTube- Freelander 1 2001 v6 Centre Diff Mount Fail
Note: I have no financial gain from writing this guide or being a member of the forum. I don't sell parts or own a business. I own a Freelander and have done for many years which is why I'm a member of this forum.
To access the underside of my Freelander I use 4 wooden HippoRamps, which I can drive up. This lifts the car 6 inches in the air for better access underneath. Also keeps it stable and level to work under.
HippoRamp build instructions over ere: http://www.landyzone.co.uk/land-rover/hipporamps-how-to-guide.257760.html
Warning: You need to chock the front wheels to stop your Freelander rolling. Don't rely on the handbrake on its own.
hipporamps EGR3kqR
Land Rover produces a special jig to correctly align the rear diff when replacing the mounts. As I don't have access to the jig, I took several different measurements to help me locate the diff in the same place later on. It's easy to replace the mounts without the jig. The measurements I took were optional.
P2271801 QllJ1VB
Disconnect the rear propeller (prop) shaft to rear diff connection shown above. E12 torx bolts and 17mm nuts x4. If you can't reach the nut at the top, drive the car forwards 10 inches. This will rotate the propeller shaft 90 degrees.
reardiff i6x8NPF
Separate the prop shaft from the rear diff and support. I used an axle stand. The rear prop shaft weighs 7kg. If it's allowed to drop, you risk damaging the universal joint at the other end.
rearprop QG4NFDX
Support the rear diff. I used an axle stand.
P3061827 uBNMKIg
All the diff mounts use captive nuts. Hence you only need to remove the bolts.
Pictured below is the right hand side (RHS) diff mount. Loosen the 2x 13mm bolts securing the mount to the diff. Now loosen the 15mm bolt securing the mount to the frame.
P3061813 K9worUT
Pictured below is the left hand side (LHS) diff mount. Loosen the 2x 13mm bolts securing the mount to the diff. Now loosen the 15mm bolt securing the mount to the frame.
P3061814 3dNzYIv
View of both the LHS and RHS rear diff mounts from underneath.
P3061820 xdmolvD
Rear view of the centre (front) diff mount.
P3061824 VAqs8HP
Pictured below is the centre (front) diff mount. Loosen the 2x 13mm bolts securing the mount to the diff. Now loosen the 15mm bolt securing the mount to the frame.
P3061826 ZZ618yE
With the diff still supported, remove all 3 bolts on the RHS rear diff mount. Remove the mount from the bracket and replace with a new mount. Fit the larger bolt through the bracket first, then the other 2 bolts holding the diff. Leave the bolts finger tight for now.
P3061827 uBNMKIg
New RHS diff mount pictured below fitted.
P3061868 1IHnblt
3 rear mounts pictured below. Note the difference between the RHS and LHS new mounts.
P3061831 STTohMi
Below are examples of the length of bolts securing each diff mount.
P3061839 jkBKNIK
With the diff still supported, remove all 3 bolts on the LHS rear diff mount. Remove the mount from the bracket and replace with a new mount. Fit the 15mm bolt through the bracket first, then the other 2 bolts holding the diff. Leave the bolts finger tight for now. The bolts on the mount are a little difficult to get to. Easily done if you have an extension bar and elbow. New LHS diff mount pictured below fitted.
P3061867 0QChPQc
The centre diff mount is the most difficult to replace due to lack of space. Make sure you remember how you took it out of it's bracket to help you to know how to fit the new one. Support the diff and remove the RHS rear mount centre bolt, then remove the diff centre mount bolts, then replace the centre mount. Lever the diff a bit with a length of wood if you need too. Be careful and don't force anything. Removing the RHS rear mount centre bolt allows you to push the front of the diff away from the centre mount, to allow for more room to replace the mount. You can then replace the centre mount, reposition the diff and refit the rear RHS mount centre bolt.
With the diff supported, loosen and remove the 15mm bolt securing the RHS rear diff mount to the bracket. Push the front of the diff away from the centre mount whilst taking care to continue to support the diff, and remove the old centre diff mount and replace with a new one. Push the diff back to it's central position and refit the 15mm bolt through the RHS rear diff mount. Now fit the bolts which secure the centre diff mount. Fit the larger bolt through the bracket first, then the other 2 bolts holding the diff. Leave the bolts finger tight for now.
P3061840 WMMV0t3
P3061860 CLBwewX
With all the bolt loose the diff should locate itself naturally. If you took measurements before then use them to confirm the alignment/position of the diff whilst following the steps below.
Whilst all 9 diff mounts are finger tight, allow the diff to sit centrally and align.
Torque the 2x 13mm bolts securing the centre diff mount to the diff, to 65Nm.
Torque the 2x 13mm bolts securing the RHS diff mount to the diff, to 65Nm.
Torque the 2x 13mm bolts securing the LHS diff mount to the diff, to 65Nm.
Torque the 15mm bolt securing the centre diff mount to the bracket to 120Nm.
Torque the 15mm bolt securing the RHS diff mount to the bracket to 120Nm.
Torque the 15mm bolt securing the RHS diff mount to the bracket to 120Nm.
New centre diff mount pictured below fitted.
P3061864 UQyevJD
Connect the rear propeller shaft to the rear diff. Use a small amount of grease on the mating faces. E12 torx bolts and 17mm nuts x4. Torque is 65Nm. If for some reason the prop has turned and the holes don't line up, put a long screw driver through the rear prop shaft universal joint and turn the rear prop shaft. Make sure the Freelander is held stationary whilst doing this.
P2271801 QllJ1VB
Lower your Freelander to the ground and test-drive.
Old centre diff mount pictured below. Rips through the rubber either side of the centre support tube have caused this mount to fail.
P3061855 U4CjDMW
Old and new mounts.
P3061857 PRjB7mo
Last edited:
")