You are using an out of date browser. It may not display this or other websites correctly.
You should upgrade or use an alternative browser.
You should upgrade or use an alternative browser.
Straight 6 rebuild
- Thread starter ajb403
- Start date
This site contains affiliate links for which LandyZone may be compensated if you make a purchase.
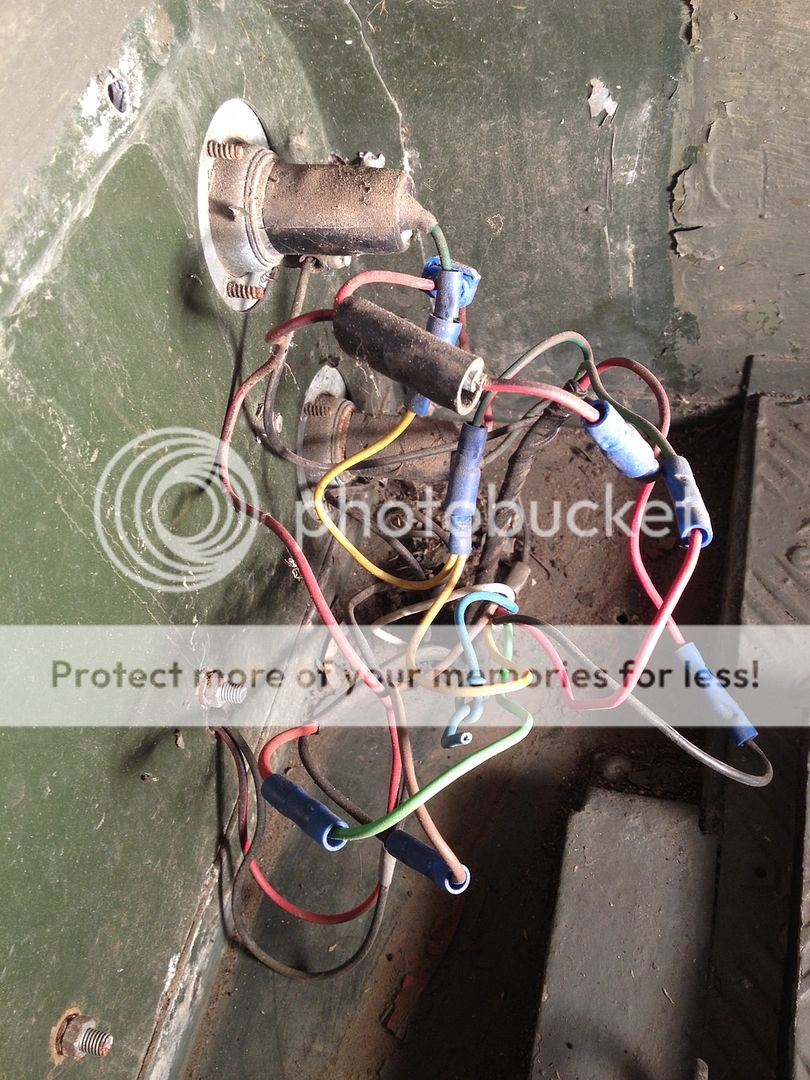
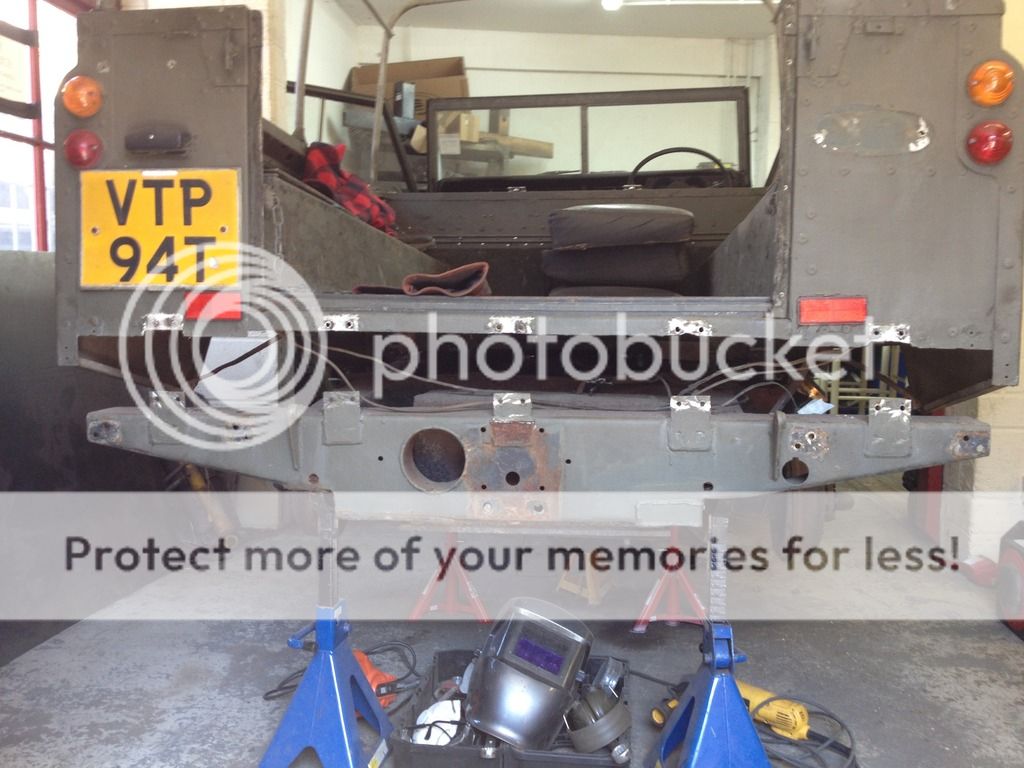
Few more hours work done but not too much visually different from how it was before, have labelled and cut the trailer socket electrics to I can remove the tow hitch from the rear cross member, removed the fuel tank pipes/wires ready for the tank to be lowered. Removed the grab handles from the rear crossmember and I think the rear tub is now ready to be lifted up a bit, I'm pretty sure I've undone/sheared/cut all of the bolts securing it to the chassis (without losing any more knuckles!  ) - 10 in pairs between the top of the rear crossmember, two brackets to the bodywork on each side, 4 bolts on each side in two pairs to the outriggers at the forward edge of the tub, two bolts on each side securing it to the seatbox and sill, and then 8 or so (I forget the exact number) securing the back edge of the seatbox to the rear tub. Can anyone think of any I've missed? It felt like it'd move when I tried to wiggle it but it's currently got the truck cab balanced on the hood sticks so I can't move it properly till I have roped in a couple of mates to help.
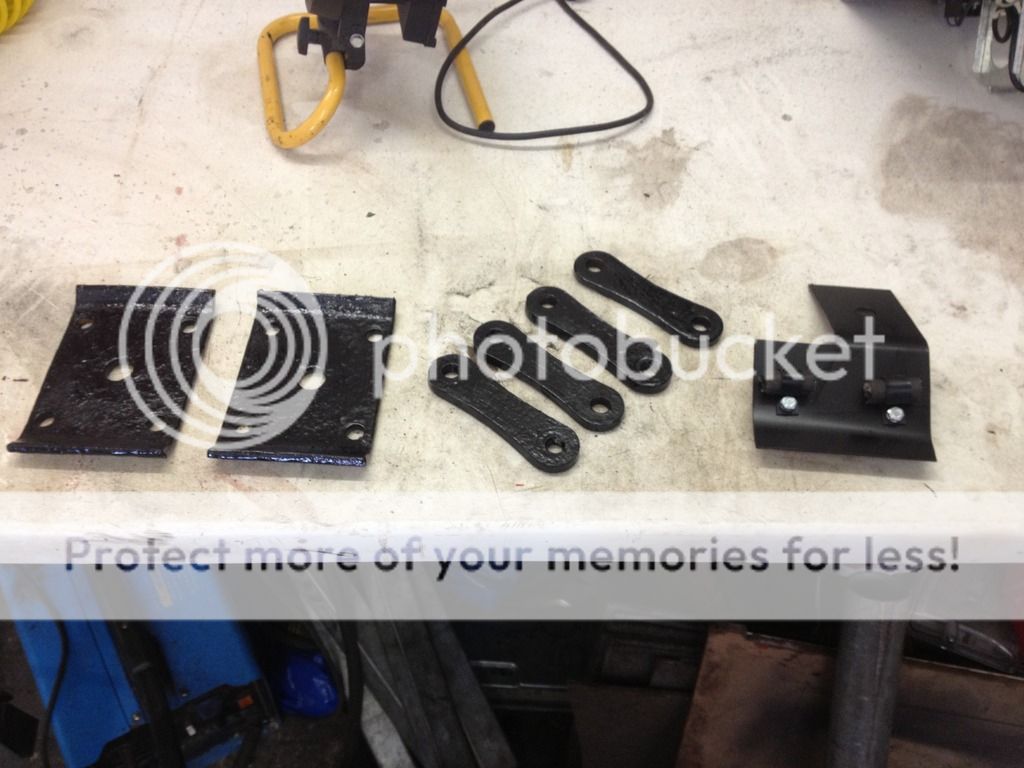
Made up a second brake pipe bracket as the NS one was in a similar condition to the OS one. Got a few other bits cleaned up and painted while we had some sun shine.
Finally, I found some treasure under the seat runners, some confetti from my wedding day nearly three years ago, a two pence piece from 1987 and a shilling from 1953! The latter confused me as we went decimal in 1971 and my landy wasn't made till 1979, this is also the second old but post decimalisation vehicle that I've found a shilling in, the other was a 1982 VW scirocco that we had for a bit. Do you recon these were good luck charms or something?!

) - 10 in pairs between the top of the rear crossmember, two brackets to the bodywork on each side, 4 bolts on each side in two pairs to the outriggers at the forward edge of the tub, two bolts on each side securing it to the seatbox and sill, and then 8 or so (I forget the exact number) securing the back edge of the seatbox to the rear tub. Can anyone think of any I've missed? It felt like it'd move when I tried to wiggle it but it's currently got the truck cab balanced on the hood sticks so I can't move it properly till I have roped in a couple of mates to help.

Made up a second brake pipe bracket as the NS one was in a similar condition to the OS one. Got a few other bits cleaned up and painted while we had some sun shine.

Finally, I found some treasure under the seat runners, some confetti from my wedding day nearly three years ago, a two pence piece from 1987 and a shilling from 1953! The latter confused me as we went decimal in 1971 and my landy wasn't made till 1979, this is also the second old but post decimalisation vehicle that I've found a shilling in, the other was a 1982 VW scirocco that we had for a bit. Do you recon these were good luck charms or something?!

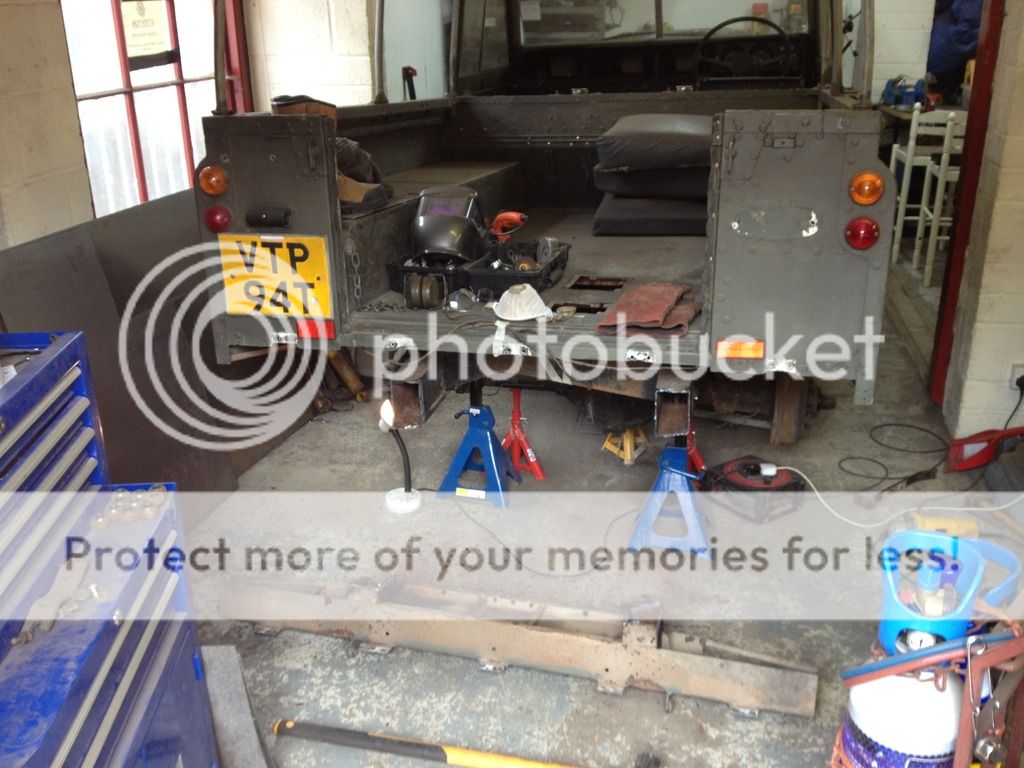
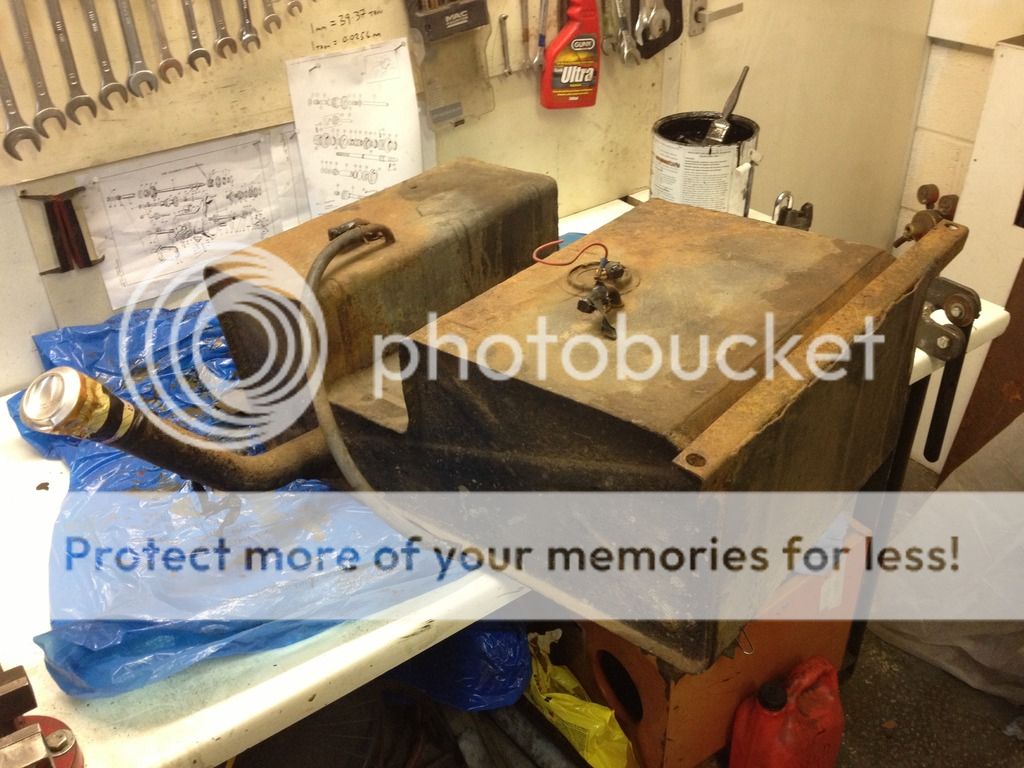
The missus is away in New York with her work for the week so I spent the weekend in the workshop, first job was to get the tank out, the fuel sender is a bit dodgy, it's always read about 3/4 of a tank when it's full to overflowing but it was reading empty after I'd syphoned a load of fuel out of it when I brought the vehicle into the workshop. I thought the tank was pretty much empty but it turned out there was nearly 4 gallons still in there! I only had 3 gallon containers so my mate got lucky and got a gallon for his car's fuel tank. The earth on the fuel sender looked a bit tired so I think it probably read a higher resistance than it should, does anyone know which way round the sender works, higher resitance when the tank is empty or when tank full?
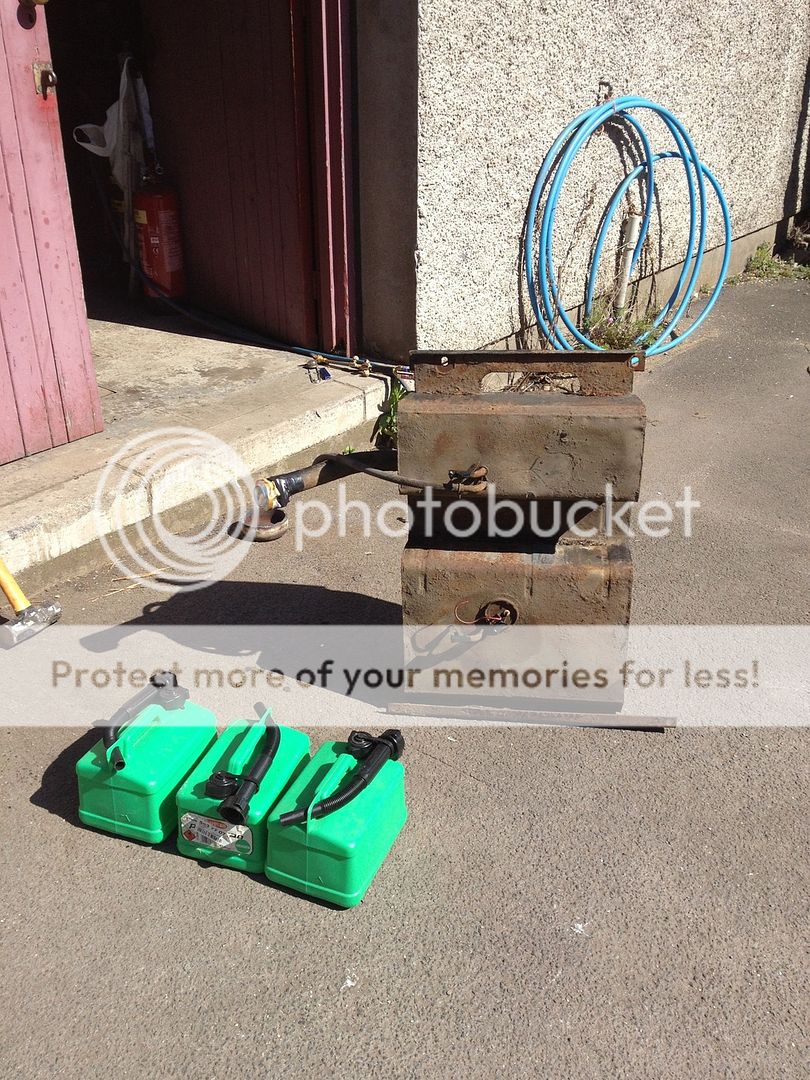
Next up was to get the tub lifted a bit and make a few measurements before cutting the rotten old rear crossmember off with the oxyacetylene torch (aka the hot spanner).


This lot came out of there, not looking so pretty.

So I put together a plan of attack and started to cut back to good metal and welding in new stuff.
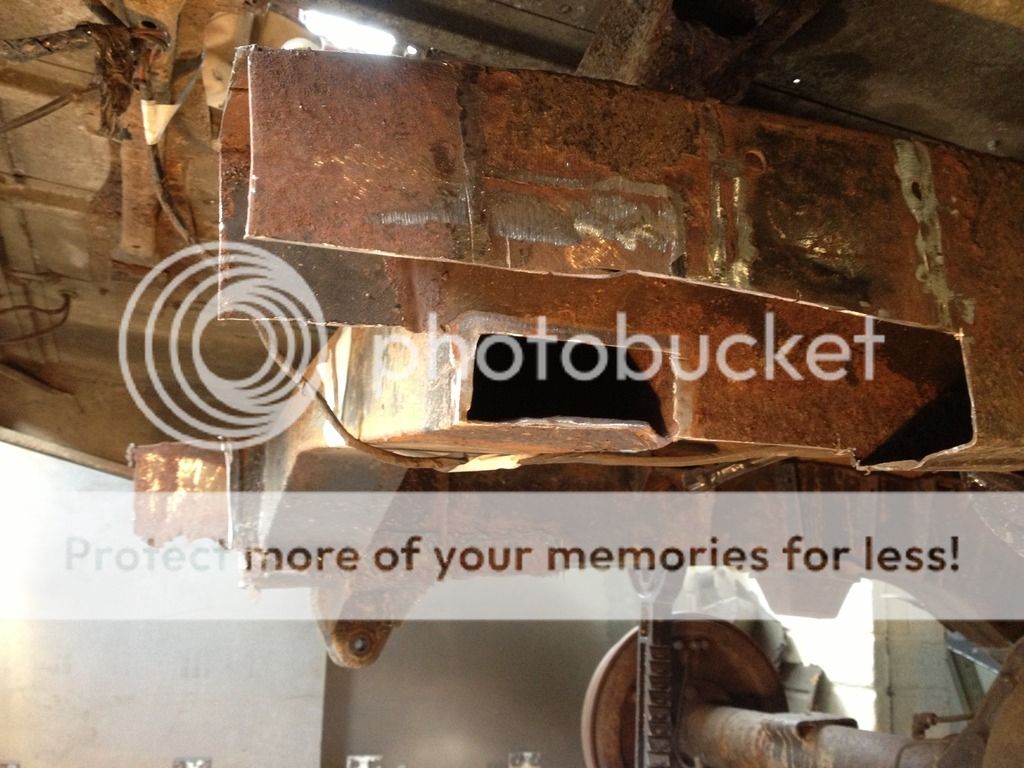

I was thinking of putting in another support inside the chassis rail to strengthen it further and then the next job is to weld on the driver's side rear suspension mount but that'll have to wait for a few days.

Next up was to get the tub lifted a bit and make a few measurements before cutting the rotten old rear crossmember off with the oxyacetylene torch (aka the hot spanner).


This lot came out of there, not looking so pretty.


So I put together a plan of attack and started to cut back to good metal and welding in new stuff.


I was thinking of putting in another support inside the chassis rail to strengthen it further and then the next job is to weld on the driver's side rear suspension mount but that'll have to wait for a few days.
dominicbeesley
Well-Known Member
- Posts
- 1,701
- Location
- Hebden Bridge, West Yorkshire
More good work - keep the pictures coming - inspiring me to pull my finger out!
BTW: Old florin and one shilling coins were still used as 10p and 5p coins into the nineties.
BTW: Old florin and one shilling coins were still used as 10p and 5p coins into the nineties.
dominicbeesley
Well-Known Member
- Posts
- 1,701
- Location
- Hebden Bridge, West Yorkshire
Ooops just spotted the question - the resistance is lower when full. Check for muck on the sender and rubbish earths...also if your temperature gauge is dodgy suspect the voltage regulator...
Cracking, thank you. I thought it was that way round as the earth on the sender is naff, the spade tab is corroded, the wire leading from it is then scotch locked(!) onto an earth wire which connects to the corroded tub support so I'd imagine the earth continuity to the battery is horrendous! Assuming there's continuity between the screwed in sender unit and the tank supporting frame then I'll be connecting an earth wire between that and the chassis.
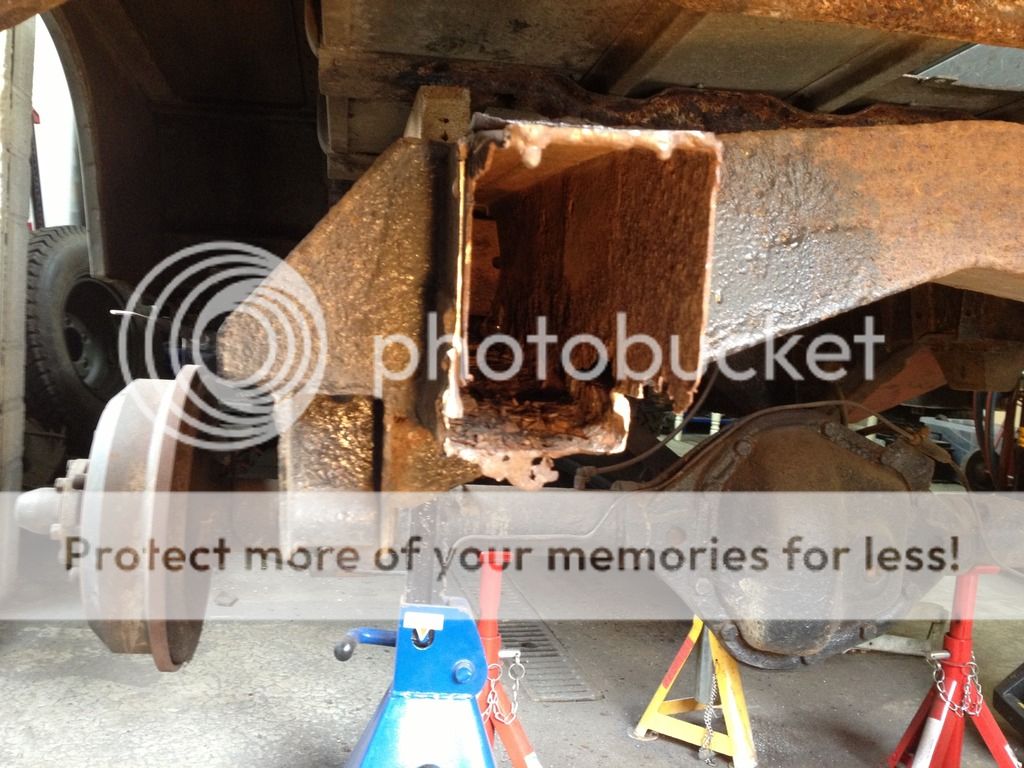
Friday after work I got the rear off side rear suspension mount welded on and started cutting into the near side of the chassis, got the old spring mount off and started removing more and more metal to get back to good thickness stuff. Turns out I had to remove quite a lot!
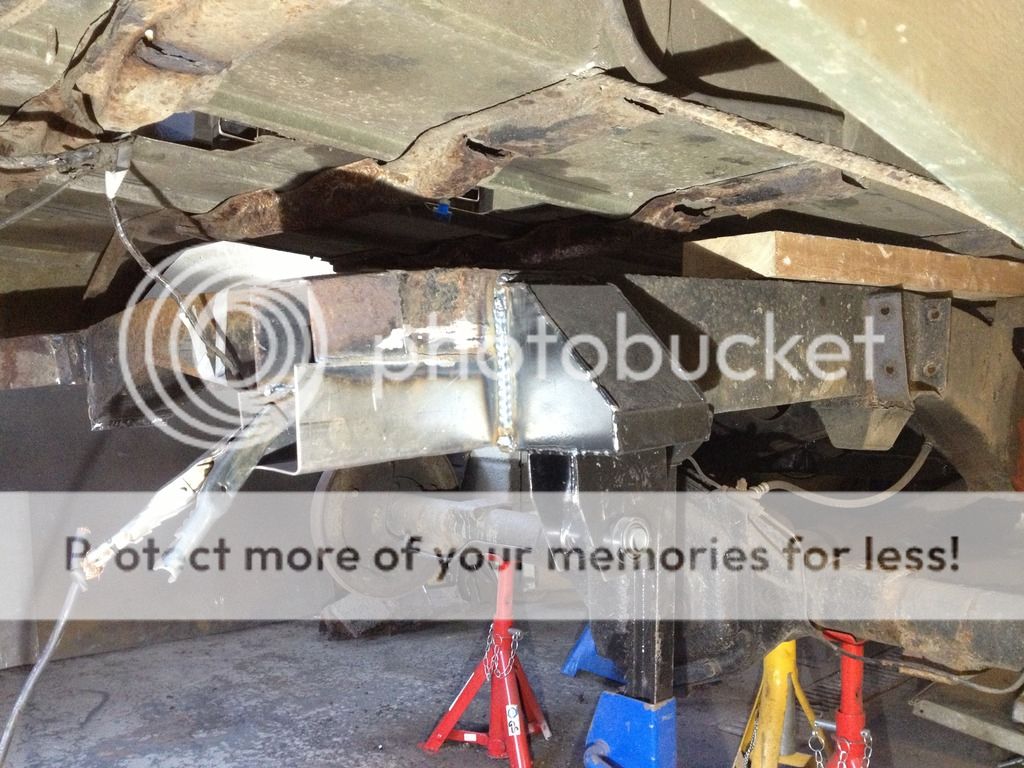

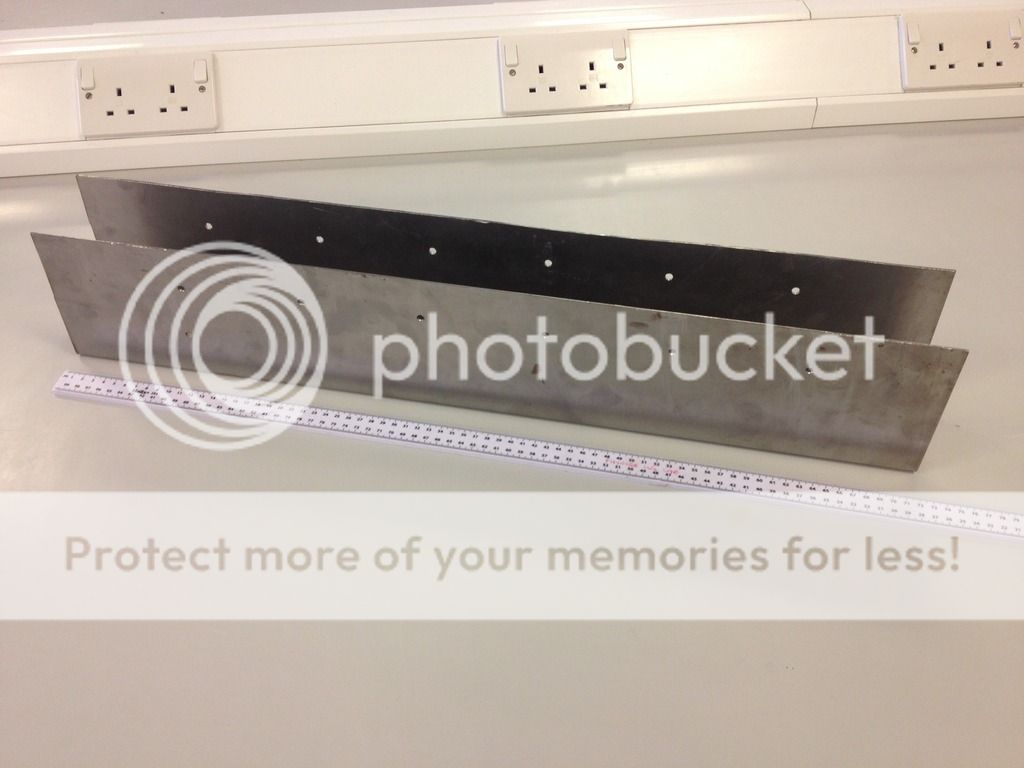
Have only had time to grind back the remains of the old welds from the old spring hanger and rear crossmember, weld in a small repair on the crossmember, and cut out a rather large bit of 2mm steel that I'm taking into the workshop at work to use their bender to make a C section that's the full depth of the chassis rail and about 2 foot long. There's no way I could do it by just clamping it in angle iron and beating it with a hammer I should really make a bender for future projects. My intention is not to try and let this in flush with the rest but to wrap it round the chassis leg (obviously with bits cut out of it for the crossmember and tub support brackets), this will mean that when the new spring hanger goes on on this side is will be positioned 2mm further out that standard but I shouldn't imagine that'd have too detrimental an effect. I don't know why the near side is in so much worse a state than the off side, nothing that can't be fixed though!


Have only had time to grind back the remains of the old welds from the old spring hanger and rear crossmember, weld in a small repair on the crossmember, and cut out a rather large bit of 2mm steel that I'm taking into the workshop at work to use their bender to make a C section that's the full depth of the chassis rail and about 2 foot long. There's no way I could do it by just clamping it in angle iron and beating it with a hammer I should really make a bender for future projects. My intention is not to try and let this in flush with the rest but to wrap it round the chassis leg (obviously with bits cut out of it for the crossmember and tub support brackets), this will mean that when the new spring hanger goes on on this side is will be positioned 2mm further out that standard but I shouldn't imagine that'd have too detrimental an effect. I don't know why the near side is in so much worse a state than the off side, nothing that can't be fixed though!

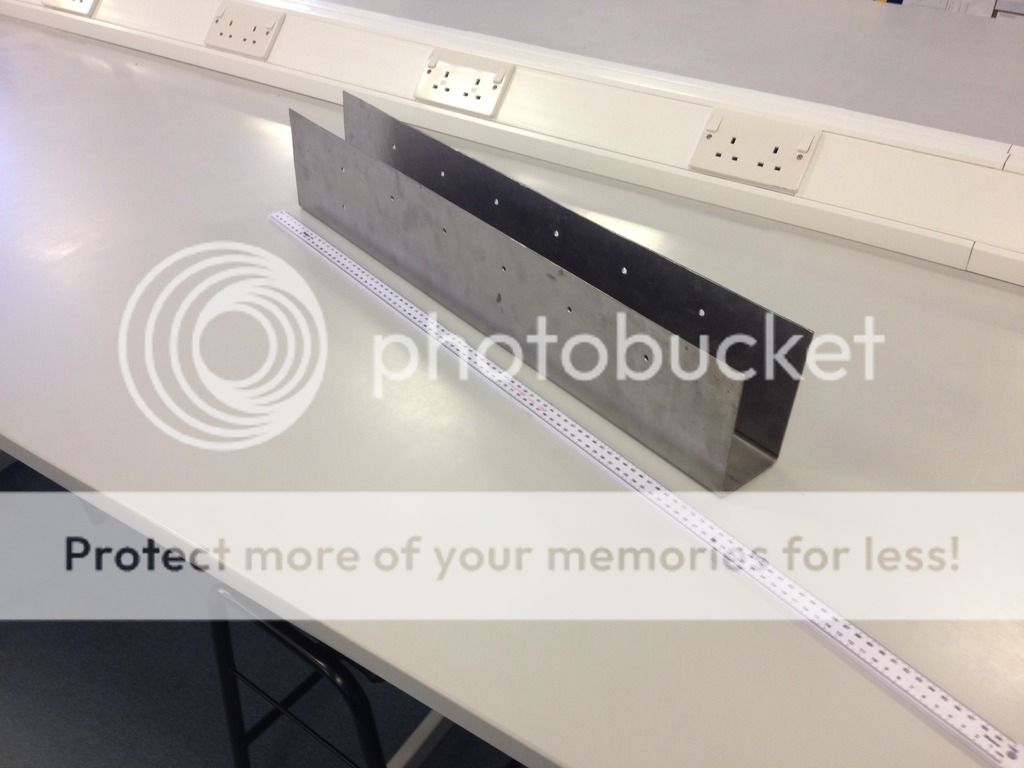
Just bent up the repair section, should do the job once it's had some extra strengthening in the bottom corners and possibly a crossbrace, the holes are for plug welds to the existing chassis leg and of course I'll be seam welding it around the edge.


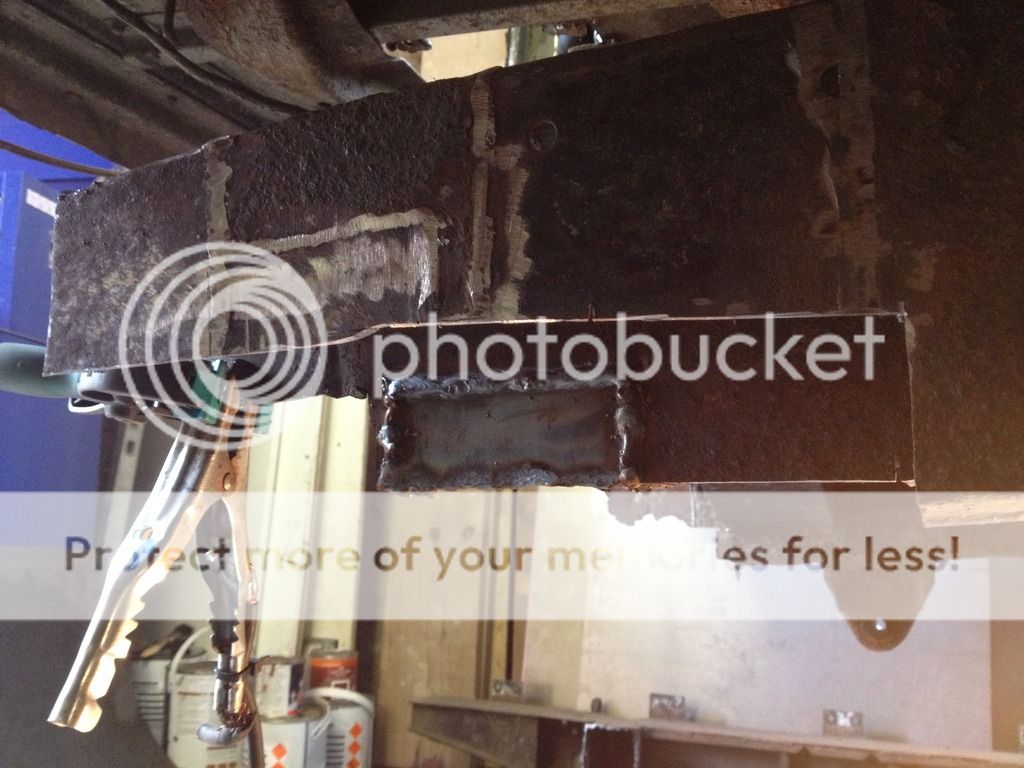
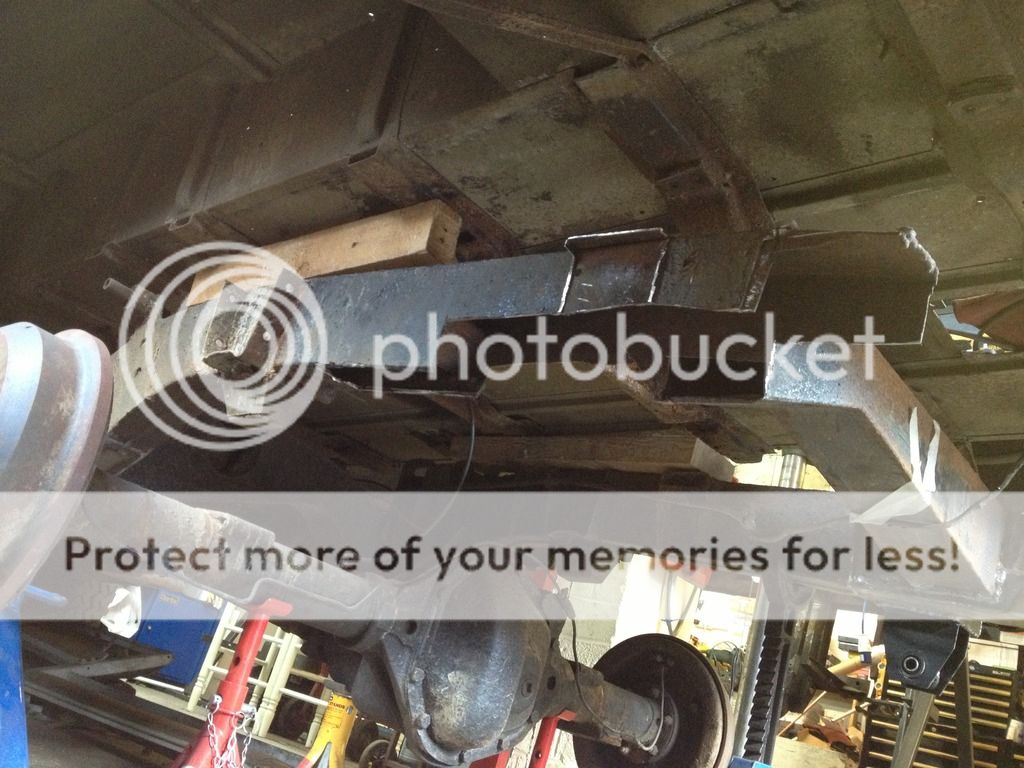
Last night I cut out the slots needed to fit around the tub supports and fuel tank crossmember and was left with something looking like this.
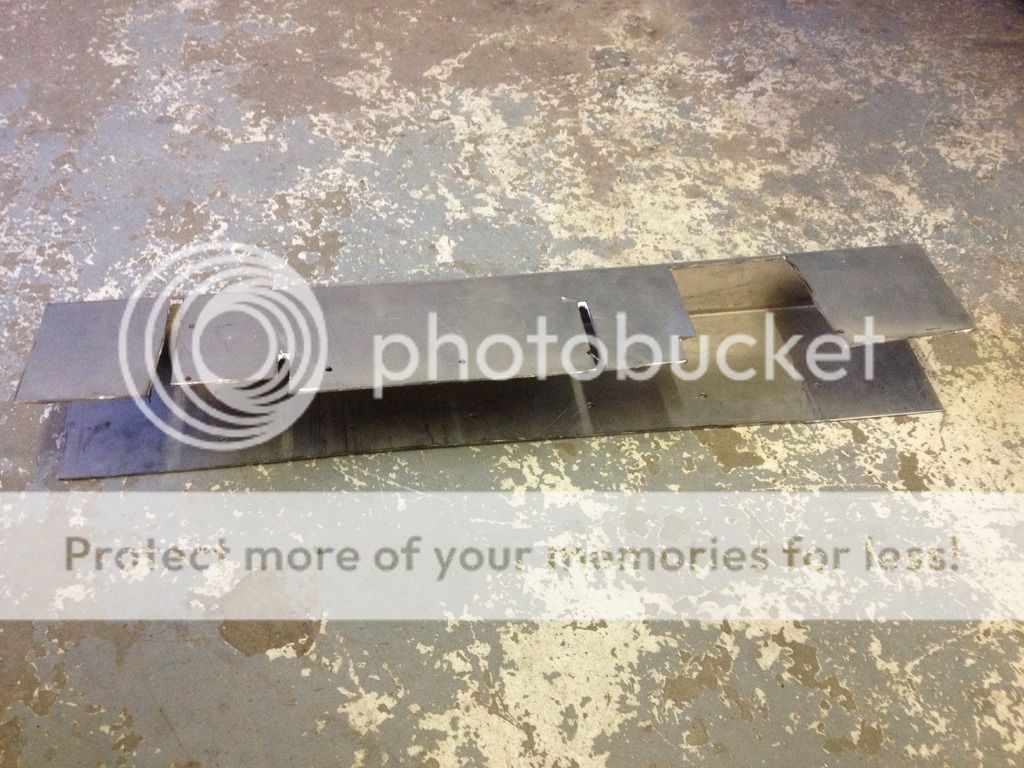
Which when dry fitted looked like this:
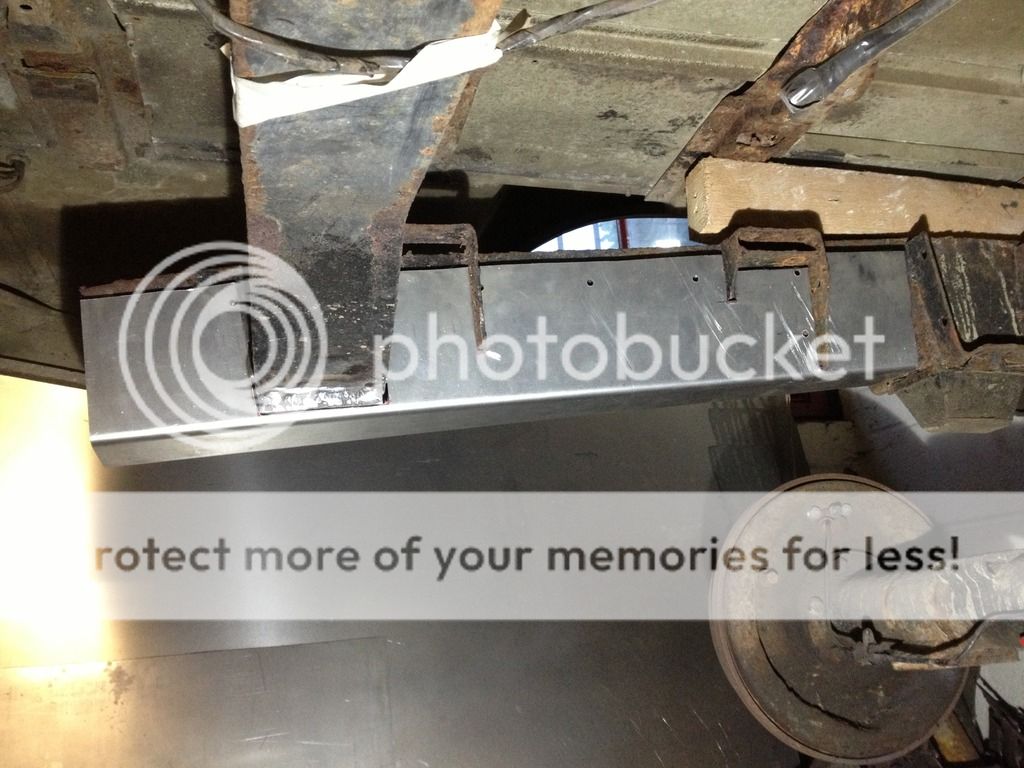
And after persuading it a little with some G clamps and a hammer I welded it in place to give this.

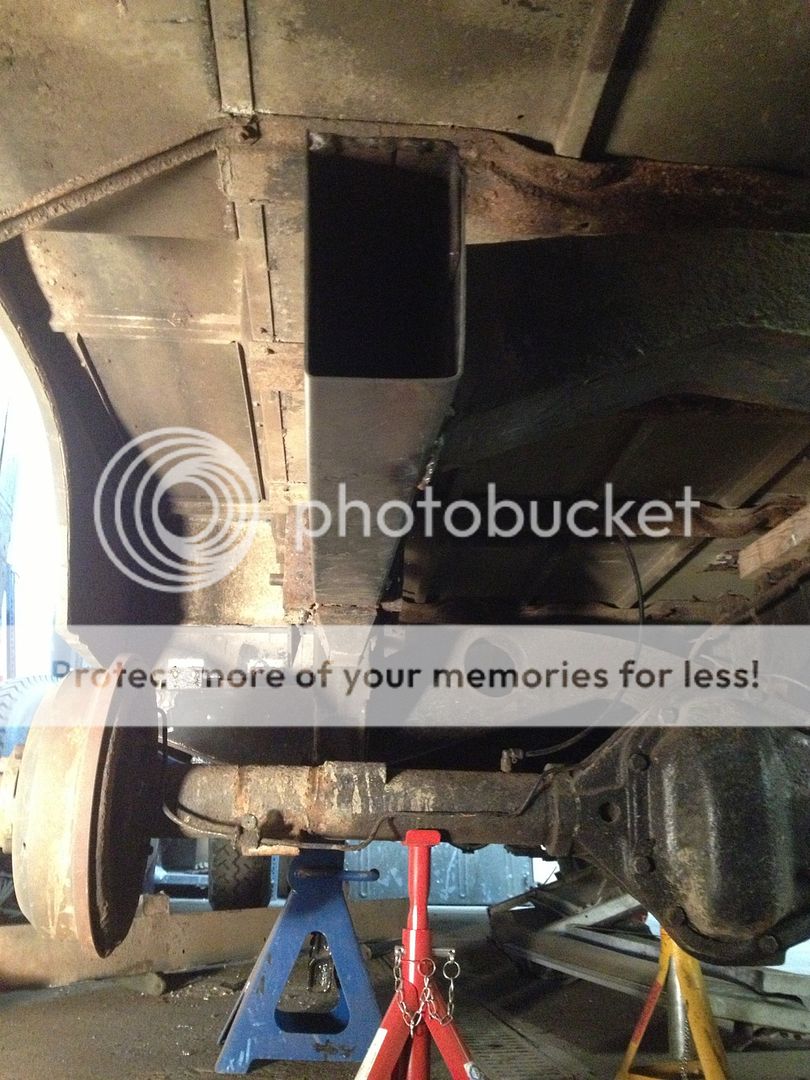
As this is replacing a piece that had a slight curve to I needed to try and get the depth of the chassis rail at the point where the rear spring hanger is to be welded as close as possible to the original dimensions. It's ended up being 5mm deeper at that point, hopefully that's close enough.
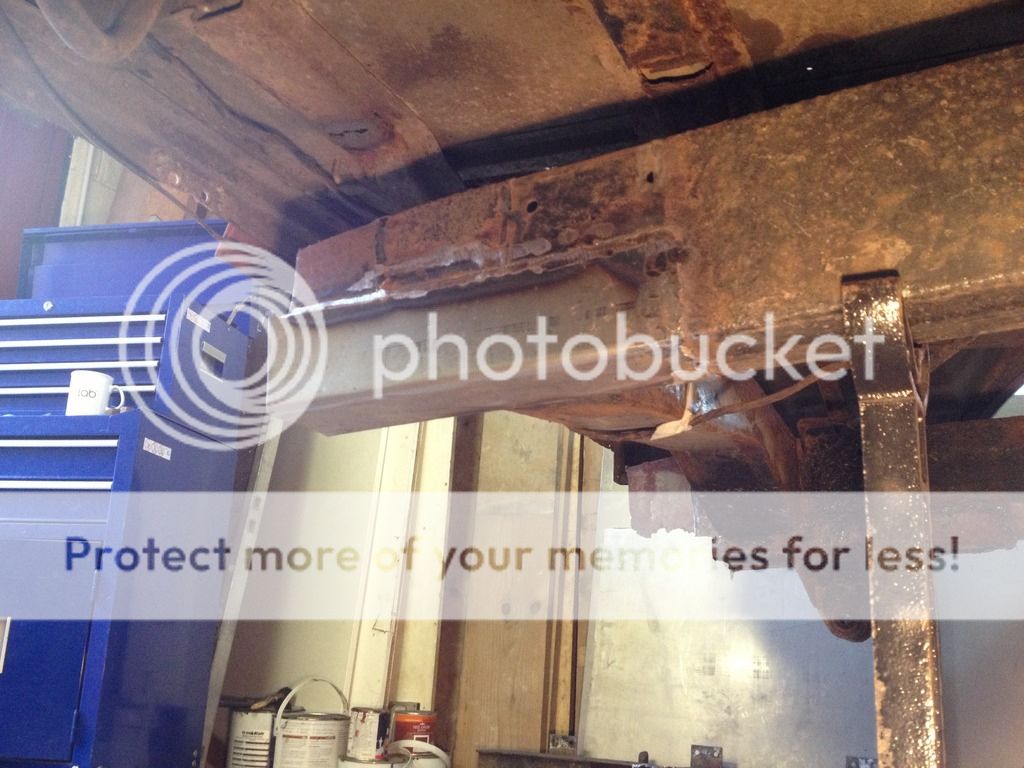
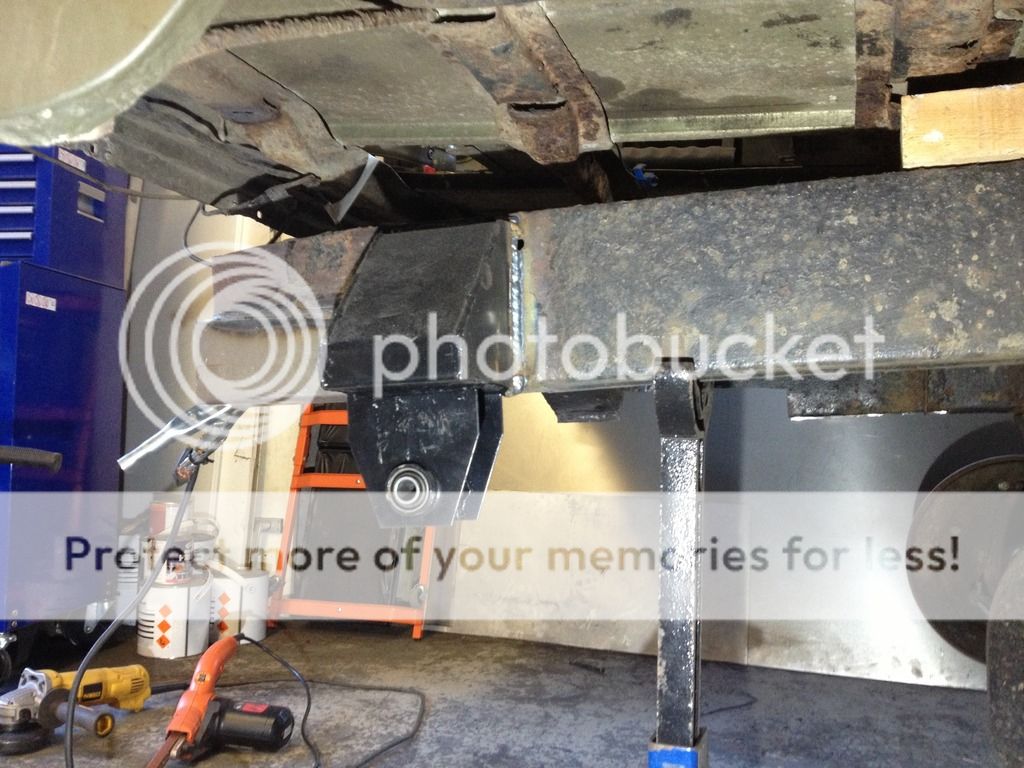
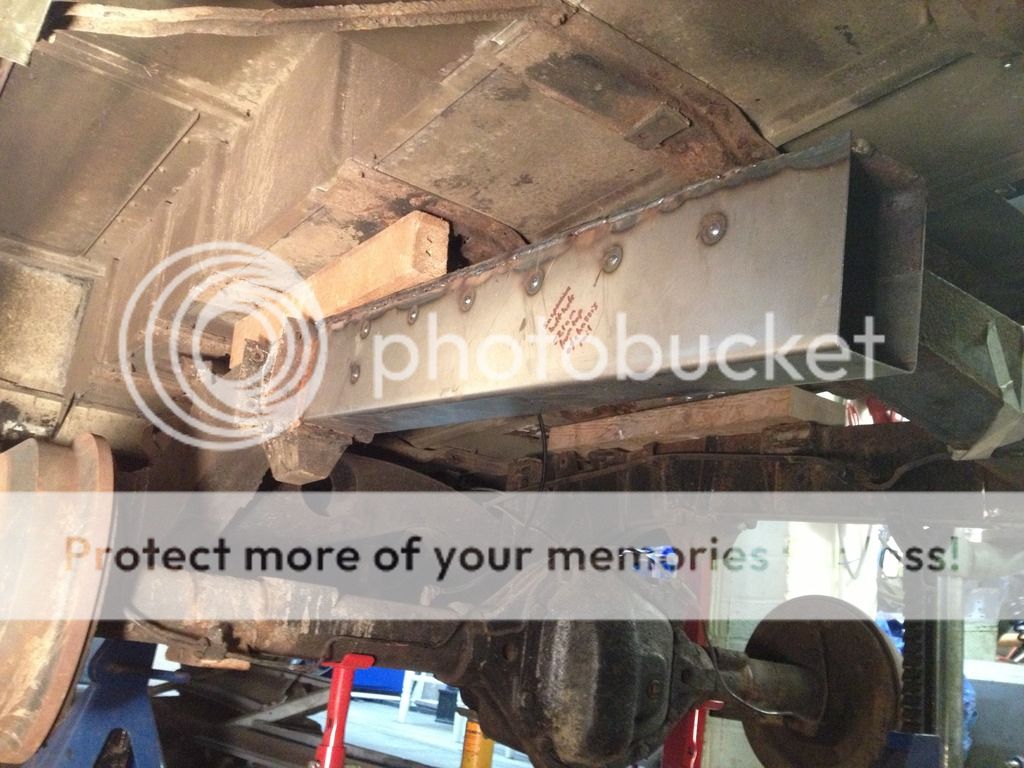
Got a few more hours work done this afternoon, got the last of the new suspension mounts welded on (not before drilling in a drain hole in it and in the side of the chassis rail behind where it sits) and ran a few welds on the inside of the newly formed box section.
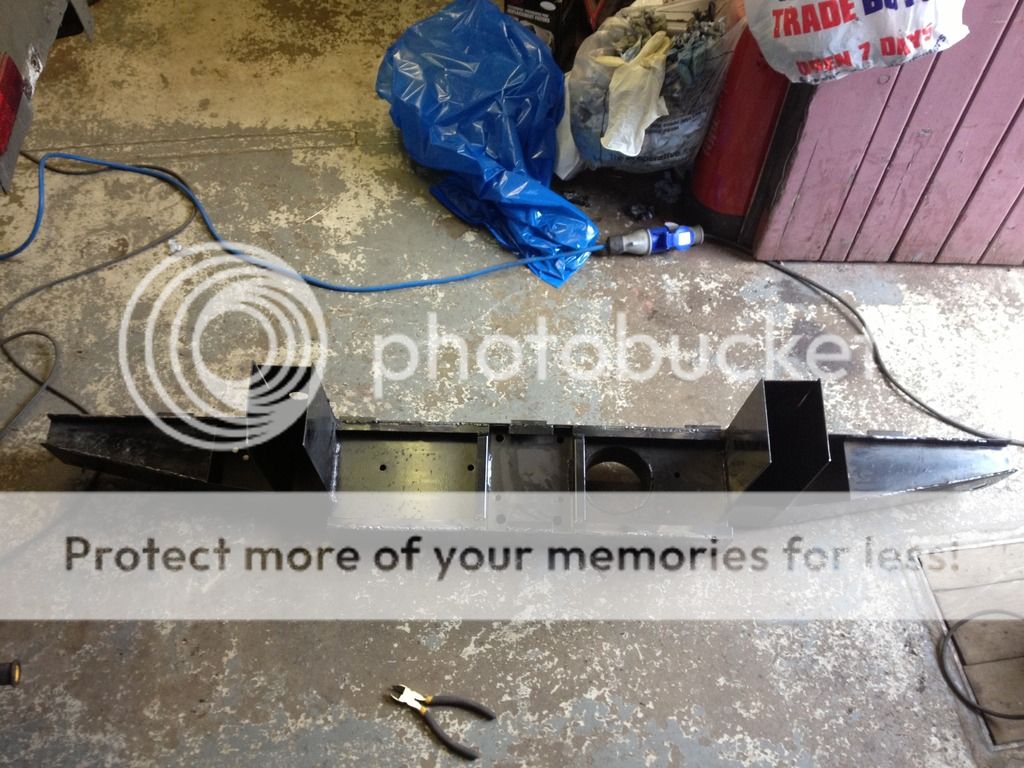
Next up was to quickly trial for the rear crossmember, should line up ok after some fettling, I'll need to do some work on the underside to neatly close up the chassis rail.


As the crossmember is a cheap britpart one the construction isn't amazing so I wire wheeled the seams and properly welded them rather than leaving it with 2 inch long stitch welds round the edge. I double checked that there's some sort of brace between the rear and forward skins so it doesn't collapse when I bolt the tow hitch onto it. I do need to machine up a spreader plate to go on the back as I'd like to be able to use it as a recovery point as well as a tow hitch if needed.
The last job of the day was to slap some hammerite on the chassis, I hate painting upside down as I always end up getting dripped on, at this point I was eyeing up my mate's Sprite up on the rotisserie spit with envy, no need to scrabble underneath that one!

Next up was to quickly trial for the rear crossmember, should line up ok after some fettling, I'll need to do some work on the underside to neatly close up the chassis rail.


As the crossmember is a cheap britpart one the construction isn't amazing so I wire wheeled the seams and properly welded them rather than leaving it with 2 inch long stitch welds round the edge. I double checked that there's some sort of brace between the rear and forward skins so it doesn't collapse when I bolt the tow hitch onto it. I do need to machine up a spreader plate to go on the back as I'd like to be able to use it as a recovery point as well as a tow hitch if needed.

The last job of the day was to slap some hammerite on the chassis, I hate painting upside down as I always end up getting dripped on, at this point I was eyeing up my mate's Sprite up on the rotisserie spit with envy, no need to scrabble underneath that one!


Cheers chap, just 2mm mild steel for the chassis work. Hopefully another 6-8 weeks and I'll have it back out on the road, I miss driving it. I think I'm set on the idea of buying a second hand gearbox, doing a box swop and then rebuilding mine at my leisure.
NiteMare
New Member
- Posts
- 836
- Location
- Birmingham
i cut a plate of 8 or 10mm steel to closely fit in the rear of the crossmember as a spreader plate for my towbar when i fitted my britpart one, it's withstood all sorts of abuse since

Well after my amazing dinner I set about cleaning and painting the rear axle, backplates and hubs. Part way through I went to get up to get something thinking I was clear of the bodywork...apparently I was not.
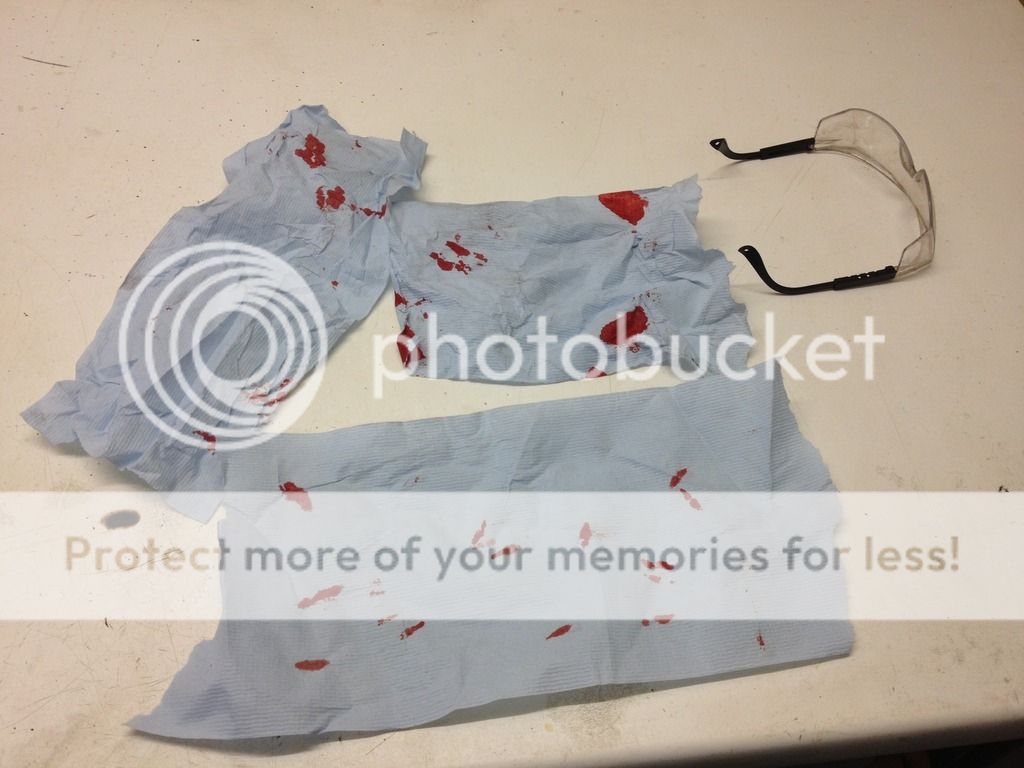
After that small interruption I got there in the end, looks much better for having a lick of paint on it.
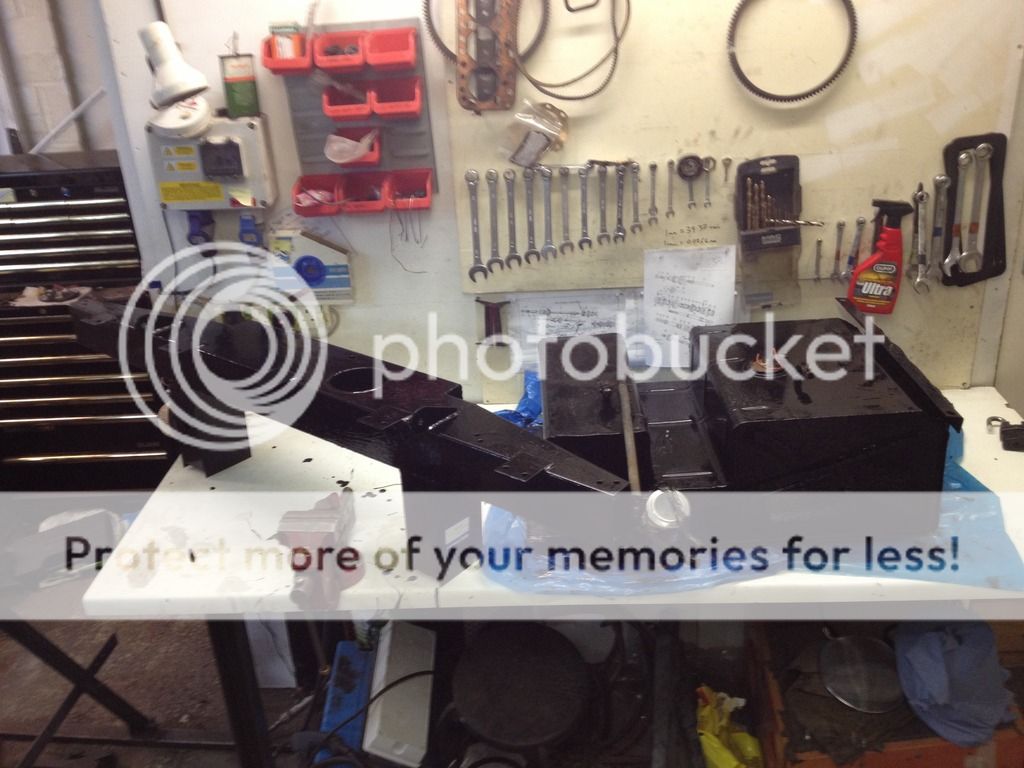
Next up was to throw a quick lick of paint on the petrol tank and the first of many on the new crossmember.


After that small interruption I got there in the end, looks much better for having a lick of paint on it.

Next up was to throw a quick lick of paint on the petrol tank and the first of many on the new crossmember.


Shrimp flavour last night, it's important to have a varied diet!

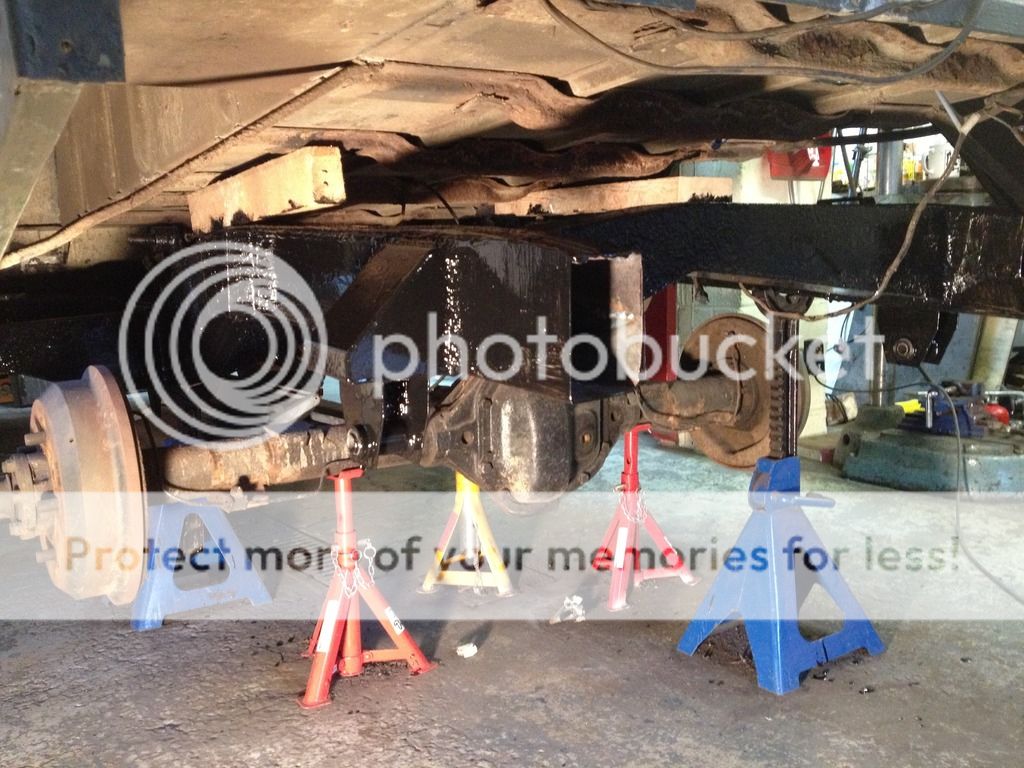
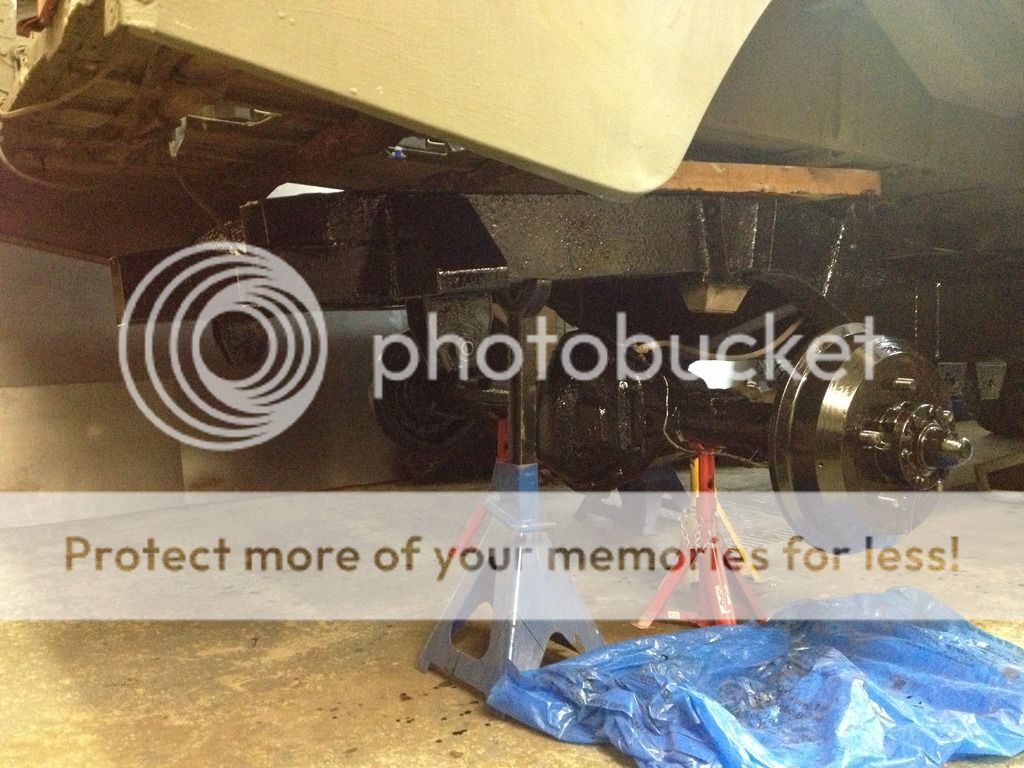
Last night was spent putting the rear suspension back together, it's been ages since I got to play with spanners, was quite refreshing! New shocks, bolts etc, the springs were reclaimed from a mate of mine who has had his 88 laid up in a barn for ages so they're a few years old but have only been used on the road for a couple of months, he's swopping to parabolics now that he's rebuilding it so I traded him for a bottle of whiskey. A fair trade I think!
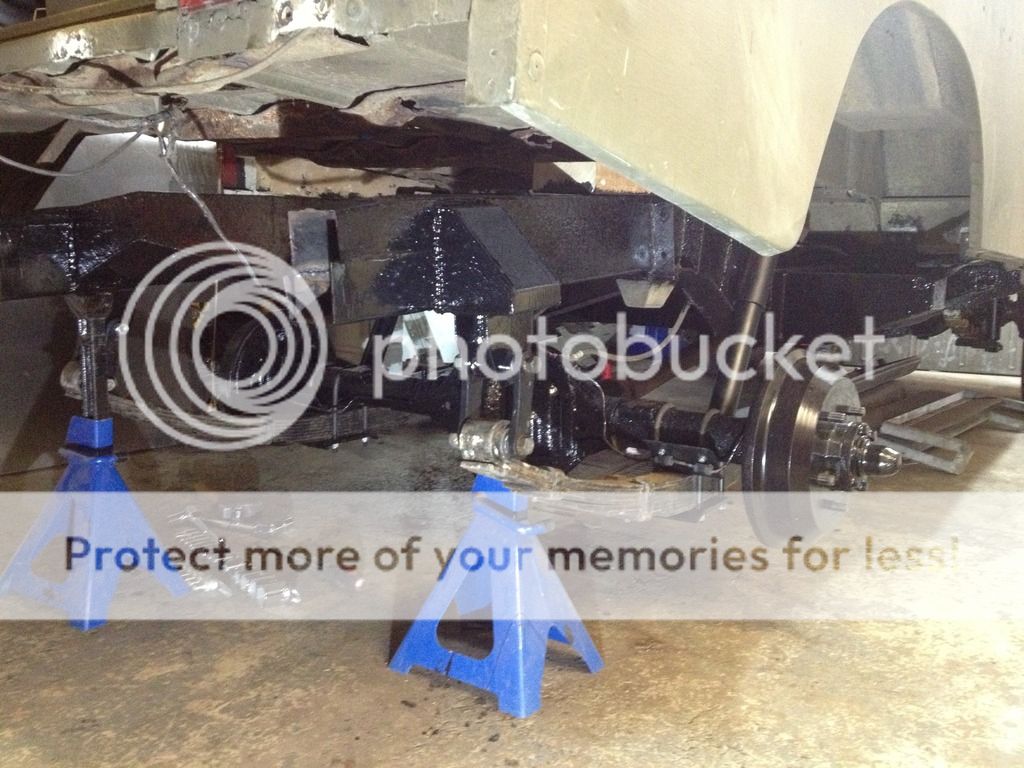
I left the vehicle with the weight of the rear end supported by the axle on axle stands so that the shocks aren't sat at full extension before I get the check straps on. I didn't get the check straps on last night as they'll get in the way of me setting the deflection of the spring to set the preload on the bushes. Next time.

Last night was spent putting the rear suspension back together, it's been ages since I got to play with spanners, was quite refreshing! New shocks, bolts etc, the springs were reclaimed from a mate of mine who has had his 88 laid up in a barn for ages so they're a few years old but have only been used on the road for a couple of months, he's swopping to parabolics now that he's rebuilding it so I traded him for a bottle of whiskey. A fair trade I think!


I left the vehicle with the weight of the rear end supported by the axle on axle stands so that the shocks aren't sat at full extension before I get the check straps on. I didn't get the check straps on last night as they'll get in the way of me setting the deflection of the spring to set the preload on the bushes. Next time.
Suspension grumbles, firstly my new rear shock absorders are weeping oil time to dig through my emails and find out who I bought them from. Secondly the britpart forwards rear suspension out riggers are naff, they come on a backing plate that sits flush with the side of the chassis rail and a plate that sits on the underside of the chassis rail so the only adjustment is sliding the whole lot along the length of the chassis. On these the spring hanger is mounted about a centrimetre too close in to the chassis rail which is causing my leaf springs to 'toe in' which in turn is causing the shackles at the rear to splay outwards slightly and putting pressure on the bush in the rear outriggers. A few calming breaths were needed after working out what was causing the problem. The width across the outside edges of the leaf springs at the rear is 97cm, at the axle its 96cm (fixed width due to the locating lugs) and at the front it's 93cm so it's definitely the front ones that are the issue. I'm not going to sort it yet, I want the vehicle on the road for the summer so I'm going to drive it and see how it settles and then take it off the road again in the future to cut the bottoms off of the suspension outrigger and transpost the whole lot sideways to put it where it needs to be.
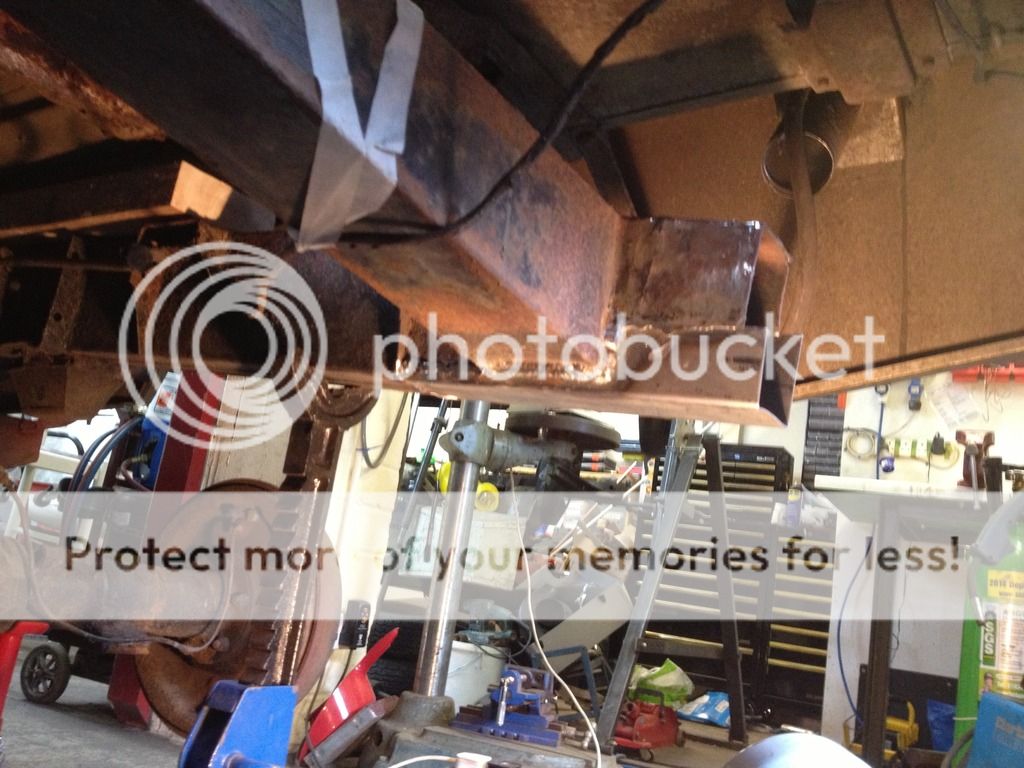
So, back to dealing with the rear crossmember, it also didn't fit. The whole thing was too wide by about 4 mm so I shaved 2mm off of each side to prevent it from fouling on the capping which runs down each corner. The welded on tabs that bolt the crossmember to the rear tub didn't line up, some were too far right, some were too far left so as the easiest of the two options I decided to file out the holes in my rear tub so I could get the bolts fitted. At this point it still didn't fit, the bottom edge wanted to fold inself under the vehicle, the back face didn't want to sit vertical so off it came again and I cut the prewelded parts of the chassis legs that are attached to it so that each of the three 'flaps' on each side were free to move along their full length, this solved the problem and with the help of a jack borrowed from my neighbour and some wood it was 'persuaded' into place.
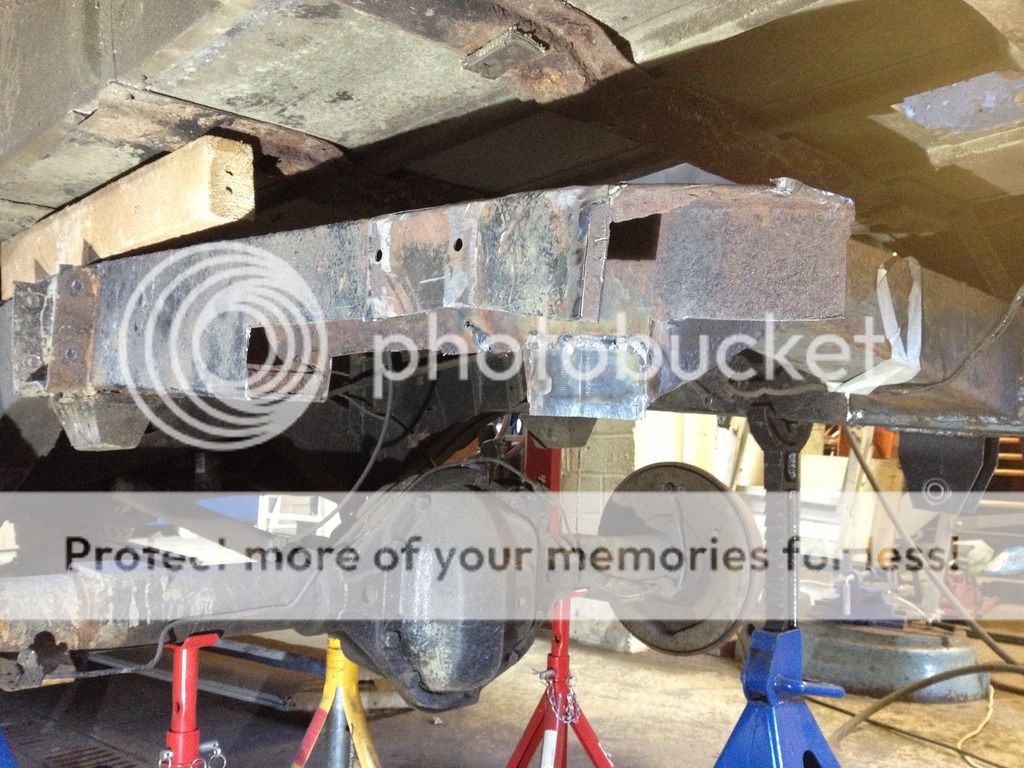
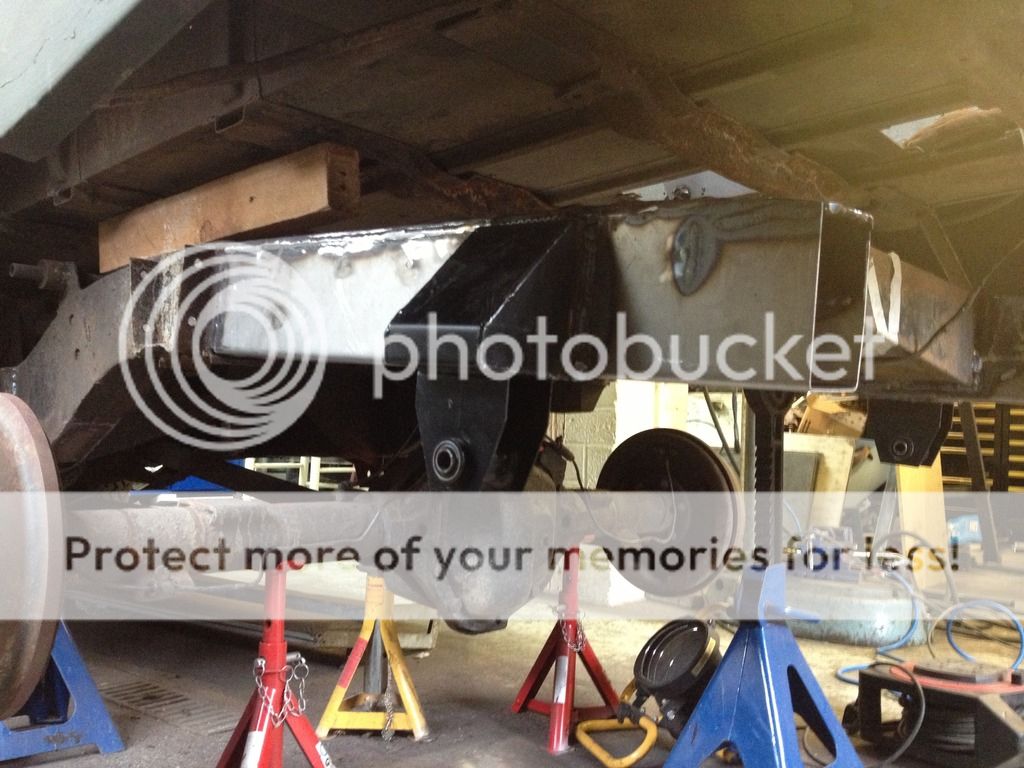
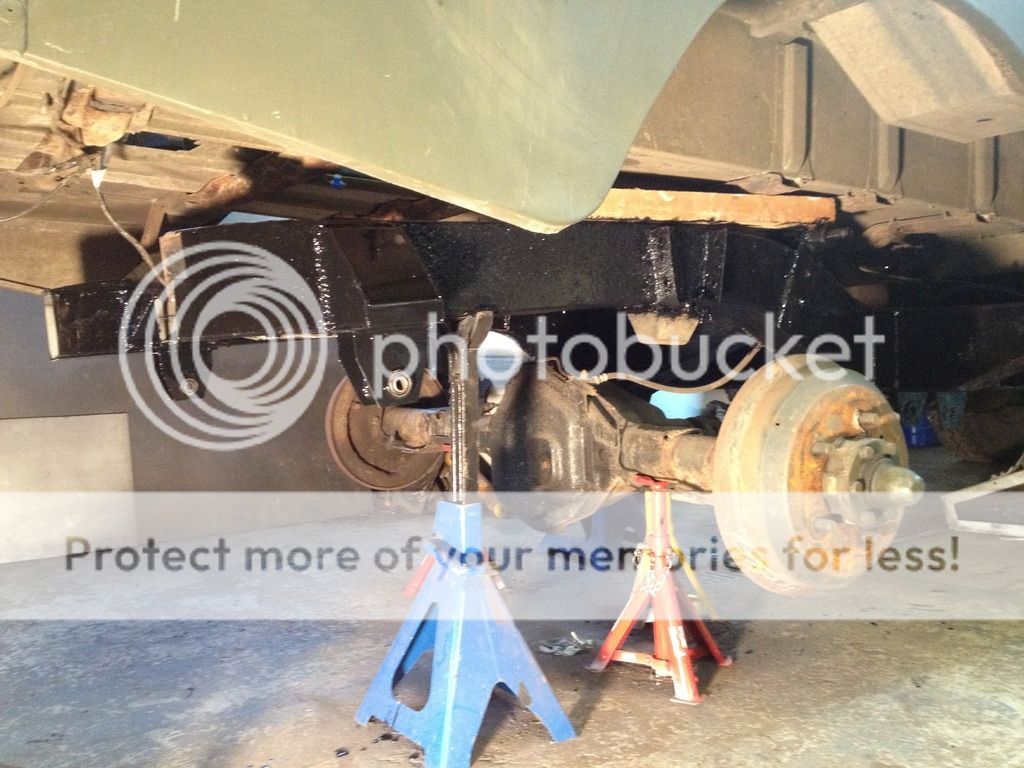
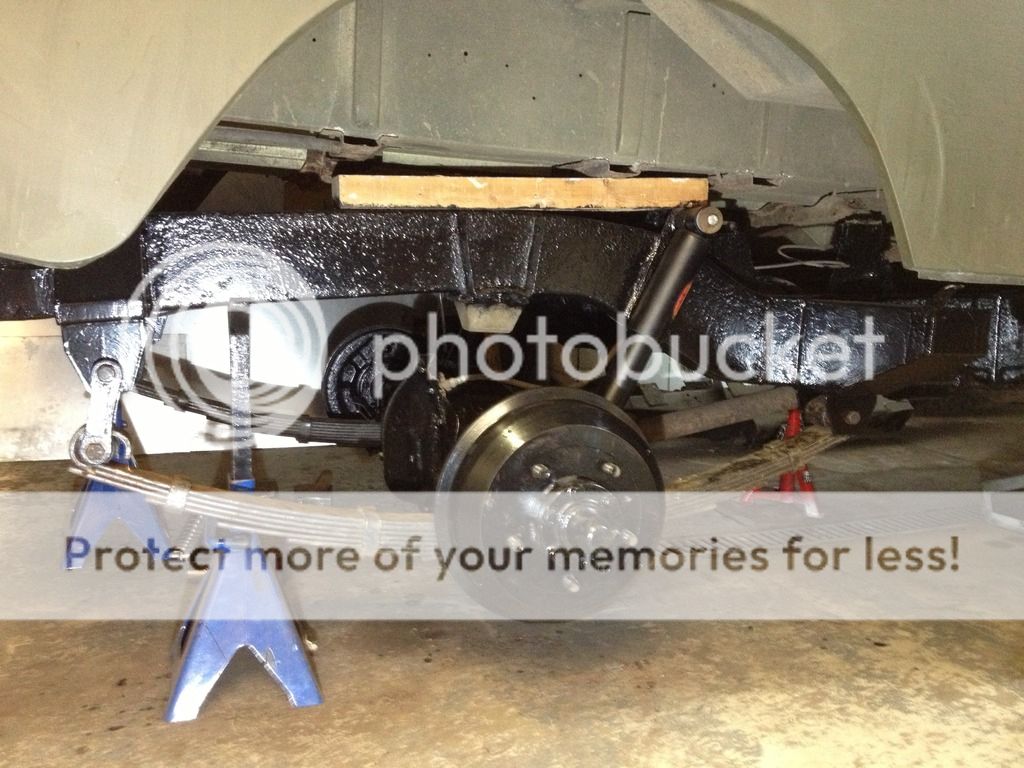
After tacking it in place the fuel tank was dropped again to allow better access and after much welding (and fabricating my own bottoms to the chassis rails because the ones supplied with the crossmember were nearly a centimetre too wide across the width of the chassis rail) it's in.
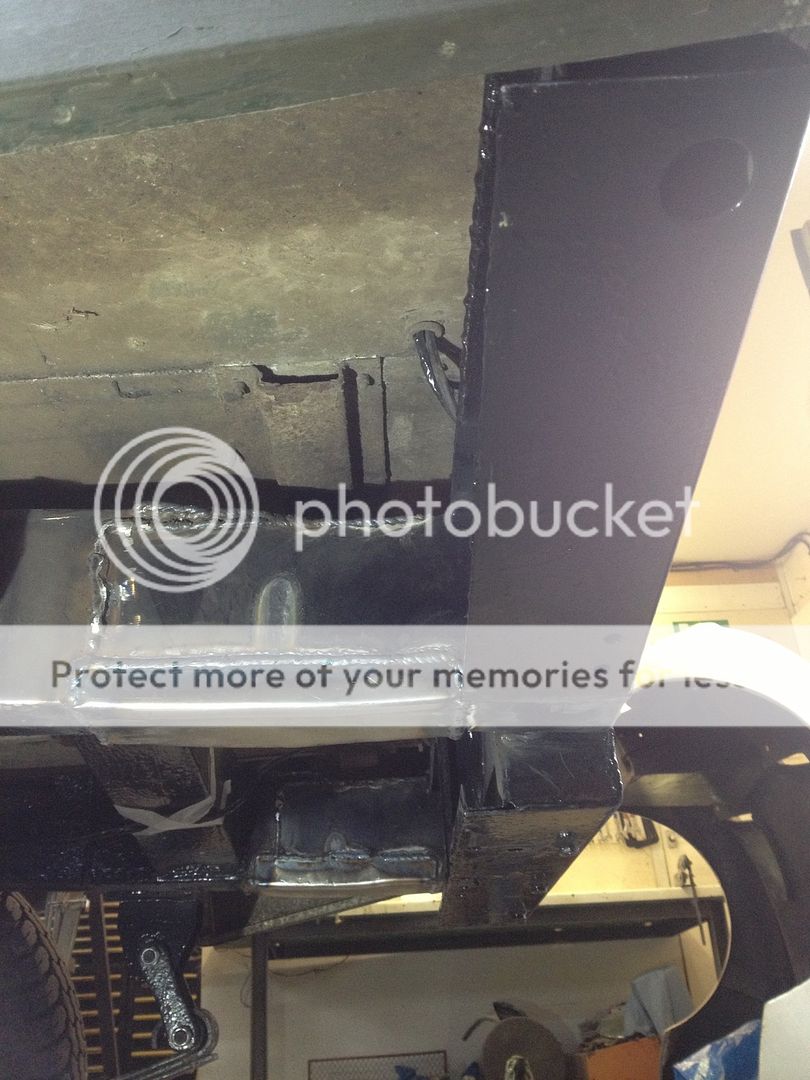
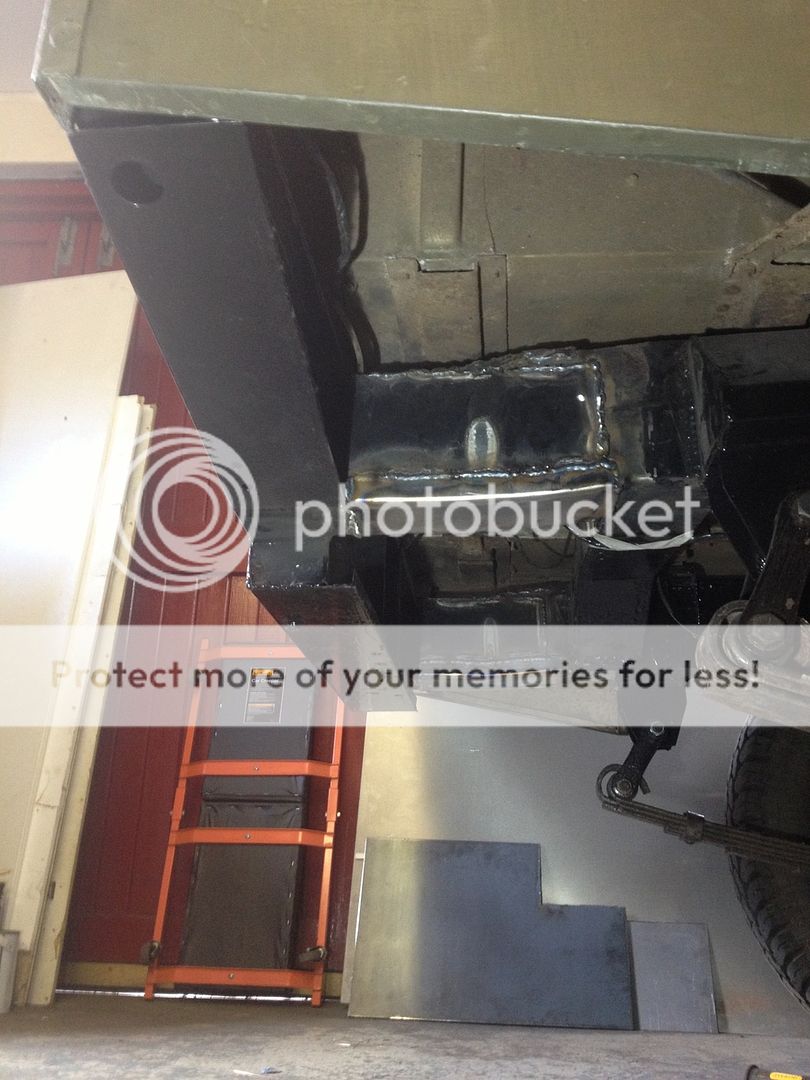
I guess this means it's strong enough.
In that last picture you can just about see the twist on the off side leaf spring and the splay of the shackles, I don't have any better pictures of it than this unfortunately.
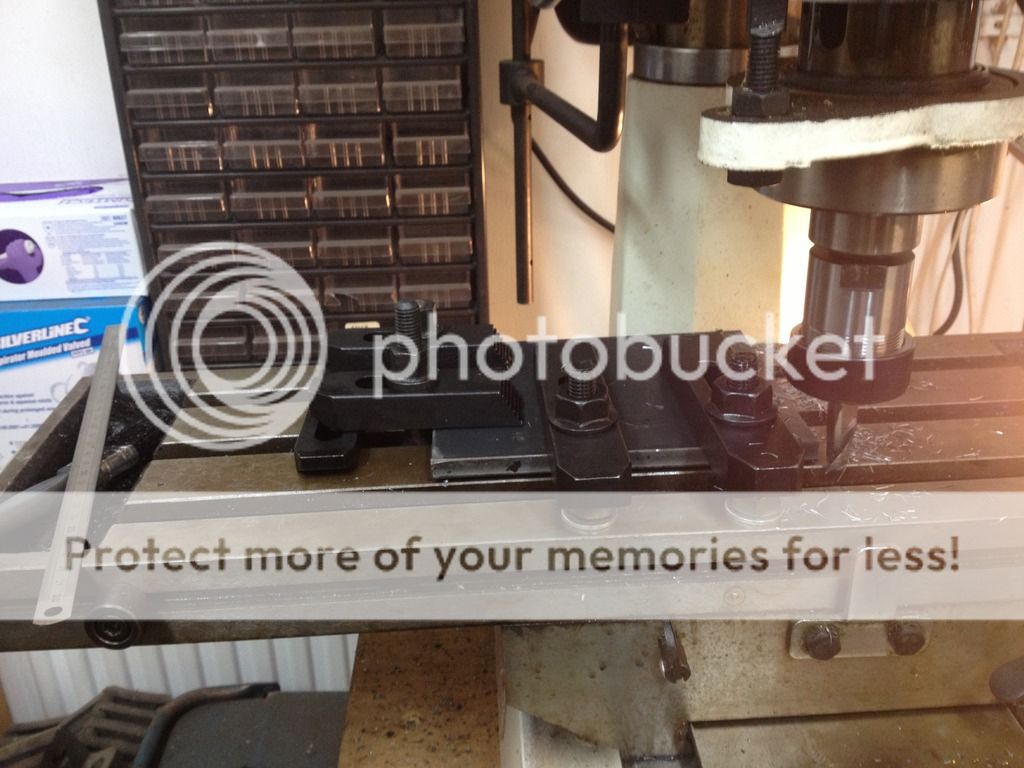
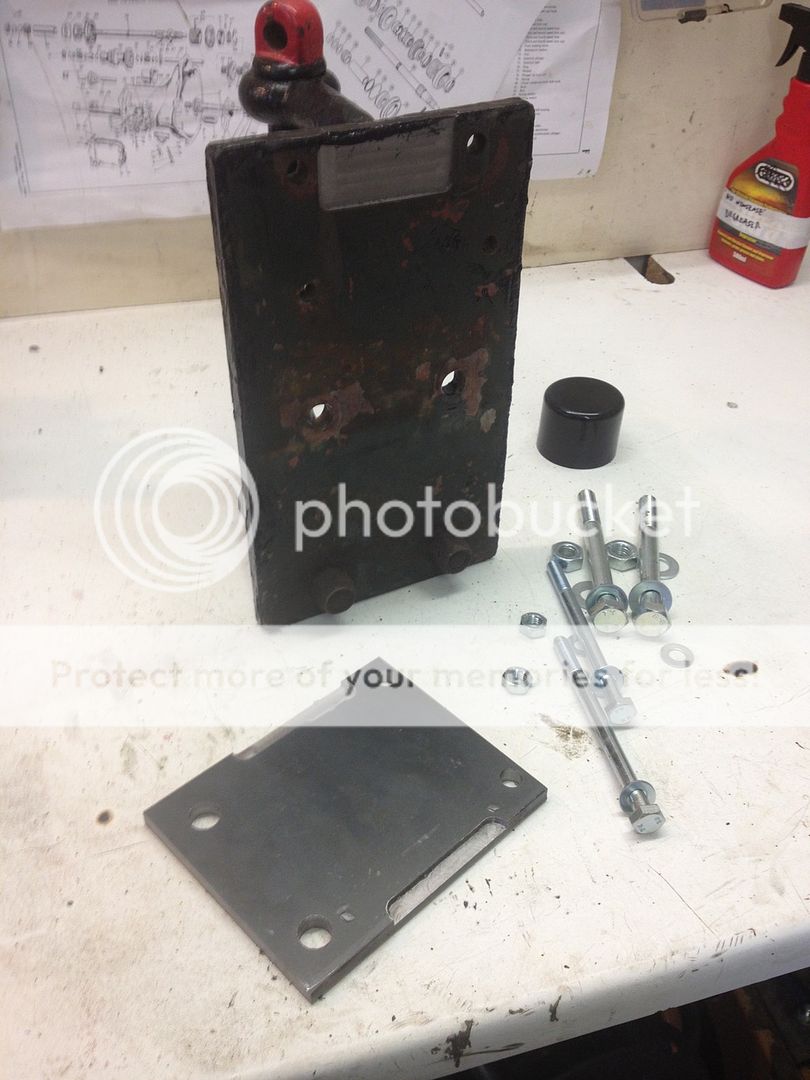
Last week the postman brought me a 600 by 400 mm sheet of 10 mm thick steel which I used my mates gas axe to roughly cut to size for the spreader plate for the tow hitch and then dressed it on my mill. The recesses on the sides are to clear the welds on the rear of the rear crossmember. The holes are 12 mm at the top for the M10 bolts and 16 mm at the bottom for the M14 bolts. After trial fitting and trimming the bolts to length it was given a spray of chassis black before bolting into place. The tow hitch has also seen some time on the mill to allow it to clear the welded on tab that bolts the rear crossmember to the rear tub. I still need to sort the electrical connector but am toying with how to attach it.

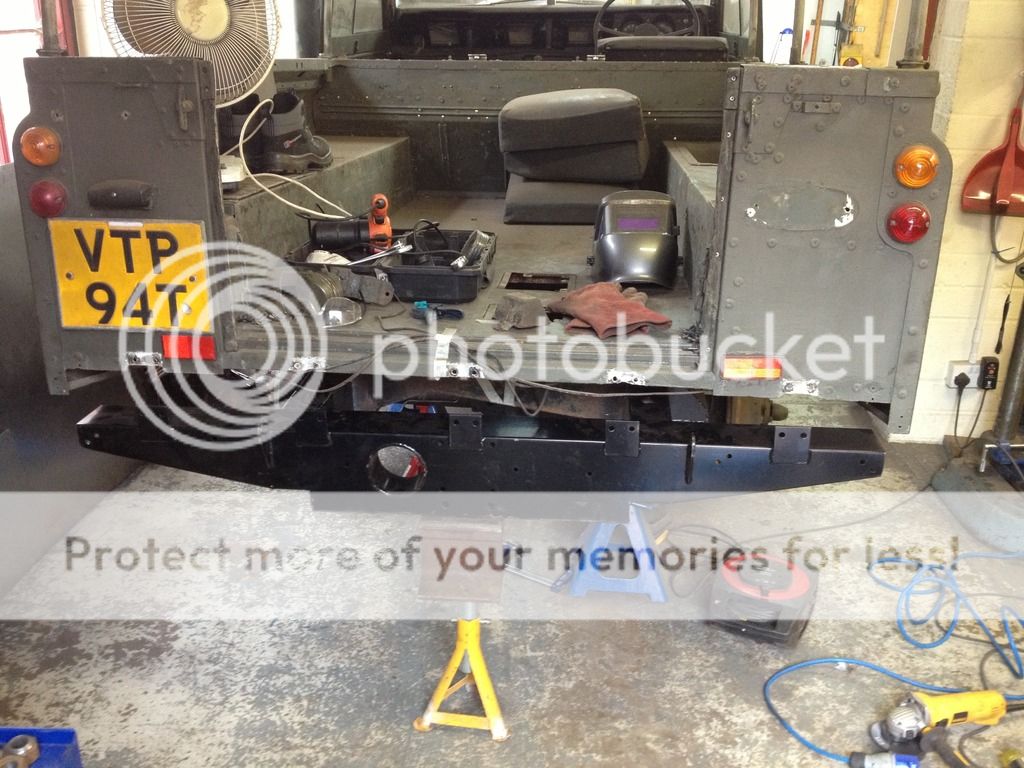
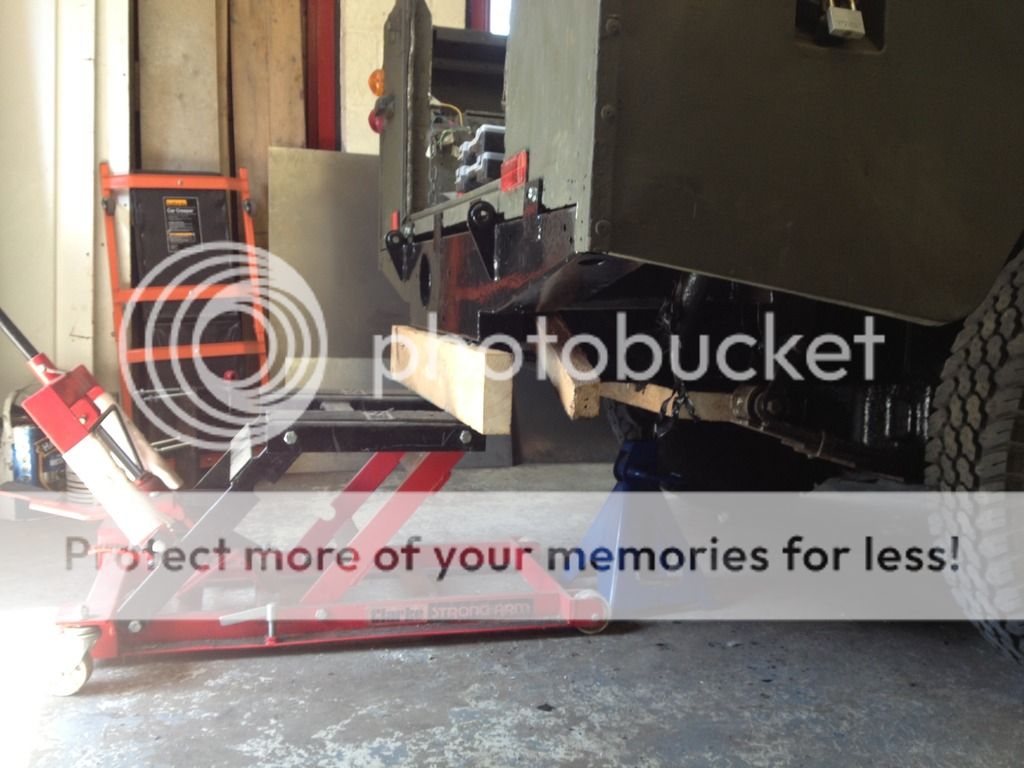
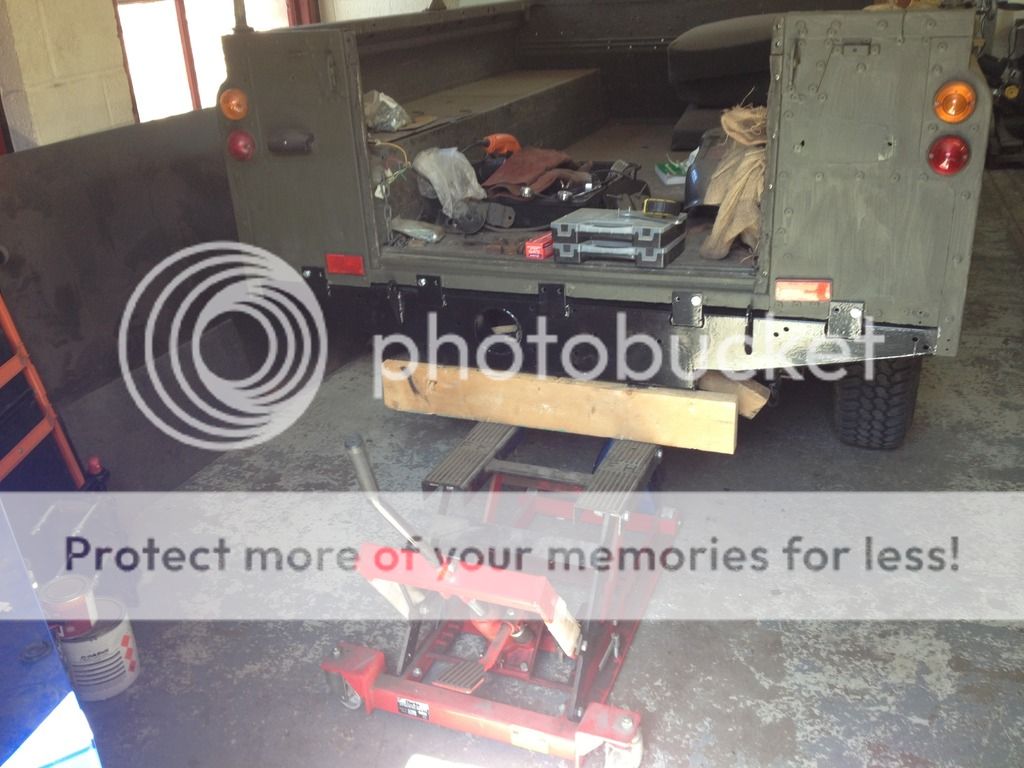
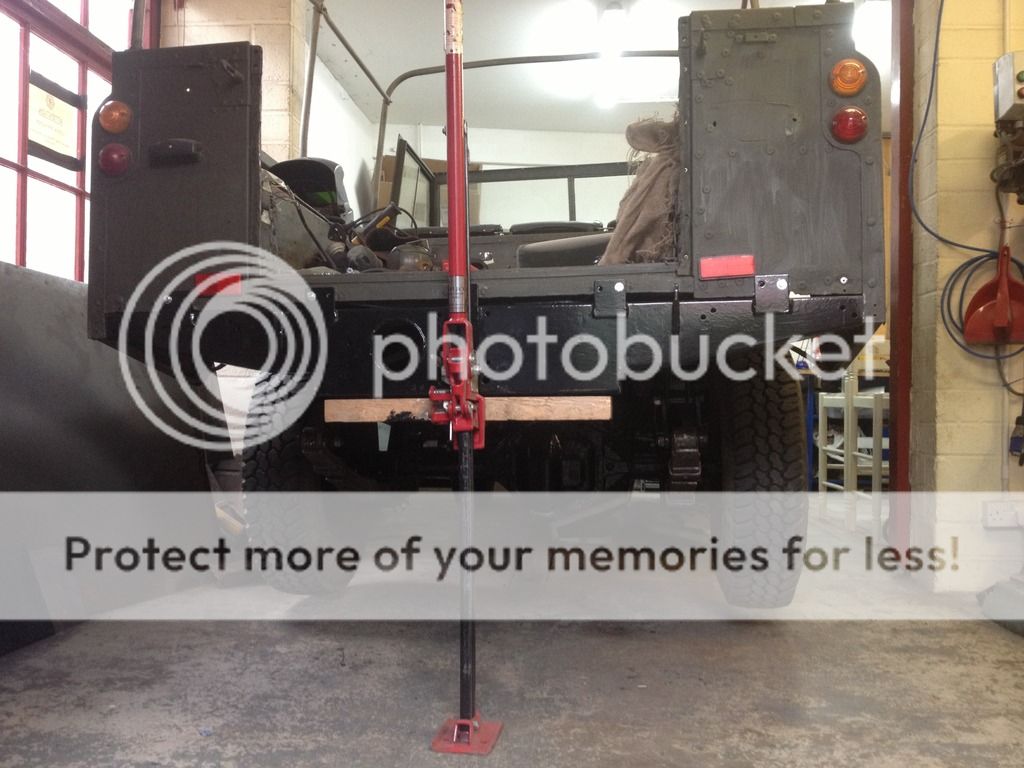
The last few jobs of the day were to refit the fuel tank, which was made so much easier with the use of my neighbour's jack rather than having to balance it on a trolley jack like I did last time. The rear tub was bolted to the rear crossmember and to the outriggers just behind the seat box. I did then try fitting the tailgate but guess what.....it doesn't fit (have you spotted the pattern yet?). Where the hinge brackets are at the minute holds the tailgate a half inch too far over to the left so I'm going to have to cut them off, dress them and weld them back on properly. Are all aftemarket rear crossmsmbers this bad or have I managed to end up with the one that they let the work experience kid put together?!
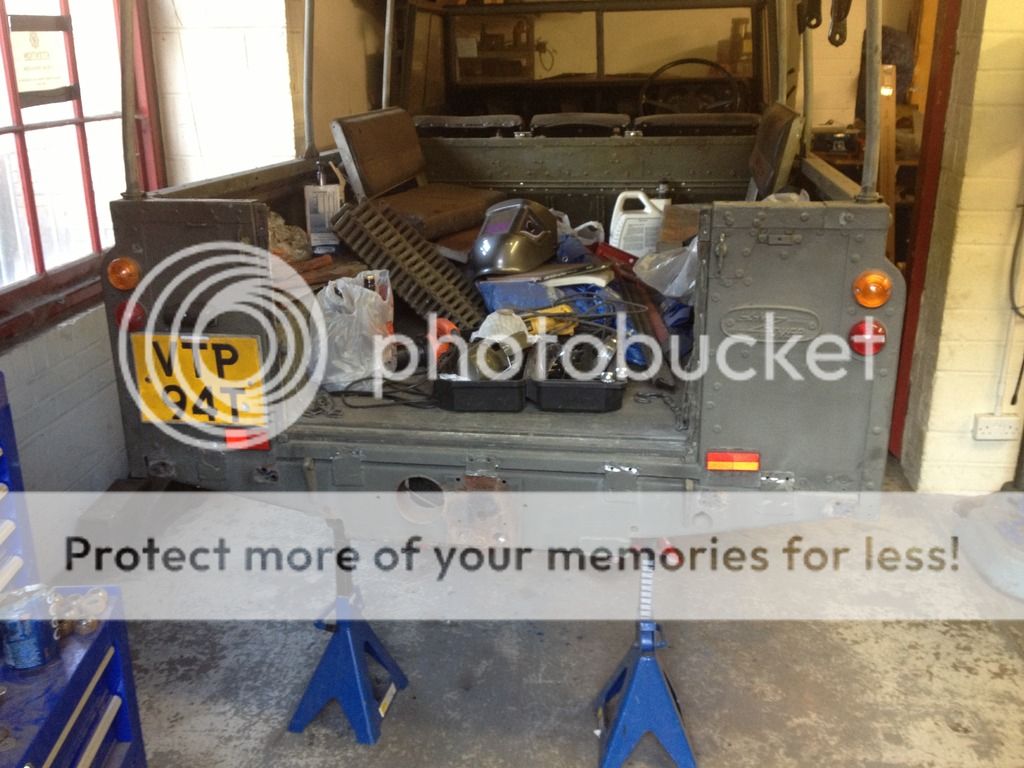
Anyway, here's how she stands currently.

time to dig through my emails and find out who I bought them from. Secondly the britpart forwards rear suspension out riggers are naff, they come on a backing plate that sits flush with the side of the chassis rail and a plate that sits on the underside of the chassis rail so the only adjustment is sliding the whole lot along the length of the chassis. On these the spring hanger is mounted about a centrimetre too close in to the chassis rail which is causing my leaf springs to 'toe in' which in turn is causing the shackles at the rear to splay outwards slightly and putting pressure on the bush in the rear outriggers. A few calming breaths were needed after working out what was causing the problem. The width across the outside edges of the leaf springs at the rear is 97cm, at the axle its 96cm (fixed width due to the locating lugs) and at the front it's 93cm so it's definitely the front ones that are the issue. I'm not going to sort it yet, I want the vehicle on the road for the summer so I'm going to drive it and see how it settles and then take it off the road again in the future to cut the bottoms off of the suspension outrigger and transpost the whole lot sideways to put it where it needs to be.So, back to dealing with the rear crossmember, it also didn't fit. The whole thing was too wide by about 4 mm so I shaved 2mm off of each side to prevent it from fouling on the capping which runs down each corner. The welded on tabs that bolt the crossmember to the rear tub didn't line up, some were too far right, some were too far left so as the easiest of the two options I decided to file out the holes in my rear tub so I could get the bolts fitted. At this point it still didn't fit, the bottom edge wanted to fold inself under the vehicle, the back face didn't want to sit vertical so off it came again and I cut the prewelded parts of the chassis legs that are attached to it so that each of the three 'flaps' on each side were free to move along their full length, this solved the problem and with the help of a jack borrowed from my neighbour and some wood it was 'persuaded' into place.


After tacking it in place the fuel tank was dropped again to allow better access and after much welding (and fabricating my own bottoms to the chassis rails because the ones supplied with the crossmember were nearly a centimetre too wide across the width of the chassis rail) it's in.


I guess this means it's strong enough.

In that last picture you can just about see the twist on the off side leaf spring and the splay of the shackles, I don't have any better pictures of it than this unfortunately.
Last week the postman brought me a 600 by 400 mm sheet of 10 mm thick steel which I used my mates gas axe to roughly cut to size for the spreader plate for the tow hitch and then dressed it on my mill. The recesses on the sides are to clear the welds on the rear of the rear crossmember. The holes are 12 mm at the top for the M10 bolts and 16 mm at the bottom for the M14 bolts. After trial fitting and trimming the bolts to length it was given a spray of chassis black before bolting into place. The tow hitch has also seen some time on the mill to allow it to clear the welded on tab that bolts the rear crossmember to the rear tub. I still need to sort the electrical connector but am toying with how to attach it.


The last few jobs of the day were to refit the fuel tank, which was made so much easier with the use of my neighbour's jack rather than having to balance it on a trolley jack like I did last time. The rear tub was bolted to the rear crossmember and to the outriggers just behind the seat box. I did then try fitting the tailgate but guess what.....it doesn't fit (have you spotted the pattern yet?). Where the hinge brackets are at the minute holds the tailgate a half inch too far over to the left so I'm going to have to cut them off, dress them and weld them back on properly. Are all aftemarket rear crossmsmbers this bad or have I managed to end up with the one that they let the work experience kid put together?!
Anyway, here's how she stands currently.

Similar threads
- Replies
- 9
- Views
- 674
- Replies
- 11
- Views
- 655