Straight 6 rebuild

This site contains affiliate links for which LandyZone may be compensated if you make a purchase.
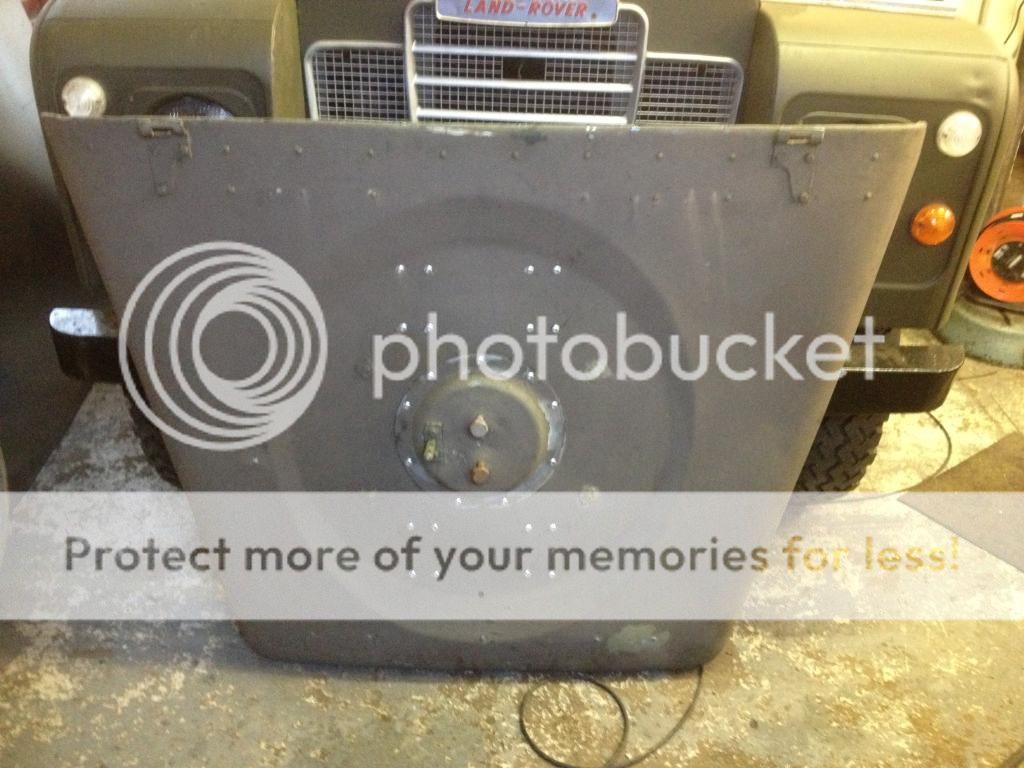
Spent most of yesterday and a few hours today at the workshop, here's a photo of the sill in it's finished state with the overlapping plates and the lip back in place.


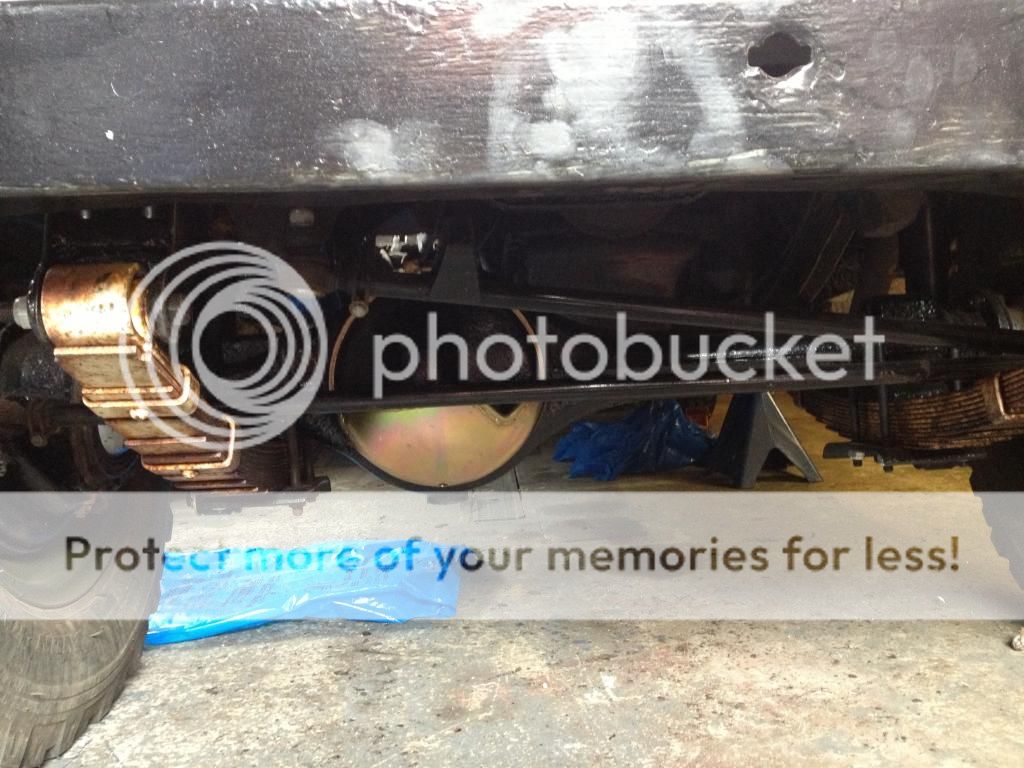
Got the door seals back onto the bulkhead on both sides and the diff guard fitted, had to remove the track rod to get it on and was expecting the ball joint to be a pain in the backside as they normally are but it came apart and went back together beautifully, job jobbed in 10 minutes.


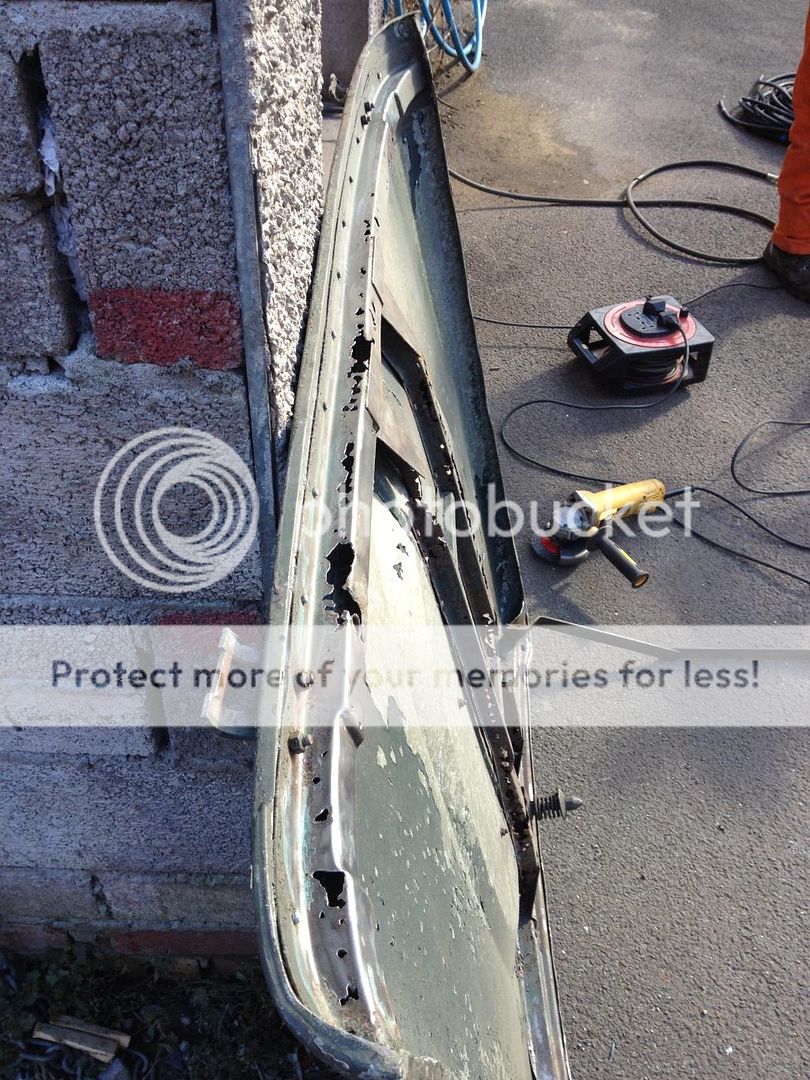
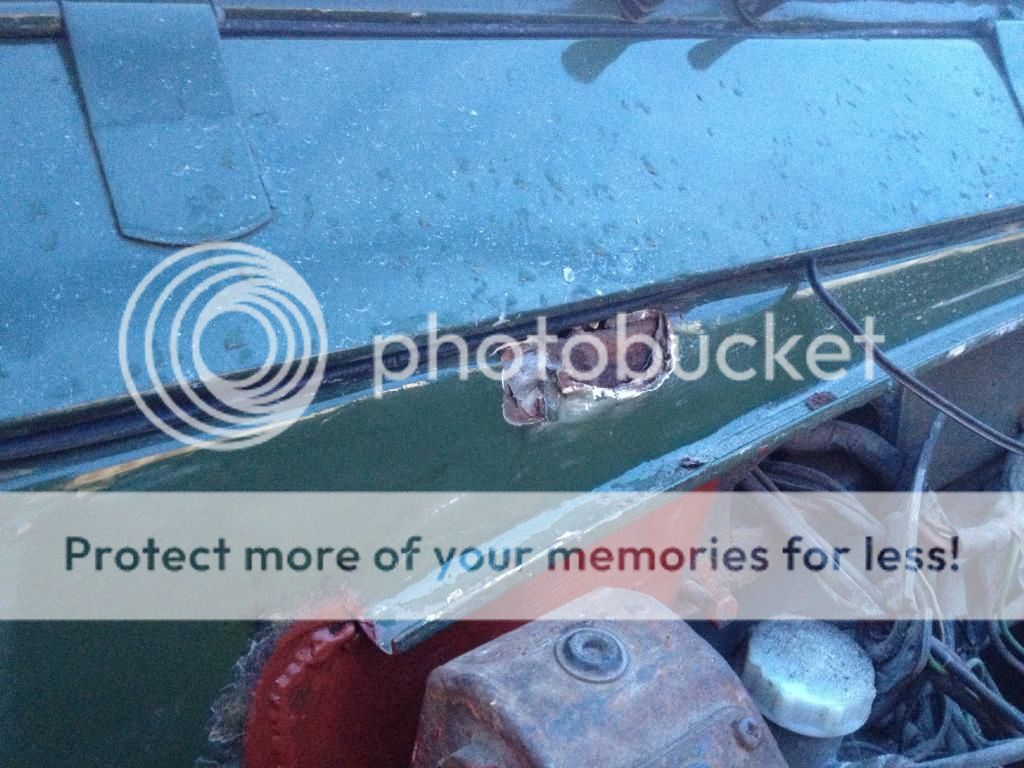
The main job for the weekend was sorting out this:


Which after a wire wheel looked like this


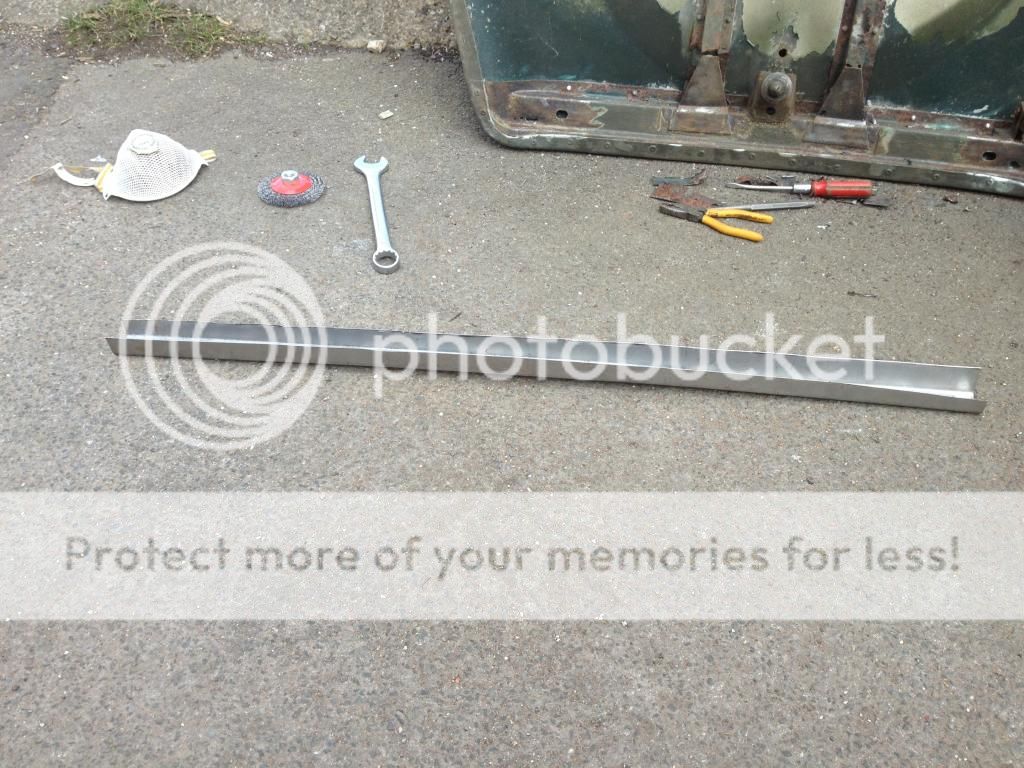
A plan was hatched and I went about bending a repair section to just plate over the top of what's there.


I stripped out the ribs and starting working on the other end which also got a plate over what's there.


Didn't have a huge selection of box section so I ended up using something which is a bit over engineered but at least I won't have to worry about it rotting out any time soon!


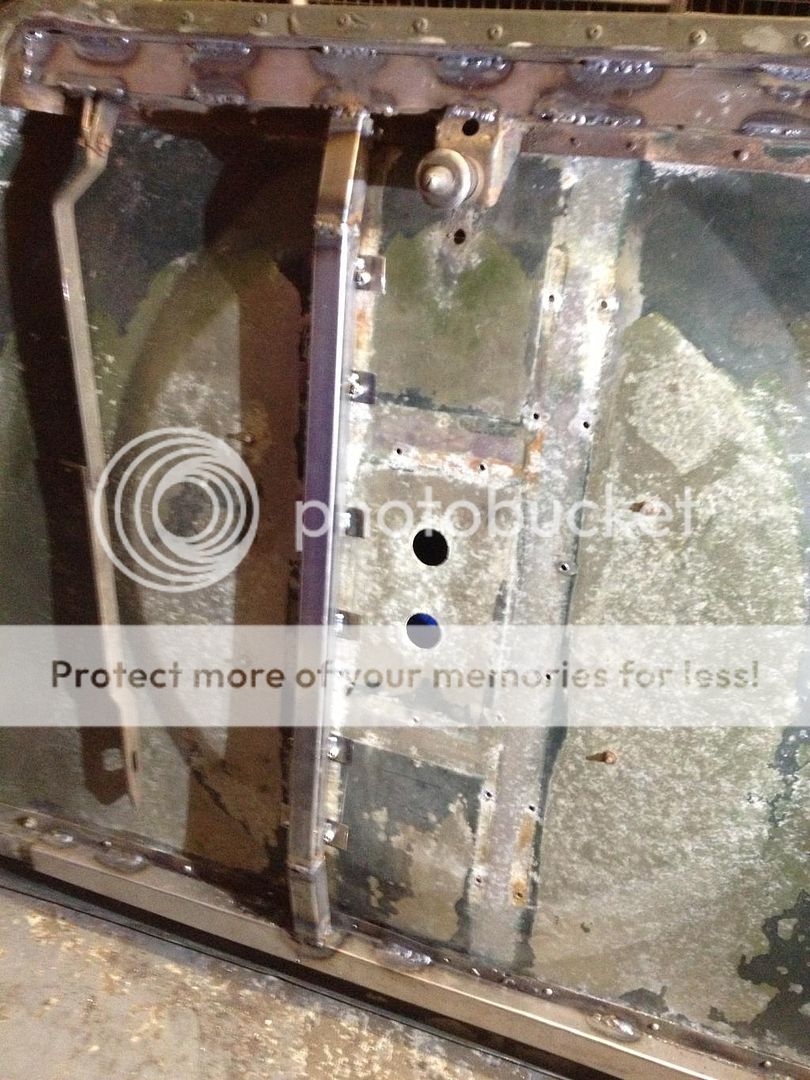
The solid aluminium rivets have been replaced with 6.4mm pop rivets to make sure everything stays put.


And after a lick of paint looks like this.


I also ended up helping a mate out on his landy and welding a couple of plates on his bulkhead for the MOT, was all going well untill the bonnet hinge failed and ripped out as we had the bonnet lent up against the wind screen so I could get access behind the brake pedal box. It turned out it was just held in with shed loads of filler....

 
I replaced my driver's side door top three years ago and have never taken it off, when I went to separate the two halves the other week one of the captive bolts just started spinning as I was turning the nut so out came the grinder to cut the nuts off so I could separate the two halves. The rest of the door top is structurally sound but the weld holding the stud to the frame wasn't up to the job so last night I decided to sort this out and do a bit of recycling at the same time...

Old studs cut out:


New studs fabricated by recycling my old bulkhead to chassis bolts, I cut them down to size and welded them to a large, trimmed penny washer that just fits inside the frame of the door top to act like a captive bolt so if the rest of the metal rots so I can still get the bolt undone.


That was then welded onto a bit of 2mm steel with a 14mm hole through it for the bolt.


And both of them welded in place.


The bolts splay by 3mm acoss their length, the bottoms of the bolts are spot on but the tops are 3mm too narrow in total so I gave both of the bolts a tickle with a power file to lose that little bit of metal and allow the bolts to side into the door bottom.


So there we go, saved myself the cost of a new door top and the faff of painting it and glazing it. An evening well spent.
 
Last edited:
They should be somewhere just off of vertical, whether it's enough I'll only know when I tey to test fit them. If I can't persuade them to fit in the gap then l'll buy new ones but wanted to see if I could save these ones first!
 
The wife was away last night so I spent the evening recovering the dash top, it's had lots of splits in it since I bought the vehicle and were just covered with duct tape. Started by stripping the old vinyl off.


Filled the perished sections with expanding foam and cut them flush when it'd cured.


Got myself a 1 metre X 1.4 metre bit of leather effect vinyl from amazon for about 6 quid, cut what I needed and stuck it down onto the dash with spray adhesive. Has come out reasonably well, certainly better than what was there before.


The driver's side seat back was looking a bit tatty so with the left over bit of vinyl I've just re-covered it, have ordered a few more trim clips to keep everything taught as this doesn't have the reinforced edges that the proper ones have.


Grabbed a couple of hours this weekend to spend tinkering, was spent bolting and screwing things back together. Repaired and painted bonnet is on, bulkhead vent seals have been stuck down and I've bolted the driver's door bottom back on.


Also, got the dash board back together with the re-covered dash top and bolted the re-covered driver's side seat back back in, they sit quite well with the rest of the vinyl and don't look particularly out of place. The heater control cable had seized up I guess due to all the metal dust in the air over the last couple of months so that was replaced. I have sealed up as many of the cracks and joins in the blower ducting that I can get to, including wrapping self amalgamating tape around where the concertinered tubes connect the dash board duct to the windscreen demisters, the flow rate is massively better than it was previously, am dead impressed. I have kept my home made baffle in the passenger side tube to get more air over to the driver's side demister, it's a very technical bit of kit....a plastic milk bottle top with a 1/2 inch hole drilled through it stuffed into the concertinered tubing, simple but effective! :D


I also turned the engine over to blow away the cobwebs, forgot about the manual choke otherwise it would have started on the first turn of the key! Looks like Photobucket doesn't like the video so have a faceache link instead.

https://www.facebook.com/video.php?v=10152888354968439&l=449892595650222302
 
Before anyone comments on it, I've never had a steering column shroud, the fusebox has always hung loose since I've had the vehicle. I think someone tried to steal it when the PO had it as there was loads of shards of broken glass under the seats, in the dash, in the window channels etc when I bought it. In fact during the last few months I've still been finding bits of glass, the most recent was inside the heater ducting that's in the lower dash.
 
I had booked Tuesday - Thursday off of work and was supposed to go to Dublin for the wife's birthday, her birthday is also St. Paddy's day so she's wanted to go to the Guinness brewery for it for years. This year was the year so we'd booked to go with a few friends and on Monday night I got my passport out to check in online only to find out it expired last year....bother (or words to that effect). :mad: So the wife went off with our friends to go drink Guinness and left us at home. Meant that I spent 3 solid days in the workshop and put in about 36 hours over the three days.

Started off by removing the rear pipe and silencer from the exhaust so I could inspect the chassis, turns out the silencer had a pinhole in it which when I wire wheeled it got a bit bigger and also exposed another hole. So I went about cutting off the outer skin and decided while I was inside that I'd allow the exhaust to breathe a little easier and hopefully allow me to hear the beautiful exhaust note from the cab rather than listen to the tick tick tick of the electric fuel pump! Got a new skin welded on and painted with high temperature paint.


I drove the landy out of the workshop at this point to turn it around and get to the rear of the chassis, without the silencer it sounded beautiful, really throaty, really loud but nice. Too loud for road use but was nice to hear, I think the neighbours were impressed ;) Next job was to fit the door tops, plenty of copper slip on the bolts to aid future removal and then adjusted the windscreen to fit the profile of the door tops. Blackburn - you queried as to where I'd welded the replacement bolts on the driver's side door top, I guess I got lucky with my eyeballing of how they should be welded on! :)


Made the most of the good weather over the last couple of days and got a couple of coats of paint on the rear wheels and the truck cab.


Next up was to start inspecting the chassis with a cross pein hammer to check out what needed work, found some crunchy bits on the crossmember just behind the handbrake drum which when wire wheeled turned into this :eek:


So, a few repair patches were in order, knocked them up and cracked the welder out again.


Turns out big foam extinguishers are just the right profile for bending steel to make the repair section that goes on the hole for the propshaft! :D

After a bit of welding it became this.


Plenty of other little jobs done too like adjusting the closure of the bonnet so once it's shut it doesn't bounce up and down, degreased and cleaned a load of the chassis including the crossmembers under the engine and gearbox (what a horrible job that was!) plus a few other bits and bobs. Till next time folks!
 
centre bottom of that crossmember would usually have a hole to allow water to drain back out i think (i'm not crawling under my 109 as i'm dying at present)
 
centre bottom of that crossmember would usually have a hole to allow water to drain back out i think (i'm not crawling under my 109 as i'm dying at present)

Aye, it's on the to do list, after spending 3 days lying on my back on the concrete floor I didn't get round to drilling the drain holes, it will be done before it gets painted black. Note to self, bring crawler to the workshop.
 
Do you want a shroud for your steering column. Pretty sure I have a spare one.
If so PM me an email address and will send you it for the cost of postage.
 
Slapped the first coat of hammerite on the repaired section of the chassis on Sunday, was just a flying visit while the missus popped in to work, didn't get round to drilling the drain holes again. Must do so next time.


Last night I had a fight with the offside rear leaf spring, this spring has a cracked leaf which caused it to fail its MOT in July, rather than faff with replacing the spring a couple of weeks before I took the vehicle off of the road I just covered the spring with a thick piece of rubber. I checked the the MOT man and asked him if, hypothetically speaking a leaf spring was covered with a protective gaiter it would not be able to be inspected and therefore would be an advisory rather than a fail, he said yes, they can peel things by hand but not use tools. So, a thick sheet of rubber secured with jubilee clips it is then! Here's my 'protective gaiter' to protect against prying MOT testers.


Anyway, last night I started removing this spring, what a major faff that was. 6 bolts should not take 2 hours swearing, 2 breaker bars, 2 three mm cutting discs, a couple of minutes with an oxyacetylene cutting torch (the hot spanner) and a couple of blows with a sledgehammer to remove! As I an replacing the suspension mount I cut through the bottom of the spring hanger to make removal of the spring easier.

 
I thought I read somewhere they could demand such things be removed to allow an inspection if they were feeling particularly awkward, stock leather gaitors covering the front swivels is something I have oft thought about doing. Mine wouldn't pass but it steers fine.

it would have been a post on a forum so it could have been from someone who didn't know what they were talking about.
 
Bought myself a new toy last week, picked it up from work in my mates high top van but couldn't get the van to the door of the workshop so had to do the last few yards in the back of my 206, the suspension didn't like it much.


Also had a sparrowhawk come visit the workshop with a friend, was nice to see.


Anyway back to all things Land Rover, I've been attacking the forward rear suspension outriggers over the last couple of days as they've both been patched and patched and patched in the past so it's time to start from scratch, both of the chassis rail behind the outriggers had rot on them too so I stopped the softly softly approach and just hacked out a chunk the chassis on both sides, let in some 2mm steel flush with the rest of the chassis rail and welded the out riggers on. Driver's side:


Was pleased with how good the driver's side chassis rail looked inside.


The bracket that supports the brake lines on the driver's side was corroded so I knocked up a new one from some 2mm steel, a couple of strips of 0.9mm and some short lengths of an old air line.


Passenger side:


Just behind the passenger chassis rail was a bit of rot so this came out and had some new metal let in.


The first thing I did this morning was to accidentally set fire to myself while cutting 2mm steel, need to get myself some fire proof overalls!

 
Back
Top