Series 3 County restoration

This site contains affiliate links for which LandyZone may be compensated if you make a purchase.
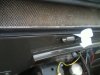
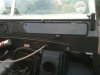
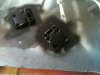
Mine have the self adhesive closed cell foam type seal that stick on to the back of the vent flap that the later 90 / early Defender had. It seals fine but I'm not saying it's any better than the original rubber seals. A small concern I had was water and dirt getting trapped behind the rubber seal and corroding the bulkhead in time. I do prefer the original look of the proper rubber seal though.
 
I had the foam type on before the respray but ordered new ones from paddocks expecting the same but this type was supplied. Going for the double sided tape for fitting. They do seem to be thicker than the foam type and hope the vents shut ok!
Now I have a tapping (irregular) when the engine is warm cleaned the engine breather (on top of rocker) but still doing it, any ideas?
Cheers
 
fitted the light one side and they work !!!
 

Attachments

  • IMG_1168.JPG
    IMG_1168.JPG
    296.6 KB · Views: 175
ok tried the double sided tape on the vent seal, it has fixed it but the seal dose hold the vent out more than before. Also cleaned the hinges ready for painting.
Will need to respray the other vent as it picked up a thumb print before it was dry
 

Attachments

  • IMG_1170.JPG
    IMG_1170.JPG
    172.5 KB · Views: 191
  • IMG_1173.JPG
    IMG_1173.JPG
    235.4 KB · Views: 199
  • IMG_1175.JPG
    IMG_1175.JPG
    185.1 KB · Views: 186
  • IMG_1176.JPG
    IMG_1176.JPG
    218.3 KB · Views: 166
think i used contact for the vent seal, closed the flap, pushing hard on the outside so it was all straight then left it for a month or so until it settled into place.
 
think i used contact for the vent seal, closed the flap, pushing hard on the outside so it was all straight then left it for a month or so until it settled into place.

Thanks Trax may try contact adheasive on the other vent when I have repainted it.
Dose anyone recommend a good oil for the gearbox transfer box and diff also is thier a guide to changing oil on the swivels they feel ok but want to make sure all the oil is renewed while its of the road
Cheers
 
Update
Thanks Blackburn for the advice on the oil.
A few small jobs off the list first the hinges repainted but will need to be done again as the sealer primer wasn’t used and reaction again. Then fitted the seatbelt brackets, next found the roof under a few leafs and stood it up removing the side panels and jet washed the wings which are in quite good condition except for the mud guard bracket that needs replacing. Anyone had to do this and how did they achieve it? The head lining will be repainted in some vinyl paint because as you see its blackened in areas.
Cheers
 

Attachments

  • IMG_1189.JPG
    IMG_1189.JPG
    275.6 KB · Views: 168
  • IMG_1185.JPG
    IMG_1185.JPG
    230.3 KB · Views: 180
  • IMG_1182.JPG
    IMG_1182.JPG
    277.2 KB · Views: 196
  • IMG_1181.JPG
    IMG_1181.JPG
    371.8 KB · Views: 168
  • IMG_1178.JPG
    IMG_1178.JPG
    284.7 KB · Views: 203
Mine had been previously rivetted with steel plate so replaced with alloy rivetted in .
But if your wing tops are good you could bond alloy in place with Tiger seal the footwell bolts will help to hold the weight and tiger seal once set will hold the top.
 
I will try the tiger seal as the wing tops are good. Not sure if could use threaded bar back to the bulk head to support it further? May only need one?
 
Update
Painted the head lining with PVC paint wrinkled up and photo is not the best but now dry looks good and wrinkle free. Will post a better picture next week.
Cheers
 

Attachments

  • IMG_1185.JPG
    IMG_1185.JPG
    230.3 KB · Views: 233
  • IMG_1191.JPG
    IMG_1191.JPG
    360.6 KB · Views: 218
update
picture of roof lining and started on the roof paint prep work, side panels finished ready to paint.
cheers
 

Attachments

  • IMG_1202.JPG
    IMG_1202.JPG
    197.8 KB · Views: 239
  • IMG_1201.JPG
    IMG_1201.JPG
    265.7 KB · Views: 178
  • IMG_1199.JPG
    IMG_1199.JPG
    226.3 KB · Views: 177
Starting to take shape !!!
 

Attachments

  • IMG_1233.JPG
    IMG_1233.JPG
    260.7 KB · Views: 229
  • IMG_1234.JPG
    IMG_1234.JPG
    310 KB · Views: 212
  • IMG_1235.JPG
    IMG_1235.JPG
    297.4 KB · Views: 215
  • IMG_1238.JPG
    IMG_1238.JPG
    283.7 KB · Views: 217
  • IMG_1232.JPG
    IMG_1232.JPG
    284.5 KB · Views: 250
Not much to show at the moment but did give the heat blower a coat of paint and damaged the door top paint fitting the door. Hoping to get the roof painted black next and finish a small welding job on the front offside out rigger support, then start on the wings and bonnet. Found the doors to be a tight fit and hoping I can push the roof side panels back or maybe the bulkhead forward. I think the tub should sit 2mm further back but to late its sitting firm against the rear cross member.
cheers
 

Attachments

  • IMG_1227.JPG
    IMG_1227.JPG
    484.1 KB · Views: 166
Ok just not had the time to do much lately but over xmas managed to line up the doors and fit the door handles plus the new dash cowl and got the rear lights to work.
Just putting up a new garage so the project is going to have minimal time spent on it
Cheers
 

Attachments

  • IMG_1251.JPG
    IMG_1251.JPG
    276.8 KB · Views: 173
  • IMG_1252.JPG
    IMG_1252.JPG
    238.2 KB · Views: 181
New workshop
Thought I would post a picture of the garage base I laid yesterday in the snow!!!. It’s my new workshop to get the land rover finished. The weather has stopped me spraying any more of the body and getting the garage base took up any time I had. Roll on spring and better weather.
I have found what I think to be brake fluid on the driver’s side floor so am expecting the seals have gone in the master cylinder, is there anything to watch for when changing them?
 

Attachments

  • IMG_1181.JPG
    IMG_1181.JPG
    371.8 KB · Views: 194
  • IMG_1254.JPG
    IMG_1254.JPG
    292.4 KB · Views: 196
New workshop
Over the next few weeks hoping to restart putting bits back on in my new garage!! First need to paint the floor and put the electric in, so let’s hope it’s soon ready for the summer?
cheers
 

Attachments

  • IMG_1256.JPG
    IMG_1256.JPG
    263.5 KB · Views: 196
  • IMG_1258.JPG
    IMG_1258.JPG
    265.4 KB · Views: 191
Very good did you do the construction yourself.
Put a precast concrete garage up for my sister 40+ years ago did not know they where still available.
 
Back
Top