Series 3 County restoration

This site contains affiliate links for which LandyZone may be compensated if you make a purchase.
update
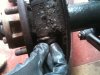
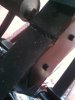
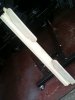
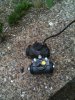
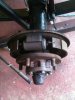
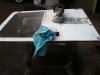
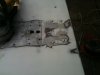
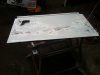
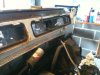
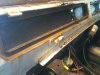
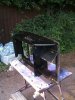
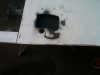
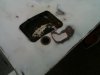
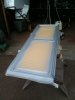
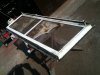
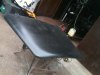
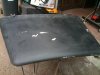
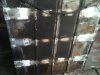
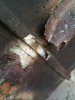
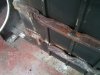
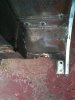
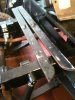
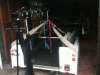
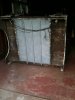
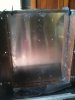
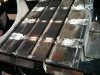
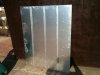
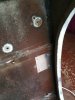
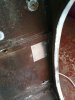
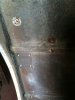
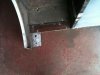
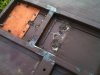
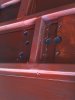
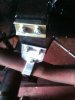
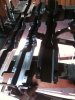
made some repairs to the rear door where it had cracked and patched up the frame. Also painted tub cross members fitted exhaust brackets and started on the front bumper.
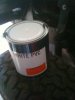
Now the family debate is on what colour to spray it.
Cheers
 

Attachments

  • IMG_0919.JPG
    IMG_0919.JPG
    224.3 KB · Views: 218
  • IMG_0929.JPG
    IMG_0929.JPG
    386.5 KB · Views: 186
  • IMG_0924.JPG
    IMG_0924.JPG
    334.8 KB · Views: 188
  • IMG_0930.JPG
    IMG_0930.JPG
    366.8 KB · Views: 216
Great to see your progress. I've an similar '74 model and am about to start sorting the back end of the chassis.
For stabilizing rust I'm using a converter off fleabay (see below). Painting the lot in red oxide is a great idea. Going to try and protect the inside of the chassis when I cut off the back end; a messy challenge I think.

mpHBgvTolltlxYDs72cvvjw.jpg


Thanks!

i rebuilt my chassis (cut off the rear crossmember, gutted and rebuilt the dumb irons and cut out and replaced any other rot) then once i'd completed my painting i used a shutz gun to vapourise a gallon of thinned waxoyl into the inside of my chassis, i still see evidence of it around drain holes two years later

i also vapourised a litre or two into all the cavities in my bulkhead
 
hey, well done for getting stuck in!

have a bit more practice with welding first though, you don't want to be unsafe or have to do it again :)

your welds look like they lack penetration, up your heat or slow your weave/wire, etc

just play on 2mm scrap for a little.

btw are you running on gas? argon/co2 mix?

Welding - The DIY Guide if you haven't seen it before :)
 
Hi All
Thanks for the posts I have managed to get hold of some PVC paint for the head lining that has been smoke damaged will post the results later in the thread.
Grantstew/NiteMare
I tried a rust inhibitor from Cromwell tools
(LPS 3 HEAVY DUTY RUST INHIBITOR 377ml)
It has been sprayed into to chassis where I could not paint in hope it seals the rust.
Trax
Thanks for the advice on the welding I have posted a picture after some practice. Dr Nitemare said to up the heat in the weld so had a practice and although not perfect was better. I also have drilled and taped the cross member/ fish plate and bolted them in place. The bolts help with the joints strength and before the bolt goes in you can spray the inside of the welds with rust inhibitor.
Had a look at the back brake and need a new cylinder still trying to get the screw out of the other side.
Cheers
 

Attachments

  • IMG_0943.JPG
    IMG_0943.JPG
    329.7 KB · Views: 212
  • IMG_0941.JPG
    IMG_0941.JPG
    389.8 KB · Views: 216
  • IMG_0940.JPG
    IMG_0940.JPG
    273.2 KB · Views: 202
  • IMG_0939.JPG
    IMG_0939.JPG
    386.5 KB · Views: 187
Update
Thought I would have a quick job removing and replacing the wheel cylinder but turned out the brake pipe had welded its self in so new one required. After a fight removed the countersunk screw the other side and its looks ok.
Cheers
 

Attachments

  • IMG_0945.JPG
    IMG_0945.JPG
    596.4 KB · Views: 208
  • IMG_0946.JPG
    IMG_0946.JPG
    553.5 KB · Views: 151
Weekend proved to be slow progress, had a good day fishing with my son and a classic car show. Managed to replace the back wheel cylinder and brake pipe, bled them and started to rub the doors down for paint. I did find that large amounts of filler has been used on the doors, but let’s face it Landrovers are best not too straight. So will flat off and leave the dents and twists as they are.
Cheers
 

Attachments

  • IMG_0962.JPG
    IMG_0962.JPG
    224.1 KB · Views: 141
  • IMG_0961.JPG
    IMG_0961.JPG
    157.3 KB · Views: 150
  • IMG_0959.JPG
    IMG_0959.JPG
    128.3 KB · Views: 162
  • IMG_0958.JPG
    IMG_0958.JPG
    157 KB · Views: 149
Last edited:
Thanks
Not sure if to take off all the capping and paint silver or keep it all the same colour? We have been looking at Grey or dark blue for the bottom half
Cheers
 
Update
Did a little more paint prep on the back door handle area front panel and the bulkhead. Lucky the metal behind the vent seals was all good. The door handle aperture is not the easiest areas to clean-up but after while got it to primer stage, not sure how I am going to get the spray gun into all the tight spots though. I used a can to prime it.
I have tried cellulose primer on the doors but it is lifting the edges of the filler so looking like may need to go for 2K paint and primer or sealer primer, any thoughts.
Honolulujoe
Will have a look into the galvafroid have tied a galv spray on other parts and it does not seem very tough.
Cheers
 

Attachments

  • IMG_0971.JPG
    IMG_0971.JPG
    276.3 KB · Views: 181
  • IMG_0970.JPG
    IMG_0970.JPG
    284.9 KB · Views: 171
  • IMG_0969.JPG
    IMG_0969.JPG
    481 KB · Views: 168
  • IMG_0968.JPG
    IMG_0968.JPG
    235.7 KB · Views: 165
  • IMG_0966.JPG
    IMG_0966.JPG
    181.3 KB · Views: 227
  • IMG_0963.JPG
    IMG_0963.JPG
    194.3 KB · Views: 181
Update
Tried a glav spray on the windscreen frame, found that because it had been previously painted with a white paint it reacted causing the paint to crack. Looking for a primer sealer now and re-rub down.
Cheers
 

Attachments

  • IMG_0976.JPG
    IMG_0976.JPG
    226.6 KB · Views: 148
  • IMG_0975.JPG
    IMG_0975.JPG
    315.5 KB · Views: 169
  • IMG_0974.JPG
    IMG_0974.JPG
    351.5 KB · Views: 170
  • IMG_0972.JPG
    IMG_0972.JPG
    271.3 KB · Views: 171
Update
Found a sealer primer and bought an etch primer for the bare ali areas. Also started on the bonnet, looks in good condition for it age. Went over the windscreen frame and will use the sealer on it before silver paint. Gave the bulk-head rust patches a coat of rust killer as well.
Cheers
 

Attachments

  • IMG_0978.JPG
    IMG_0978.JPG
    227.4 KB · Views: 168
  • IMG_0979.JPG
    IMG_0979.JPG
    232.9 KB · Views: 163
  • IMG_0980.JPG
    IMG_0980.JPG
    272.8 KB · Views: 182
  • IMG_0981.JPG
    IMG_0981.JPG
    306.6 KB · Views: 148
Update
Cleaned up the sills ready for paint and brought the tub indoors to have a look at the work needed. The cross supports have rotted out and I have replacements ready for fitting but once removed I found the floor (ali) has also dissolved along with the strengthens. Will be looking to replace the whole floor!!
Cheers
 

Attachments

  • IMG_0998.JPG
    IMG_0998.JPG
    184.2 KB · Views: 170
  • IMG_0997.JPG
    IMG_0997.JPG
    367 KB · Views: 181
  • IMG_0996.JPG
    IMG_0996.JPG
    221.4 KB · Views: 218
  • IMG_0995.JPG
    IMG_0995.JPG
    418.7 KB · Views: 200
  • IMG_0992.JPG
    IMG_0992.JPG
    479.9 KB · Views: 187
  • IMG_0991.JPG
    IMG_0991.JPG
    176.3 KB · Views: 177
  • IMG_0990.JPG
    IMG_0990.JPG
    195.9 KB · Views: 166
Update
Cut out the old tub floor and fabricated a replacement, used 19mm x 19mm 16gauge box and roofing bolts for the top hat sections. I have etch primed the aluminium ready for paint. Just need to seal the perimeter and pop rivet it in place. Will have to make up some smaller patches for seat fixings and the tub fixing that have rotted.
Cheers
 

Attachments

  • IMG_1009.JPG
    IMG_1009.JPG
    427.8 KB · Views: 161
  • IMG_1008.JPG
    IMG_1008.JPG
    325.5 KB · Views: 166
  • IMG_1004.JPG
    IMG_1004.JPG
    315.2 KB · Views: 173
  • IMG_1002.JPG
    IMG_1002.JPG
    201.9 KB · Views: 159
Update
Managed to fix and seal the new tube floor and make a few repairs to the seat fixings and tube fixings. It’s all the little jobs that seem to take time!! We have chosen a dark grey for the body colour and will be painting the tube bottom in it soon.
Cheers
 

Attachments

  • IMG_1011.JPG
    IMG_1011.JPG
    342.3 KB · Views: 152
  • IMG_1012.JPG
    IMG_1012.JPG
    372.7 KB · Views: 120
  • IMG_1013.JPG
    IMG_1013.JPG
    392.3 KB · Views: 130
  • IMG_1015.JPG
    IMG_1015.JPG
    216.7 KB · Views: 132
Back
Top