Dom's 88" rechassis

This site contains affiliate links for which LandyZone may be compensated if you make a purchase.
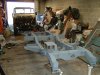
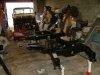
Hi Don, it's a bit too heavy for one person - well for one weedy person like me. Two people is ok three better if you want to flip it / get stands under it. I did manage once to pick up the LWB on my own but it buggered my back.

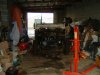
It is possible to move one around on your own if you have some castors or something to stick under one end which I've been using to get it around the place on my own.

I've got a lot of new fastners but my inner Yorkshireman probably won't let me throw all the old ones away. To be honest the only ones that seem to have come undone without shearing while I've been doing this have been the originals that I saved last time I had it apart. All the modern ****e seems to rust solid and shear.

Joe, good shout - I spotted them too. Ordered some today.

Thanks for the offer Trax but I think I'm sorted now. I've got plenty of non-bendy ones I'd just like to fit soft ones to reduce the idle shake.

I think I've now got two sets of soft fronts so I may stick fronts on the back...

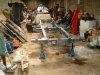
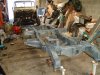
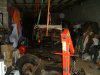
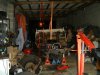
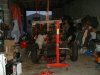
Sanded down and primed the chassis this aft. Surprisingly knackering work and my spray gun was playing up - I think due to the heat.
 

Attachments

  • DSCF0246-s.JPG
    DSCF0246-s.JPG
    141.5 KB · Views: 162
  • DSCF0247-s.JPG
    DSCF0247-s.JPG
    199.4 KB · Views: 176
  • DSCF0248-s.JPG
    DSCF0248-s.JPG
    184.5 KB · Views: 148
  • DSCF0249-s.JPG
    DSCF0249-s.JPG
    152.8 KB · Views: 135
Slow progress today...spent ages getting the bottom fed spray gun clean as it had been left full of black goo...then it sheared off at the pot. Spent another half an hour working out the right mixture with the gravity fed gun...and the compressor died.

Next three hours spent doing the job with brush and roller, not very well but well enough.

Got front brake lines and balance switch on then had to call it a day.

Doesn't really look like this is going to get finished this weekend!

D
 

Attachments

  • DSCF0250-s.JPG
    DSCF0250-s.JPG
    146.9 KB · Views: 150
Well done Dom, inspiring stuff!

I'm getting close to ordering my chassis! 😁
 
Thanks rubins,

Well, me and my mate Dan went up on Saturday afternoon about 2 o'clock and stayed overnight in the garage until just after 4 o'clock on the Sunday. A reasonable amount of beer was drunk and we watched a good few hours of the Le Mans 24hr race.

We didn't get quite as much done on the Landy as I'd hoped...we've basically got the suspension and axles done (though the will have to be re-done at some point as the spring bushes are going!). Bulkhead and gearbox back in.

Dismantling the rear-tub was a bugger, even though it had just been put back together a few months ago it was all rusted solid. Then we wasted a couple of hours horsing around trying to lift the bulkhead. I didn't want to remove the brake pedal or steering as I know they can be a #### to put back / remove so it was a bit too heavy for two of us and we didn't have a block and tackle. At first we didn't dare undo the windscreen as the hinge-pin was stuck and I didn't want to break the hinge loop as they're expensive...in the end the hammer prevailed and we hung the bulkhead precariously on ratchet straps from the beam and lowered the chassis out of the way.

Then we wasted several hours shunting chassis's back and forth with different combinations of wheels on them to try and cut down on noise outside as the neighbours have young kids. It was a bit like one of those puzzles and we wanted to get the new chassis in along with the gearbox and axles on the floor...in the right order. In our fatigue and beer fuddled states it took a few goes to get that right.

Reassembly was just a reverse previous steps....my arse! A lot of cocking around with the back axle mainly due to swapping the pins for ones with the wrong thread length...

Gearbox went in dead easy...another mate had popped up at that point and it was just a case of two blokes holding it while I got the easy job of getting my fingers trapped whilst bolting it down. New super-soft gearbox mounts went in. We'll see how long they last and if it's any smoother. I've got 4 other pairs to try if the break or are rubbish.

Then two hours of fannying with the bulkhead...we lifted the new chassis up to the bulkhead and got one pin in one side then lifted the chassis up until it lined up with the other pint...but it didn't the chassis was 3/8" too short or the bulkhead too wide. After a lot of pushing shoving, swearing, hands on hips, talk of slitting discs and welders I had a tantrum and gave it a good go with the lump hammer. The bulkhead lost and gracefully popped into place.

Wiring loom is threaded and rear tub is placed but not nipped up...got a few brake lines to fettle then engine back in...hopefully the rest should be pretty straight forward.

Struggling to get the tub to go in nicely but I suspect that might be from me "resizing" it to meet the stretched chassis on the old one when I re-floored it recently some creative hammering to come there I think - I'm struggling to get the seatbelt brackets to sit behind the chassis tabs even without shims. I could grind the bottoms down and stick them in front but they are part of the seatbelt setup so best not cheat too much.

It's made me realise that this motor deserves a proper restoration at some point but for now it needs to earn its keep.
 

Attachments

  • DSCF0258-s.JPG
    DSCF0258-s.JPG
    129.2 KB · Views: 134
  • DSCF0257-s.JPG
    DSCF0257-s.JPG
    139 KB · Views: 130
  • DSCF0256-s.JPG
    DSCF0256-s.JPG
    148.9 KB · Views: 139
  • DSCF0255-s.JPG
    DSCF0255-s.JPG
    151.2 KB · Views: 150
  • DSCF0254-s.JPG
    DSCF0254-s.JPG
    136.8 KB · Views: 164
  • DSCF0253-s.JPG
    DSCF0253-s.JPG
    127.7 KB · Views: 137
  • DSCF0252-s.JPG
    DSCF0252-s.JPG
    179.3 KB · Views: 148
  • DSCF0251-s.JPG
    DSCF0251-s.JPG
    156.5 KB · Views: 157
One step forward two steps back this weekend.

I plumbed in the brakes and tried to bleed them...snapping the final bleed nipple off in the process. Then snapped off an easyout in the bleed nipple so will need a new wheel cylinder both pipe and nipple rusted solid and when I got it out it was weeping too.

This afternoon spent a couple of frustrating hours getting the rear tub back home - would have been a lot easier with someone to help me pushing and shoving. I'm hoping that it won't need adjusting too much to get the doors to shut.

I plugged in all the rear wiring and at least that all worked first time!

D
 
Got the engine back in this morning - after a lot of pushing and shoving and a near miss when the chain snapped - rated at two tonnes my arse!

Tried driver's door and it lines up perfectly! Never did before - not sure if that is having the bulkhead and tub on straighter or the new shiny hinges! The doors still don't quite sit flush with the body - I don't know why.

Petrol tank not so good - bloody pipes won't line up with the holes in the tub. Must remember to take a Q-cutter with me tomorrow. Not sure if the tank is made wrong or chassis holes drilled wrong.

Getting there...very slowly!
 

Attachments

  • DSCF0259-s.JPG
    DSCF0259-s.JPG
    182.9 KB · Views: 157
  • DSCF0260-s.JPG
    DSCF0260-s.JPG
    150.7 KB · Views: 136
New trackrod ends on drag from box to relay, new tre on relay end of drag link. Brakes bled up successfully this time. Petrol tank in with a bit of pushing, shoving and hole widening...spotted that rear tub is not resting properly on supports - bugger, that will need sorting.
 
Some progress today - sorry no pictures.

Rear tub now in - I had some bother with the floor not resting on the chassis rails properly. I suspect that this is more to do with the old chassis which had the rear cross member welded on at an angle and some sort of home-made brackets for the front of the tub. The only way to make it right would be to alter the tub floor completely. Instead I've put some spacers made of 6mm flat bar.

Seatbox in which was a right t*** of a job single-handed.

Engine plumbed and wired in except for radiator - gave it a quick blast to check the exhaust and wiring.

Rear prop on

Slight set-back when the dash mounting screw captive thread thing broke off...not sure how to bodge that but bodge it I will...

All these gorgeous days when I should be out with the top off and instead I'm rolling around in brake fluid and oil on the floor under my landy...
 
Got a bit more done:

Front prop on
Radiator in
Roll bar bolted up and sealed to floor
Windscreen back on - new windscreen wiper blade came with broken clips! ordered a pair of straight ones from Rimmers
Wings on and mudgards fitted (that took some doing and bodging)
1/2 front floor and seal in and sealed


Not too far to go but not much time to spend on it....
 

Attachments

  • DSC_0292-s.JPG
    DSC_0292-s.JPG
    106.1 KB · Views: 82
  • DSC_0293-s.JPG
    DSC_0293-s.JPG
    68.2 KB · Views: 130
is that a custom od lever? might just be the pic angle, just seems to be longer than the usual one, or is it because you use that roamerdrive iirc and their lever is different from the fairey one
 
Yes, it's a Roverdrive. The lever is a little longer, which is a good thing as it gets quite a lot of use and is fairly easy to reach. On the roverdrive you can use the OD in any gear and on the hills round here it's good to have a split between 2nd and 3rd and 4th...

Hoping to get a few hours in this evening and have her more or less ready for a test...

Likely problems will be brakes - they always seem ok until it's moving then they need faffing and the clutch which seems very close to the floor.
 
the fairey one is too short imho, there was a chap on the s1 forum making some longer ones - that cleared the middle seat - to order, so I got one, much better.
 
The RoverDrive one is a bit close to the 4th gear position for comfort...so I bent the stick a bit! If I had the time and tooling I'd quite like to make a dash/column mounted lever as even with the longer stick its a bit out of a reach and a bit intimate if there's a middle seat passenger!
 
Forgot my camera again but getting closer...MOT this aft. No real dramas just a lot of arsing around getting all the lights to work properly - I spent a fair amount of time rewiring the rad panel with multi-way connector blocks. That all worked fine, however on a final check this morning one rear and one front sidelight were off. A lot of cleaning of Lucas connectors and reseating of bulbs seems to have cured it.

One minor problem is that the new chassis seems to be 1/4" narrow than the old one - the front bumper doesn't quite fit! Everything else is fine and both LWB and SWB Richards chassis measure the same...odd?!?

Took it for a belt around the yard yesterday and a good jump over the curbs to settle the suspension and it seems ok though the rear brakes might need another bleed. The clutch feels _very_ light and closer to the floor but not floppy - I suspect the new clutch is just that much thicker and the release arm/bearing not knackered. No more disco-knee at traffic lights hopefully.

Just the tilt to go back and hopefully it should go through if they don't get sniffy about the chassis change...
 
It passed! Embarrassingly both the rear indicators didn't work when I got there but was given 10 minutes to fettle them...they worked this morning! Does anyone know what the kgf numbers for 10" brakes should be mine came out around 200 on the rears and 250 on the front which seemed a bit low I seem to remember them being a bit more like 300...maybe I've just got used to the brakes on my missus new motor. Had an hours drive to check nothing's loose and it feels great to be back in the Landy and it rattles less now!
 
no idea about the brakes but congrats on the pass :D

I notice the brake difference when I get in the wifes runaround, first time I press its almost an emergency stop :D
 
Back
Top