1973 88" rebuild - my turn!

This site contains affiliate links for which LandyZone may be compensated if you make a purchase.

Freetime101

Active Member
Posts
355
Location
North East
Yay another rebuild thread :D

I initially started out fixing the handbrake ready for the MOT, but one thing lead to another and I've decided to jump in with both feet and take the old girl back to a bare chassis. I'm getting bored of fixing PO's bodges so have decided to strip it all and do it properly!

I expect this thread will be filled with questions from me, as well as photos. So for those that just want to keep up on progress I'll be documenting the progress on my blog www.meandmylandy.wordpress.com
As for the rest of you, brace yourself - stupid questions are coming!:rolly:

Now for the bit you're actually interested in:

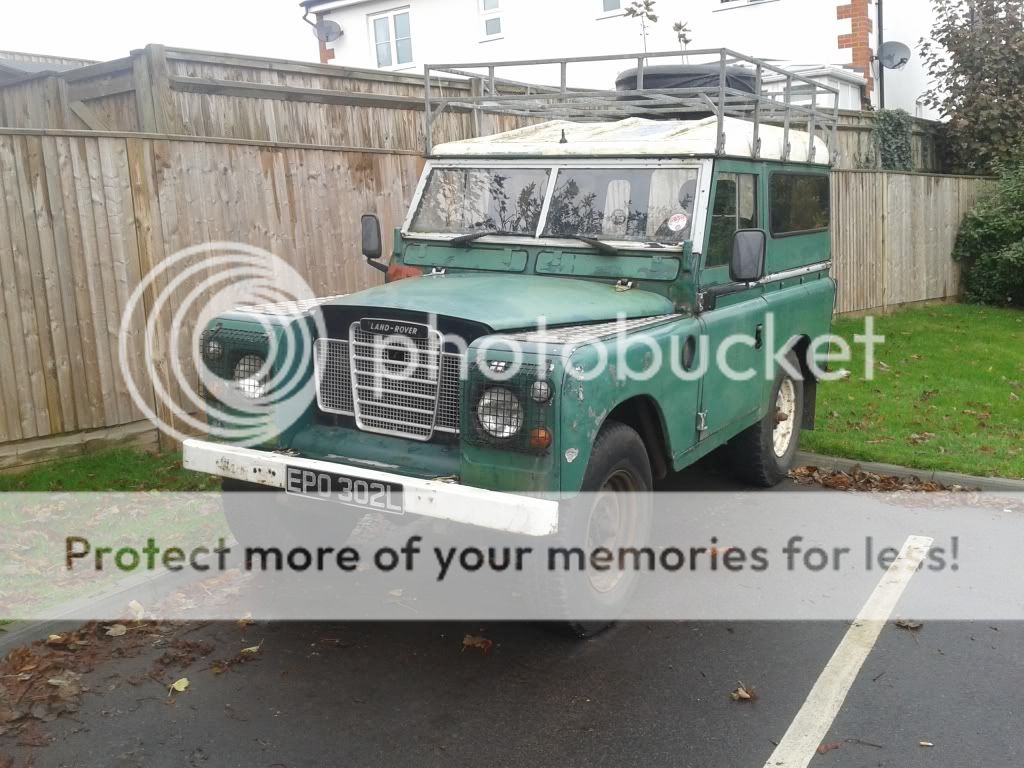
I bought her back in November last year with the intention of just giving her a good clean and a lick of paint... but things were not that simple...


The first thing I did was fix the indicators, replace the speedo cable and remove the bullbar (now for sale if anybody wants it):


Next I needed a new tyre, the spare was also worn so I picked up a set of 5 Insa Turbo Rangers for the same price as 2 new tyres:

The only catch was the colour :rolleyes:

Then with it being winter I decided to try and improve the heating, well, the airflow to be precise. There was plenty of heat coming into the passenger footwell but nothing making it's way over to the driver, or the windscreen. I discovered a gaping hole in the heater hose so most of the air was blowing into the engine bay, I fixed this with so good old fashioned duct tape:

Manky engine bay...

The air flow was still pretty poor so I removed the lower dash and fitted some drain pipes directing the hot air straight up to the windscreen. Sadly I never got around to taking a photo of this, but it was spectacular :D
I also needed to replace the drivers side windscreen washer as it was blocked, this was a right PITA and needed the top dash removing to get to the pipework.

And that was it until December, I had a few weeks of happy motoring and then disaster hit... I got water in the engine which led to a top end rebuild. I covered this in another thread so won't go into it again here. Everything was back together in January and I had another few months happy motoring.

With the arrival of the nice weather I took the opportunity to whip the roof: off
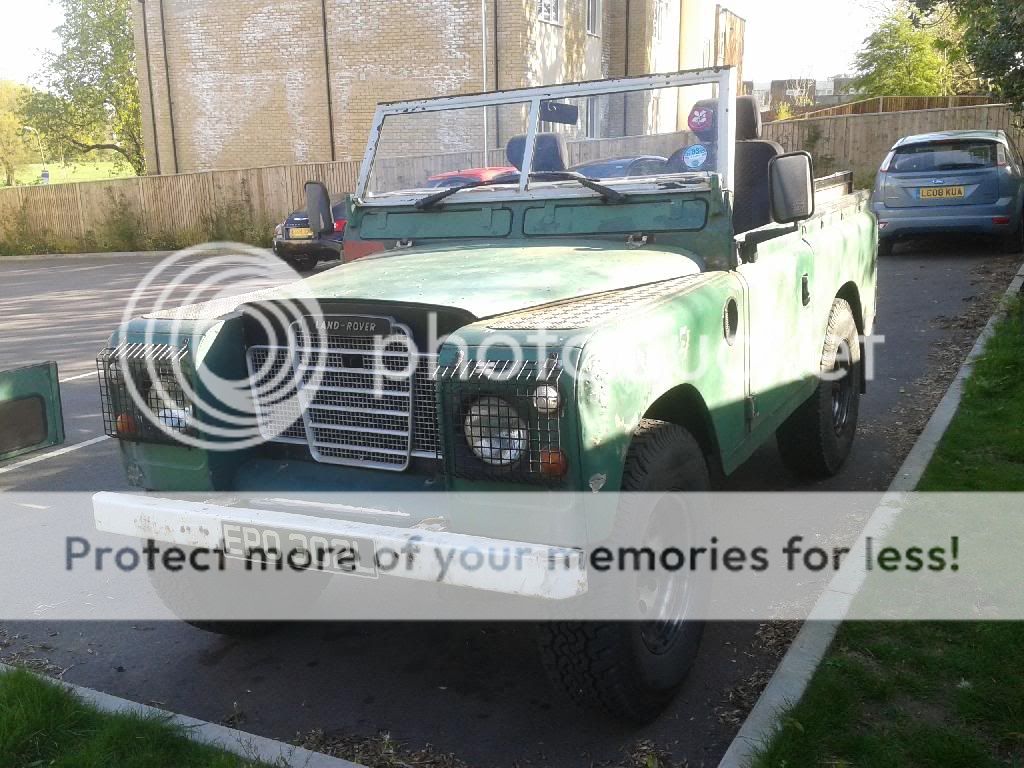
Paint the cappings:


And scrape the flaky paint off of the windscreen:


You'll notice the roof rack has also been removed, this was the missus' idea - I'm not so sure...

I even managed a trip out laning but unfortunately picked up quite a bad oil leak on the way home... The MOT was due that week and I had a long list of jobs to do, and so we ended up here :D
 
Good luck, will be starting my S2 rebuild on galv chassis soon. The broom stick roof support, was that an LR upgrade option on the S3?
 
Amongst other things I needed to adjust the handbrake to get rid of the slack for the MOT, the handle adjuster is between the handbrake lever and the chassis - the only way I could get to it was by removing the seat box, which also needs the floor removed:


Not sure it's fitted correctly but if so, it's a stupid design...

As you can see the gearbox itself is manky, I decided to replace the gaskets to try and cure a few leaks. I also found that the handbrake drum is jammed on (still is) so decided to take the whole box out for a closer look.

I also wanted to replace the sump gasket to try and cure a few leaks there, I didn't fancy doing this from beneath the engine as it wasn't much fun last time. I figured with the gear box out it's only a few more bolts to get the engine out...

It turns our there was more than just a few things to unbolt, but eventually it came out:


I then got a bit carried away unbolting things:


You really shouldn't leave me alone with a socket set...


My girlfriend's brother then turned up to give me a hand, I didn't take any photos sadly as I was too busy unbolting things. After a few hours we ended up here:


So we carried on:


Old brake fluid, yummy:


The Landy is now in bits and ready for the rebuild :D
 
Good luck, will be starting my S2 rebuild on galv chassis soon. The broom stick roof support, was that an LR upgrade option on the S3?

Cheers, I'll need it! The broom stick is Land Rover special tool #324, £246.99 from your local dealer :p

I'll be keeping an eye out for your rebuild thread :5bcheers2:
 
So working from the ground up I began with the rear axle:


First up it was time to lose the shoes and springs, the nuts were rusted onto the U bolts, I'll be replacing these anyway so out came the grinder:


A word of caution for anybody copying this, the bolts are under tension and tend to pop as you cut them - so don't rest the spring on your knee as you cut! :eek:

I then gave it a blast with the pressure washer:

Most of the paint came off too!

I'll be stripping down the axle, wire brushing back to bare metal and painting it over the weekend, then putting together a shopping list of new parts. So here comes the first question:

I only plan on doing this once, so will be staying way from **itpart and going for OEM where I can afford to. Are plastic seals worth the extra over leather? Land Rover, Range Rover Parts & Accessories - Discovery, Defender and Freelander

Cheers
 
Nice work and seemingly quick progress. The chassis looks to be in excellent condition.

Taking it apart is the easy bit :p

I've yet to have at it with a hammer but at first glance the chassis is in brilliant condition, considering it's age. Just one tiny bit of welding to do on the end of the bulkhead outrigger, nothing structural.
Having said that, it has had new dumb irons and a new rear cross member at some point.
 
Looking good.
Just a note, on my s3 to afjust the handbrake only required seat base off the unscrew metal hstch on seat box. 5 min job. Seat box out is a big job if bolts rusted up.
Rebuild the gbox too whilst its out its not top expensive and good fun. Good luck.
 
So I've got the rear axle apart now, I haven't taken the stub axles off as they're well and truly stuck! I figure if they're that stuck they won't leak though so it should be fine...

The main thing I've noticed it I'm yet to find a proper gasket :eek: just instant gasket gunk stuff used for every join... no wonder it was leaking...

Anyway, on with the pics :)

Manky:


The hub caps were full of oil - should they be? Or should the felt washer keep the oil inside the axle? The outer face of the (leaking) drive flange was also chewed up like somebody has been at it with a stilson...


Will this need replacing?


I gave the back plates a thorough clean with the pressure washer, then a wire brush in the grinder:

Then a lick of paint:


I'll give the whole axle a few coats before I'm done.

Onto the axle case, it has the strengthening gusset along the bottom, one end was rusted through so I cut out the rusty section, only to find this mess underneath:


I cleaned it out the best I could and coated it with kurust:


And that's as far as I got... I'll leave the kurust on for a few days then paint the axle, weld a plate back over the gusset and paint that too :)
 
That 1st pic of brake shoes has the ring clamp at base fitted to the wrong shoe should be fitted to the trailing shoe in each drum . ie the rear shoe .
When brake applied travelling forward front leading shoe is pushed hard against pivot , rear trailing shoe tries to go around with the drum hence the retaining clamp.
 
Thanks for the heads up, that's how it looked when I removed the drum - I'll be sure to fit it the correct way around when I rebuild the axle.

Any thoughts on the drive flange/leaking hub cap? Is it duff?
 
The felt washer should stop the oil check the axle breathers are clean as pressure can build up if not.
Hubs should be ok just give them a dressing down with a file caps do not seal very well in any case.
 
That 1st pic of brake shoes has the ring clamp at base fitted to the wrong shoe should be fitted to the trailing shoe in each drum . ie the rear shoe .
When brake applied travelling forward front leading shoe is pushed hard against pivot , rear trailing shoe tries to go around with the drum hence the retaining clamp.

thanks for pointing that out, I noticed yesterday when fiddling with my rear brakes, the passenger side had the plate on the wrong shoe, It wouldn't have noticed to me if I hadn't seen your post the other day. hope it was a po that did it and not a garage.
 
Progress has been slow on this so far... between the day job and home life it's difficult to find time to work on the Landy... However I have managed to get a few bits done.

I started with the rear axle, so far I've stripped and painted the rear axle case, and one half of the drive hub/drum etc:


They look much nicer in shiny black :)

The diffs and pans are coated in thick red paint, I'm not sure what sort of paint it is but it's brilliant, it's dry to touch but very difficult to remove as it just smears like thick oil, the steel underneath is perfect - I would have left it had I known. I'd like to find out what it is to buy it in black for the chassis as it's miles better than Hammerite and hopefully cheaper than POR15...

The bearings feel fine so I soaked them in EP90 (well, the closest thing I could find in Halfords)

I also replaced the inner hub oil seal, this was a pain to get in right, a job made even more annoying as the original wasn't leaking - I figured I should replace it them whilst everything was apart though. At least it's done now:

Just 3 more to go...

I haven't fitted the second hub nut or locking washer yet, I'll do this when the whole axle is back together and I can tighten it correctly. Also the axle is on it's side in the pic above - I have fitted the brake back plate correctly :p

I've now hit an issue with the rear diff though... or rather finding parts for it.
The front diff is a later rover type like this:

This is taken from the series part manual so is fine, however the rear is an early type as shown in the Haynes manual:
Land-Rover-Series-II-IIA-III-Drivetrain-Differential-Schematic.png


I can't find the part numbers for this so I have 2 questions:
1: Does anybody know if the pinion oil seal is the same for both? I hope so as I have 2 of these :)
2: Does anybody know where I can get a new oil seal retainer gasket? The Haynes manual says I need to remove the retainer to change the oil seal so I guess I'll need a new gasket too...

Cheers :)
 
Not sure of the answer but try landroverweb.com it has all parts catalogs listed.
Your going to have a show winner with all the detail
Cheers
 
Thanks, they're a brilliant resource. I've been using them for reference as they are series III specific whereas the Haynes covers all models so can be a bit general.

I seem to have a series II diff on the rear so it isn't listed. I've done a bit more googling though and the seals seem to be interchangeable so that's good. I guess I'll have to make a gasket though as I still can't find one...

I'm hoping to have a nice looking Landy by the end of this, at least one that doesn't need repairing every time I use it! Rivet counters may want to look away though as I will be making a few concessions to comfort/performance...
 
Back
Top