You are using an out of date browser. It may not display this or other websites correctly.
You should upgrade or use an alternative browser.
You should upgrade or use an alternative browser.
1973 88" rebuild - my turn!
- Thread starter Freetime101
- Start date
This site contains affiliate links for which LandyZone may be compensated if you make a purchase.
Freetime101
Active Member
- Posts
- 355
- Location
- North East
Awesome thanks, I googled that part number and there's a company around the corner from me that sell them - bonus!
Freetime101
Active Member
- Posts
- 355
- Location
- North East
Well the rear axle is mainly back together:
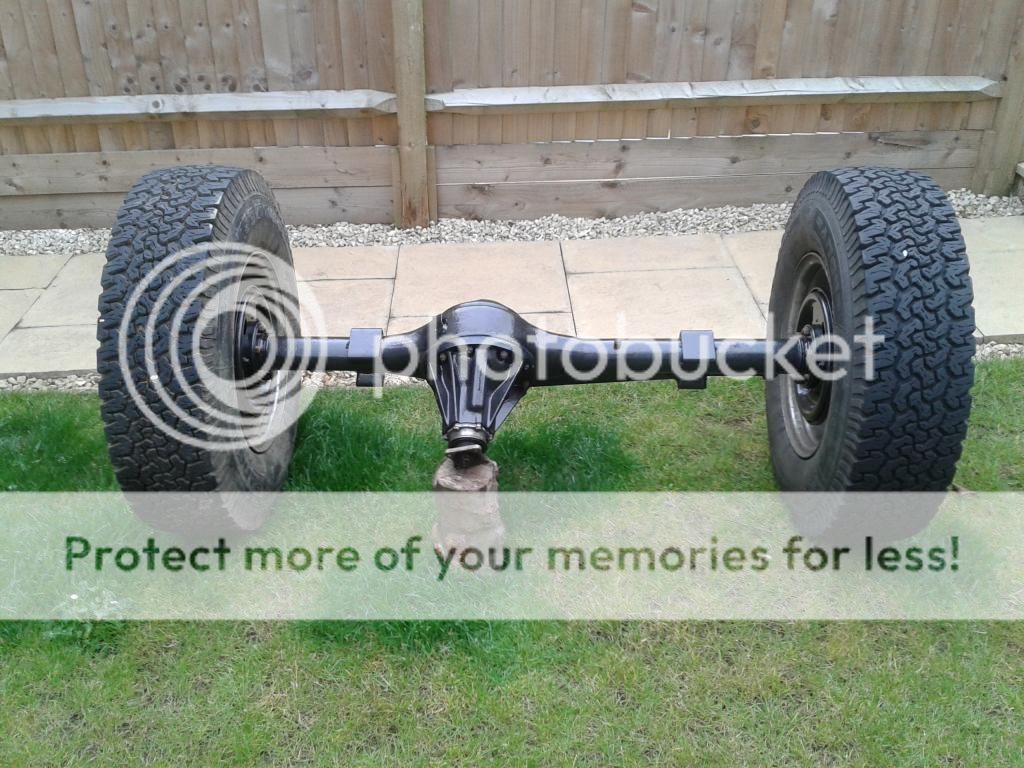
I still need to weld a plate back onto the bottom where I cut the brace off, add the brakes and lines, replace the pinion seal and fill it with oil.
It turns out the pinion nut is a bugger to undo so I'll do that when the axle is back on the chassis and I get brace it to get some force on it.
On to the front axle now:
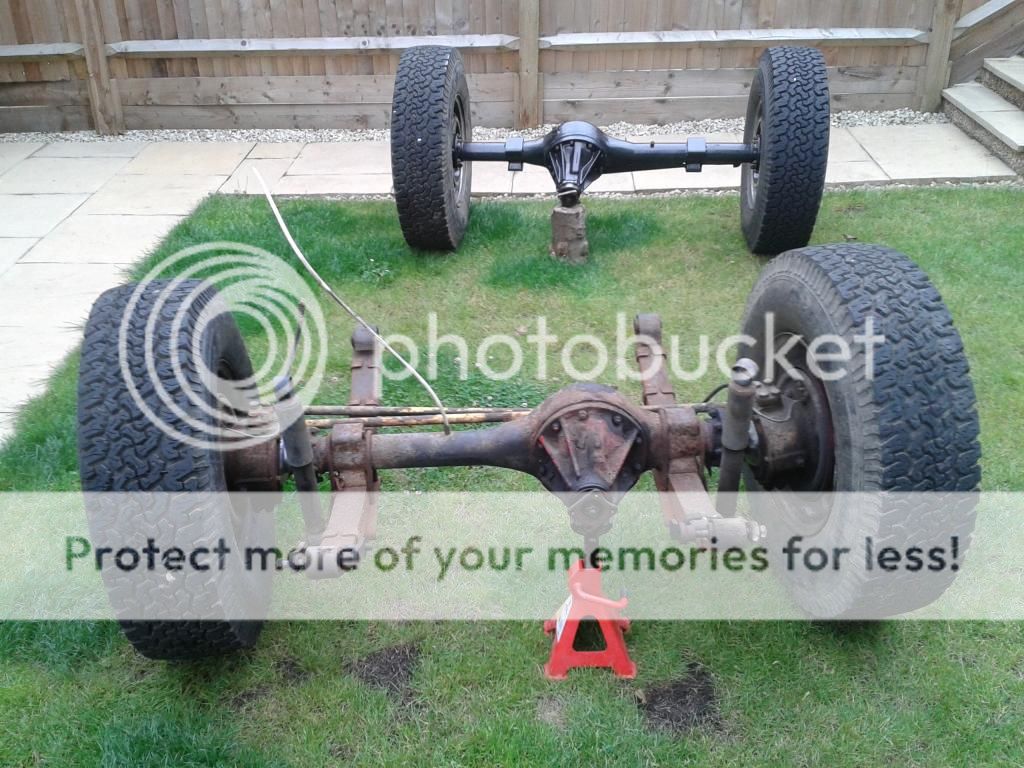
Springs and wheels off:
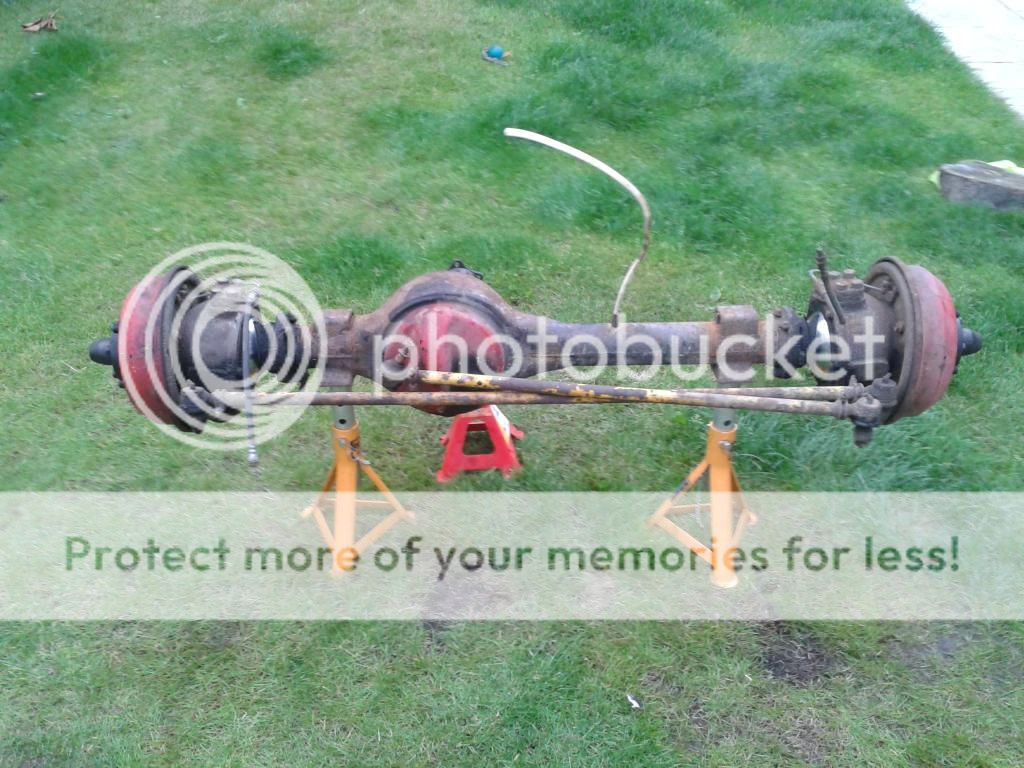
And the steering arm/track rod after a good pressure washing:

This is taking for ever...!
honolulujoe
Well-Known Member
- Posts
- 6,137
- Location
- richmond surrey
is the rest of the car up on bricks or have you taken the whole thing apart.
that first axle looks pristine btw
that first axle looks pristine btw
Freetime101
Active Member
- Posts
- 355
- Location
- North East
Cheers, probably a good days work to get the rear axle done but it took me over a month to do, working around the day job etc. The original plan was to take one axle off at a time and leave the chassis on stands but decided to take the whole thing apart in the end, see the beginning of the thread
Freetime101
Active Member
- Posts
- 355
- Location
- North East
Making progress, slowly but surely...
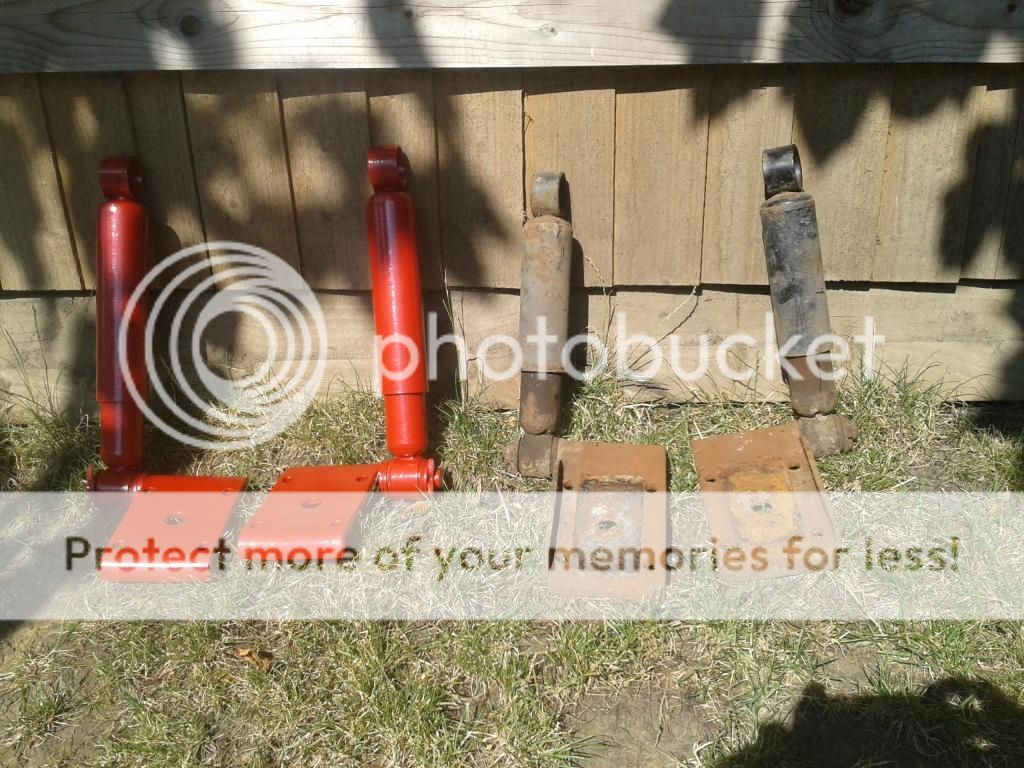
I'm fitting para's and have been advised to put the original shocks back on to see how I fare before splashing out on gas shocks so I've wire brushed the rear shocks back to bare metal ready for a coat of Hammerite:
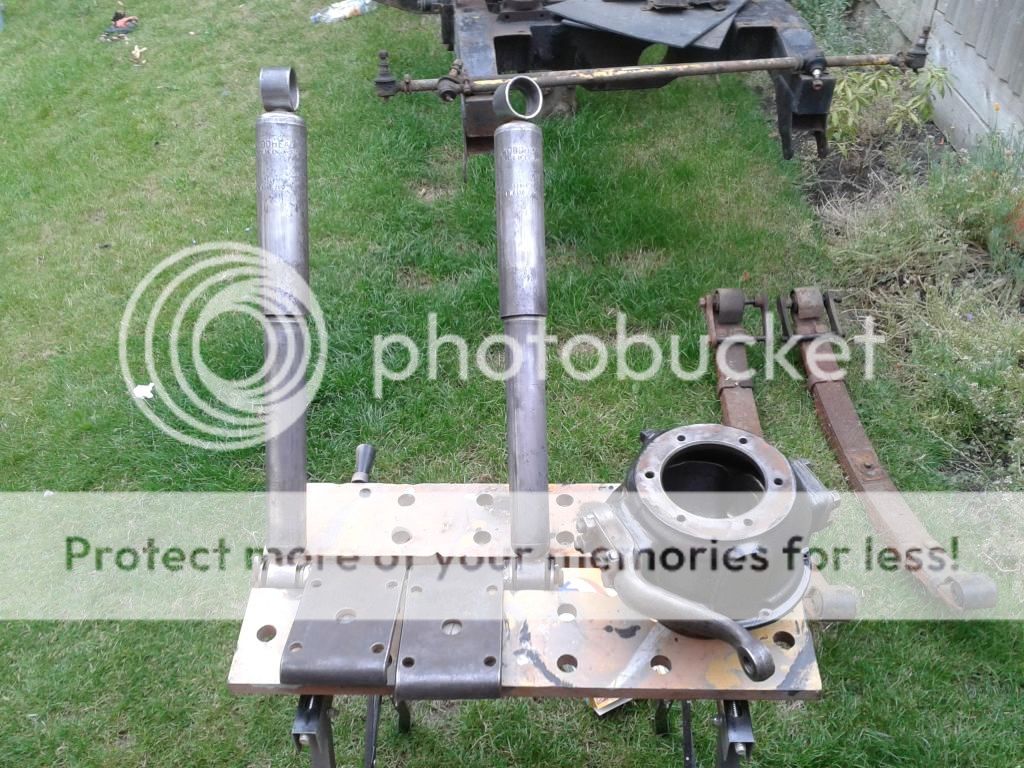
No idea whether or not they're original, they seem in pretty good nick:

I've begun paints the other parts of the axle too guess which is which:

I decided to leave the swivels together as they look ok and I need this back on the road asap... this may lead to more work in the near future but at least they are accessible.
Freetime101
Active Member
- Posts
- 355
- Location
- North East
Right then, it's been a while but I've been busy - honest...
Got the shocks painted, decided to go red for a bit of bling...
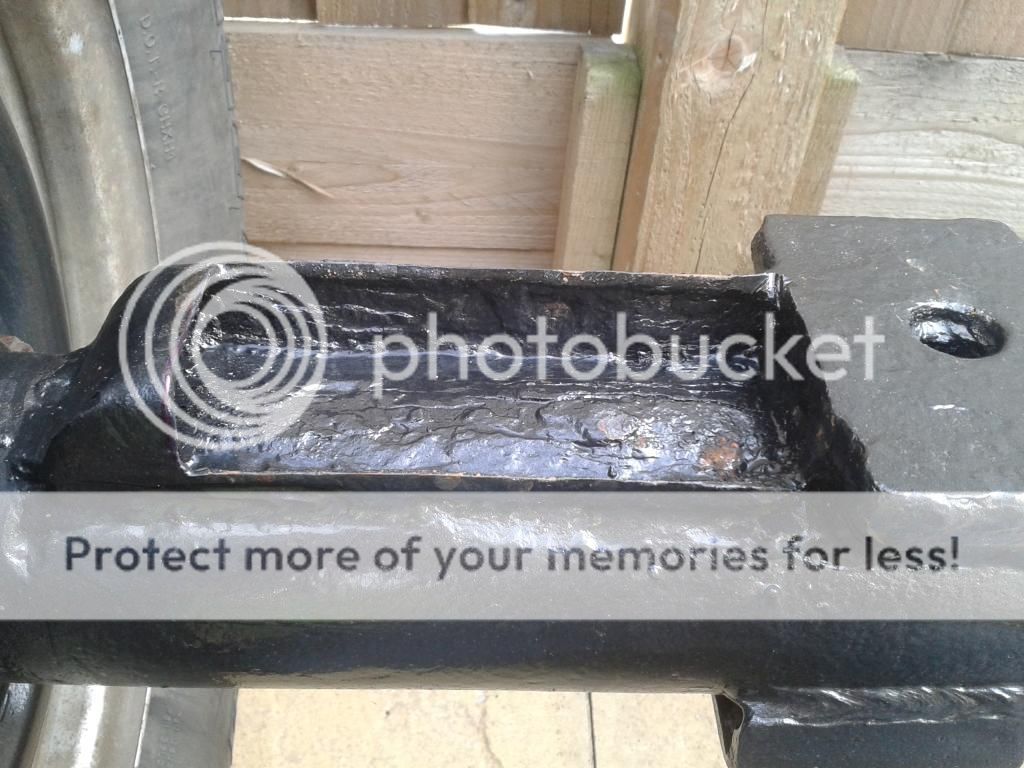
And finally got round to fixing the reinforcing gusset on the rear axle, this is how I'd left it for the past few weeks:
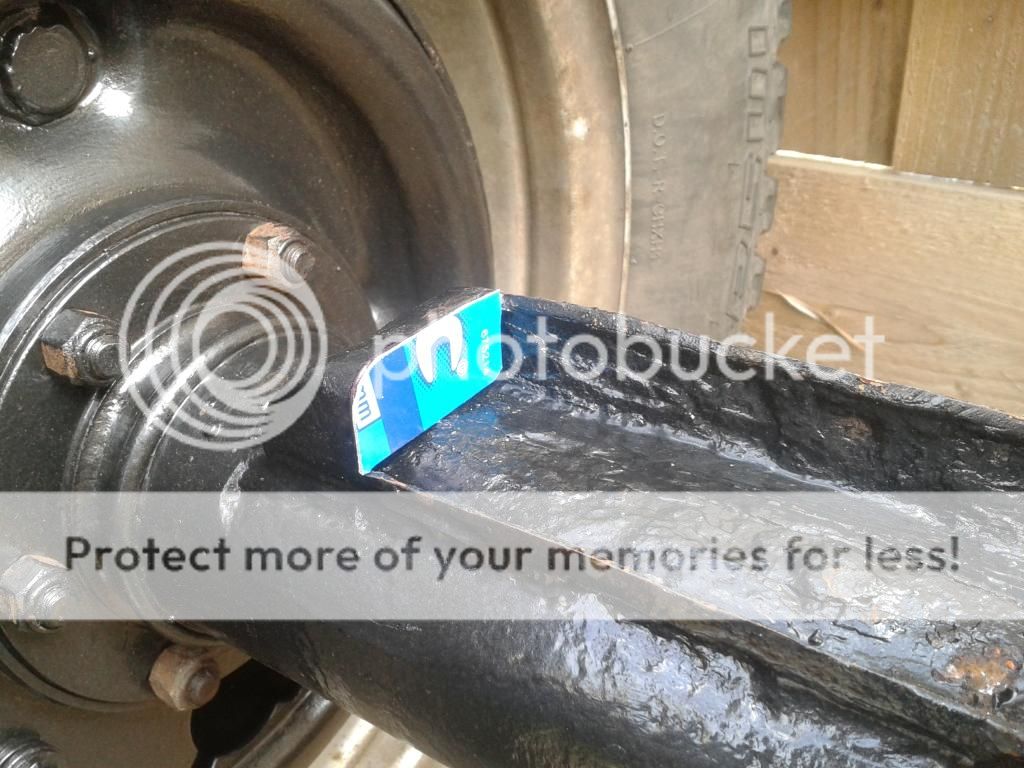
And here's how I went about fixing it:
First off it's back to preschool for some arts and crafts, put the grinder down and get the scissors out. I cut some pieces of cardboard to get the shape of the curve:
And stuck them onto another piece of cardboard to make a template:
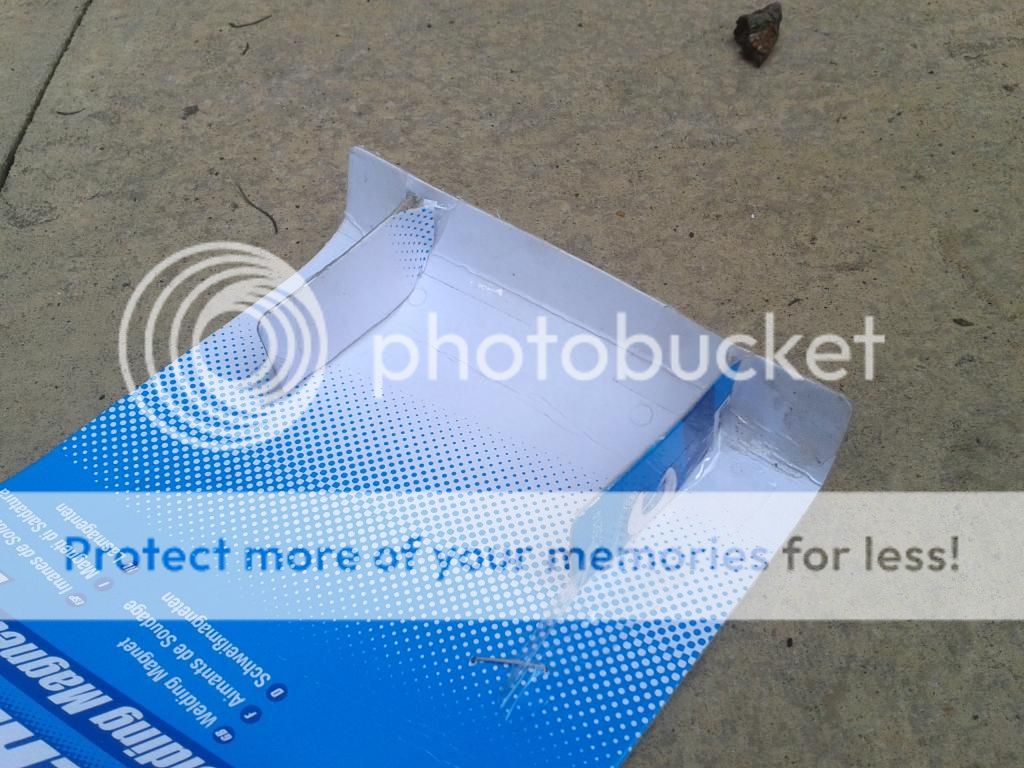
tada:


Now paint over it with black waxoil and job's a good'un!
Okay maybe not, I measured out the steel, remember, measure twice cut once!

Oops, too big...
 [/URL]
Time to treat myself to a new cutting disc I think:

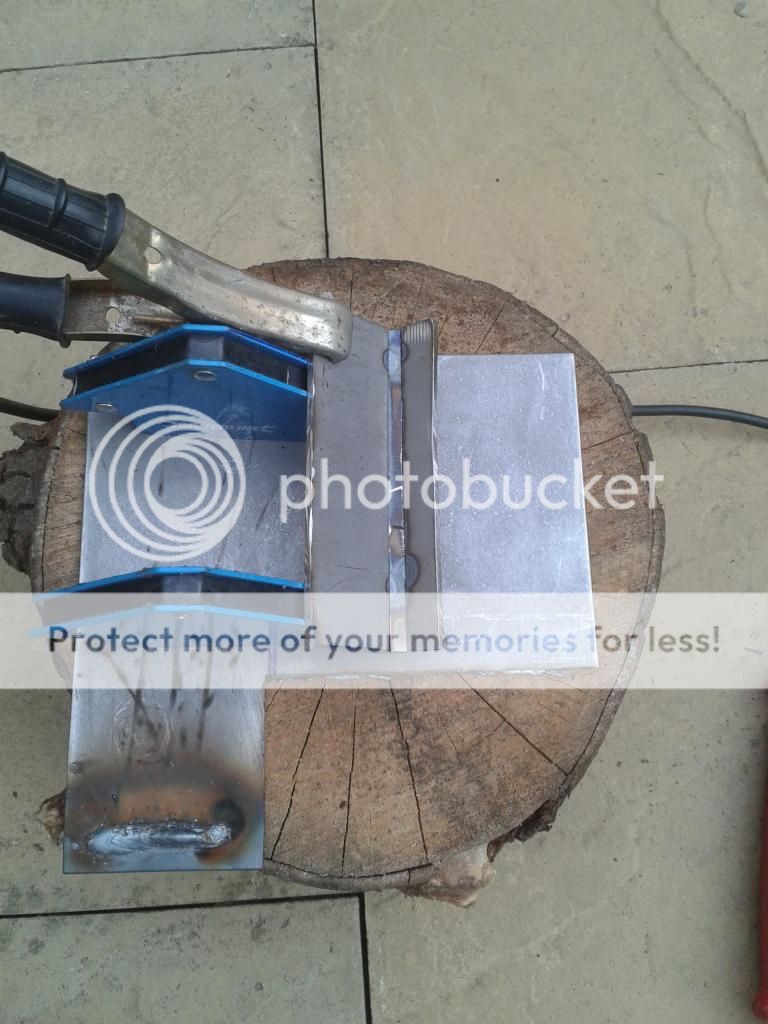
Now as I don't have a metal bending machine, and didn't fancy hammering a small curve out of 3mm steel I cut 3 separate strips to make up the curve:

And used 4 of the nastiest welds to tack it all together:
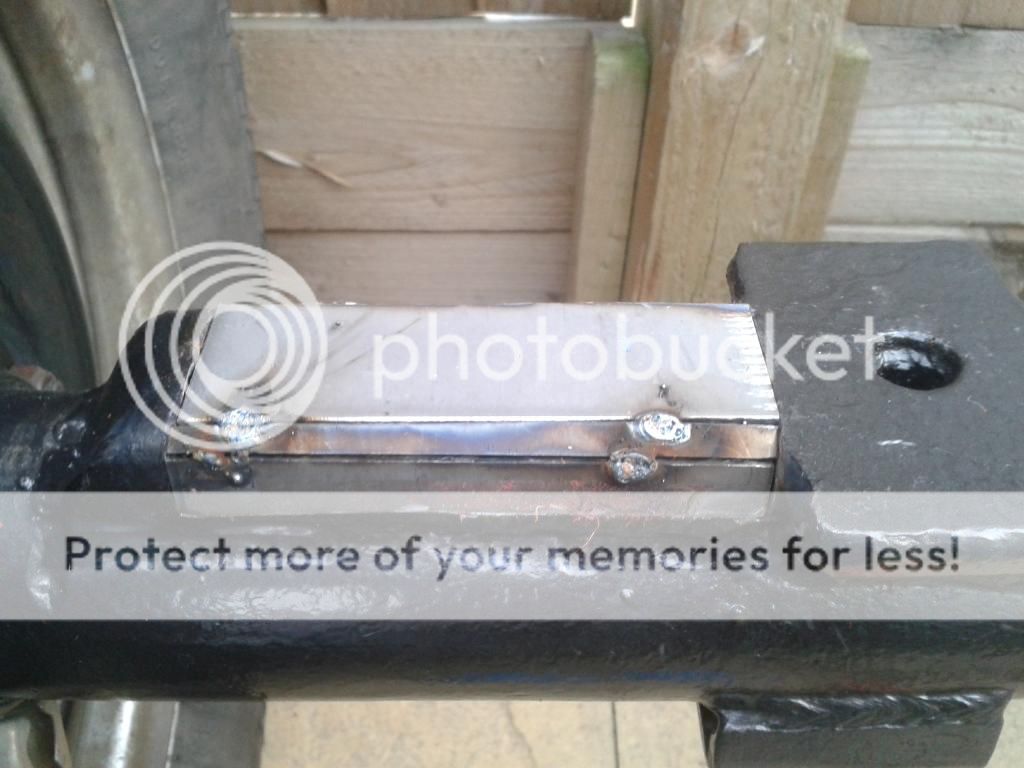
Before welding up from the inside:
Now here's where it all went Pete Tong... I made a right pigs ear of it and had to start again, the bit I'd left on the axle was mere rust so I couldn't get a decent weld. I decided to cut it all off and ground it back to bare metal. My phone threw a wobbler at this point so no pics, but you all know what clean metal looks like right?
Round 2, I gave up on the fancy curve and went for a simple right angle:
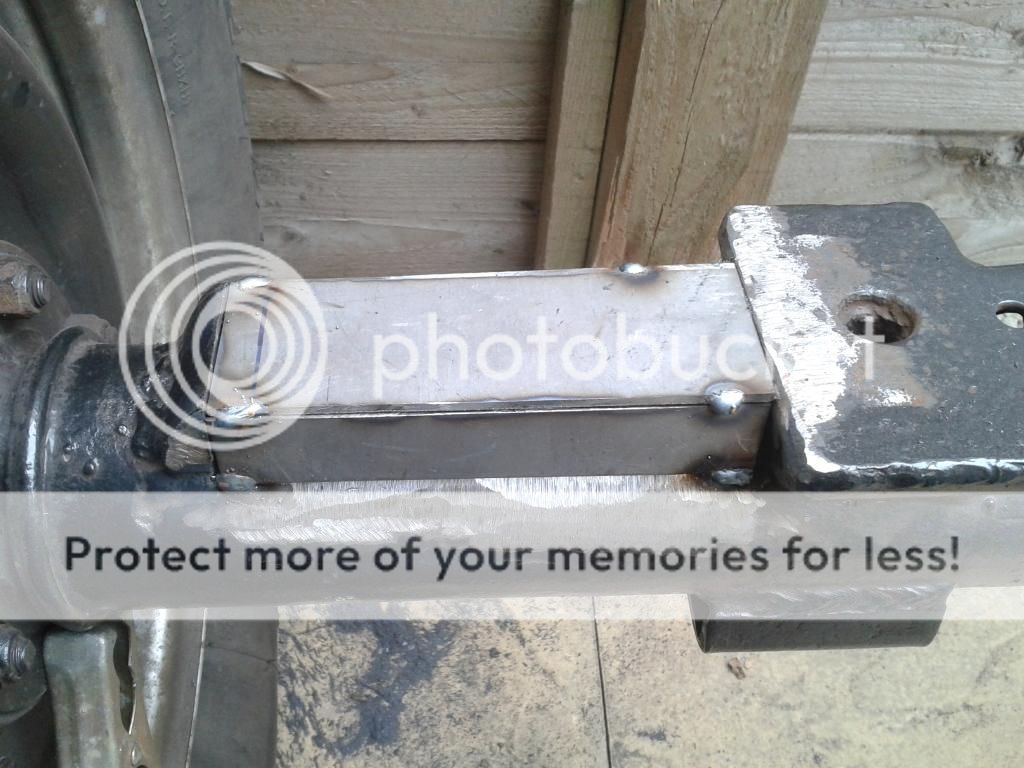
Welded it up and ground it back:

And gave it a lick of paint:

Another coat or two and it's good to go!
Got the shocks painted, decided to go red for a bit of bling...

And finally got round to fixing the reinforcing gusset on the rear axle, this is how I'd left it for the past few weeks:

And here's how I went about fixing it:
First off it's back to preschool for some arts and crafts, put the grinder down and get the scissors out. I cut some pieces of cardboard to get the shape of the curve:

And stuck them onto another piece of cardboard to make a template:

tada:


Now paint over it with black waxoil and job's a good'un!
Okay maybe not, I measured out the steel, remember, measure twice cut once!

Oops, too big...
Time to treat myself to a new cutting disc I think:

Now as I don't have a metal bending machine, and didn't fancy hammering a small curve out of 3mm steel I cut 3 separate strips to make up the curve:

And used 4 of the nastiest welds to tack it all together:

Before welding up from the inside:

Now here's where it all went Pete Tong... I made a right pigs ear of it and had to start again, the bit I'd left on the axle was mere rust so I couldn't get a decent weld. I decided to cut it all off and ground it back to bare metal. My phone threw a wobbler at this point so no pics, but you all know what clean metal looks like right?
Round 2, I gave up on the fancy curve and went for a simple right angle:

Welded it up and ground it back:

And gave it a lick of paint:

Another coat or two and it's good to go!
Last edited:
Freetime101
Active Member
- Posts
- 355
- Location
- North East
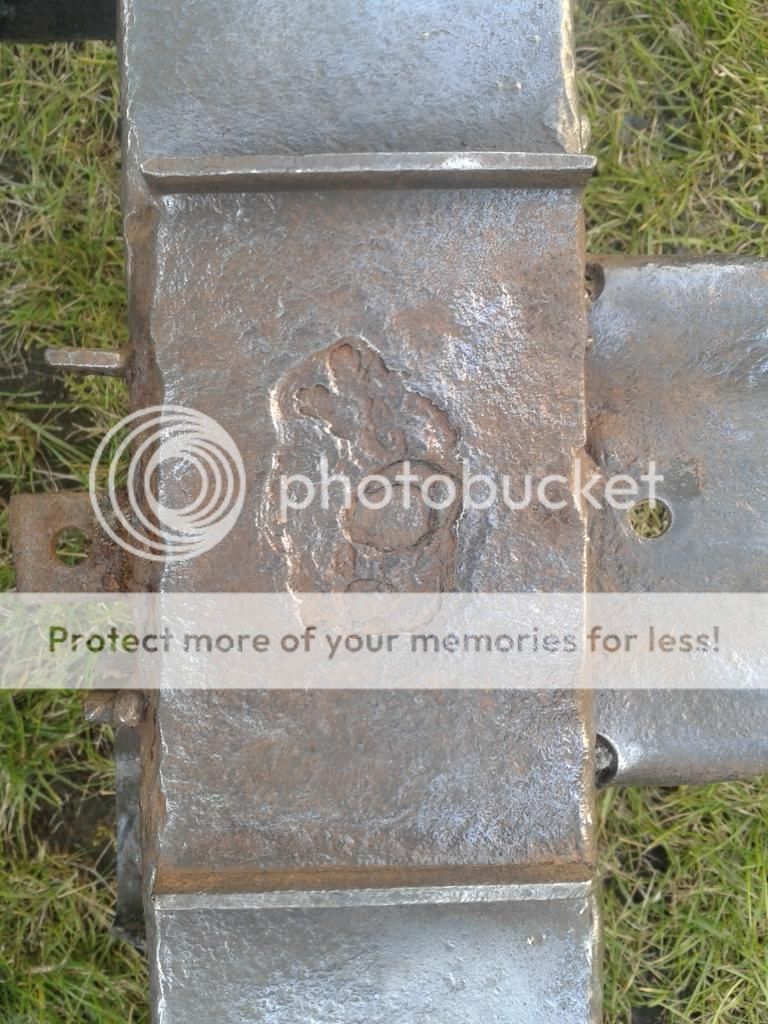
I've also been cracking on with the chassis:
I started dressing back some of the PO's welds:

This turned out to be a bad idea:

This is the bottom of the drives side dumb iron, I'll come back to this later.
I've found 1 or 2 other spots that need some attention:
After a ridiculous amount of time spent with a wire brush in the grinder, I'm nearly done:
Just the first coat of red oxide, will be chassis black ontop. I was going to go for POR15 but couldn't justify the cost, think I'll spend the money on treating inside the chassis too.
However something ain't right:

One dumb iron is higher than the other:

The question is, is one high or is one low? I'll be back shortly after some slightly more accurate measuring.

I started dressing back some of the PO's welds:

This turned out to be a bad idea:

This is the bottom of the drives side dumb iron, I'll come back to this later.
I've found 1 or 2 other spots that need some attention:

After a ridiculous amount of time spent with a wire brush in the grinder, I'm nearly done:

Just the first coat of red oxide, will be chassis black ontop. I was going to go for POR15 but couldn't justify the cost, think I'll spend the money on treating inside the chassis too.
However something ain't right:

One dumb iron is higher than the other:

The question is, is one high or is one low? I'll be back shortly after some slightly more accurate measuring.
Freetime101
Active Member
- Posts
- 355
- Location
- North East
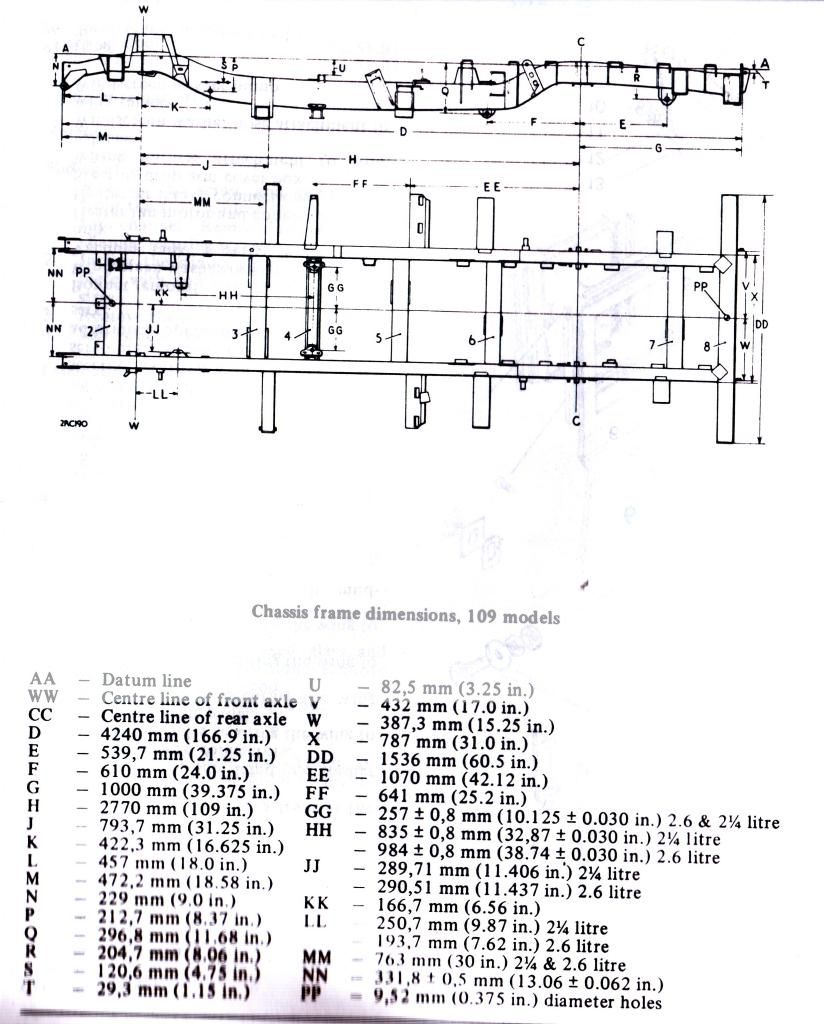
So according to the manual, the centre of the bolt hole should be 9 inches below the top of the chassis rail (measurement N):
So I came up with this ingenious measuring device:
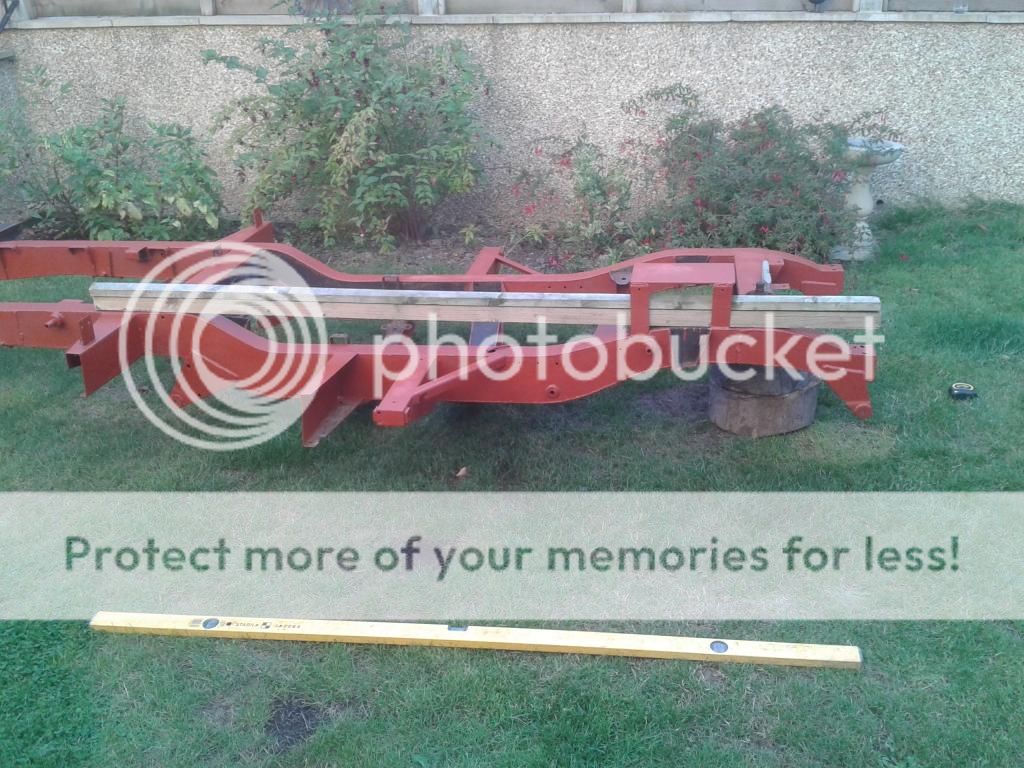
Driver's side is low:

9 and 7/16ths:
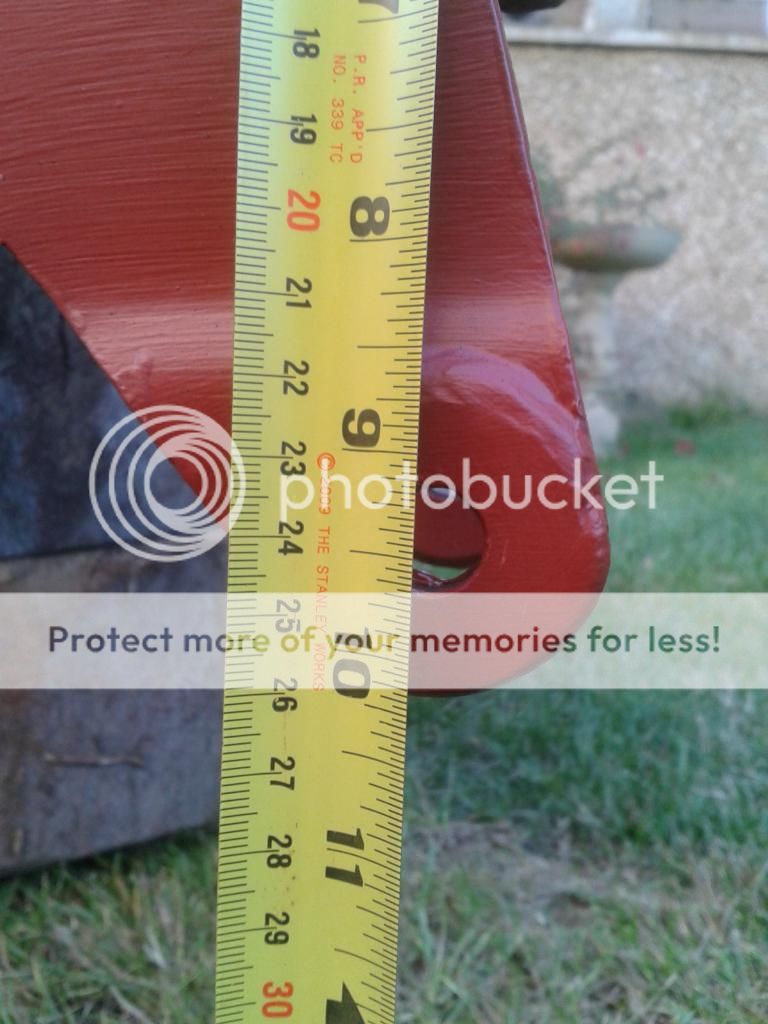
Passengers is high:

8 and 5/8ths:

About 3/4 of an inch difference between them... Do I raise the drivers, lower the passengers or put both back to 9"?

So I came up with this ingenious measuring device:

Driver's side is low:

9 and 7/16ths:

Passengers is high:

8 and 5/8ths:

About 3/4 of an inch difference between them... Do I raise the drivers, lower the passengers or put both back to 9"?
Rubins4
Well-Known Member
- Posts
- 813
Hi. Good work on the overhauling of bits and pieces. Sorry I can't help with your dumb iron question, but I hate to see all your time and effort with the rebuild and thread posting with no comments.
Just overhauling my front axle at the minute so red oxide and black paint everywhere too!
Like your measuring apparatus anorl
Just overhauling my front axle at the minute so red oxide and black paint everywhere too!
Like your measuring apparatus anorl
Freetime101
Active Member
- Posts
- 355
- Location
- North East
Hi, thanks for the comment I think I'll raise the drivers side as I need to weld a plate underneath anyway, this will lower my suspension slightly but as it's only a fraction of an inch I don't suppose it matters.
I have to say despite it's bad reputation I'm pretty impressed with the Red Oxide (trade tin from Screwfix), it covers well and sticks like muck to a blanket!
I've also stripped and painted the front axle, just need to put it back together now... I used hammerite for the axle though and I'm not as impressed...
I think I'll raise the drivers side as I need to weld a plate underneath anyway, this will lower my suspension slightly but as it's only a fraction of an inch I don't suppose it matters.I have to say despite it's bad reputation I'm pretty impressed with the Red Oxide (trade tin from Screwfix), it covers well and sticks like muck to a blanket!
I've also stripped and painted the front axle, just need to put it back together now... I used hammerite for the axle though and I'm not as impressed...
Rubins4
Well-Known Member
- Posts
- 813
I think what ever you use, by the time you e waved a spanner and socket at it to put it all back together it will need a touch up.
I'm starting to think about chassis prep as I will need to get on to it soon ish. There is thewaxoil....dinitrol... debates to wade through
How are you cleaning you bits an pieces up before wire brushing? I've been using a degreaser but to be honest it's crap. Petrol is much better!
I'm starting to think about chassis prep as I will need to get on to it soon ish. There is thewaxoil....dinitrol... debates to wade through
How are you cleaning you bits an pieces up before wire brushing? I've been using a degreaser but to be honest it's crap. Petrol is much better!
Freetime101
Active Member
- Posts
- 355
- Location
- North East
To be honest I don't bother, I pressure wash most of the muck off then set to it with grinder. I then clean the bare metal thoroughly with white spirit before painting.
When I painted the cylinder head I used petrol to clean it - by far the best option I think.
When I painted the cylinder head I used petrol to clean it - by far the best option I think.
Freetime101
Active Member
- Posts
- 355
- Location
- North East
What's the most helpful thing during a Land Rover rebuild?
A house move? No? Thought not...
Anyway, it seems I'm daft enough to attempt this, so here we go!
My plan is to put the Landy back together and get it trailered to the new place. I had a crazy plan to put it back together, MOT it, then drive it - but this would be far too much work in not enough time. It would also be a waste of oil and brake fluid etc as I'd be dismantling it all again at the other end!
So, engine and gearbox back in:
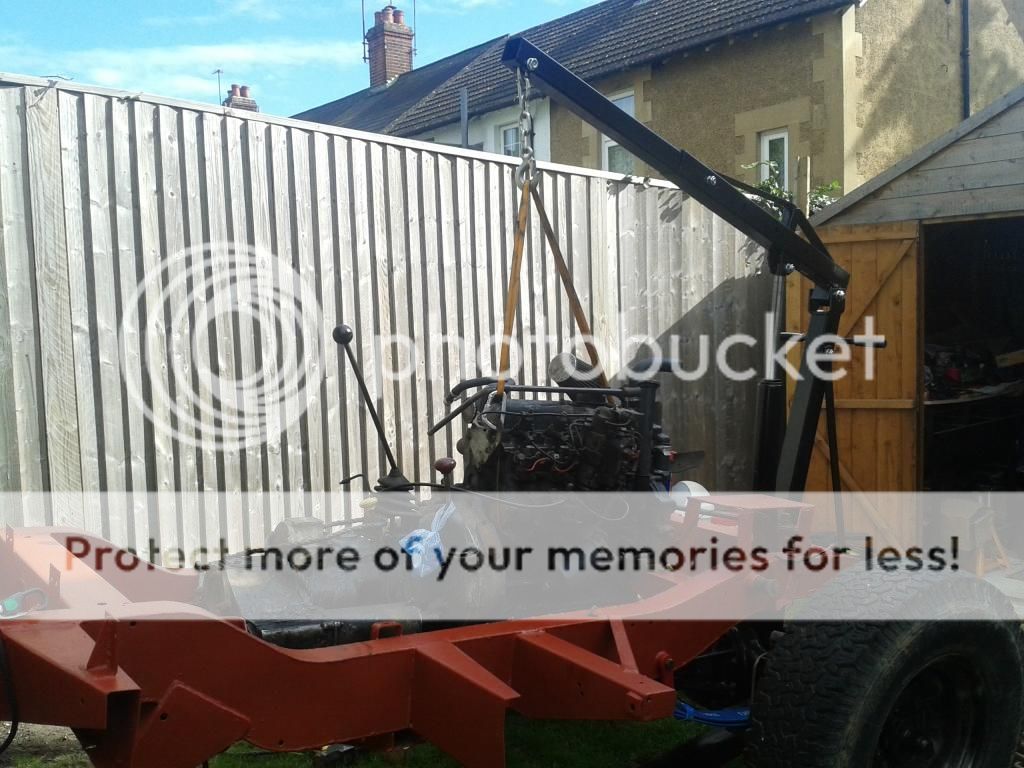
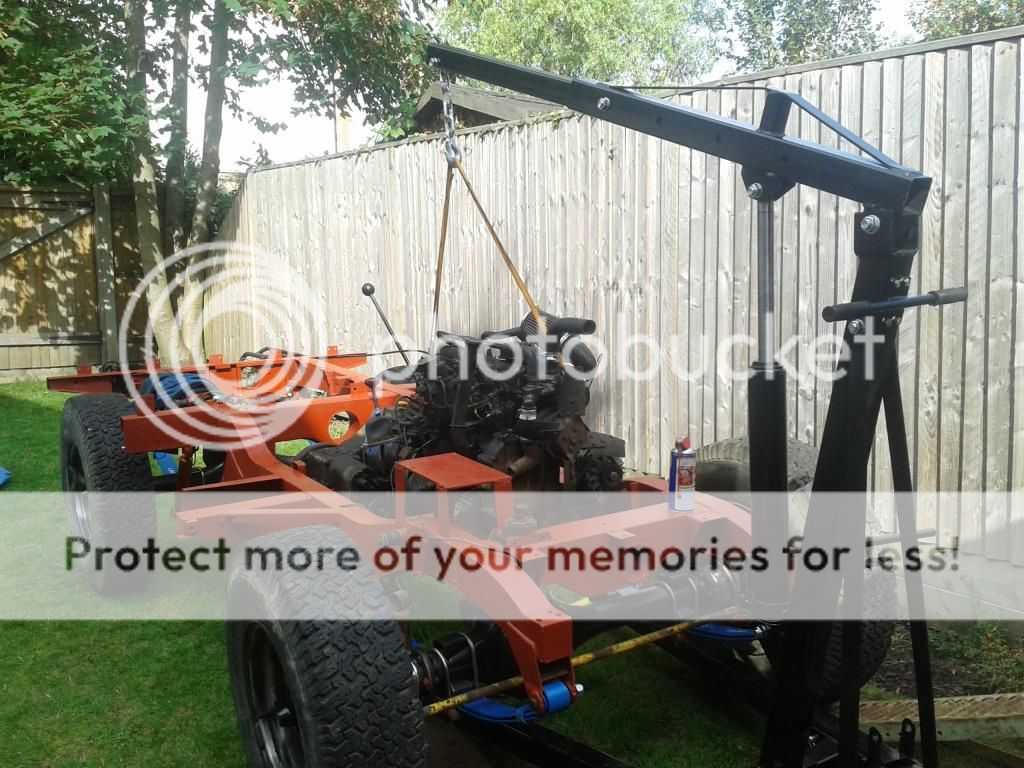
Bolting shiny repainted parts, to half finished parts, to manky old parts is a truly upsetting experience, but hey ho, needs must!
Next up is the body work and packing it all up ready to ship!
honolulujoe
Well-Known Member
- Posts
- 6,137
- Location
- richmond surrey
chassis looks good
Freetime101
Active Member
- Posts
- 355
- Location
- North East
That's just the undercoat (red oxide), I was going to paint it black but ran out of time...
It's in pretty good nick but there are a few places still to weld
Covered in scratches and manky oil now though
It's in pretty good nick but there are a few places still to weld
Covered in scratches and manky oil now though
Aaron Moore
New Member
- Posts
- 7
- Location
- Northern Ireland
The is defintely looking good, not too many patches, I ahd the same issue with the dumb irons, I just dropped the one with the worst repair to the same level as the other. Nice to see another series 3 being rebuilt though, keep at it!
Freetime101
Active Member
- Posts
- 355
- Location
- North East
Right then, it's been a while but we're back on track with this
Just a quick recap:
Both axles have been stripped, rebuilt and painted with black Hammerite - with a splash of red here and there, because why not
The chassis has been stripped, welded and the front dumb irons levelled out. It's now sporting a fresh coat of chassis black on top of a few coats of red oxide.
We're sitting on GB parabolic springs with the original oil shocks for now. The springs give a 2" lift so I'll need longer shocks and brake lines - just need to decide oil or air
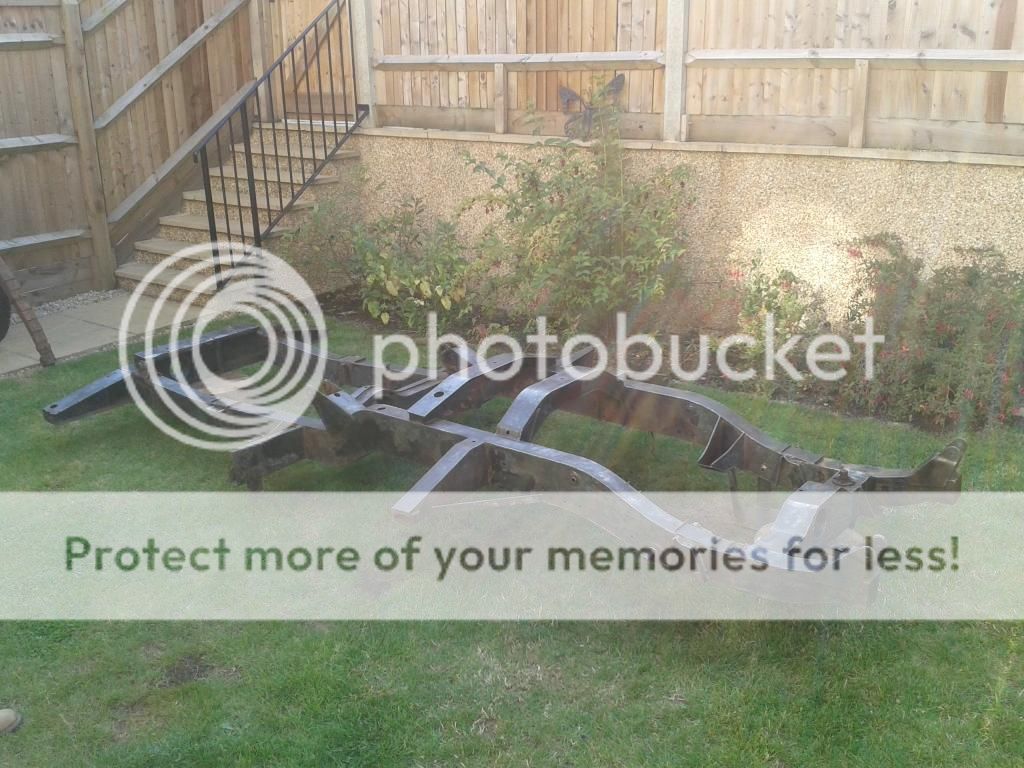
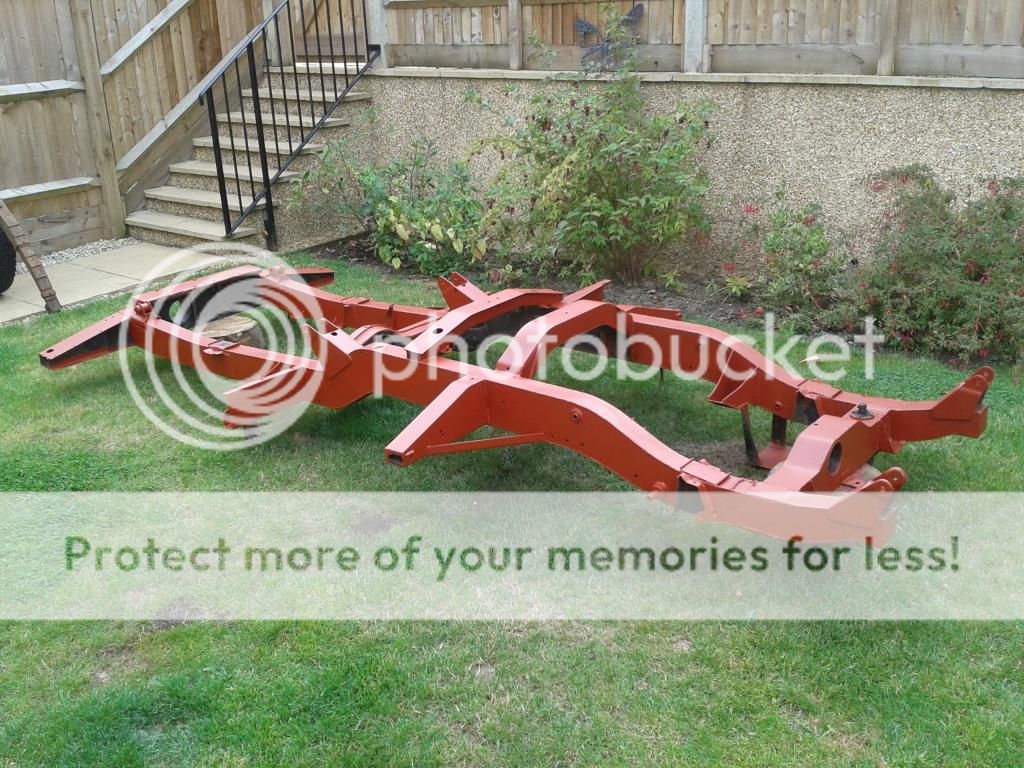
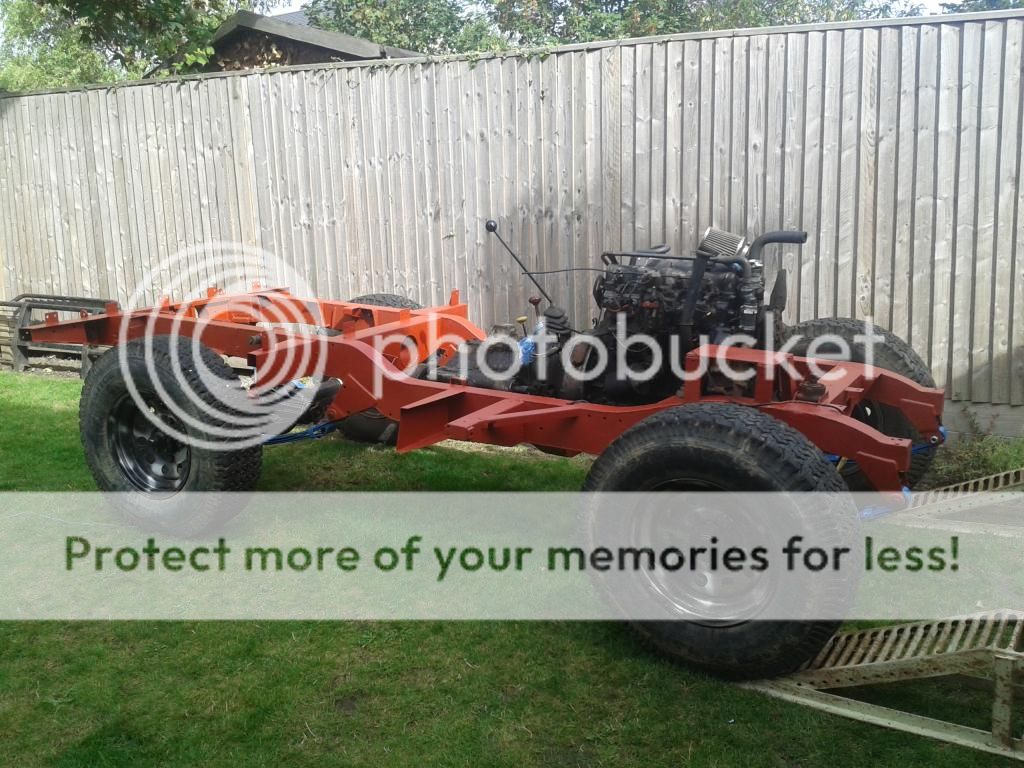
The chassis and axles are back together so we finally have a rolling chassis:


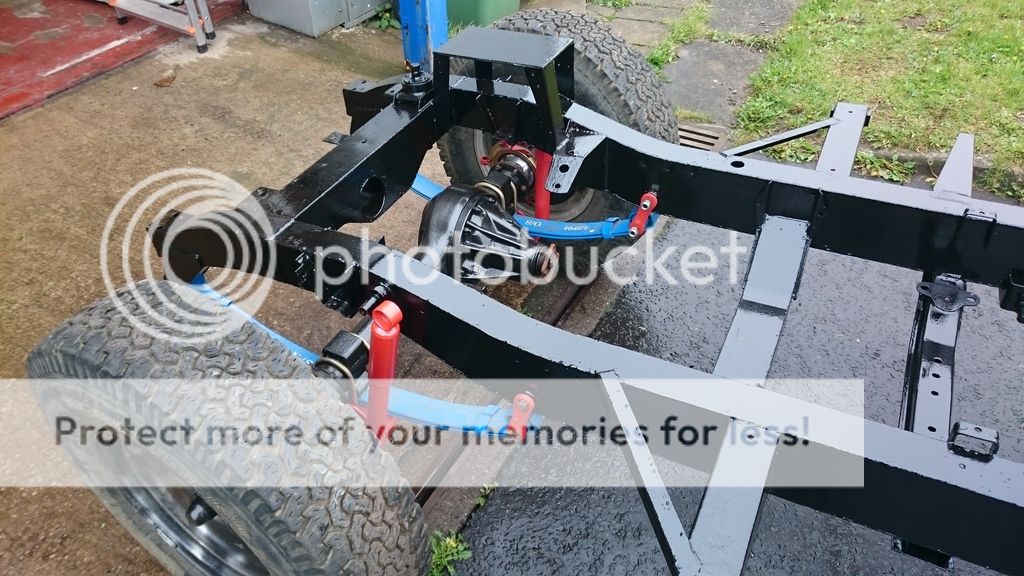


I've left the shackle bolts loose for now, I'll tighten them once the body and engine are on so the Landy is sitting at it's normal height. I also need to wait until the engine and body weigh the chassis down enough to fit the shocks - I'll be buying longer shocks but want to test the oil filled shocks to decide whether to go oil or gas
Up next is the engine and gearbox!
Just a quick recap:
Both axles have been stripped, rebuilt and painted with black Hammerite - with a splash of red here and there, because why not
The chassis has been stripped, welded and the front dumb irons levelled out. It's now sporting a fresh coat of chassis black on top of a few coats of red oxide.
We're sitting on GB parabolic springs with the original oil shocks for now. The springs give a 2" lift so I'll need longer shocks and brake lines - just need to decide oil or air
The chassis and axles are back together so we finally have a rolling chassis:


I've left the shackle bolts loose for now, I'll tighten them once the body and engine are on so the Landy is sitting at it's normal height. I also need to wait until the engine and body weigh the chassis down enough to fit the shocks - I'll be buying longer shocks but want to test the oil filled shocks to decide whether to go oil or gas
Up next is the engine and gearbox!
Similar threads
- Replies
- 0
- Views
- 380
- Replies
- 8
- Views
- 436
- Replies
- 6
- Views
- 794