Jackual_NZ
New Member
- Posts
- 379
- Location
- Hastings, NZ
Rebuilding a turbo isnt as difficult a task as it may seem, The only part you need to see a specailist is the balancing of the turbo wheels, I took mine to be re-built by a turbo engineer and was quoted $760 + GST (about £355 + VAT !). Needless to say i didnt ask him to carry on, i paid for the work already done ($80 labour) and orderd a re-build kit(Garrett part number. 709143-0001) from the local garage.
The first thing to do is get the turbo out of the car, which if its been on there all its life could be a task as the exhaust downpipe and manifold studs could well be siezed. undoing all the plumbing (oil feed, intercooler and air filter pipes) as needed at this step, also take off the wastegate actuator (two 8mm screws and a circlip).
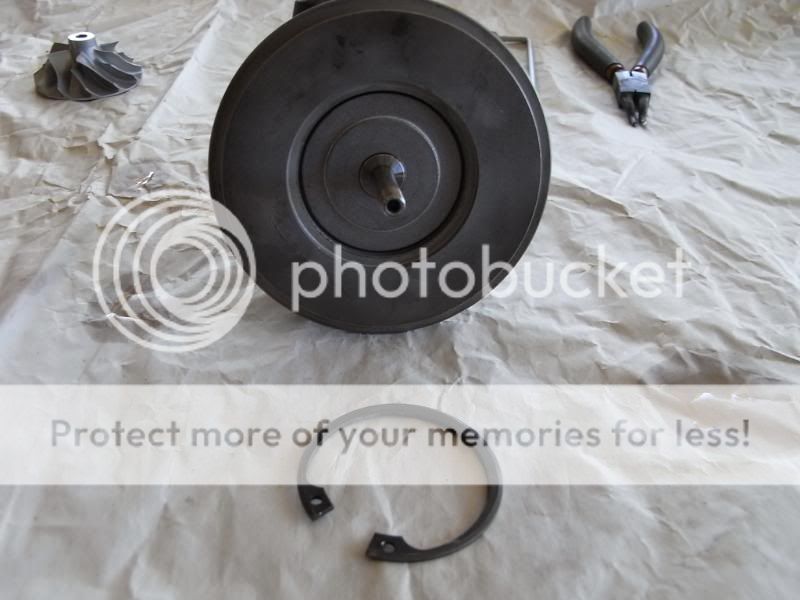
Now then, youve got your turbo on the bench. Time to mark up the positions of the housings in relation the the main bearing block. Strip down begins by removing the large circlip under the aluminium compressor housing, keep the circlip safe because there is not one supplied in the kit.
The exhaust housing now takes a different approach, undo the four retaining bolts about half way, The housing will no doubt be seized solid, either leave over night soaked in sillicone pentrating oil or if availble blow torch and persistance.
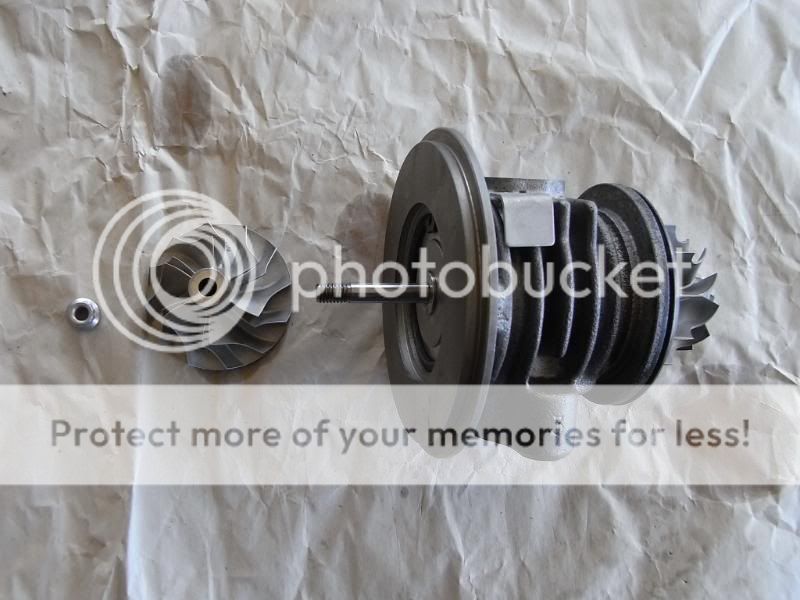
Now its in three main parts. The aluminium compressor housing, The exhaust housing, And the main bearing block with the two turbo wheels.
A very important step is to mark the positon of the compressor wheel on the shaft using a scribe this helps for rebalencing. Using a 10mm socket and 12-point 8mm socket remove the nut off the turbo shaft (Left hand thread) carefully withdraw the compressor wheel from the shaft. The whole shaft assembly can now be withdrawn from the exhaust side.
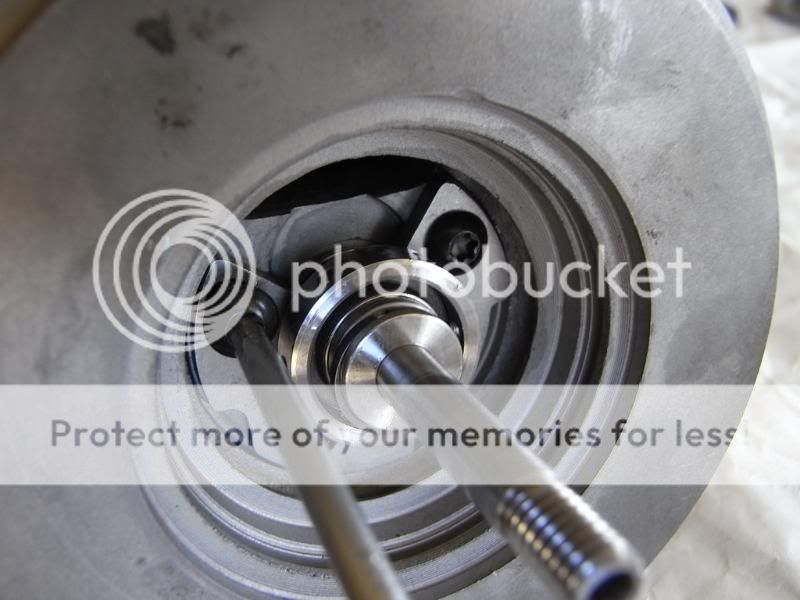
On the compressor side of the main bearing block, The cover plate of the mechanicle seal and circlip are now visible, remove the circlip and the cover, The mechaniclseal and thrust bearing with three torx head screws are visible, remove the three torx screws and then withdraw the seal along with the thust bearing.
behind the thrust bearing is one of two phosphor-bronze main bearings, the compressor side bearing will just slide out, ont hte exhaust side it will require a tiny circlip to be removed, i removed all circlips because new ones are supplied in the kit.
Thats it all in bits now, i beadblasted the parts clean and checked for cracks around the wheels and housings.
Now time for the photo rebuild (sorry i didnt get pics of the strip down!)
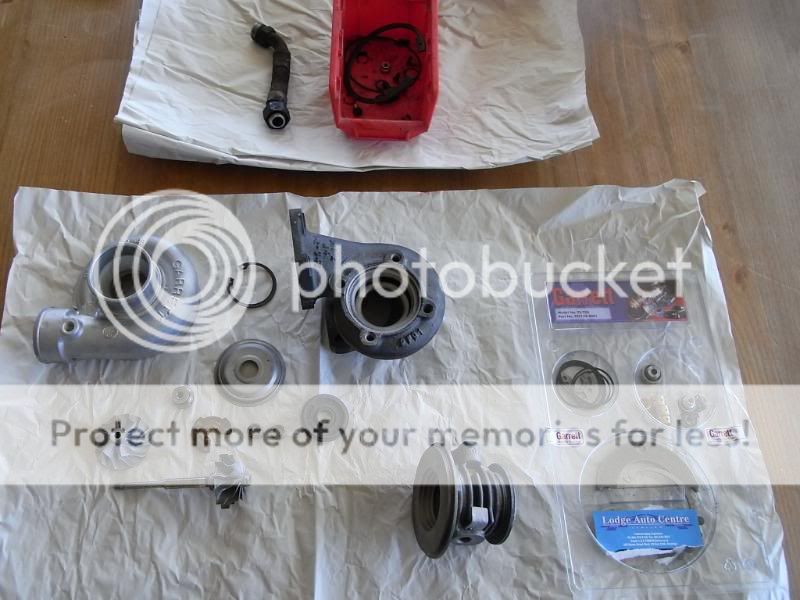
Heres what now should be covering your workbench/dining room table!.
Ok, so to begin the rebuild i reversed the order of strip down, put the new circlips in.

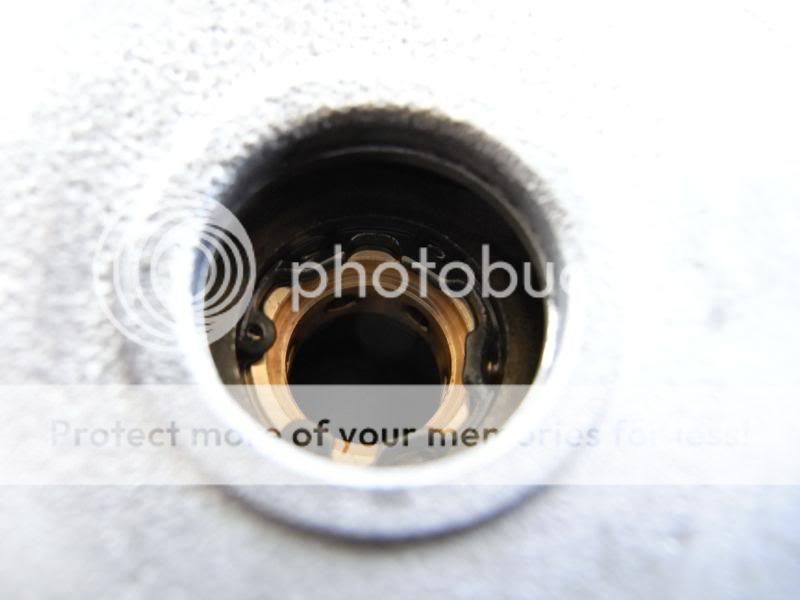
Two types of bearings were supllied in the kit, the skinnier of the pair are the ones that fit, use loads of engine oil on the bearings.
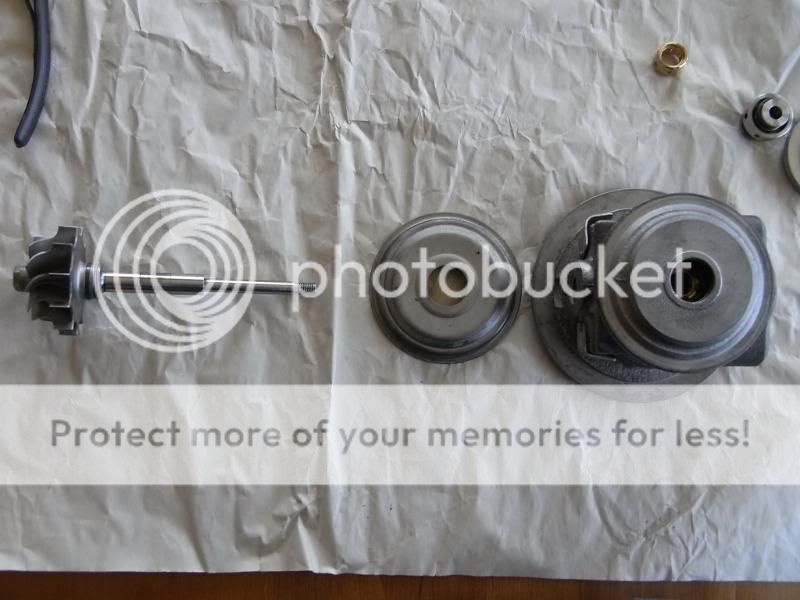
Here is the parts that make up the mechanicle seals and thrust bearing.

The seal on the exhaust side has a sealing ring and a sring clip, its real fiddly job to put on.
Behind the exhaust impeller wheel the was a baffle/sheild thing. slide this onto the shaft and the locate the shaft with the seal rings and baffle into the main bearing block.
It took me about 20 mins of swearing to get the seal rings and spring clip to locate, once located dont pull it back out as this will destroy the spring clip.
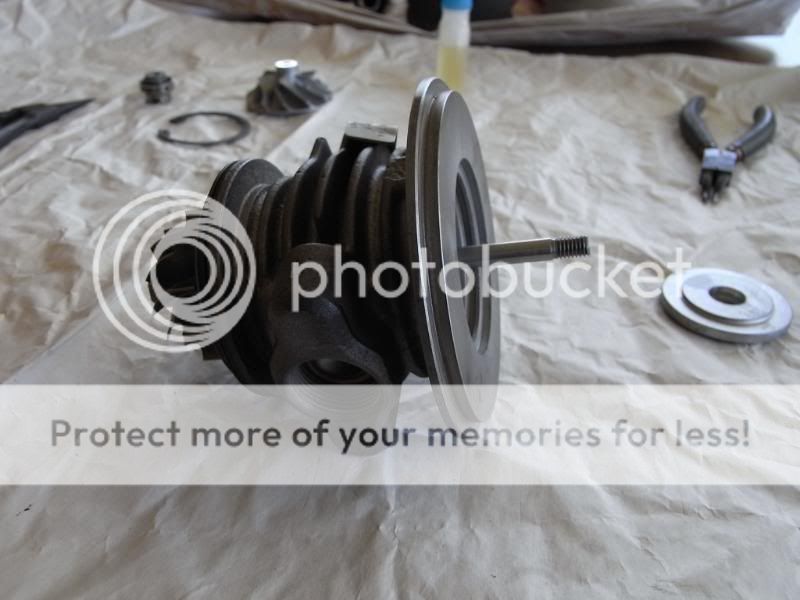
The seal on the compressor side of the turbo is also part of the thrust bearing, again the sealing ring was a bit of a pig to fit, almost like a piston ring, but a lot lot smaller. three torx screws secure the thrust plate with a dab of loctite just to be sure.
Then the cover plate and o-ring which fits on the groove around the edge of the cover, followed by the circlip with the chamferd edge facing outwards.

Next using the position marks line up the compressor wheel.
Now we should have the main bearing unit complete. something like this;
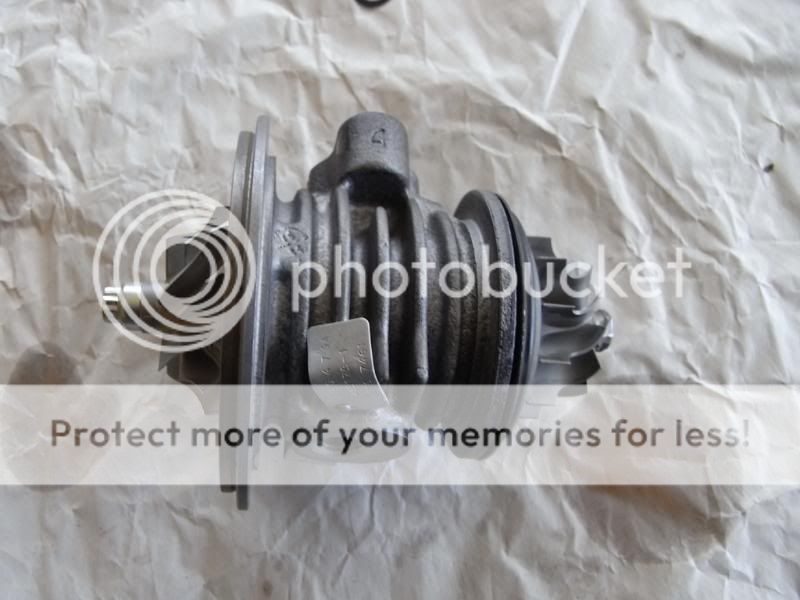
This whole assembly should now be balenced by a turbo specialist, if not you could end up with one of the impeller wheels disintegrating and going into the engine.
there should be a little amount of slop in the turbo shafts, the bearings "float" on a layer of oil when the engine is running, dont forget that oil measures something between bearing surfaces!.
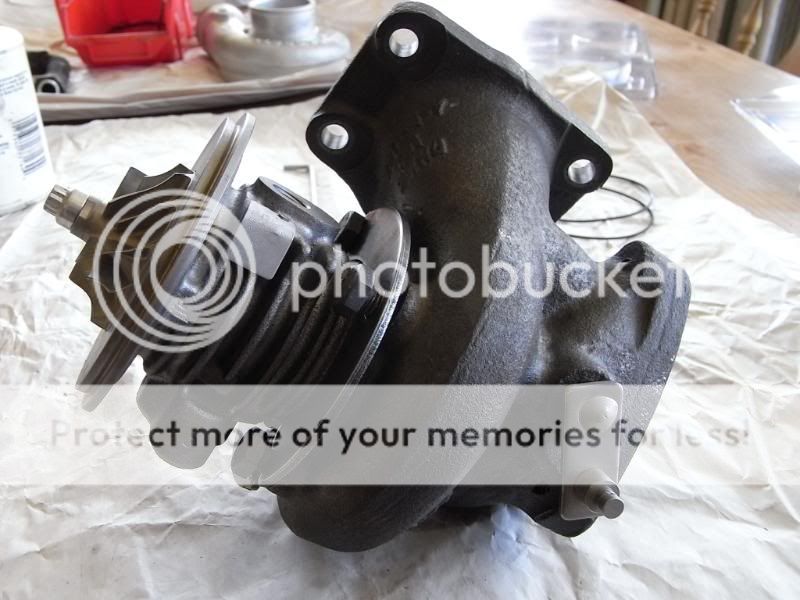
The rest is pretty straight forward, using the new retainers and bolts, put the exhaust housing back up to the main bearing block, i used a pin punch to mark the position but if your not going to blast clean then tippex or marker pen will do the job.
The next part i had to take the turbo to work to use some big circlip pliers to position the compressor housing dont forget the o-ring inbetween the bearing block and housing.
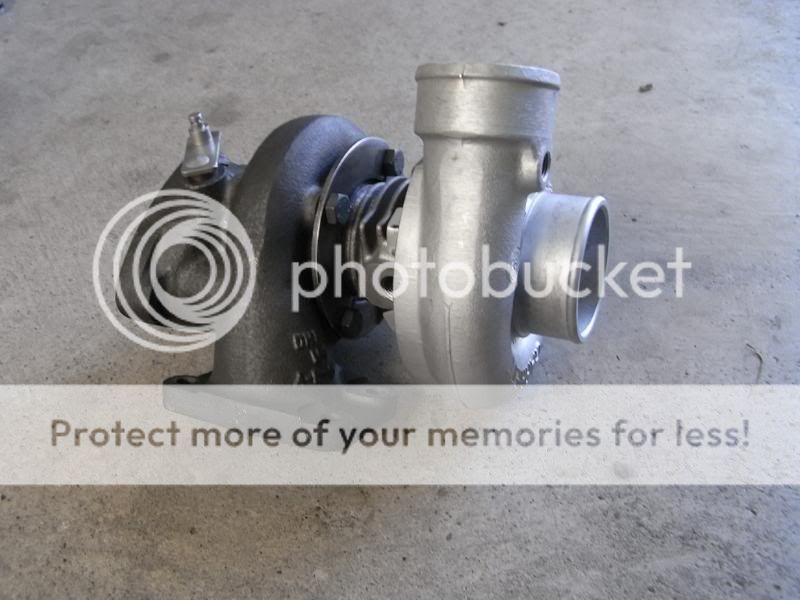
Then all there is to do is fit the wastegate actuator, plumb the oil and air pipes back in, and bolt back up the manifold and downpipe using new nuts and a dab of copper ease.
Took about and hour to remove,3 hours to dissassemble and blast clean & 2 hours before work to re-build.
spent $220 on the re-build kit but most important of all is i saved all that hard earned money from that riporf turbo twallop.
!). Needless to say i didnt ask him to carry on, i paid for the work already done ($80 labour) and orderd a re-build kit(Garrett part number. 709143-0001) from the local garage. The first thing to do is get the turbo out of the car, which if its been on there all its life could be a task as the exhaust downpipe and manifold studs could well be siezed. undoing all the plumbing (oil feed, intercooler and air filter pipes) as needed at this step, also take off the wastegate actuator (two 8mm screws and a circlip).
Now then, youve got your turbo on the bench. Time to mark up the positions of the housings in relation the the main bearing block. Strip down begins by removing the large circlip under the aluminium compressor housing, keep the circlip safe because there is not one supplied in the kit.
The exhaust housing now takes a different approach, undo the four retaining bolts about half way, The housing will no doubt be seized solid, either leave over night soaked in sillicone pentrating oil or if availble blow torch and persistance.
Now its in three main parts. The aluminium compressor housing, The exhaust housing, And the main bearing block with the two turbo wheels.
A very important step is to mark the positon of the compressor wheel on the shaft using a scribe this helps for rebalencing. Using a 10mm socket and 12-point 8mm socket remove the nut off the turbo shaft (Left hand thread) carefully withdraw the compressor wheel from the shaft. The whole shaft assembly can now be withdrawn from the exhaust side.
On the compressor side of the main bearing block, The cover plate of the mechanicle seal and circlip are now visible, remove the circlip and the cover, The mechaniclseal and thrust bearing with three torx head screws are visible, remove the three torx screws and then withdraw the seal along with the thust bearing.
behind the thrust bearing is one of two phosphor-bronze main bearings, the compressor side bearing will just slide out, ont hte exhaust side it will require a tiny circlip to be removed, i removed all circlips because new ones are supplied in the kit.
Thats it all in bits now, i beadblasted the parts clean and checked for cracks around the wheels and housings.
Now time for the photo rebuild
(sorry i didnt get pics of the strip down!)
Heres what now should be covering your workbench/dining room table!.
Ok, so to begin the rebuild i reversed the order of strip down, put the new circlips in.
Two types of bearings were supllied in the kit
, the skinnier of the pair are the ones that fit, use loads of engine oil on the bearings.
Here is the parts that make up the mechanicle seals and thrust bearing.
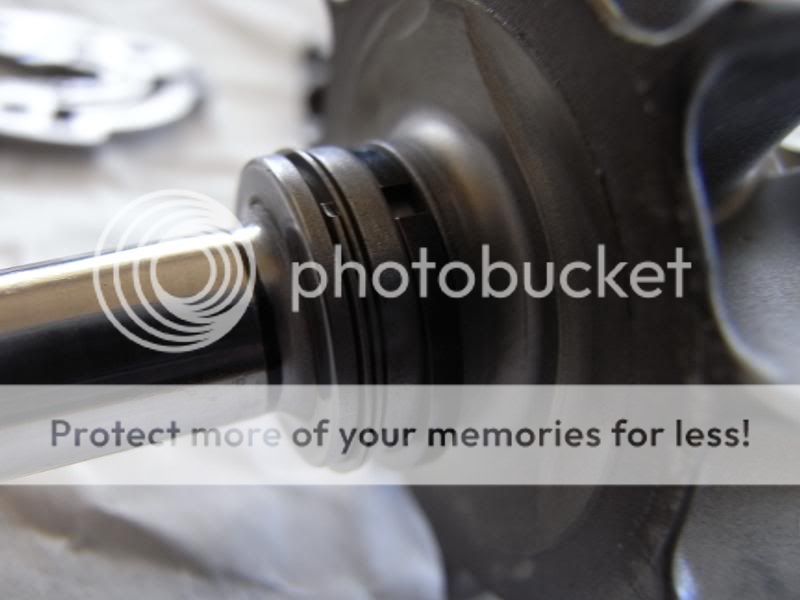
The seal on the exhaust side has a sealing ring and a sring clip, its real fiddly job to put on.
Behind the exhaust impeller wheel the was a baffle/sheild thing. slide this onto the shaft and the locate the shaft with the seal rings and baffle into the main bearing block.
It took me about 20 mins of swearing to get the seal rings and spring clip to locate, once located dont pull it back out as this will destroy the spring clip.
The seal on the compressor side of the turbo is also part of the thrust bearing, again the sealing ring was a bit of a pig to fit, almost like a piston ring, but a lot lot smaller. three torx screws secure the thrust plate with a dab of loctite just to be sure.
Then the cover plate and o-ring which fits on the groove around the edge of the cover, followed by the circlip with the chamferd edge facing outwards.
Next using the position marks line up the compressor wheel.
Now we should have the main bearing unit complete. something like this;
This whole assembly should now be balenced by a turbo specialist, if not you could end up with one of the impeller wheels disintegrating and going into the engine.
there should be a little amount of slop in the turbo shafts, the bearings "float" on a layer of oil when the engine is running, dont forget that oil measures something between bearing surfaces!.
The rest is pretty straight forward, using the new retainers and bolts, put the exhaust housing back up to the main bearing block, i used a pin punch to mark the position but if your not going to blast clean then tippex or marker pen will do the job.
The next part i had to take the turbo to work to use some big circlip pliers to position the compressor housing dont forget the o-ring inbetween the bearing block and housing.
Then all there is to do is fit the wastegate actuator, plumb the oil and air pipes back in, and bolt back up the manifold and downpipe using new nuts and a dab of copper ease.
Took about and hour to remove,3 hours to dissassemble and blast clean & 2 hours before work to re-build.
spent $220 on the re-build kit but most important of all is i saved all that hard earned money from that riporf turbo twallop
.