- Posts
- 83,310
- Location
- Embasinga stocæ
With thanks to Les Henson of lr4x4 forum
Once prop uj's are worn, it can cause an awful squealing noise, and vibration through the drivetrain. Once the UJ has started to wear, it needs to be repaired quickly, as the vibration can cause damage to other components, such as transfer bearings, prop sliding joint, and pinion oil seal/bearing.
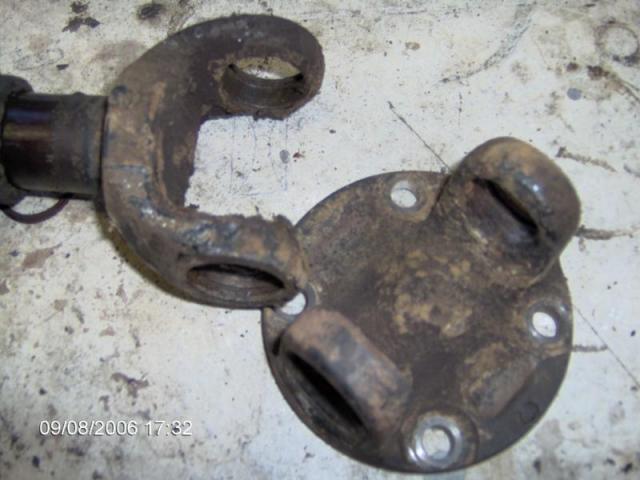
Anyway - you have to take the prop off the vehicle in order to fix it. The correct propshaft tool is a good idea, but at a pinch you could do it with a couple of 14mm or 9/16" spanners .
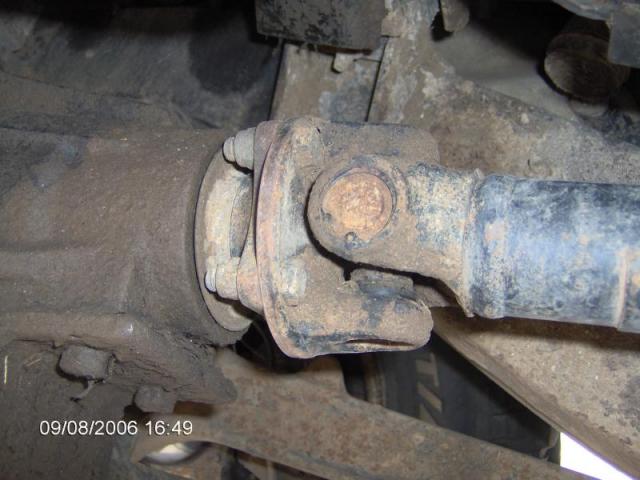
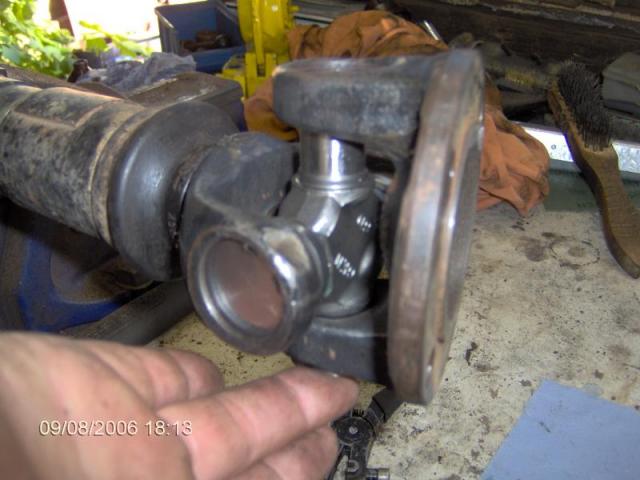
First thing you need to do is, with a small file, mark the propshaft flange and its mating flange, so that you can re-align the propshaft in the correct orientation.
It is a good idea to also mark both parts of the UJ housings, so that each UJ assembly can be rebuilt in the same orientation as it was dismantled.
Props are designed as a balanced unit, but it is always best to be safe. Also ensure that you know which way round the propshaft is fitted. there is a sliding joint at one end and the prop has to be refitted the same way round. If you decide to remove the yoke from the splined housing, it is critical that you fit it back exactly the same position as you remove it.
The rear prop is almost identical to the front prop in its procedure. Dont forget that the rear prop is attached to the handbrake drum, so as soon as you release the prop, the car is free to move. It is worth doing the job on a flat surface and to chock the front wheels and lift one rear wheel off the ground. That will allow you to rotate the props to get at all the bolts, without letting the vehicle roll away.
It can save alot of time and effort to spray the prop bolts with WD40 before attempting to remove them and to invest in a set of good quality circlip removal pliers.
At the transfer case end the nuts can be removed, but not the bolts - they are captive by the position of the drive flange, so undo each one and remove the nuts - tap the bolt threads backwards as far as they will go.
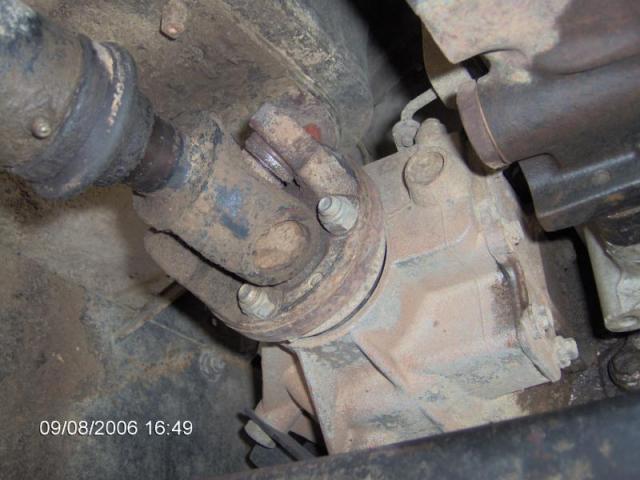
Axle end next, and the nuts and bolts can be removed.
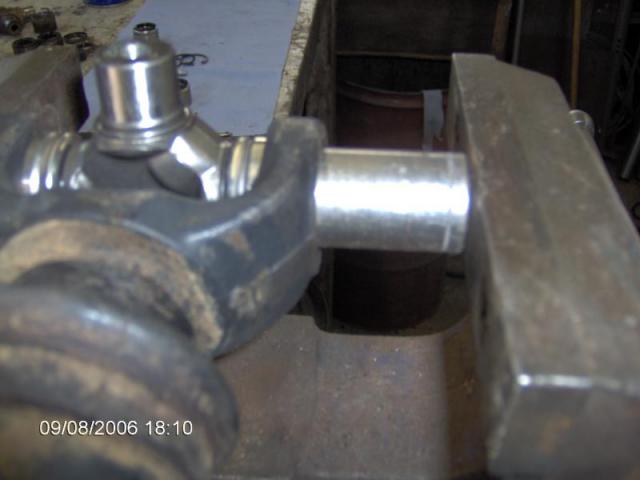
Once the prop is off the vehicle, a work bench and vice is preferable. You can do this job at the side of the road if you have to, but it's better to have a bench and vice to hand.
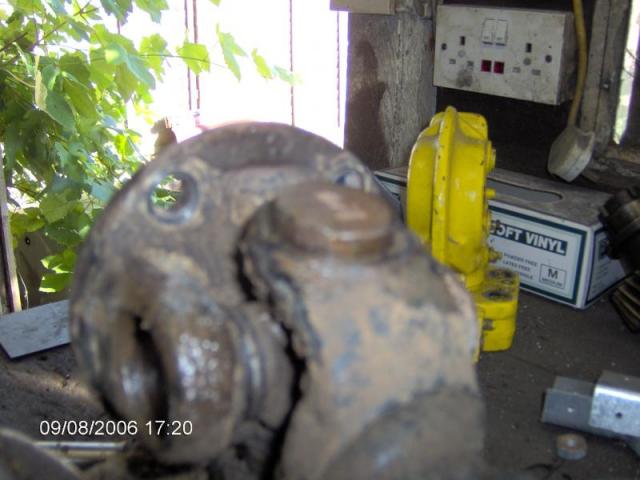
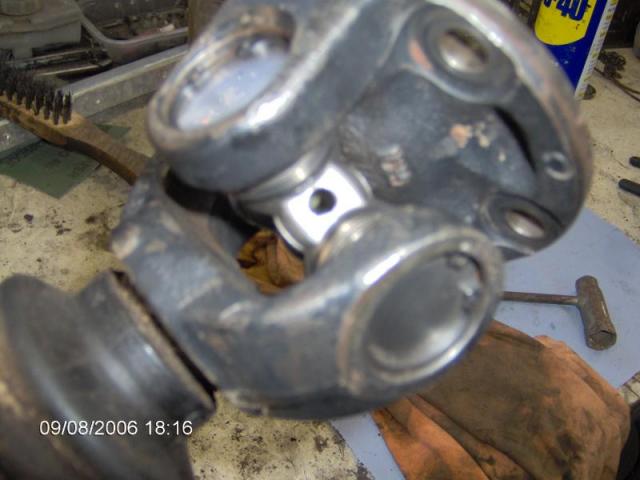
The UJ gets quite rusty, as do the circlips that retain the bearing cups. A soaking with thin oil will help.
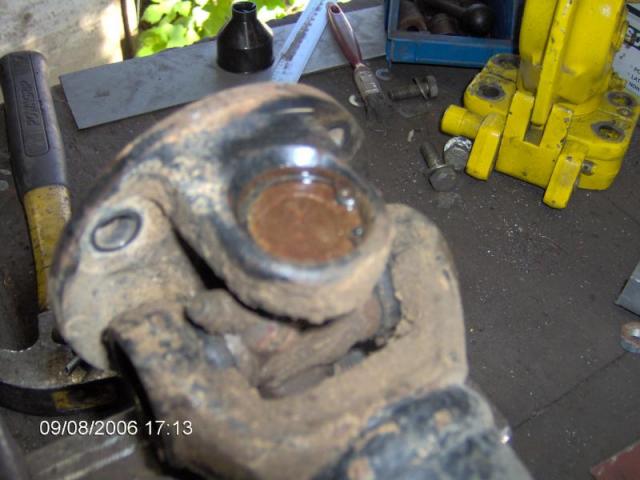
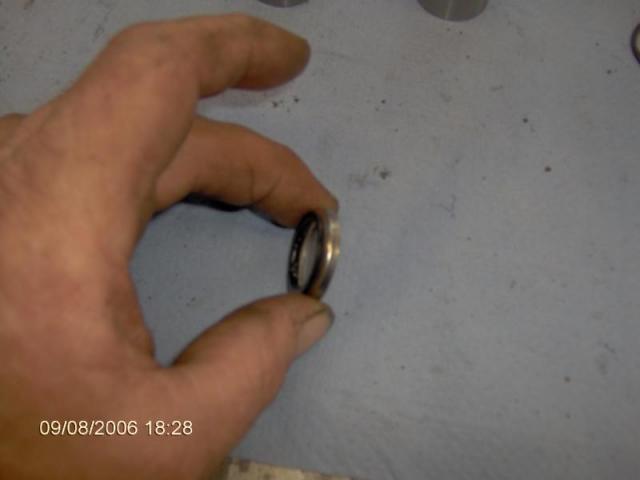
Remove the grease nipple and carefully remove the circlips - if they are seized or very corroded, then the eyes can snap off.
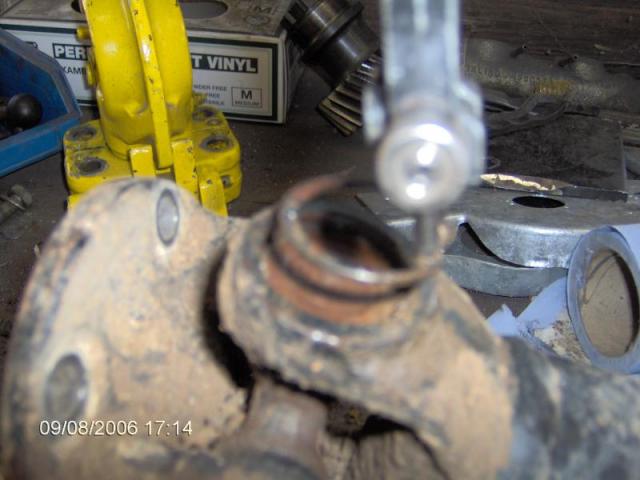
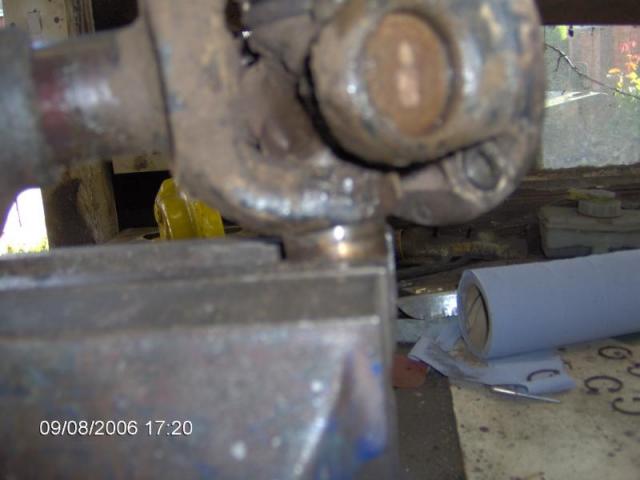
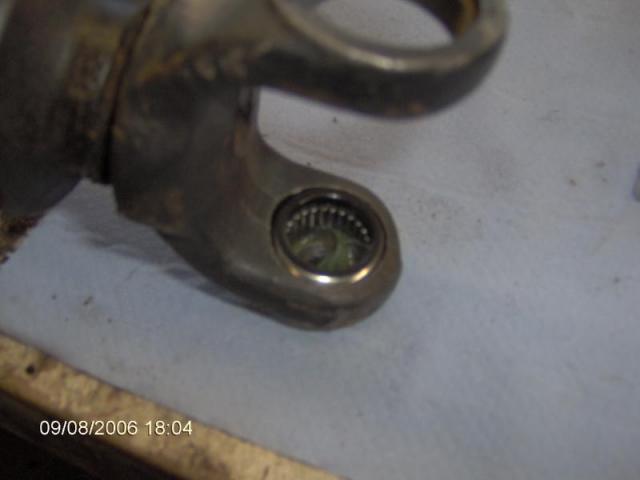
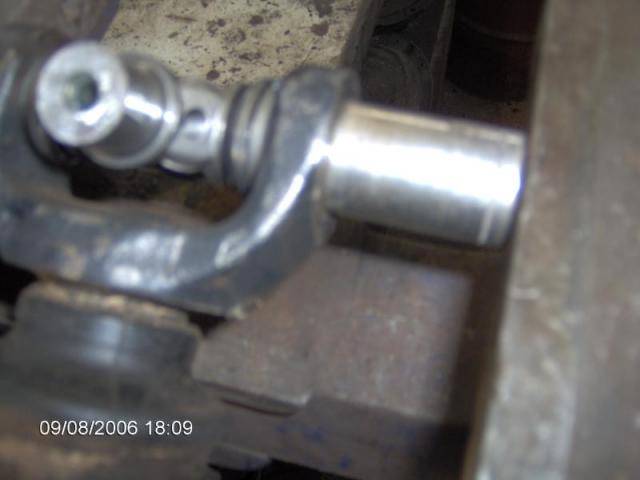
Using a drift or similar sized socket - knock the bearing cup inwards as far as it will go.

The cup on the opposite side will stick out of the yoke a few mm.
The cup can then be gripped in the vice or in a pair of vice grips and pulled out of the yoke,.
Once the cup is out, knock the spider back the opposite way until the opposite cup is then sticking out, and remove it in the same way.
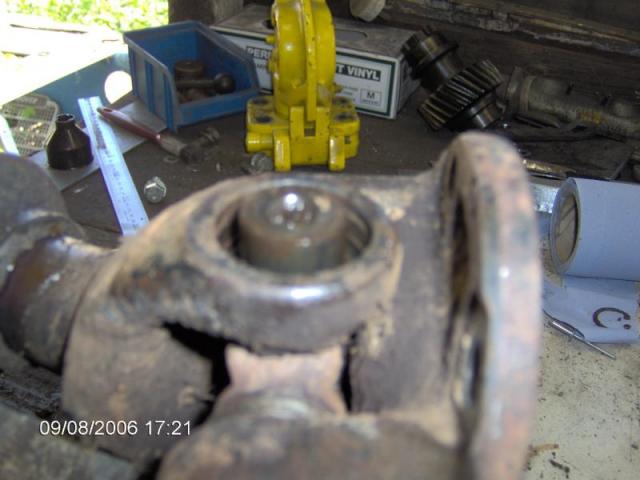
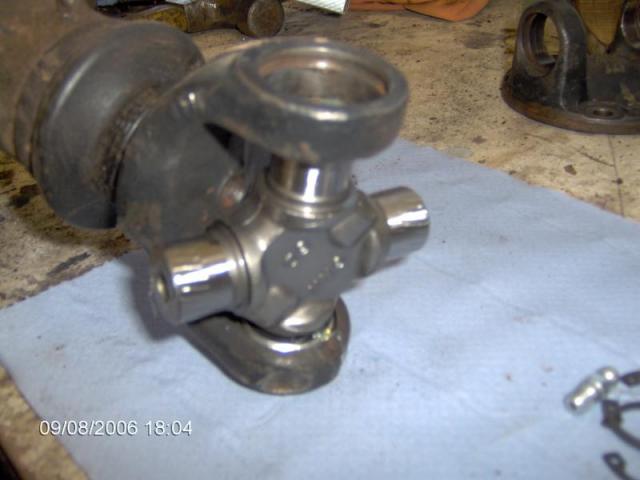
The shaft and end yoke will then separate.
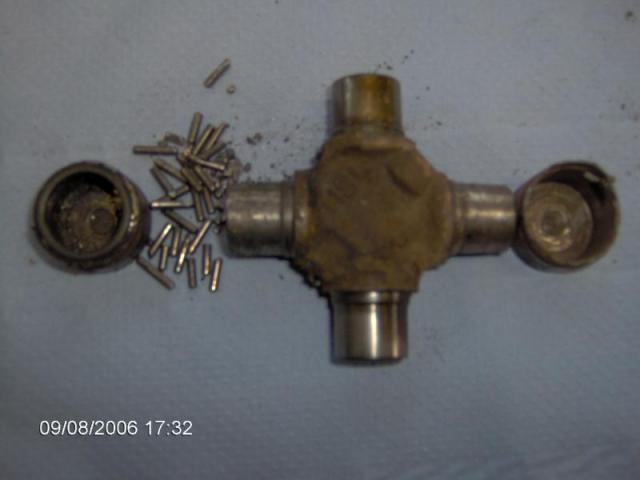
The remaining two bearing cups can be removed in the same way. The remains of the needle rollers. Once a UJ starts to go, it disintegrates very quickly, and it's quite normal to see them in this condition.
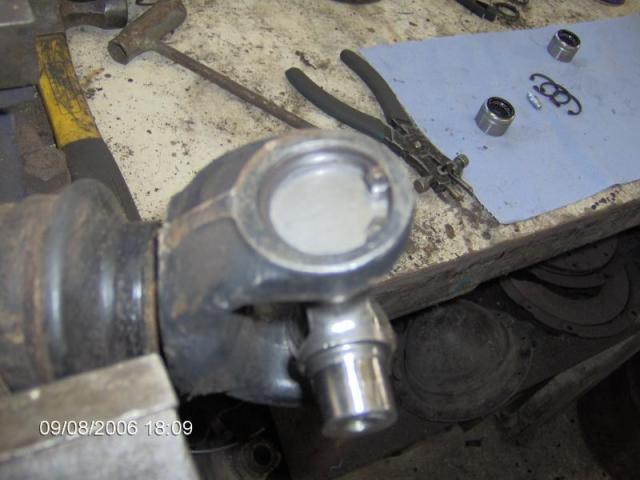
The flange and prop end now need to be cleaned. It's very important that no dirt gets inside the new UJ.
There are some real cheap and nasty UJ's on the market - these are GKN (who own Hardy Spicer), good quality items.
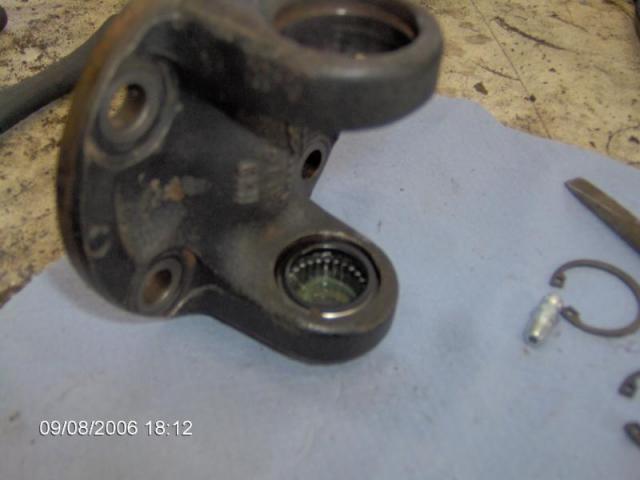
The new UJ, you get 4 new circlips and the grease nipple. Remove the bearing cups from the spider and, if fitted, remove the grease nipple (Saves you breaking the nipple whilst fitting the UJ into the housings).
Each cup has a seal. These are small and quite delicate while off the bearing. Take care not to damage one when doing this job.
From now on in, you have to take great care not to dislodge any of the needle rollers, they are only staying in place because of the adhesive qualities of the grease. A tip is to smear extra grease inside the roller cup to help "stick" them in place. If a needle falls over while you are assembling the new UJ, you won't know about it until a circlip won't fit in it's slot, and will have to remove (and then possibly have to replace) the UJ again.
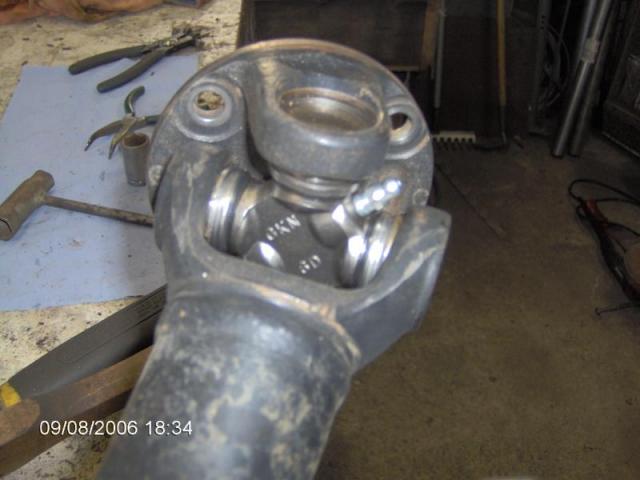
Place one bearing cup in it's housing - not so far that it sticks through on the inside, and don't forget the seal.
Now carefully fit the spider - take care not to dislodge a needle roller. If you are unsure - take the spider back out and check.
Place the second seal on the spider and the put the second cup in the housing.

Place the assembly in a vice (or use a G-clamp), and carefully press the bearing cups in. Make sure that the spider stays square and fits inside both cups without dislodging the rollers as it goes.
In order to get the bearing cup right in, use a socket and push the cup in until it's inside the circlip slot. Don't worry if you push it too far in.
Put the first new circlip in.
Turn the UJ round and once again press the opposite cup in with the socket - which will push everything tight up against the first circlip you fitted.
The second circlip slot should now be visible flush with the top of the cup, and you can then fit the second clip. If you can't see the second slot, and the UJ is flush against the first clip, then a needle roller has fallen over, and you'll have to take it all apart again. Don't use excessive pressure, and at all times make sure the bearing cups are going in nice and square, they can bind in the housing and wreck it if you're not careful.
Method is exactly the same for the drive flange.
Once the first cup is in place - hook it onto the spider.
Place the second cup in the housing, and press the two in the same as before.
There's a threaded hole for the grease nipple - usually 8mm socket.
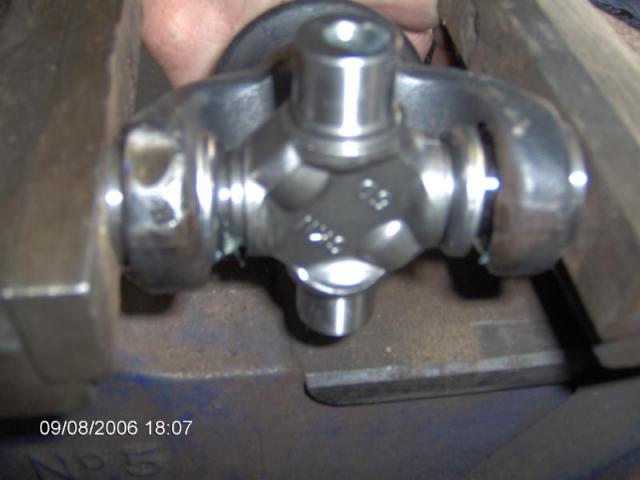
The new UJ - all finished. Both ends done and the prop is as good as new.
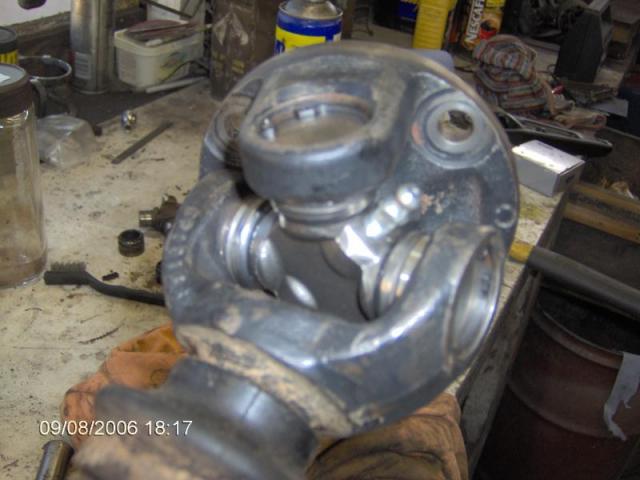
That's it - re-fit the prop to the vehicle, grease the new UJ's and the sliding joint.
Few things to beware of - the needle rollers can fall over or be easily dislodged. You won't know it until the bearing cup won't go far enough in to fit the circlip, and dismantling the new UJ to fix the problem may result in you having to buy another one.
The small seals - don't forget them - the first of each pair of cups it goes on the cup once it's in the housing, but then on the spider before fitting the second cup.
Make sure the work area, the parts of the prop you are using again, and tools, are clean. Any grit inside the new UJ will wear it out very quickly.
Don't forget to grease the UJ's once the prop is back on the vehicle.
Once prop uj's are worn, it can cause an awful squealing noise, and vibration through the drivetrain. Once the UJ has started to wear, it needs to be repaired quickly, as the vibration can cause damage to other components, such as transfer bearings, prop sliding joint, and pinion oil seal/bearing.
Anyway - you have to take the prop off the vehicle in order to fix it. The correct propshaft tool is a good idea, but at a pinch you could do it with a couple of 14mm or 9/16" spanners .
First thing you need to do is, with a small file, mark the propshaft flange and its mating flange, so that you can re-align the propshaft in the correct orientation.
It is a good idea to also mark both parts of the UJ housings, so that each UJ assembly can be rebuilt in the same orientation as it was dismantled.
Props are designed as a balanced unit, but it is always best to be safe. Also ensure that you know which way round the propshaft is fitted. there is a sliding joint at one end and the prop has to be refitted the same way round. If you decide to remove the yoke from the splined housing, it is critical that you fit it back exactly the same position as you remove it.
The rear prop is almost identical to the front prop in its procedure. Dont forget that the rear prop is attached to the handbrake drum, so as soon as you release the prop, the car is free to move. It is worth doing the job on a flat surface and to chock the front wheels and lift one rear wheel off the ground. That will allow you to rotate the props to get at all the bolts, without letting the vehicle roll away.
It can save alot of time and effort to spray the prop bolts with WD40 before attempting to remove them and to invest in a set of good quality circlip removal pliers.
At the transfer case end the nuts can be removed, but not the bolts - they are captive by the position of the drive flange, so undo each one and remove the nuts - tap the bolt threads backwards as far as they will go.
Axle end next, and the nuts and bolts can be removed.
Once the prop is off the vehicle, a work bench and vice is preferable. You can do this job at the side of the road if you have to, but it's better to have a bench and vice to hand.
The UJ gets quite rusty, as do the circlips that retain the bearing cups. A soaking with thin oil will help.
Remove the grease nipple and carefully remove the circlips - if they are seized or very corroded, then the eyes can snap off.
Using a drift or similar sized socket - knock the bearing cup inwards as far as it will go.
The cup on the opposite side will stick out of the yoke a few mm.
The cup can then be gripped in the vice or in a pair of vice grips and pulled out of the yoke,.
Once the cup is out, knock the spider back the opposite way until the opposite cup is then sticking out, and remove it in the same way.
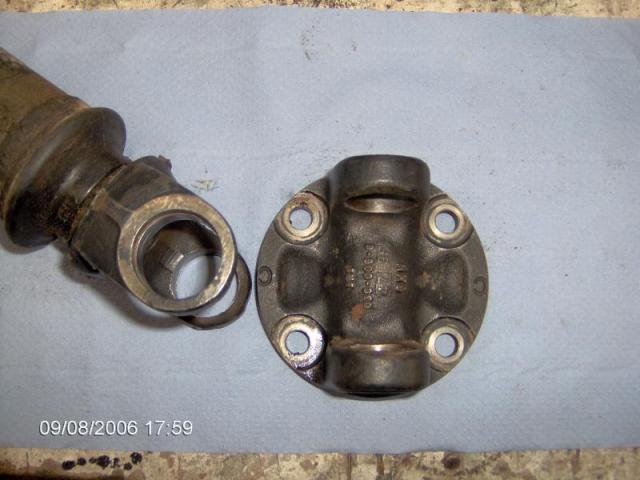
The shaft and end yoke will then separate.
The remaining two bearing cups can be removed in the same way. The remains of the needle rollers. Once a UJ starts to go, it disintegrates very quickly, and it's quite normal to see them in this condition.
The flange and prop end now need to be cleaned. It's very important that no dirt gets inside the new UJ.
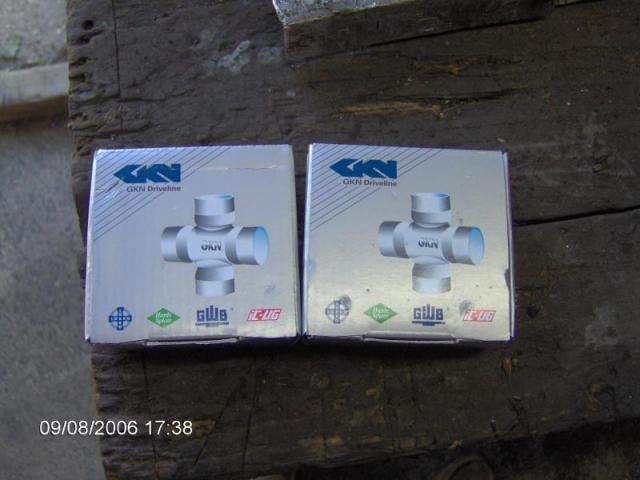
There are some real cheap and nasty UJ's on the market - these are GKN (who own Hardy Spicer), good quality items.
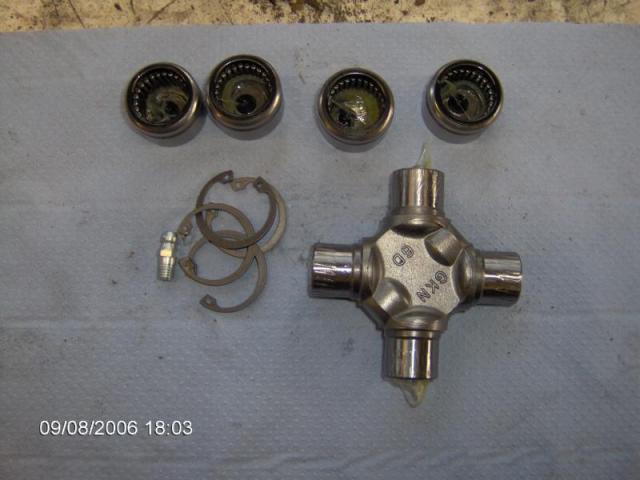
The new UJ, you get 4 new circlips and the grease nipple. Remove the bearing cups from the spider and, if fitted, remove the grease nipple (Saves you breaking the nipple whilst fitting the UJ into the housings).
Each cup has a seal. These are small and quite delicate while off the bearing. Take care not to damage one when doing this job.
From now on in, you have to take great care not to dislodge any of the needle rollers, they are only staying in place because of the adhesive qualities of the grease. A tip is to smear extra grease inside the roller cup to help "stick" them in place. If a needle falls over while you are assembling the new UJ, you won't know about it until a circlip won't fit in it's slot, and will have to remove (and then possibly have to replace) the UJ again.
Place one bearing cup in it's housing - not so far that it sticks through on the inside, and don't forget the seal.
Now carefully fit the spider - take care not to dislodge a needle roller. If you are unsure - take the spider back out and check.
Place the second seal on the spider and the put the second cup in the housing.
Place the assembly in a vice (or use a G-clamp), and carefully press the bearing cups in. Make sure that the spider stays square and fits inside both cups without dislodging the rollers as it goes.
In order to get the bearing cup right in, use a socket and push the cup in until it's inside the circlip slot. Don't worry if you push it too far in.
Put the first new circlip in.
Turn the UJ round and once again press the opposite cup in with the socket - which will push everything tight up against the first circlip you fitted.
The second circlip slot should now be visible flush with the top of the cup, and you can then fit the second clip. If you can't see the second slot, and the UJ is flush against the first clip, then a needle roller has fallen over, and you'll have to take it all apart again. Don't use excessive pressure, and at all times make sure the bearing cups are going in nice and square, they can bind in the housing and wreck it if you're not careful.
Method is exactly the same for the drive flange.
Once the first cup is in place - hook it onto the spider.
Place the second cup in the housing, and press the two in the same as before.
There's a threaded hole for the grease nipple - usually 8mm socket.
The new UJ - all finished. Both ends done and the prop is as good as new.
That's it - re-fit the prop to the vehicle, grease the new UJ's and the sliding joint.
Few things to beware of - the needle rollers can fall over or be easily dislodged. You won't know it until the bearing cup won't go far enough in to fit the circlip, and dismantling the new UJ to fix the problem may result in you having to buy another one.
The small seals - don't forget them - the first of each pair of cups it goes on the cup once it's in the housing, but then on the spider before fitting the second cup.
Make sure the work area, the parts of the prop you are using again, and tools, are clean. Any grit inside the new UJ will wear it out very quickly.
Don't forget to grease the UJ's once the prop is back on the vehicle.
Last edited:
")