Brown's brake rebuild thread

This site contains affiliate links for which LandyZone may be compensated if you make a purchase.

Brown

Well-Known Member
Full Member
Posts
7,729
Location
East Midlands
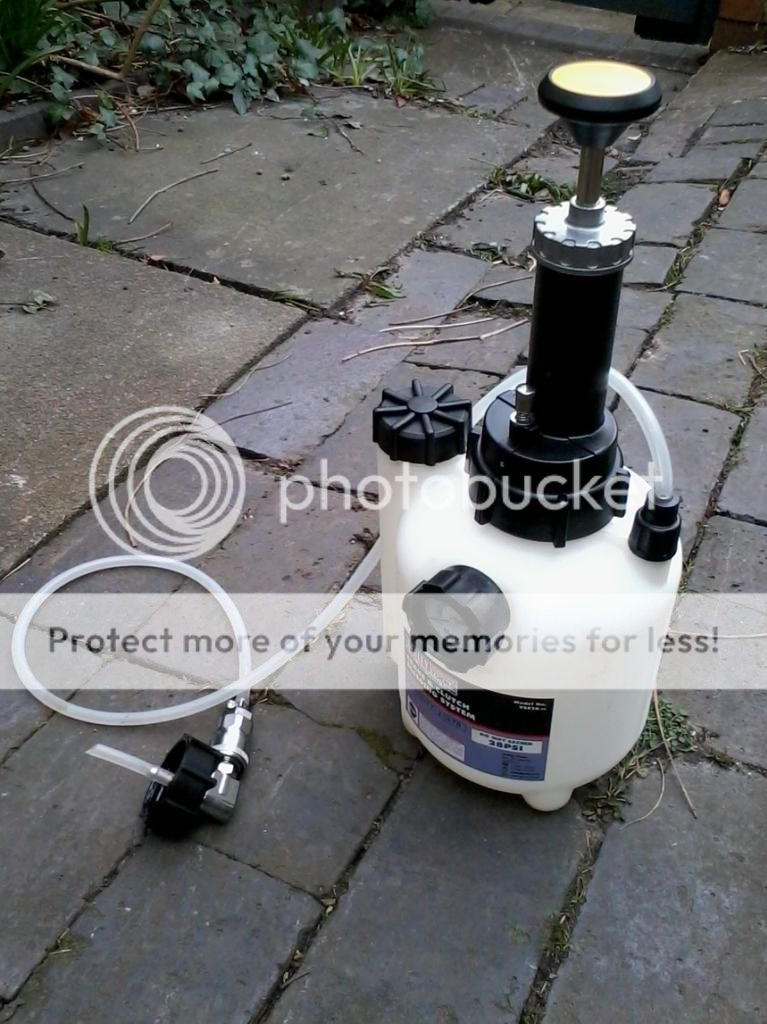
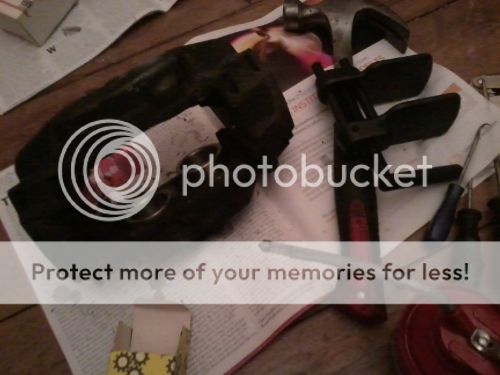
There comes a time in the life of every Land Rover when you get to that point where the Haynes manual recommends renewing brake components. Seals, flexi pipes and the like. As I really hate bleeding brakes I thought I'd renew as much as possible in one go so I'll only have to do it once. Accordingly over the last few days the postman has been knocking with various bits and pieces.
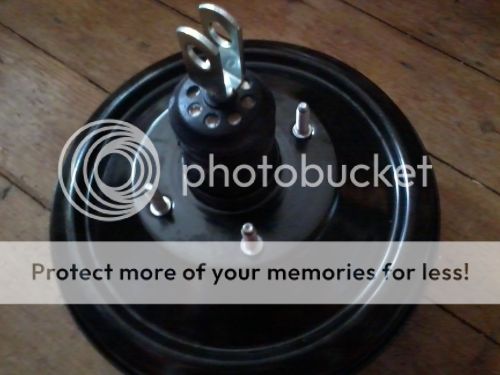
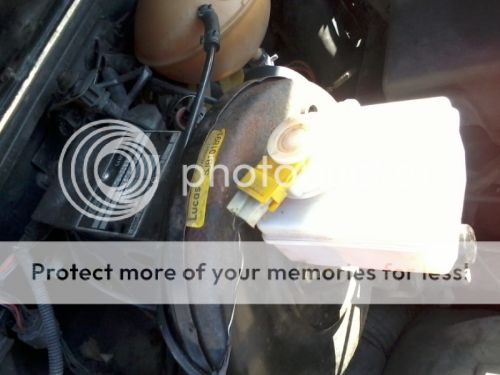
Here's a servo
2013-03-19164705_zpsc65bc6e8.jpg

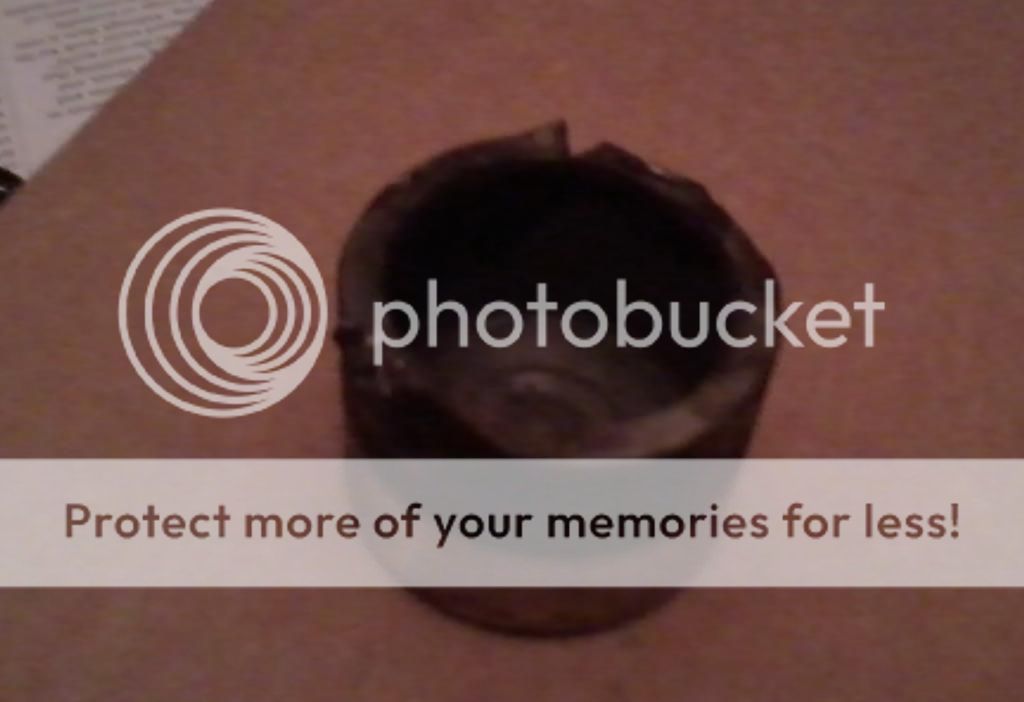
and a master cylinder
2013-03-19164523_zps7bb64d8d.jpg

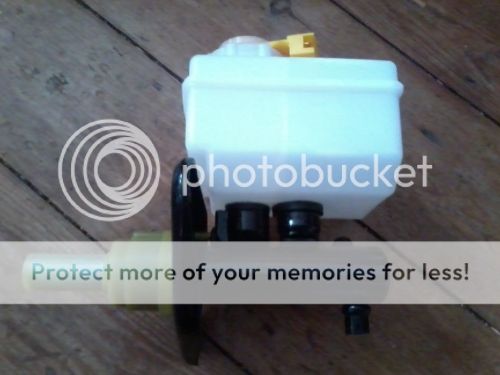
I was wondering whether to replace all the seals in the old one, but rather than mess about with little rubber rings I thought I'd get a whole new one.
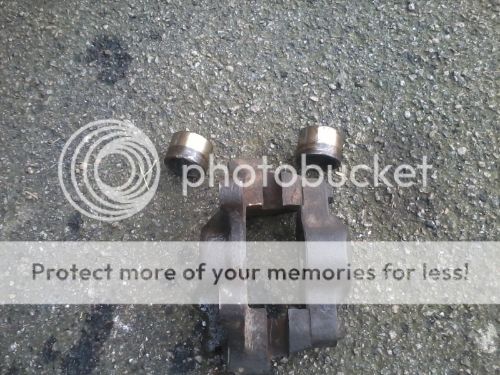
New pistons
2013-03-19164405_zps0b93d3d7.jpg


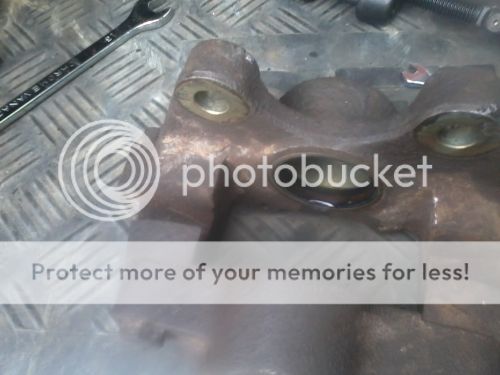
seals and seal retainers
2013-03-19164212_zpsa405becd.jpg

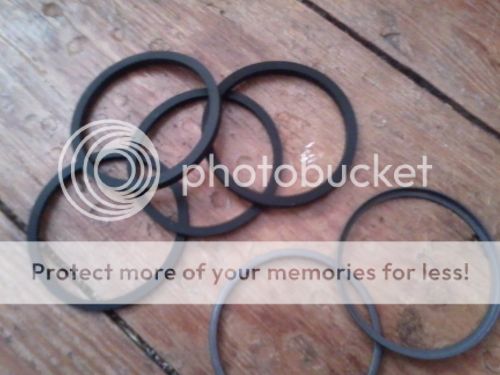
Interestingly, the cheapo ones that came with my stainless steel piston kit just looked like slices of rubber tube, so I bought some more that look a little better. The latter have a little groove round the inside of the outer seal, for example. Just like the picture in the manual, which is reassuring.
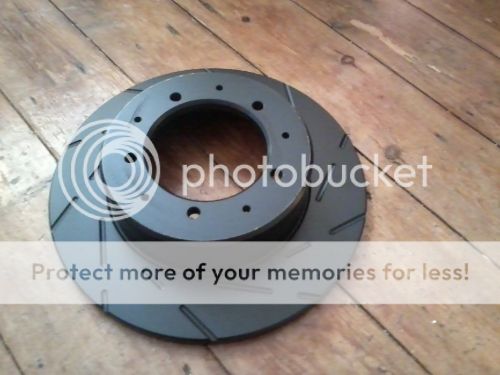
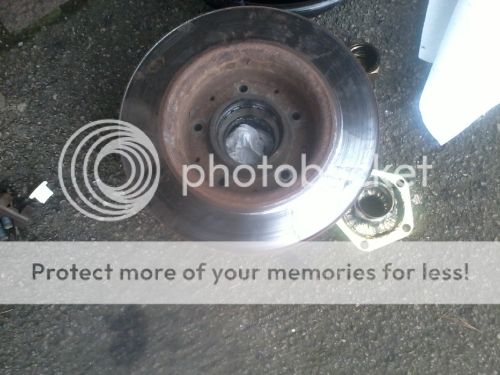
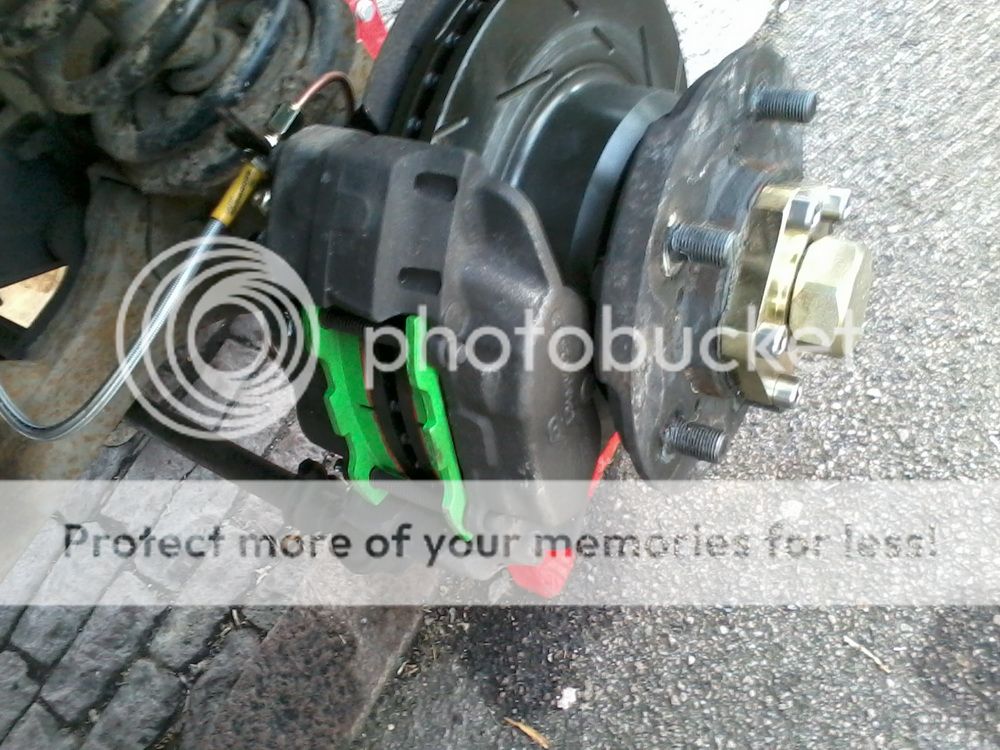
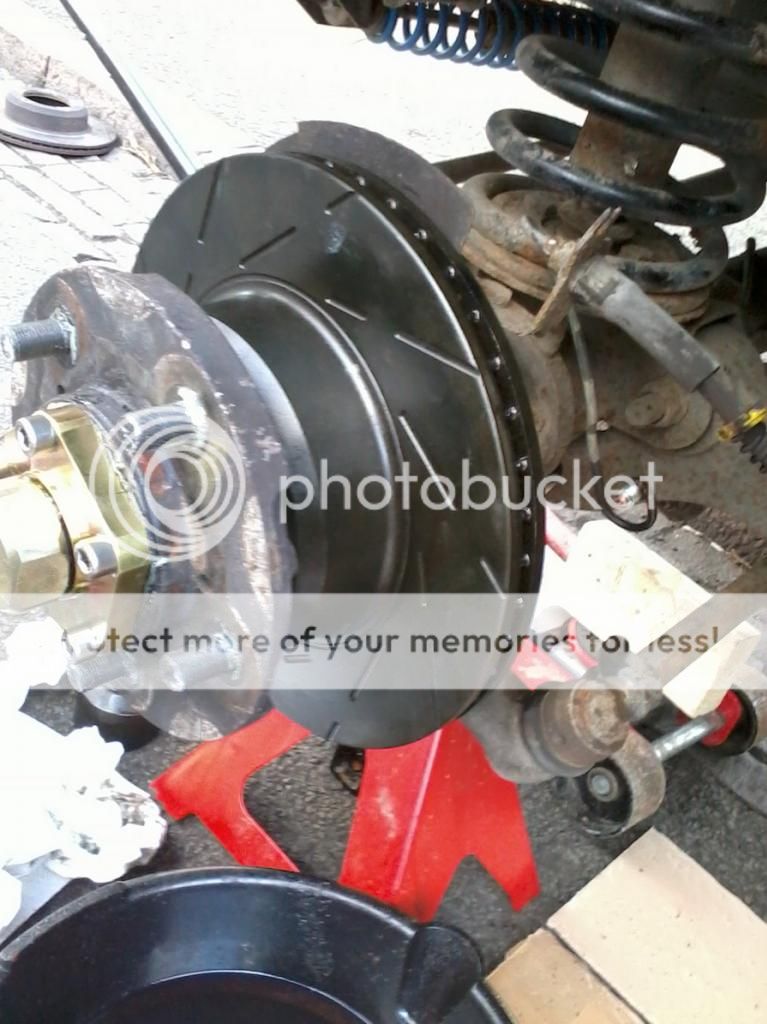
A quick check with the digital calliper reveals that my discs are getting a little bit thin, so I got some more. Yes, they're grooved ones, because I'm such a poser.
2013-03-19164118_zpsc37d9264.jpg


And finally, I got a load of bolts so I can replace them as well
2013-03-19164832_zpsf7587660.jpg

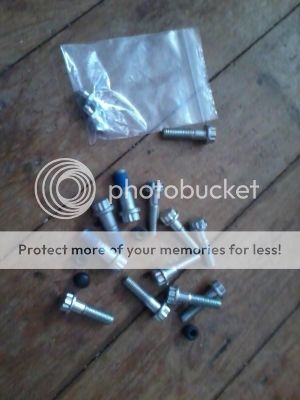
Gone are the days of my youth when I used to lovingly rehabilitate rusty nuts and bolts. I like new ones.

Stay tuned folks and in a little while I shall put up some pictures of today's progress.
 
Here are a few pictures of what I managed to get done today.
Here's the old servo and master cylinder in situ
418590e0-a6b1-45bb-86ac-c580997682be_zps1154cdf3.jpg

And here they are gone. The most difficult bit was getting the split pin out of the clevis pin that joins the brake pedal to the servo.
New ones offered up. My goodness me, they fit.
2013-03-29110423_zpsa55822f6.jpg

I've put the clevis pin in the other way round so the split pin is on the driver's side and I can actually see to manipulate it.

Heartened by that success, I moved on to the calipers. I thought I'd start with one of the rear ones as there are only two pistons to worry about and it would be a nice easy thing to begin with. Here they are. Although the brakes appeared to be working, at least one of the pistons seemed to be pretty well rusted in. It wouldn't come out and needed patient tapping from side to side to free it. Fortunately the insides of the cylinders are still fairly nice so the calipers will live to fight another day. You can see the hammer 'bruises' on one of them where I had to knock it around to loosen it.
2013-03-29122634_zps55c82f75.jpg


And here's the caliper
2013-03-29125555_zps90c86e94.jpg


Now let's try a disc. The bolts are out, but the disc doesn't want to come off the hub. A larger hammer was needed.
2013-03-29132019_zpsb5e9a1d4.jpg


And here they are all back together. EBC so called 'Greenstuff' brake pads aren't green all the way through. It's only green paint. How disappointing. I feel like I did when I discovered that Tiger Woods wasn't a real tiger.
2013-03-29151053_zpsf9507b4a.jpg


By this time it was about time for tea, so I brought one of the front calipers in to replace the seals in the comfort of the dining room, so as to be all ready to fit tomorrow.
fc203531-6429-4bcd-8a6d-8ca799e210a5_zpsc7e62872.jpg

Despite all the angst about replacing seals I've read on the internet, mine have gone in without too much difficulty. I've pressed the outer seal retaining rings in with that piston wind back tool you can see in the picture and they've popped in quite nicely. I also bought a cheap oil can to use as a brake fluid dispenser so I don't get it all over the place. The can has never had oil in it so it should be OK.

Photobucket isn't being my friend today. Some of the pictures are turning out a sensible size but others are enormous, despite my sizing them all to fit neatly on the page. Sorry!
 
Last edited:
Right, I refuse to let Photobucket destroy my life. I shall size the pictures on my computer at home in future.

It's not all been plain sailing today. I snapped a piece of pipe whilst trying to undo the nuts. It was the pipe leading from the front flexible hose to the front caliper.
2013-03-29211752_zps73a44f9a.jpg

I had neither a replacement nor a pipe flaring tool in the house. I nipped over to Halfords just as they were shutting. They had rolls of pipe, but no flaring tool. 'It's a bit specialist for us mate'. They do have them on their website but clearly not where a 17 year old assistant can find them in store. I shall have to go and look for one tomorrow morning. We have a Machine Mart, a Screwfix and a Toolstation in our local town so surely somewhere will have one. I'll just pop out on the car. Oh no I can't, the brakes are disconnected.

p.s. It's definitely a Photobucket problem. My picture of a bit of broken brake pipe was definitely a sensible size when it left my computer. And now Photobucket's blown it up to something enormous.
 
Last edited:
Here's a quick update on today's progress. Here's the driver's side front in situ - new disc, pads and hose. Machine Mart came up trumps with a flaring tool and I've made a little S shaped piece to go from the flexible hose to the calliper.
2013-03-30171953_zpsedc502f5.jpg

I've also replaced the pipe from the brake balance valve to the wheel arch. Most difficult bit was getting the air intake pipe out of the way. Its bolts were so rusted they snapped eventually. I won't put it back until I'm confident the brakes are working.
Here's the passenger side getting the same treatment
2013-03-30172042_zpsb76b4d50.jpg

Finally, here's the worst piston. It wouldn't come out at all. The spikes round the top are caused by me chiselling it around to get it out. It's rusted around halfway down. Another little exhibit for the Land Rover pathology museum.
2013-03-30205602_zps86148e74.jpg

I've got the new seals and pistons in and will put the callipers back on tomorrow. I'll fill it with brake fluid and see if it works.
 
Just been out this morning, put the remaining callipers back on and given it an initial bleed. I actually have some pedal resistance but it needs a pump or two before it's firm. I'm letting it settle whilst I have a cup of coffee and then I'll bleed it again to see if that firms things up.
 
Bled the system again and it was still a bit spongy, so I left it to sit for a while and had a late lunch and then went and bled it again this afternoon. I think I've got all the air out now. I thought the bubbles would never stop out of the rear passenger side. It would run clear for a while and then a load more bubbles and froth would come out. Fortunately I've got one of those pressure bleeders that you screw onto the reservoir and pump up. It would have been impossible if I'd been trying to do it with one person pressing the pedal and me on the bleed nipples. No wonder people have such trouble with it. I might let it settle overnight and then bleed a little more out tomorrow just to make sure.

Looks like it's all gone back together OK. There was a slight weep on one of the joints but that was because I'd forgotten to tighten it fully. I took it up gently another half a turn and it's now dry.

Yes Lorri, I'm hoping my new stainless steel pistons will last a bit longer than the old ones before going rusty. I thought about painting the callipers a bright colour, but it seemed a bit boy racer-ish for me. Impressions are that it stops a little better. It used to be really easy to lock the front wheels, presumably because they were the only ones with working brakes. Now it stops quickly and positively.

Steve, the discs are from EBC and were ridiculously expensive!
 
And finally, just to finish up, here's a picture of my special new friend the pressure brake bleeder. I'm so pleased I bought this little beauty.
2013-04-01111856_zps1991680f.jpg

I wanted something that would create its own pressure, rather than those things that use a compressor or a tyre, and this fits the bill nicely.
 
Enjoyed reading this thread as much as you have doing the job, well done!
Can't quite see what bleeder you have - can you let us know please? I'm hoping to start the rebuild of my axles later in the year and will want something that can bleed a system from scratch when the truck is back together. Had wondered about the vacuum type but they have mixed views.

oops - I'd let this thread sink down and get lost over the last few days and didn't answer your question. It's a Sealey. I got it off Amazon. Makes life a lot easier. The reason I got this is that I wanted something that didn't need a separate compressor or spare tyre and would let me bleed single handed. So far so good. From experience so far the key seems to be to bleed several times, leaving the system to settle for a while (or even overnight) between bleeds. I shall be adding a couple more posts to this thread in a week or two as I want to replace the metal pipe from balance valve to nearside front wheel and the one that goes across the back axle as the first is corroded and the other has strange bends in it. Watch this space.
 
Thanks Brown, funnily enough I'm also a Brown! Seems odd when I look at the thread...
I'll keep an eye out for one of those as you rate it. Good luck with the pipes, making your own or buying them?
 
Front one's bought and sitting in the dining room, the rear one will get made from my roll of 3/16ths copper. Plus I'll be making a short copper pipe to go on the nearside front calliper.
 
Nice job Mr Brown, excellent description and phots, looked a lot easier than mine, but is is my first time LOL
 
Thanks gentlemen. It probably looks quick and easy because I've condensed all the action down into a few posts, so you don't see all the messing about looking for spanners which I could have sworn I had in my hand five minutes previously, or moments of despair on snapping bits of the metal pipework for which I didn't have replacements. Since posting this I've replaced a couple of lengths of the original metal pipework, but didn't add because I forgot to take pictures.
 
Thanks gentlemen. It probably looks quick and easy because I've condensed all the action down into a few posts, so you don't see all the messing about looking for spanners which I could have sworn I had in my hand five minutes previously, or moments of despair on snapping bits of the metal pipework for which I didn't have replacements. Since posting this I've replaced a couple of lengths of the original metal pipework, but didn't add because I forgot to take pictures.

I have a full set of tools that I bought off my brother including bottom 3drawer cabinet and 6 drawer top chest Packed solid with tools. & I still can never find that "spanner I has a minute ago" :eek:
 
Mr Redhand, I saw on another thread you've got a lot of endfloat on your halfshafts. I can sympathise - one of mine floated all the way out somewhere near Aberystwyth and left me without drive. That's why, as you can see, I've got those drive flanges with screw on end caps, to keep the buggers in!
 
Back
Top