- Posts
- 16,482
PART 2
Following on from Part 1 http://www.landyzone.co.uk/lz/f10/gems-front-timing-chain-cover-part-1-a-260980.html
So, carrying on from where I left off....
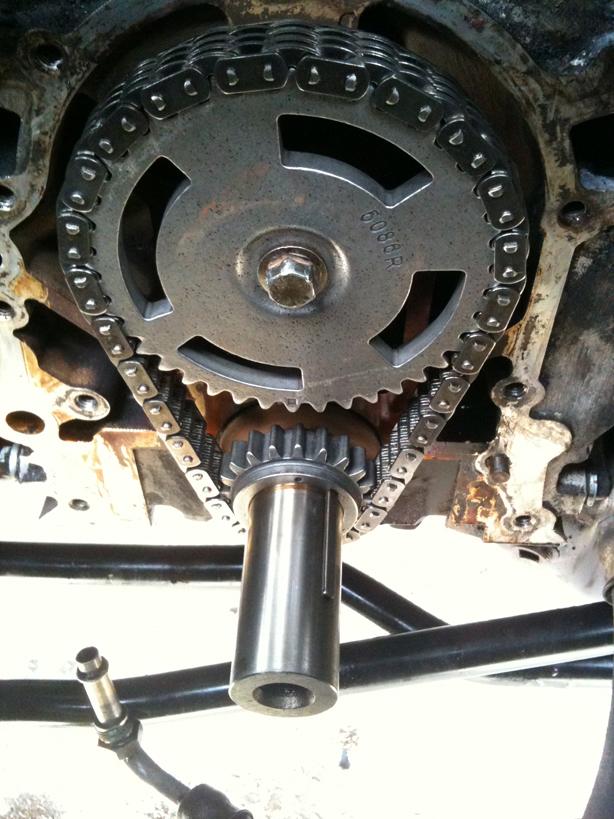
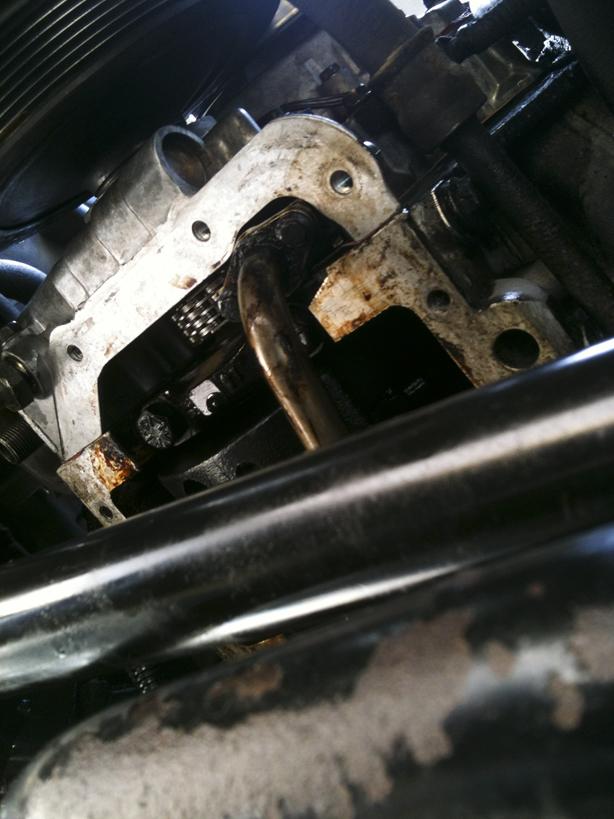
The front cover is off exposing the timing gears and chain, first align the timing gears, they should have a dimple mark on them to line them up
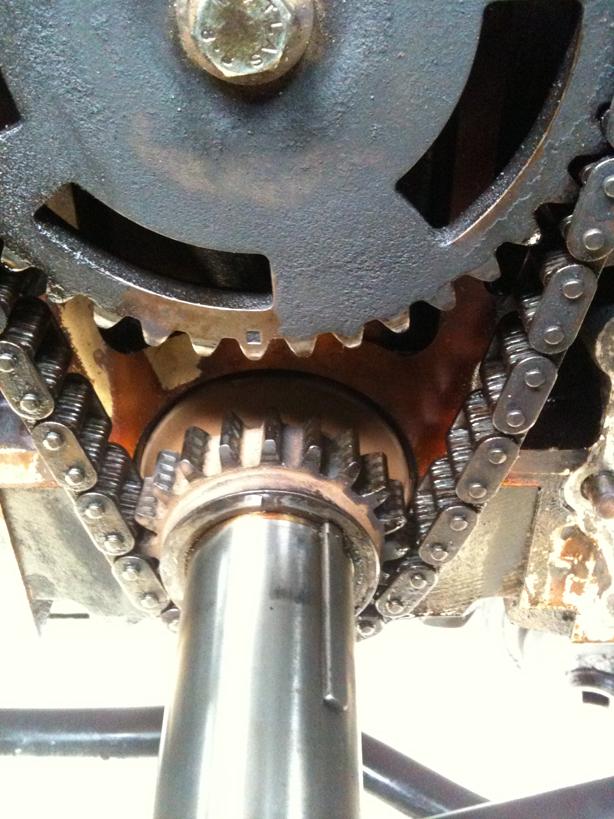
Considering I am replacing the timing gears and chain as mine were old and a little slack, I wedged a screwdriver in the crank sprocket against the chain to lock it in place while I cracked the Camshaft bolt off...if you are to refit the same set, it would be best to restrain the crank by refitting the pulley and fitting the pulley holding tool (more about this tool later!)
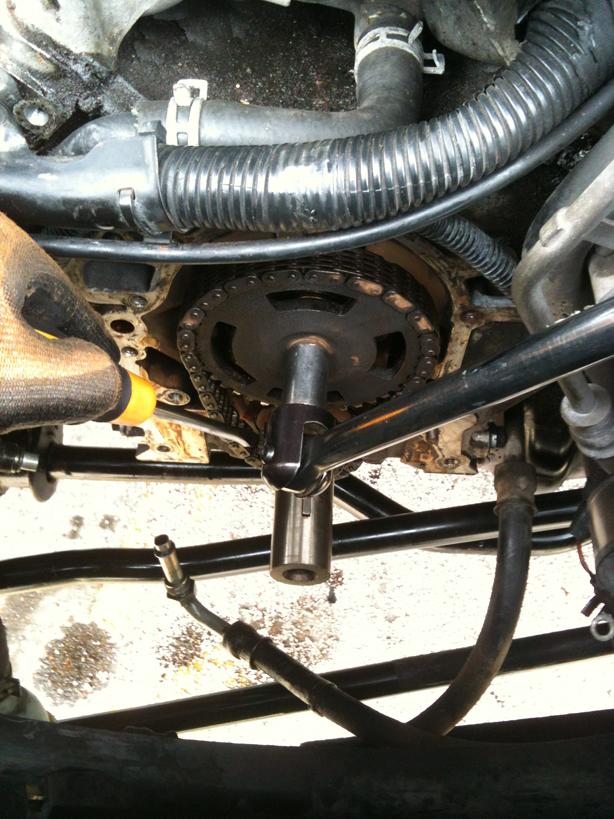
With some gentle pulling and wiggling, remove the timing chain and sprockets...careful not to move the crank or cam while doing this!
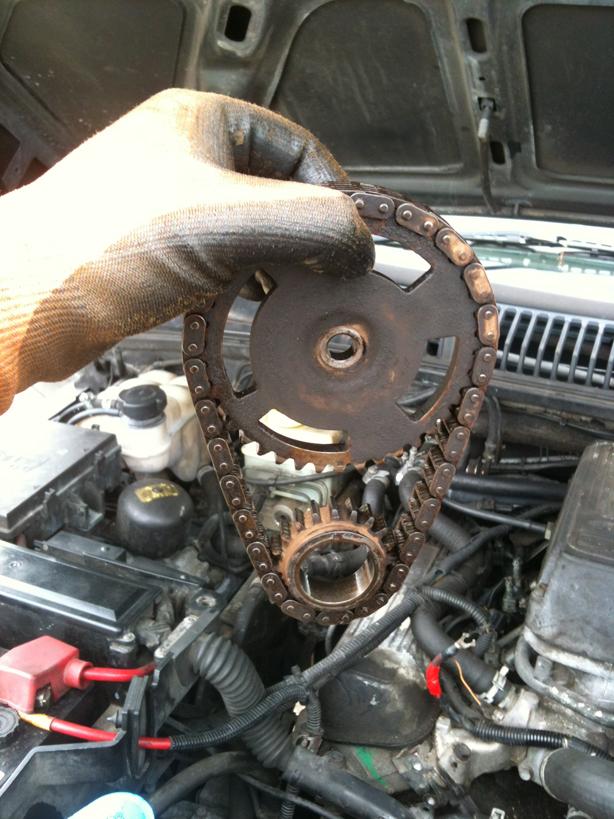

Lay the new sprockets and chain down and line up the timing marks and put the chain round ensuring they stay aligned.
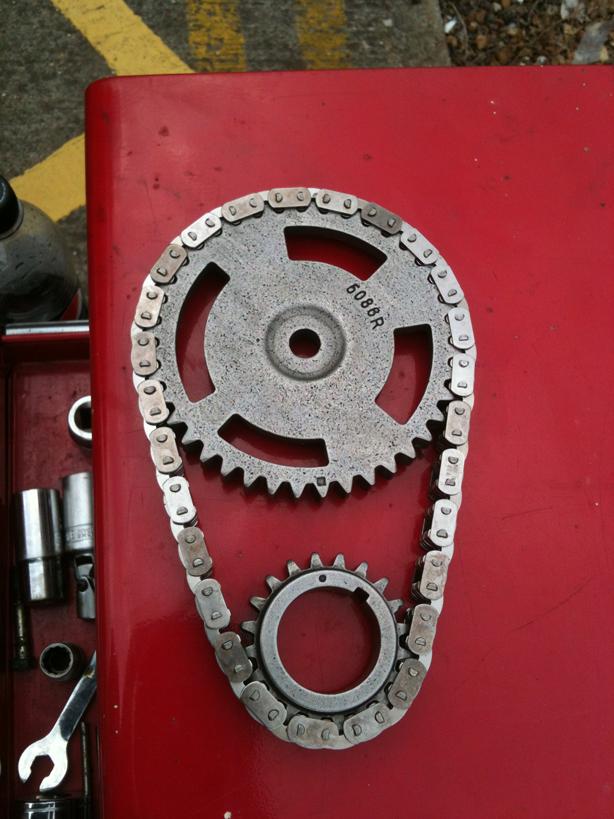
Slide them on to the crank and camshaft as an assembly and torque the camshaft bolt to the specifications in RAVE
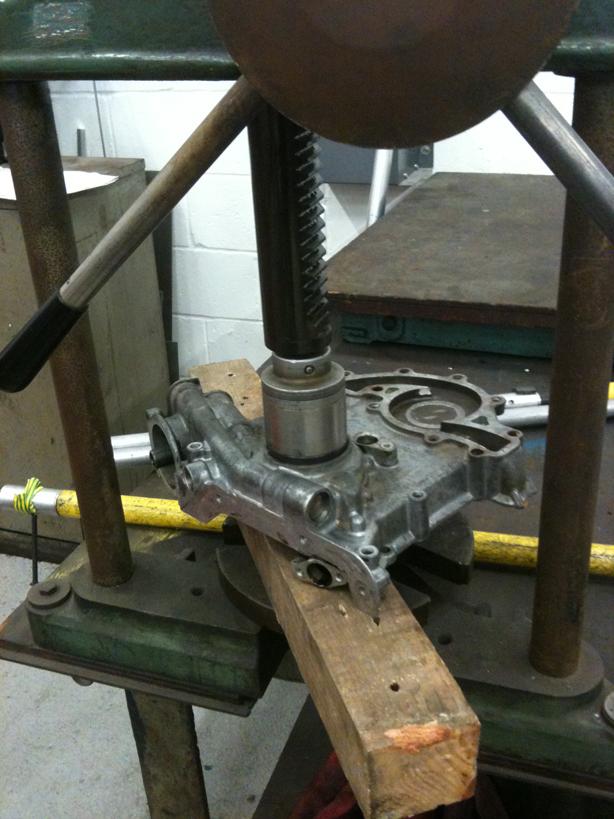
Time to prep the replacement front cover....knock out the old seal and the official procedure is to fit the front cover to the engine then put the seal in place and slide a special tool over the end of the crank shaft and press the seal into place...
Not having the special tool and it not being strictly necessary, before you remove the original seal, look to see how deep it seats in the cover and then using a press and a large socket or similar, gently press the new seal in square to the right depth.
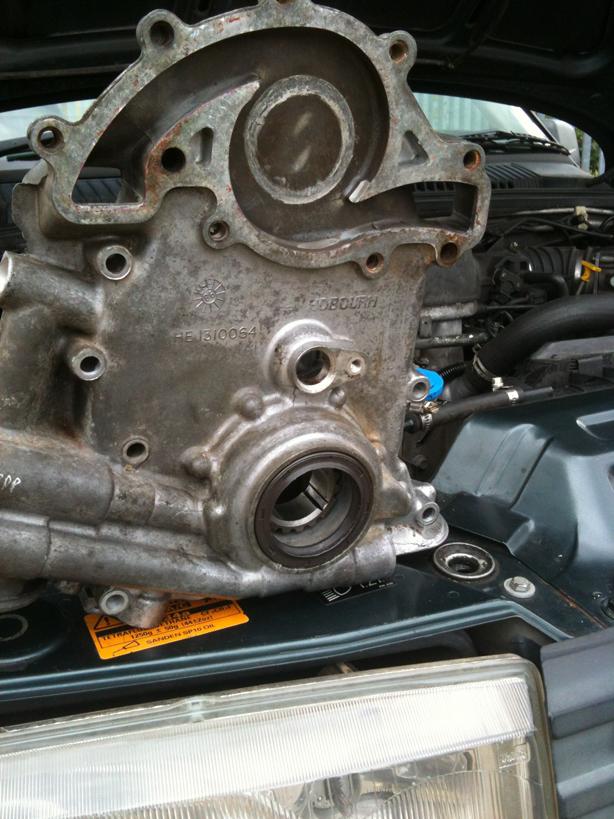
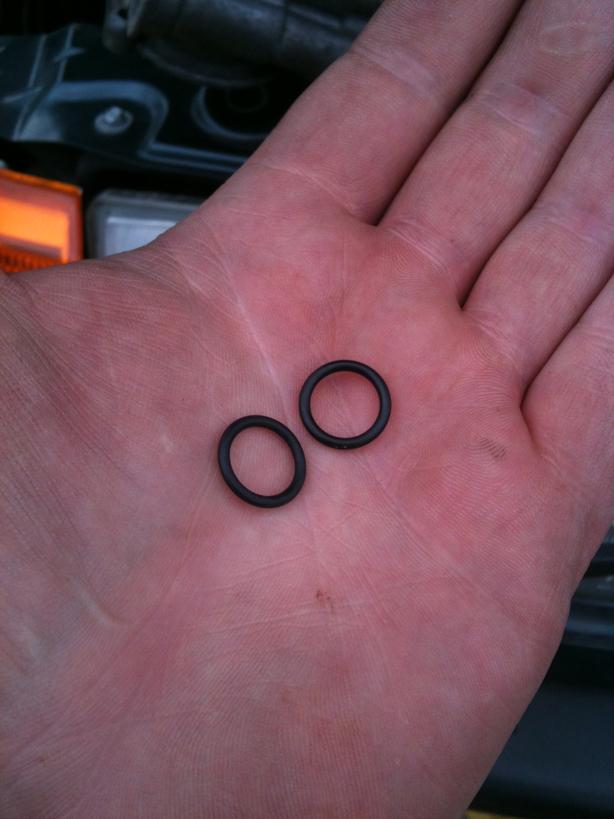
Replace the O rings that fit on to the Oil Cooler unions, lube with clean oil or Vaseline first!
Clean the mating face and fit a new gasket

Fit the front cover over the mounting dowels and fit the bolts. Torque to the required specification....I like to torque bolts for 2 reason...1) RAVE says so and 2) the parts are cast/machine aluminium and can crack or strip if over tightened.
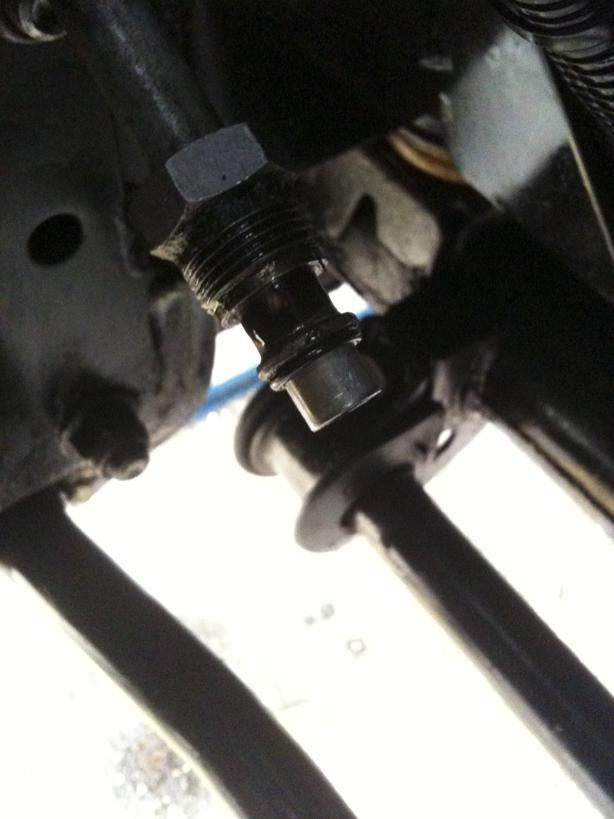
Fit the cooler unions – note, don’t over tighten them as you can crack the front cover if over torque...I don’t own any ‘Crows Foot’ ratchet heads so I couldn’t torque these so I used a good guesstimate.
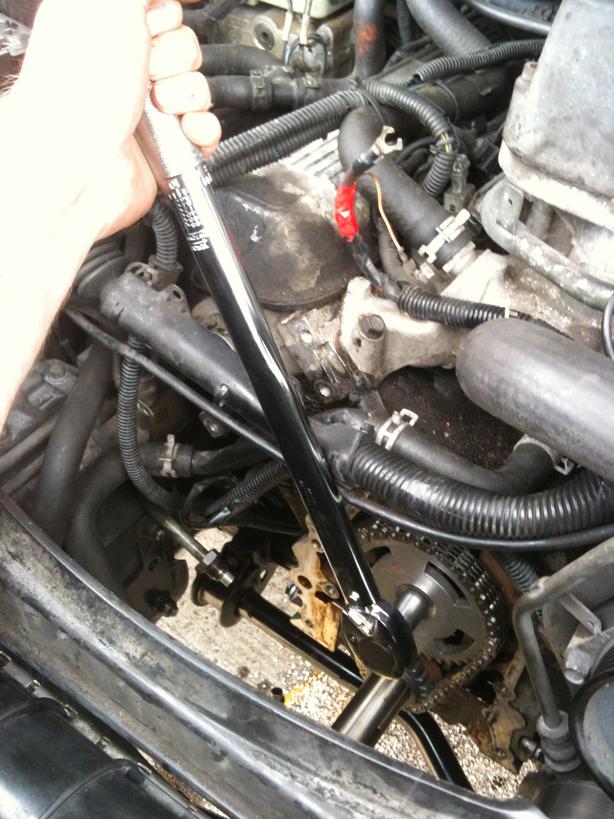
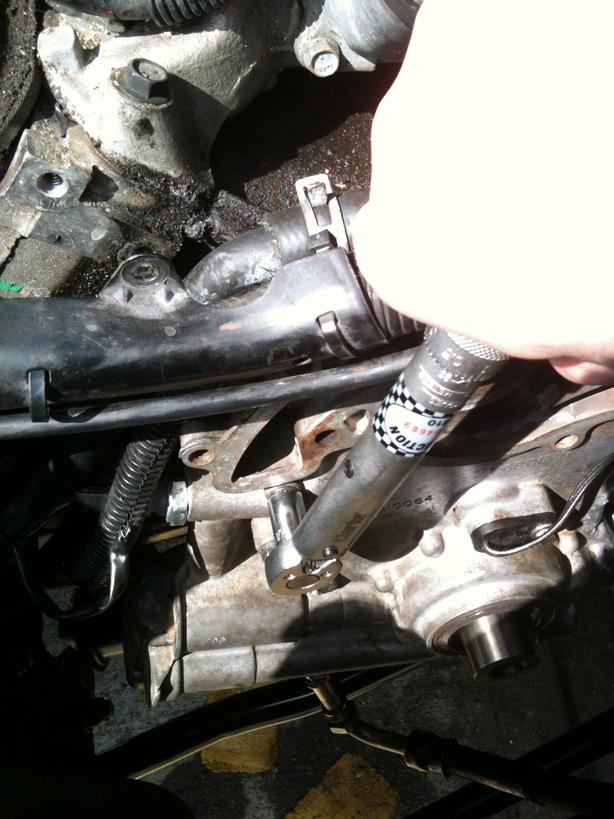
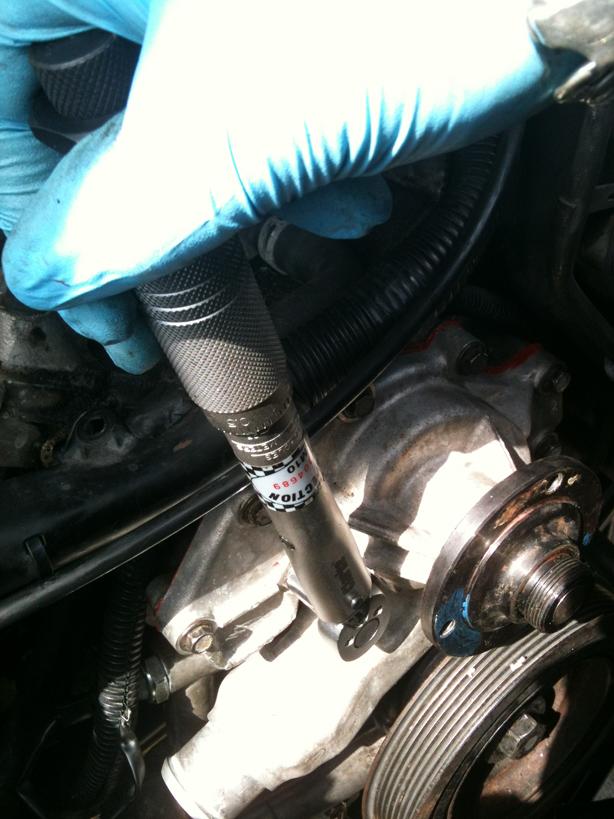
Now, time to fit the Crank Pulley. Mine came off far too easily when you consider the bolt is suppose to be torque to 270Nm (200lb whatsits) so I fabricated a tool to hold the crank pulley in place while torquing it up correctly.
The Disc is 89mm diameter with two 8.5mm holes drilled at 74mm centres directly opposed and the centre hole is 2” (50.4mm) diameter, one of our machinists kindly made the disc for me!
I then (badly) welded the 20mm box to it as a handle about 16” long!
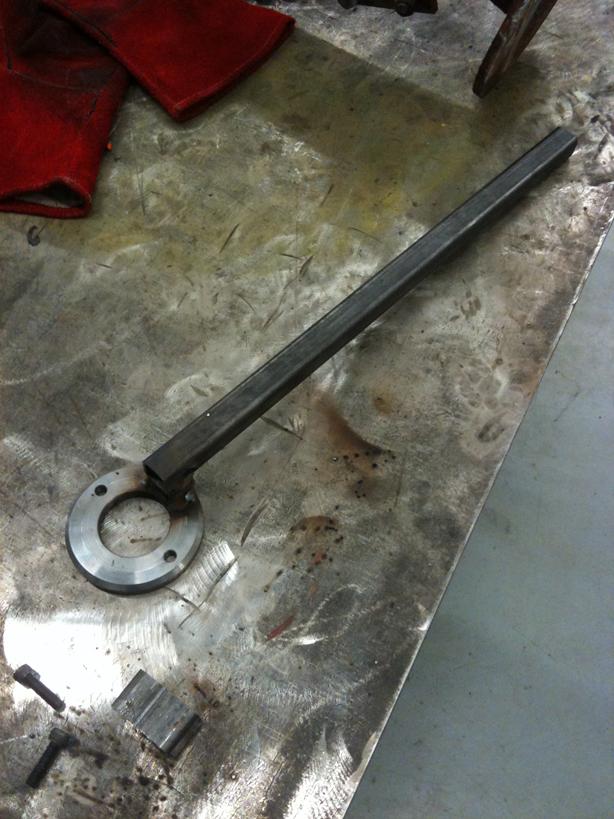
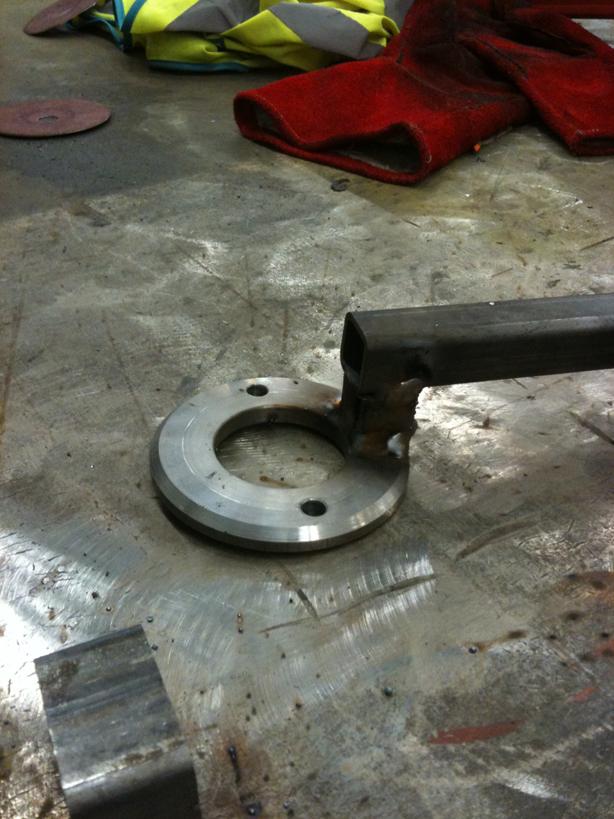
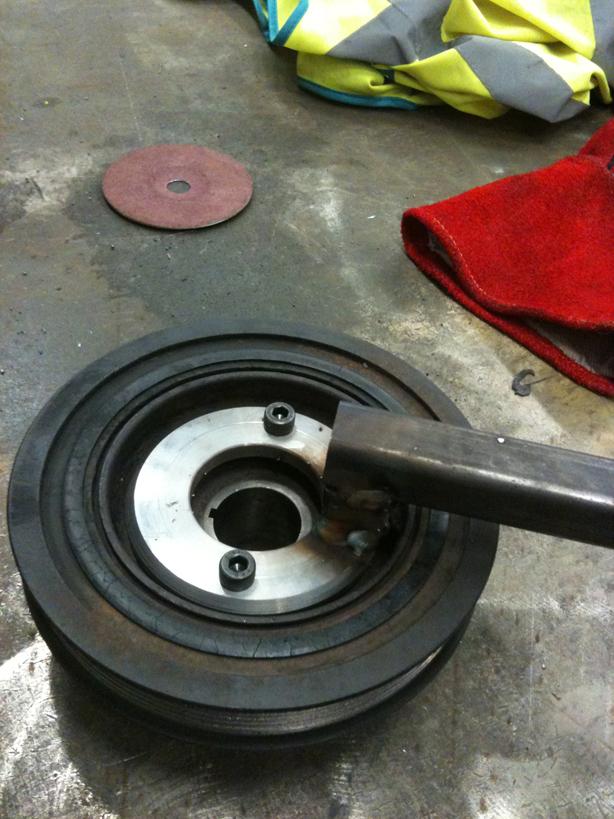
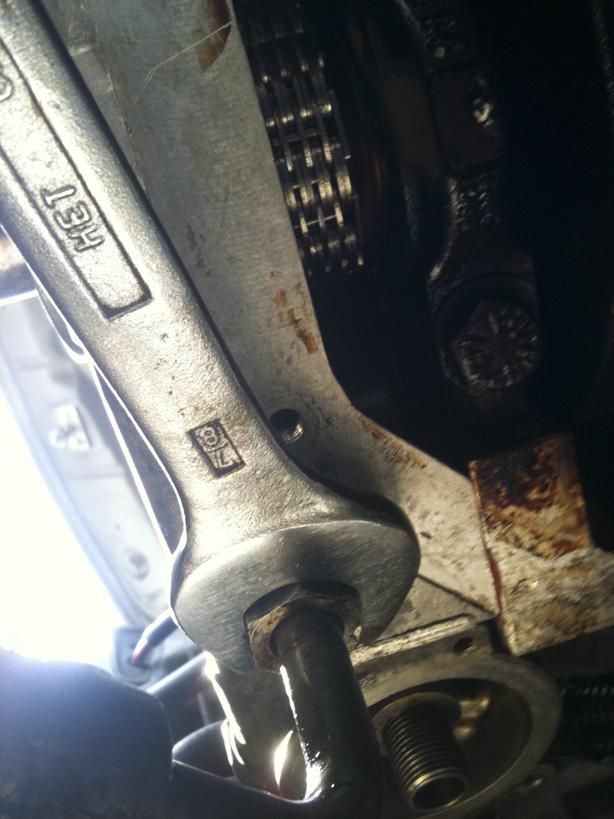
This then bolts to the crank pulley using 5/16” UNC Socket Caps – M8 would be seen to fit but the thread pitch is slightly different and will bind up after a few turns....stick to 5/16” UNC unless really in the ****e!
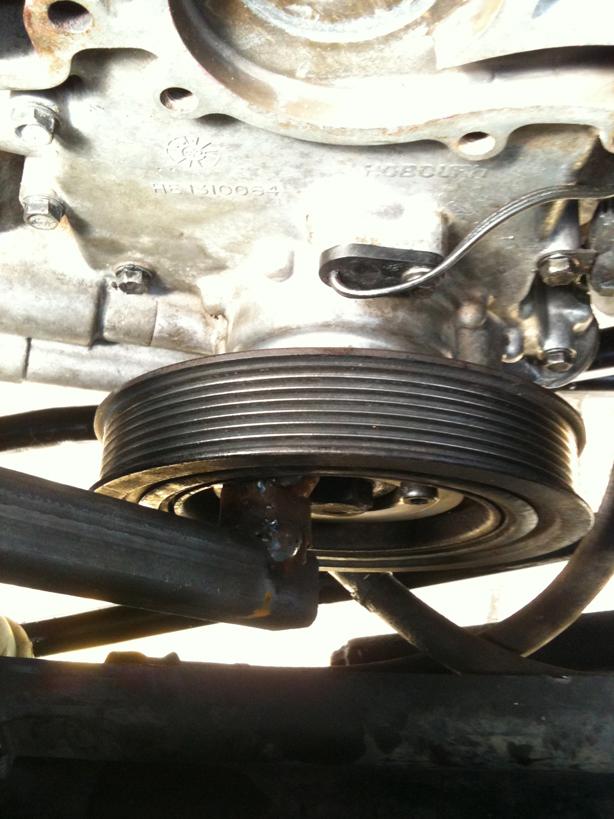
Fit the crank pulley and fit the tool, then torque the bolt correctly.
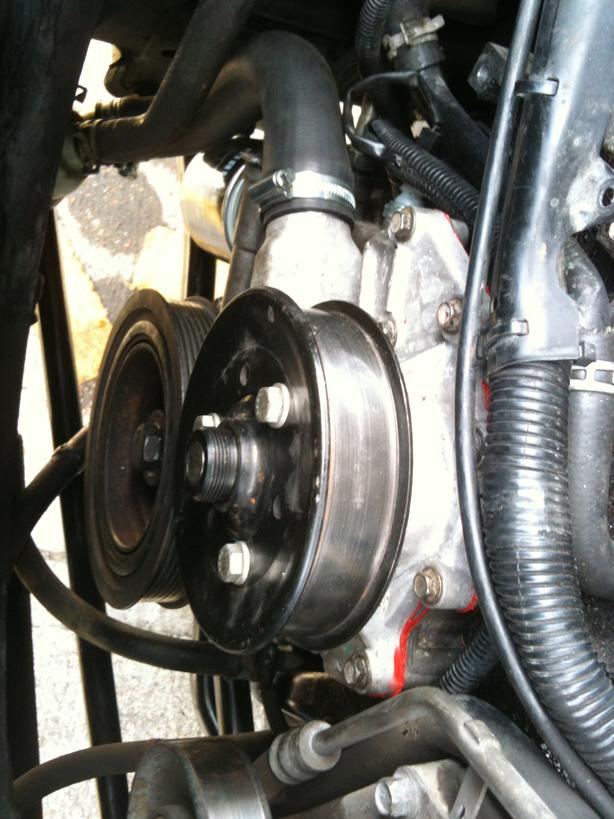
Next clean the water pump mating faces and fit a new gasket, I always like to smear a tiny amount of liquid gasket sealant in addition to the paper gasket, not strictly necessary, but I do it!
Fit the water pump and again torque the bolts on fitment, remember 3 are longer than the others so get them in the right place!
Fit the pulley and torque up...
Time to fit the Oil Pick Up and Sump. Clean up the sump mating faces and fit a new gasket...the one I got was a rubber gasket, I smeared some gasket sealant on the sump and laid the rubber gasket on top, the sealant holds it in place while you refit! (forgot to take pictures of the sump in place!)
I fitted a new bottom hose as the original looked past its best, and fitted a fresh oil filter. Smear the filter seal with clean oil before fitting.
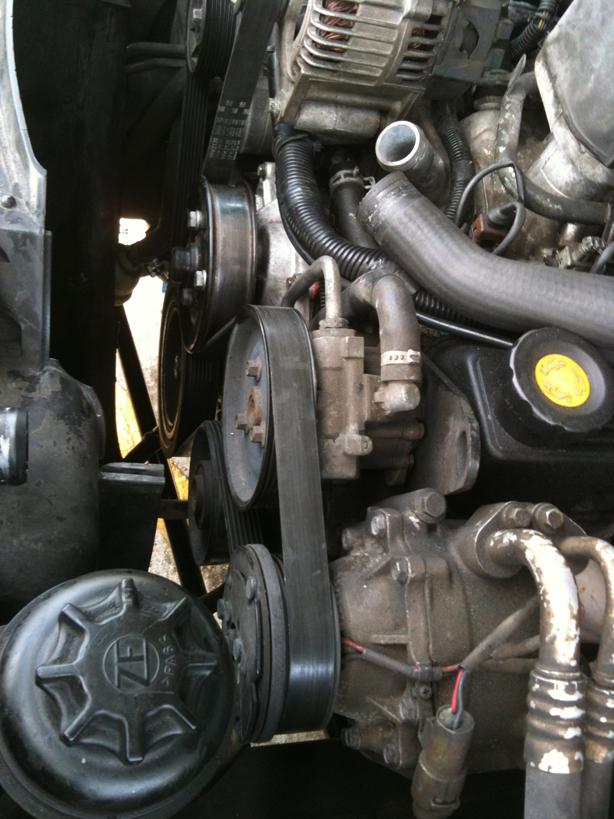
It Alternator Bracket, Wiring Heat Shield, Earth Strap and P Clip. Then the Alternator and Belt tensioner.
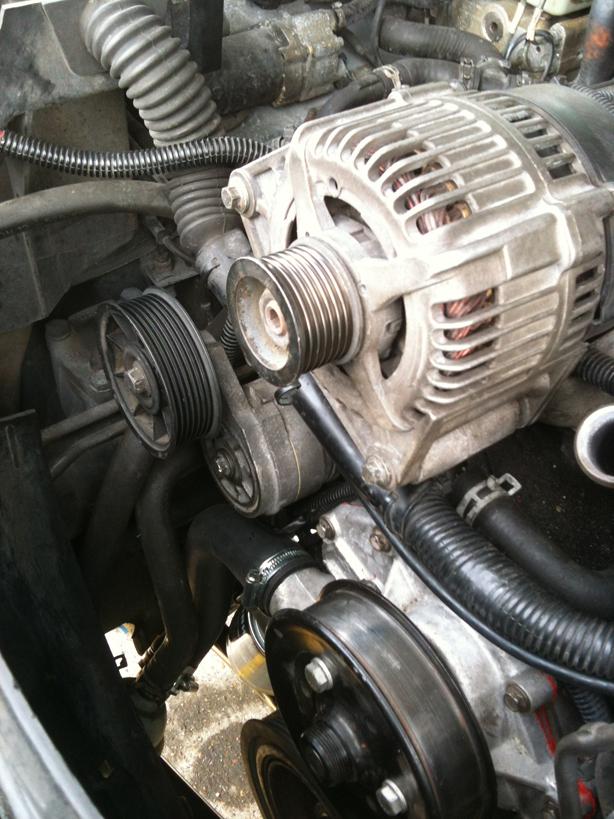
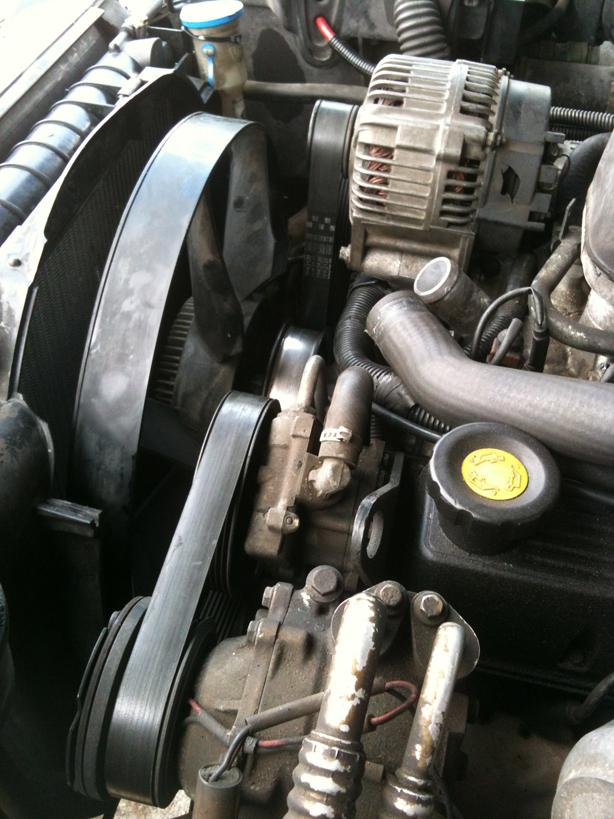
Refit the serpentine belt
Refit viscous fan and shroud, fill with clean oil and fresh coolant. Reconnect battery and resync the keys. Then start the car....and after a few rattles as things get lubed up and the hydraulic lifters reprime with oil and BINGO...job done....
OR IS IT ??????
Once the car was up to temp and everything was running fine, I took her for a drive...the dash mileage display started pulsing and the HEVAC control kept going on and off...hmmmm check battery voltage and Alternator output.
Stopped, engine off...battery 12.8V...nice, started car, rechecked....16.8V on battery.
Then noted the familiar smell of Hydrogen Sulphide (rotten egg smell) and a few whiffs of smoke from the battery....rushed round and turned engine off and quickly disconnected battery....Alternator Regulator fecked.
Bugger....
No time to strip Alternator, so sourced a replacement one...being delivered tomorrow (hopefully)
Things were going so well!!!
Following on from Part 1 http://www.landyzone.co.uk/lz/f10/gems-front-timing-chain-cover-part-1-a-260980.html
So, carrying on from where I left off....
The front cover is off exposing the timing gears and chain, first align the timing gears, they should have a dimple mark on them to line them up
Considering I am replacing the timing gears and chain as mine were old and a little slack, I wedged a screwdriver in the crank sprocket against the chain to lock it in place while I cracked the Camshaft bolt off...if you are to refit the same set, it would be best to restrain the crank by refitting the pulley and fitting the pulley holding tool (more about this tool later!)
With some gentle pulling and wiggling, remove the timing chain and sprockets...careful not to move the crank or cam while doing this!
Lay the new sprockets and chain down and line up the timing marks and put the chain round ensuring they stay aligned.
Slide them on to the crank and camshaft as an assembly and torque the camshaft bolt to the specifications in RAVE
Time to prep the replacement front cover....knock out the old seal and the official procedure is to fit the front cover to the engine then put the seal in place and slide a special tool over the end of the crank shaft and press the seal into place...
Not having the special tool and it not being strictly necessary, before you remove the original seal, look to see how deep it seats in the cover and then using a press and a large socket or similar, gently press the new seal in square to the right depth.
Replace the O rings that fit on to the Oil Cooler unions, lube with clean oil or Vaseline first!
Clean the mating face and fit a new gasket
Fit the front cover over the mounting dowels and fit the bolts. Torque to the required specification....I like to torque bolts for 2 reason...1) RAVE says so and 2) the parts are cast/machine aluminium and can crack or strip if over tightened.
Fit the cooler unions – note, don’t over tighten them as you can crack the front cover if over torque...I don’t own any ‘Crows Foot’ ratchet heads so I couldn’t torque these so I used a good guesstimate.
Now, time to fit the Crank Pulley. Mine came off far too easily when you consider the bolt is suppose to be torque to 270Nm (200lb whatsits) so I fabricated a tool to hold the crank pulley in place while torquing it up correctly.
The Disc is 89mm diameter with two 8.5mm holes drilled at 74mm centres directly opposed and the centre hole is 2” (50.4mm) diameter, one of our machinists kindly made the disc for me!
I then (badly) welded the 20mm box to it as a handle about 16” long!
This then bolts to the crank pulley using 5/16” UNC Socket Caps – M8 would be seen to fit but the thread pitch is slightly different and will bind up after a few turns....stick to 5/16” UNC unless really in the ****e!
Fit the crank pulley and fit the tool, then torque the bolt correctly.
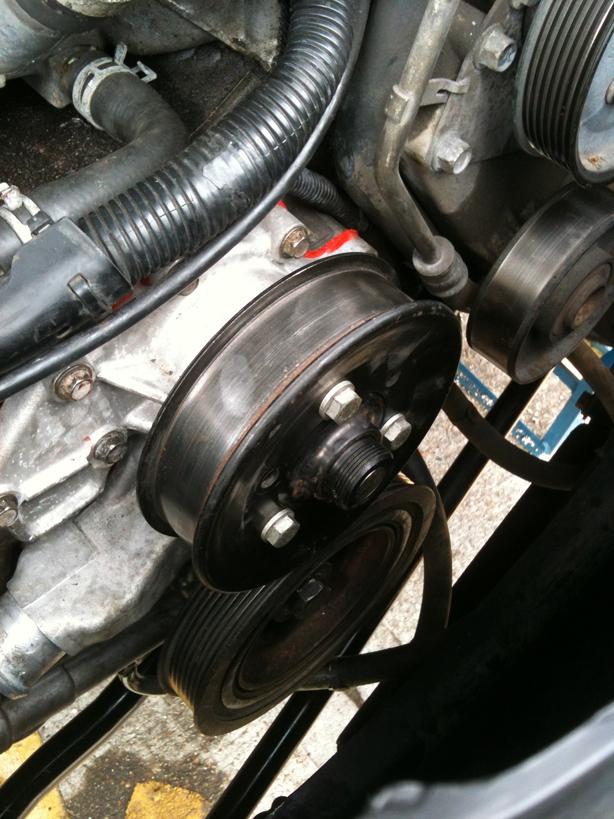
Next clean the water pump mating faces and fit a new gasket, I always like to smear a tiny amount of liquid gasket sealant in addition to the paper gasket, not strictly necessary, but I do it!
Fit the water pump and again torque the bolts on fitment, remember 3 are longer than the others so get them in the right place!
Fit the pulley and torque up...
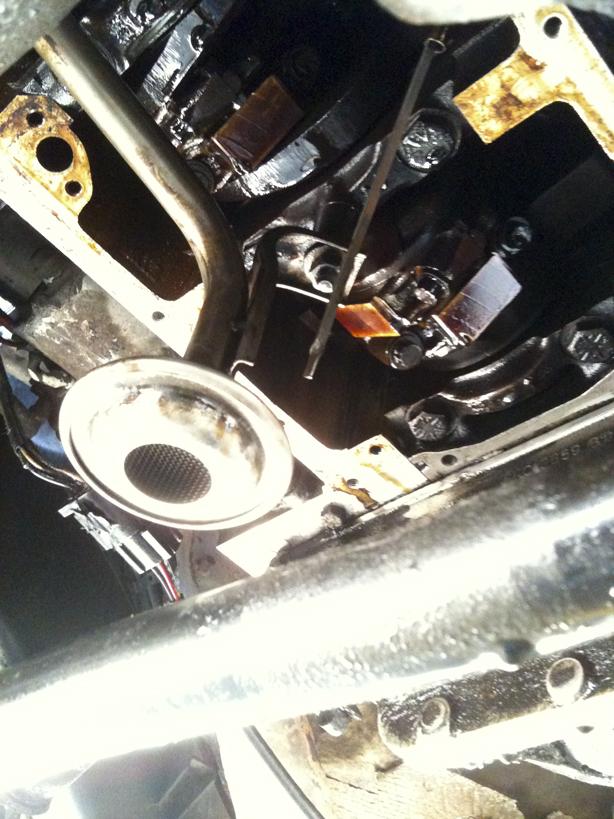
Time to fit the Oil Pick Up and Sump. Clean up the sump mating faces and fit a new gasket...the one I got was a rubber gasket, I smeared some gasket sealant on the sump and laid the rubber gasket on top, the sealant holds it in place while you refit! (forgot to take pictures of the sump in place!)
I fitted a new bottom hose as the original looked past its best, and fitted a fresh oil filter. Smear the filter seal with clean oil before fitting.
It Alternator Bracket, Wiring Heat Shield, Earth Strap and P Clip. Then the Alternator and Belt tensioner.
Refit the serpentine belt
Refit viscous fan and shroud, fill with clean oil and fresh coolant. Reconnect battery and resync the keys. Then start the car....and after a few rattles as things get lubed up and the hydraulic lifters reprime with oil and BINGO...job done....
OR IS IT ??????
Once the car was up to temp and everything was running fine, I took her for a drive...the dash mileage display started pulsing and the HEVAC control kept going on and off...hmmmm check battery voltage and Alternator output.
Stopped, engine off...battery 12.8V...nice, started car, rechecked....16.8V on battery.
Then noted the familiar smell of Hydrogen Sulphide (rotten egg smell) and a few whiffs of smoke from the battery....rushed round and turned engine off and quickly disconnected battery....Alternator Regulator fecked.
Bugger....
No time to strip Alternator, so sourced a replacement one...being delivered tomorrow (hopefully)
Things were going so well!!!
Last edited: