Gassed up ?

This site contains affiliate links for which LandyZone may be compensated if you make a purchase.

rewmer

Well-Known Member
Posts
2,082
Location
Clacton, Essex, UK
Well people, I have taken the plunge and have ordered my LPG system from Blazegas. Its a DIY kit that includes certification after install (provided you have followed the instructions)total price just over £1400 .Its a Zavoli sequential multi point system. The first part of the kit arrived today and initial thoughts are that it looks simple enough to fit following the excellent provided manual. If anyones interested I will do a photo story of the fitting and post it when its all done and running. Heres to half price motoring..
 
No not fitted yet,I was being sar-car-stic ;) . Should start on tuesday, I will charge up the camera and let you know how I get on...
 
Well got the front end done. All went very well. Instructions proved to be excellent and very detailed with some good tips. Tools required to remove the upper manifold - 8mm socket 10mm socket and some good long extensions.

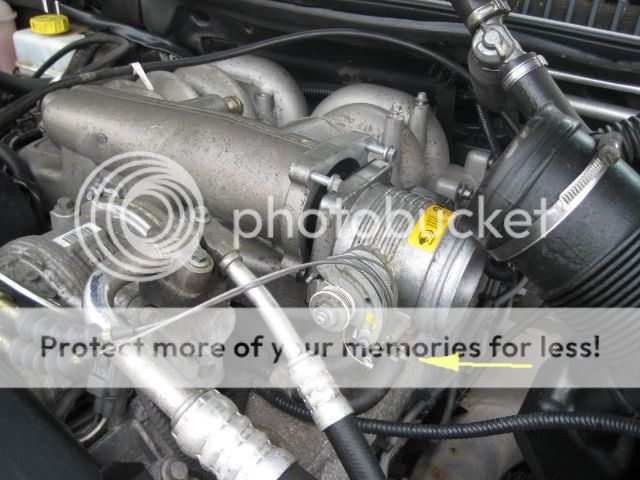
If you remove the throttle body, you dont need to remove the water fittings arrowed nor the throttle /cruise cables.
throttlebody-1.jpg


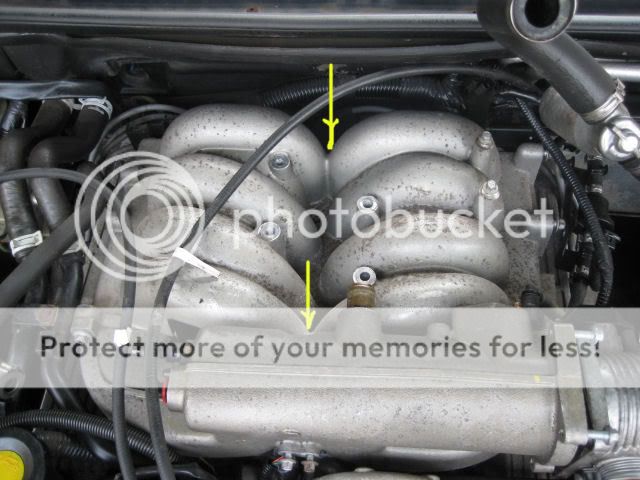
Dont forget the two short bolts arrowed, they are easy to overlook
boltpositions-1.jpg


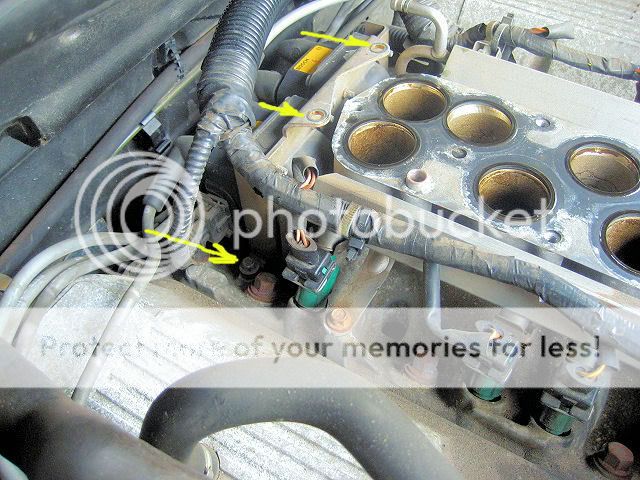
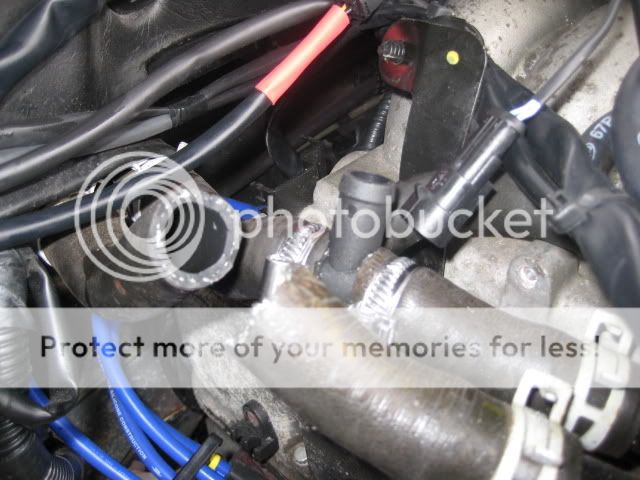
Arrows here show the positions of the coil bracket bolts. The lower ones are a real cow to see. A bit of touchy feelie required. You only need to remove the top ones - the bottom one just need to be loosend.
lowercoilscrews-1.jpg


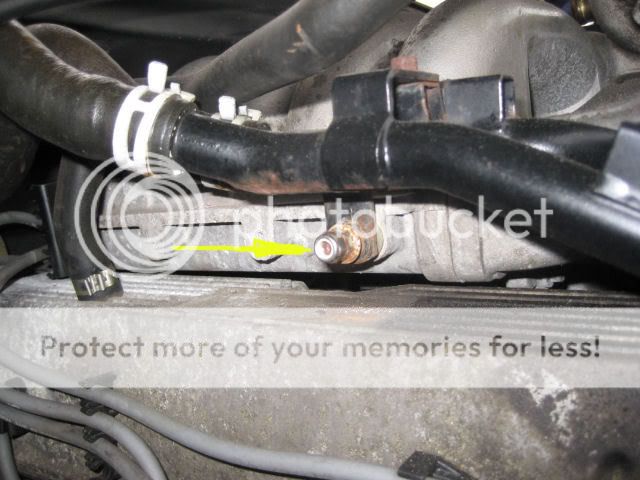
This stud is best removed to assist lifting the manifold.
waterpipestud-1.jpg


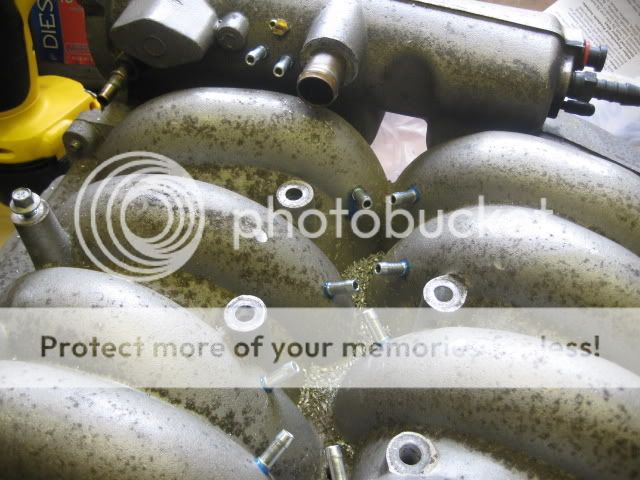
Once on the bench, the manifold is drilled and tapped M6 to take the injectors - 8 in total for the cylinders plus 3 on the plenum for vacuum and vent.
injectorsfitted.jpg


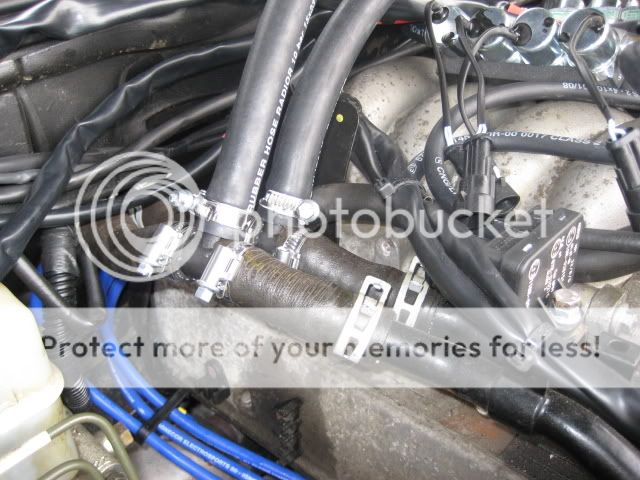
Before refitting the manifold, fit the "cut" harness to the petrol injectors.This feeds the Gas ECU with signals and cuts the petrol injectors when running on gas. This is also a good time to change those plug leads to a set of Magnecors, otherwise access to the coils is tricky with the manifold in place.

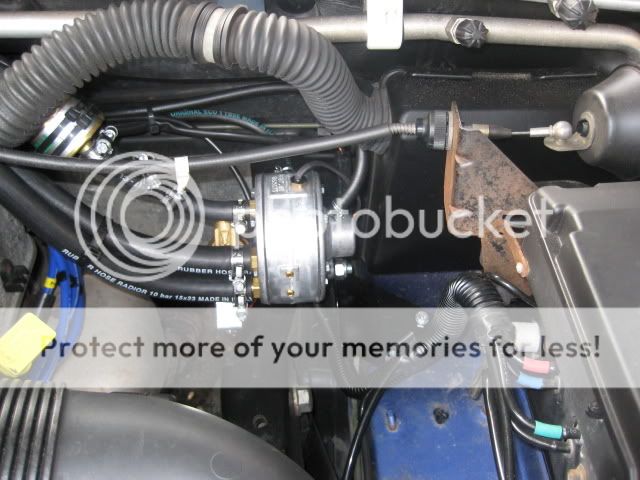
The vaporiser fits on existing tapped holes - easy.
vaporiser.jpg


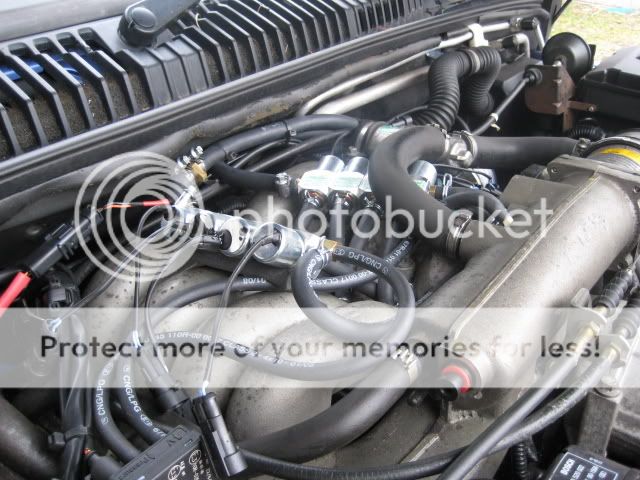
The refitted manifold complete with injectors and valves.
manifoldrefitted.jpg


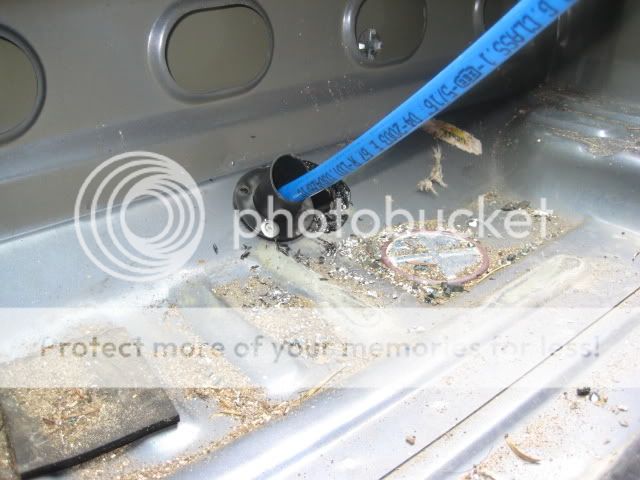
Cutting into the heater supply pipes to feed the vaporiser. I ended up cuting about 1.5 inches from each pipe to allow for the T and the shape of the pipes.
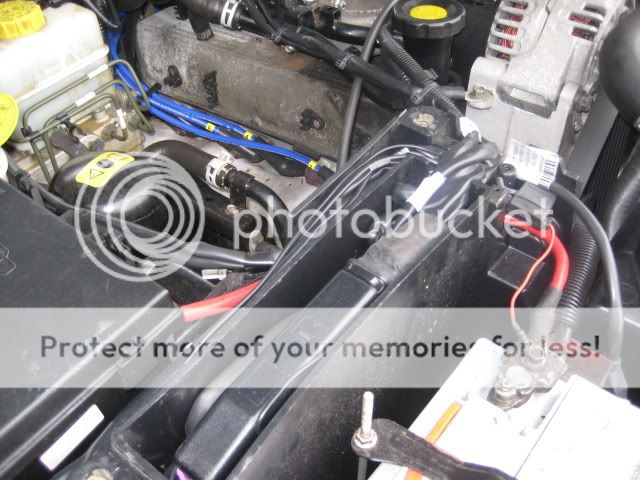
cutintowater.jpg


The finished job.
finishedwaterpipes.jpg


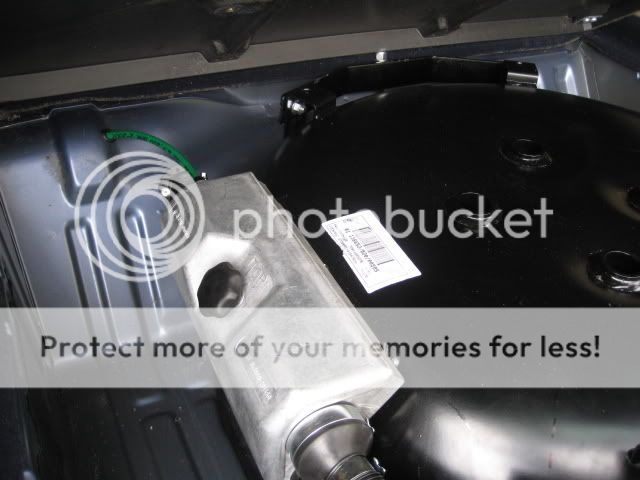
The ECU tucks very neatly in the space once used by the old GEMS ECU. The Bosch ECU is was relocated for some reason ( anyone ?)
ecu.jpg


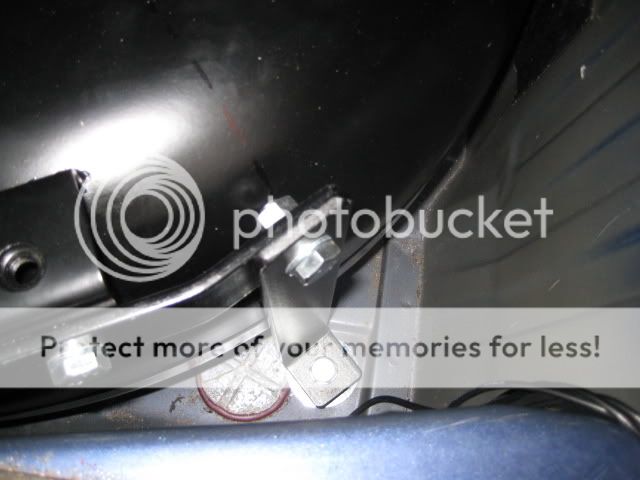
Neat little switch / gauge. Notice it is offset to one side to clear the fixings. The cable is fed through an existing grommet behind the header tank, which is conviently clipped in position.
switch.jpg


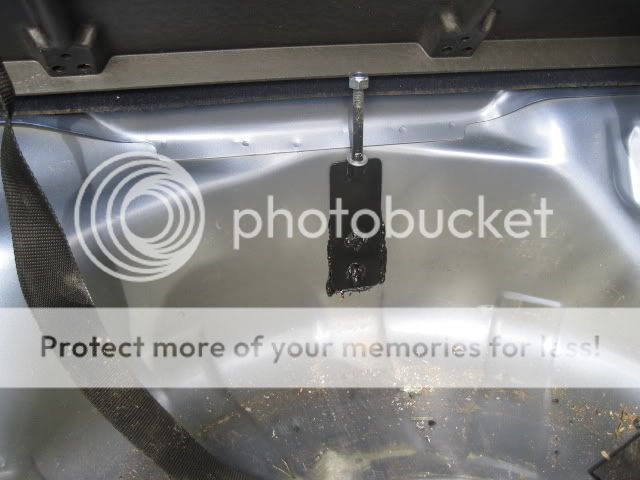
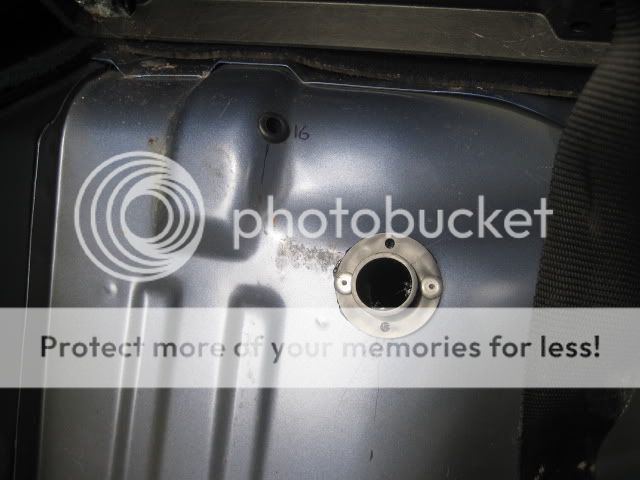
So far, it has taken about 14 hours to this point. The tank is next but at time of posting it hasnt arrived. I will follow up as and when it arrives.
 
Tank has arrived so here is the second installment......

Tank front fixing fitted.
rorwardmountfitted.jpg


Fittings for front vent and gas feed fitted. These are seperate on the later RR as the twin exhaust system used means the gas supply has to be moved to keep in with the regulations.
ventandsupply.jpg


Rear vent / filler bush fitted. The more observant of you may notice that I had to re-drill this due to the filler valve being out of place from the recommended position. The instructions call for it being fitted under the bumper left of the towing electrics. Not wanting to put another hole in the bumper, I opted to fit it in the spare hole for the trailer socket. Its worth noting that this was the only time I moved away from the instructions and the only time I made a mistake....
fillervent.jpg


Filler valve fitted in its non-conformist position.
filler.jpg


The supply to the vaporiser at the front end get routed along the top of the left hand chassis rail using P clips where accesable and tie-wraps where not.
pipeclippedtochassis.jpg


The tank fitting took the best part of the day - with a break for lunch.The picture below shows one of the rear fixings
rearfixing.jpg


Tank in position
IMG_0523.jpg


Again the instructions were spot on. All I need to do now is get the system checked over and commisioned, which should be happening today. Overall I was extreemly impressed with the way things went - although you can buy cheaper kits, these are generic and not specificly for the RR and the benefit of buying this kit was proved with the ease of fitting. Only time will tell if its a good system, but I will keep you posted.
 
hi mate very impressed i was going to ask the question of how to diy lpg and you have answered it allready.
how much to get i commisioned?
is there not a cheaper kit avaliable that is specificly for the RR and benefit's of buying that kit ?
 
Sure you can pick up kits for the RR on Ebay for £800. But these are not engineered specificaly for the RR, they are RR compatible - a big difference. You will spend a lot of time guessing how or where to fit things, and then, after it is inspected to get your Certificate, a lot of time moving thiings.
The kit I bought was specifically for my model. The only thing I had to worry about was which one of the batterys in my cordless drill was charged. The commisioning / setup was included in the price. Again the ease of fitment was proved by the fact that it took me just over 2 days start to finish. If I did it again it would be more like 1.5 days. Ive just got back from commisioning and can report the system is flawless. The only way to tell when it changes is the tick from the valves when its on gas, change overs are undetectable and performance changes unnoticable.
 
hi mate very impressed i was going to ask the question of how to diy lpg and you have answered it allready.
how much to get i commisioned?
is there not a cheaper kit avaliable that is specificly for the RR and benefit's of buying that kit ?
does that mean you had it commisoned by the suplier?
 
yes I did. They have pre configured "maps" for all the variation of RR. This standard map is then tweaked to suit the individual engine so that the gas ECU and the petrol ECUs run with sae parameters. IFf this isnt done the petrol ECU will make adjustment from the readings it gets when running on gas, and then when you run on petrol the settings will be all over the place. Something I think your cheap system wont tell you in the instuctions......
 
yes I did. They have pre configured "maps" for all the variation of RR. This standard map is then tweaked to suit the individual engine so that the gas ECU and the petrol ECUs run with sae parameters. IFf this isnt done the petrol ECU will make adjustment from the readings it gets when running on gas, and then when you run on petrol the settings will be all over the place. Something I think your cheap system wont tell you in the instuctions......
ahh i see so seem's best option,are you in anyway related to the motor trade? just wondering how hard the kit is to install for your average joe blogs?
im a technician so would like to say i should cope haha.cheers
 
Back
Top