S3 109 Safari project......

This site contains affiliate links for which LandyZone may be compensated if you make a purchase.
I removed the old hasp that held the bonnet down cleaned up the holes and welded them up. I’m not planning on using it again!
 

Attachments

  • IMG_9365.jpeg
    IMG_9365.jpeg
    415.3 KB · Views: 11
  • IMG_9366.jpeg
    IMG_9366.jpeg
    415.4 KB · Views: 11
One disappointing point of the repair panel is that they don’t have return lips on the front faces to replicate the original , and that just annoys me! So, I cut some flat steel plate to size and bent it to shape and after some faffing around welded it. I managed to melt the raw edge into the new metal and put a bevel on it with the grinder. Not sure what will do with the other edges. I’ll sleep on it…..😀
 

Attachments

  • IMG_9373.jpeg
    IMG_9373.jpeg
    655.5 KB · Views: 17
  • IMG_9374.jpeg
    IMG_9374.jpeg
    618.5 KB · Views: 10
  • IMG_9375.jpeg
    IMG_9375.jpeg
    627.6 KB · Views: 10
  • IMG_9377.jpeg
    IMG_9377.jpeg
    704 KB · Views: 8
  • IMG_9378.jpeg
    IMG_9378.jpeg
    656.4 KB · Views: 8
  • IMG_9379.jpeg
    IMG_9379.jpeg
    722.8 KB · Views: 12
Okay, wee update for today on the front panel. I had a look at the landing angle on the top of the panel, and there appears to be fairly serious rust in that area. It must be where the rain drops track under the front of the bonnet and sits under the bonnet rest strip happily rusting away! 😀
Anyway I cut out the worst section on the right hand side, folded up a repair section and welded it in.
 

Attachments

  • IMG_9425.jpeg
    IMG_9425.jpeg
    709.8 KB · Views: 4
  • IMG_9426.jpeg
    IMG_9426.jpeg
    459.4 KB · Views: 3
  • IMG_9427.jpeg
    IMG_9427.jpeg
    522.5 KB · Views: 5
  • IMG_9428.jpeg
    IMG_9428.jpeg
    752.8 KB · Views: 3
  • IMG_9429.jpeg
    IMG_9429.jpeg
    333.4 KB · Views: 3
  • IMG_9430.jpeg
    IMG_9430.jpeg
    393.4 KB · Views: 3
  • IMG_9431.jpeg
    IMG_9431.jpeg
    390.6 KB · Views: 3
  • IMG_9432.jpeg
    IMG_9432.jpeg
    434.4 KB · Views: 5
  • IMG_9433.jpeg
    IMG_9433.jpeg
    550.4 KB · Views: 4
  • IMG_9434.jpeg
    IMG_9434.jpeg
    627.4 KB · Views: 4
After trying to clean the rust and old paint off the front, I thought another solution was required, as the work to clean it satisfactorily would be really messy and would take forever 😟….
 

Attachments

  • IMG_9438.jpeg
    IMG_9438.jpeg
    630.5 KB · Views: 4
  • IMG_9437.jpeg
    IMG_9437.jpeg
    418.4 KB · Views: 6
  • IMG_9436.jpeg
    IMG_9436.jpeg
    627.6 KB · Views: 4
  • IMG_9435.jpeg
    IMG_9435.jpeg
    592.9 KB · Views: 4
Step forward my new solution - get someone else to do it! 😂
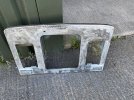
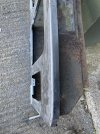
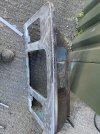
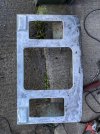
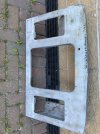
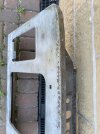
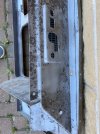
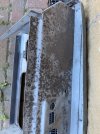
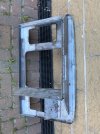
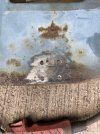
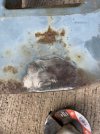
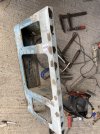
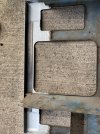
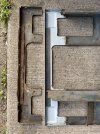
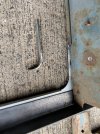
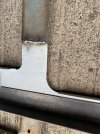
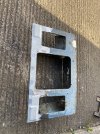
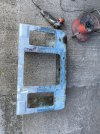
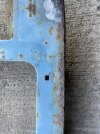
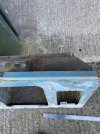
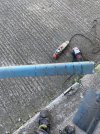
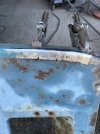
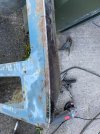
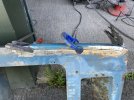
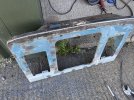
… Joking aside, this is definitely the best way to go… I took it to a local chap who refurbishes wheels, and he acid dipped and blasted it. There is no way on earth I would get it as clean as that! I’m so impressed I think I will give him a few other blasting jobs that would just take forever. I will paint it with Kurust first then get it filled, flatted and ready for painting.
 

Attachments

  • IMG_9521.jpeg
    IMG_9521.jpeg
    531.1 KB · Views: 7
  • IMG_9520.jpeg
    IMG_9520.jpeg
    433.4 KB · Views: 7
  • IMG_9519.jpeg
    IMG_9519.jpeg
    423.1 KB · Views: 5
  • IMG_9518.jpeg
    IMG_9518.jpeg
    437.2 KB · Views: 7
  • IMG_9517.jpeg
    IMG_9517.jpeg
    565.8 KB · Views: 5
Back
Top